
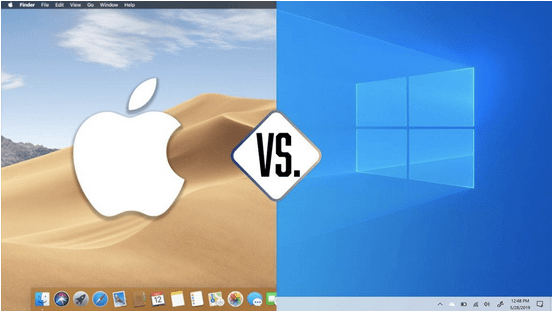
Switching from one Operating System to another OS can certainly be a cumbersome process. Though, it completely depends on the fact for what purpose you want to switch to a specific system; for professional or recreational use. So, it’s completely relevant if you want to switch from Mac to PC since Windows OS controls the market. This guide will walk you through everything you need to know when switching from Mac to Windows.
Switching From Mac To Windows : Things To Consider
PART 1: Reasons You Might Want To Switch From Mac To Windows
If you are feeling frustrated by your current Apple ecosystem, maybe it’s the right time to try a new operating system – Windows. Here are five main reasons why you should consider migrating from Mac to Windows.
1. Cost-Effective
There are certainly thousands of computers sold at thousands of retailers, hence you can get tons of variations when it comes to price range. Macs, on the other hand, have a universal price, so it gets certainly difficult to get an affordable deal with Apple products.
2. Better OS For Gamers
PC games are becoming sophisticated day by day and need a significant amount of storage space and top-notch graphics cards to run advanced games. Additionally, most of the latest game titles are simply not compatible with macOS. Hence, Windows becomes a better choice!
3. Affordable Support
When it comes to getting effective Technical Support from Apple, it is hands down more expensive than Microsoft and PC Support. When you purchase a Mac, you get 90-days phone support for Free. After that, you have to pay to get the support!
4. Less RAM Is Needed
Make a note, a Windows PC running on low memory can certainly become sluggish, but it won’t just break down. On the other hand, a Mac running on low memory will more likely crash. Hence, a PC running with fewer resources is certainly much more reliable.
5. Freeware
There is a plethora of free software and utilities available for Windows PC users. Popular website Download.com has more than fifty thousand solutions and services for Windows, while there are less than five thousand programs available for Mac.
PART 2: Steps You Need To Take When Migrating From Mac To Windows
To help you make a swift move from Mac to Windows, we’ve concluded 10 essential steps:
1. Pick A Computer
One of the greatest perks about migrating from Mac to PC is that you have a copious amount of device options and price range available. You can choose from a wide range of desktops, laptops, tablets notebooks, etc. You have amazing choices available for business computers and consumer laptops as well, all designed to fit users’ unique needs and requirements. Plus, Windows PCs are certainly more budget-friendly than Macs.
2. Create A Microsoft Account
Making a Microsoft account is similar to creating an Apple ID on Mac. To get the maximum benefits out of your device, you need to have a Microsoft account. It serves as a single sign-on for most of the Microsoft services, such as – Office, Outlook, OneDrive, Bing, Skype, Xbox, Surface, MSN, and more programs that can be downloaded from the official Windows Store. Having a Microsoft account can help you stay productive by syncing all your Windows devices and services. To sign in or create a New Microsoft Account, click here!
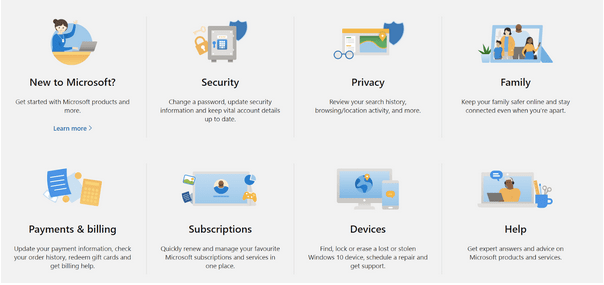
(You can manage all the aforementioned things using Microsoft Account)
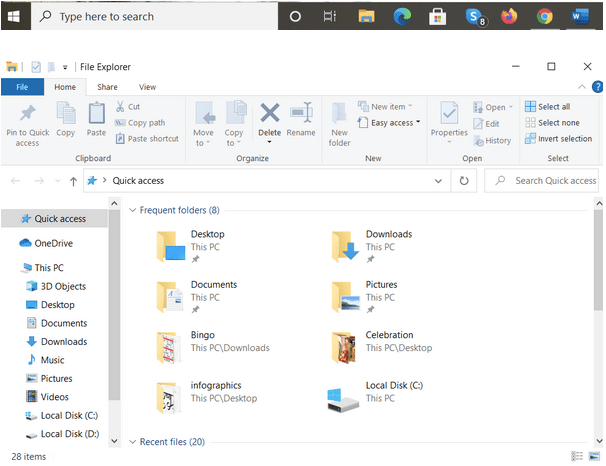
3. Know Your PC Interface Better
One of the significant changes you can observe while switching from Mac to Windows is their interfaces. Hence, it is important to know the interface of your Windows PC, so that you can better use your computer:
- Navigation – To locate all your files, folders, apps, and settings, all you have to do is: Click on the Start menu (Find the option on the bottom-left corner of the screen).
- Search – If you are missing the great Spotlight functionality, we have good news for you. Windows OS certainly makes it easy for users to find all the needed files, folders, applications, and more by simply typing what you are looking for through the search bar. (Find it attached to the Start button on the bottom-left corner of the screen)
- Management – To minimize, resize, or close the current window, you can find the options on the top-left corner of the window on your Mac. Whereas, on Windows, you can find the same options on the right corner of the Window.
4. Learn About The New Keyboard
Another evident difference you’ll observe when it comes to comparing Macs and PCs is their Keyboards. You have tons of shortcuts to speed up the routine tasks and increase productivity. When using a Mac, you majorly rely on the Command key to execute a task through a shortcut, whereas on Windows PCs, you will have to use the Control key the most. You can check out our complete guide on Popular Windows Keyboard Shortcuts:

5. Switch Applications
Now that you are all set to migrate from Mac to Windows, one of the major problems you’ll be facing is finding a suitable alternative for Mac programs and settings on Windows. Here we have curated a concrete list of options that can help you achieve all your tasks effectively and efficiently:
Windows Alternatives For Popular Mac Programs:
- TextEdit – Notepad
- Terminal – Command Prompt
- Grab – Snipping Tool
- Stickies – Sticky Notes
- Time Machine – Backup and Restore solution
- iWork – MS Office
- Notes – OneNote
- Mail app – Email clients for Windows
- iMovie – Windows Movie Maker
- Preview – Windows Photo Viewer
- Photos App – Windows Photo Gallery
- Spotlight – Search bar
6. Move Your Data From Mac To Windows
Whenever you buy a new device, figuring out the easiest yet quickest way to move your data from one place to another is a necessary evil. It can be a challenging process to transfer and save your entire data, but you can achieve the task by following any of the workarounds below:
- Try transferring all of your data using an external hard drive. It can certainly store a large number of files and folders.
- Try transferring all of your data using a Remote Desktop network between your Mac & Windows. Later, you can easily copy important files from one place to another in one go.
- Try transferring all of your data using cloud storage or file sharing solution such as Google Drive, Right Backup, Onehub, Box, Wire, and many more.
- Try transferring your browser data by simply syncing the browsers with your account.
- Try transferring your Calendar entries by launching the app > clicking File option & Export.
- Try transferring your emails using applications like Emailchemy that will help you convert Apple Mail to Windows & Outlook-friendly formats.
Now that you’ve successfully moved all of your data, it’s time to learn how you can integrate your iPhone with Windows OS.

Must-Read: How To Share Files Between Mac And Windows PC?
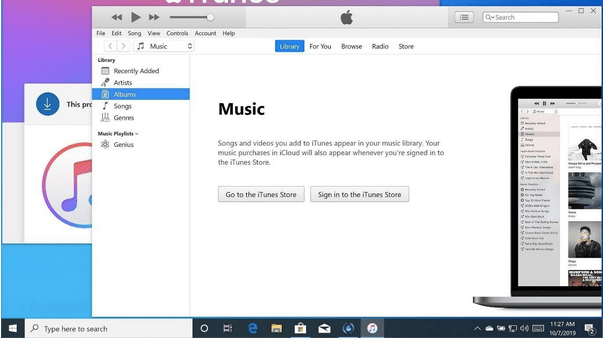
7. Integrate Your iPhone
It was certainly an uncomplicated process to integrate and sync your iPhone with your Mac. But when it comes to Windows, the process isn’t that seamless. No doubt, you’ll be missing out on the benefits such as iMessage, AirDrop, and the ability to access and sync popular applications on your smartphone from your Mac. But it’s not all bad when it comes to Windows PCs. You can simply install iTunes from the Apple website for Windows, which can help you access your iPhone via computer. Not only this, Microsoft has taken initiatives to make the entire process hassle-free for iPhone users.
- Just type ‘Phone Companion’ in the search bar and launch the application.
- Follow the on-screen instructions and select your iPhone to connect it to the PC.
- Once you establish a successful connection, you can easily access and sync photos, emails, music, and other files from your Windows PC on your iPhone.
8. Protect Your Windows Computer
Honestly, Macs aren’t just bulletproof, but there’s no doubt that Windows PCs are more vulnerable to cyberattacks. Hence, you need to follow a different approach when it comes to protecting your system from potential viruses and malicious content.
- Use Windows Defender – Microsoft offers a built-in security tool for Windows Operating System – Defender. It helps in detecting and removing multiple kinds of viruses, adware, spyware, malware, and other threats that can harm your system. (Start menu > Settings > Update & Security > Windows Defender > Turn on Real-Time Protection)
- Use Windows Firewalls – To shield your computer from harmful threats that might attack your device over the Internet, you need to enable Firewall, that safeguards your PC from malicious websites, emails, and networks you connect to. (Start menu > Control Panel > System and Security > Windows Firewall > Turn Windows Firewall On/Off)
- Use Antivirus Software – Though, Windows offers dedicated security tools that can help you secure your PC, but adding an extra layer of protection causes no harm to your system either. Several users prefer to run a powerful and advanced Antivirus and Antimalware Solution that can help them guard their PC against new and existing threats.

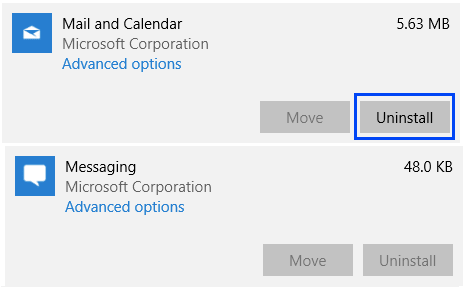
9. Remove Bloatware
Pre-installed software & programs are something that you have to deal with when it comes to migrating from Mac to Windows. Windows PCs come with plenty of programs that you might necessarily use. These include trialware photo editing software, games, not-so-powerful security software, and so on. These utilities certainly create a mess on your computer and take a significant amount of storage on your computer. Unlike, this doesn’t happen with Mac, it gives a minimalist and decluttered feel. Hence, you might need to get rid of these useless programs to personalize your Windows system according to your needs and preferences. To do so:
- Look for Add or Remove Programs from the Search bar.
- Click on the very first result that appears.
- As soon as the list of installed and system applications appear.
- Click on any app & hit the Uninstall button.
Sometimes removing Bloatware can become a cumbersome process. To handle those issues, while removing pre-installed system applications, you can follow the guide here!
10. Manage Windows Updates
Another significant difference when it comes to migrating from Mac to Windows is the Updates that you can enjoy automatically on your PC. Unlike Macs that alerts you when you have an update and gives you a choice if you’d like to install it. Windows Operating System, by default automatically installs the latest updates to ensure your system is well-protected from common threats and attacks. Though, you always have an option to bypass the automatic updates, if you want to save resources for a specific time.

Hopefully, these tips help you to ease your tech transition from Mac to Windows. In case you need additional advice for managing Windows or Mac operating system, feel free to message us on our Social Media Handles or drop a line at [email protected]
PART 3: The Best Apps To Get When Moving From Mac To Windows
While moving from Mac to Windows, you’ll need to get a new suite of applications that can help you ease your workflow and increase overall productivity. That’s why we have created a special list of Must-Have Windows 10, 8, 7 Software for different categories, including – Cleaning, Antivirus, Video Player, Security, VPN, Photo Editing, and more.