
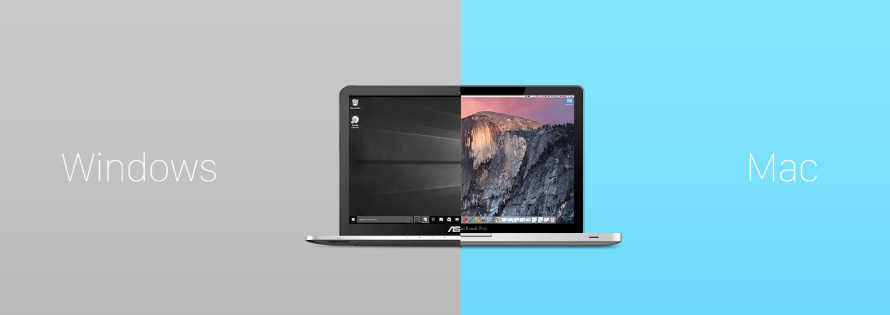
Both Windows and Mac have been in an active progression for decades. Each has its own set of pros and cons and they truly define a desktop operating system in a modern era. But as they say, ‘Changes are Necessary’ and if you’re someone who is long-time user of Windows and giving a thought to move from Windows to Mac, then you really should!
We understand that the process of making the leap from Windows to Mac, can be bit unintuitive and frustrating at first. However, once you adapt to variations offered by the new OS, you’ll not regret your decision moving from Windows to Mac!
Here are couple of basics to familiarize you with your new Mac and make the switch a little swift and easier.
10 Things You Should Know When You Get Started with Your New Mac
Disclaimer: Switching from Windows to Mac can be very confusing and frustrating, go ahead with patience & serenity. These 10 tips are clubbed here to ease your way from PC to Mac:
- Get Started With: Installing Apps
New Computer, New Operating System, New Software Applications!
Start Downloading programs you need for productivity, entertainment & much more from Mac App Store.
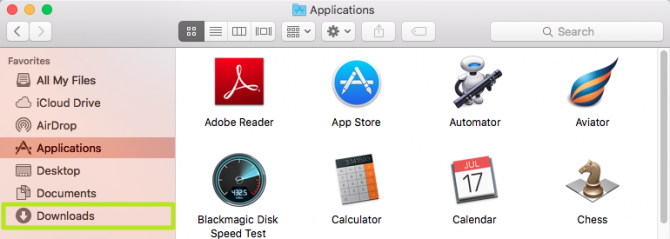
Step 1- Launch App Store from Dock.
Step 2- Look for the App you want to install.
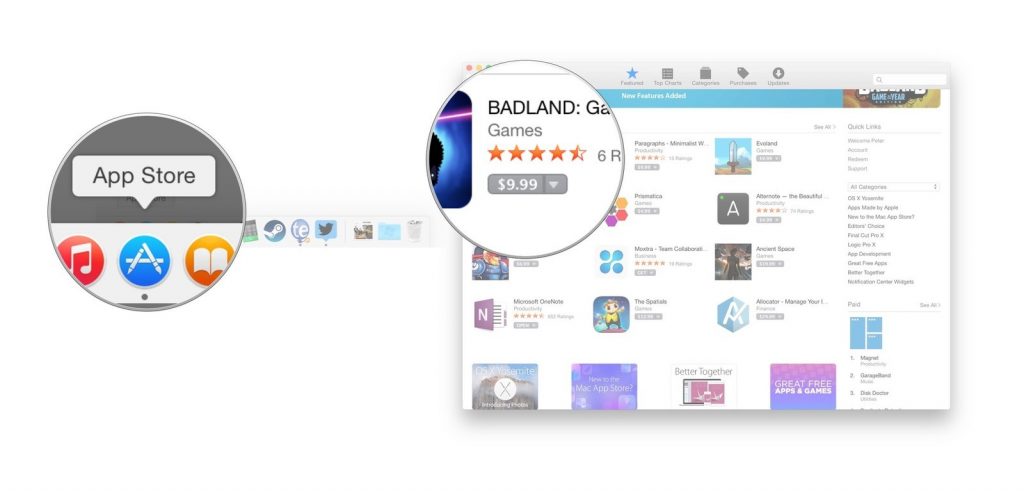
Step 3- Once your desired app appears, Click on Get or Price button to start downloading. (Get-Indicates Free Apps, Price– Indicates Paid Apps)
Step 4- If you tap on Get Button, then it will turn into Green and say Install. If you click on Price, it will turn into Green, and say Buy App.
Step 5- Tap and Proceed!
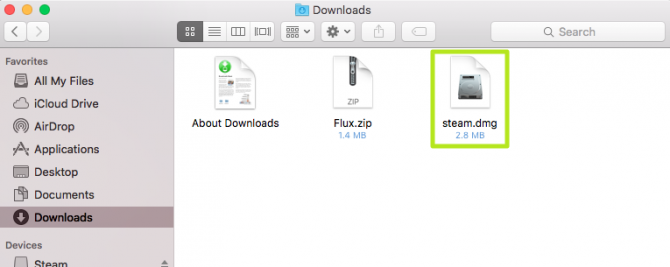
Downloading Apps in Mac is bit different, sure there is Mac App Store just like Windows Store, but not everything is in there. If you want any other app outside the store, then the installation process is slightly complicated.
-If the File downloaded is in .zip extension > then double-click to unpack it.
-If the File downloaded is in .dmg extension > then you have to first mount it onto your machine. To do so:
Step 1- Tap Finder Icon at the bottom left of the dock
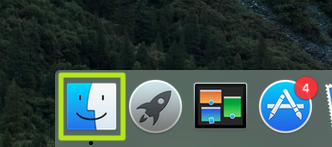
Step 2- Explore “Downloads”
Step 3- Double-Tap on the Downloaded File.
Step 4- Read on-screen instructions.
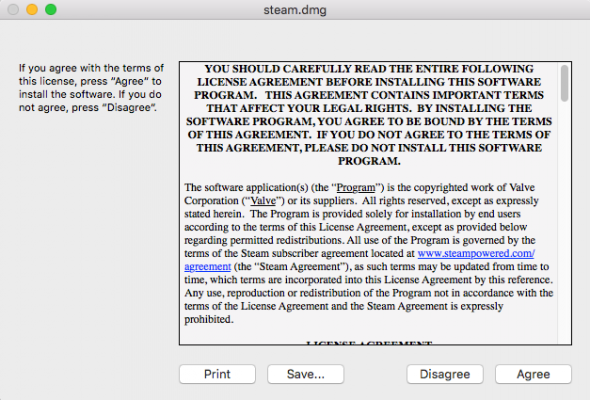
Step 5- Click Agree. Once your file is mounted, look for your app under Devices header in the Finder, successfully installed!
You can drag all your applications at the bottom of the screen in dock. It displays the icons of apps that are mostly or often used.
- Get Familiar With: New Keyboard
The most tangible difference you can feel, when you switch to Mac is the New Keyboard. The trickiest of all, Windows switchers will find the new mac keyboard subtly complicated. But it’s actually not! Your new Mac has many of the same shortcuts as PC’s- just that you have to access them differently.
For example: In Windows we use CTRL+P to Print, CTRL+S to Save, in Mac you have to use Command Key (?- a looped square symbol, right next to space bar), instead of Control Key to apply shortcuts.

Explore Windows Keys in Mac:
![]()
| Windows | Mac |
| CTRL Key | ? Command Key |
| Backspace | Delete |
| Enter | Return |
| Alt | Option (lets you access special symbols, for ex: press option+4 – ¢ symbol, option+Y – ¥ symbol) |
Explore Other Shortcuts:
| Command-X | Cut |
| Command-C | Copy |
| Command-V | Paste |
| Command-Z | Undo the Previous Command |
| Command-A | Select All Files/Folders |
| Command-F | Locate/Find Items |
| Command-O | Opens Selected File/Folder |
| Command-P | |
| Command-T | Opens a New Tab |
| Command-S | Save |
| Command-Q | Quit |
| Command-W | Close Current Window |
| Space Bar | Launches Quick Look |
| Command-Tab | Switch to most recent used app |
| Shift-Command-3 | Take Screenshot |
Find Other Shortcuts right here!
Explore Other Changes:
| Windows | Mac |
| Right Click | Tap the trackpad with two fingers |
| Buttons for Closing/Minimizing/Maximizing Windows | Upper Left Corner |
| Control Panel | System Preferences |
| Recycle Bin | Trash (Located in Dock) |
| Windows File Explorer | Finder |
| Search Bar | Spotlight |
OS X offers many shortcuts by default, browse them in System Preferences > Keyboard > Shortcuts.
- Get To Know: Finder File Manager
Meet your Windows Explorer alike- ‘Finder’ located at the bottom of your desktop dock. Similar to Windows Explorer, it organizes your files, folders, photos, documents and helps you to locate items when you misplace them.

Shortcut Keys:
| cmd ?+ ? | Go to Higher Folder |
| cmd ?+ ? or cmd ?+o | Open any File or Folder |
| cmd? + backspace | Delete the selected file/folder |
| Return | To Rename |
| Command-D | Make Duplicates of Selected Items |
| Command-E | Ejects the selected Disk |
| Command-F | Launches Spotlight Search in Finder |
| Command-I | Opens the Get Info Window for a Selected File |
Find Other Finder Shortcuts right here!
- Get Efficient With: Spotlight
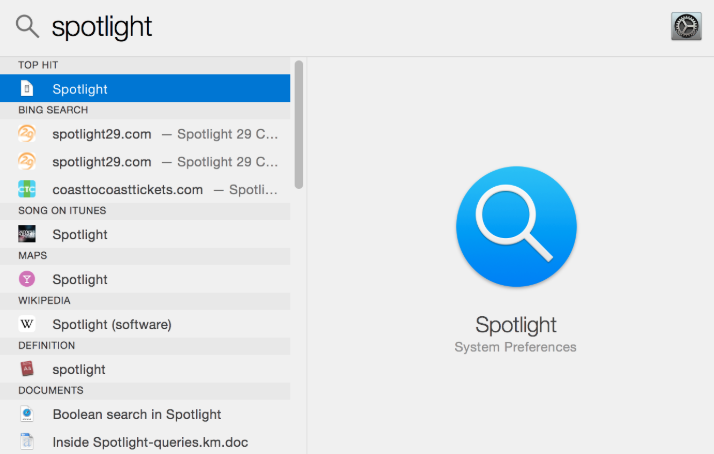
Spotlight is a search feature which helps to find apps, files and other documents on your Mac. You can search on the basis of file type or location!
Click magnifying glass, located in the menu bar or use shortcut cmd+ space bar. It works similar to quick search available on iPhone or iPad. You can take advantage of Spotlight suggestions to get latest updates on News, Stocks, Movie Showtimes, Sports, places nearby, Weather and much more. Not only this, you can use Spotlight to get calculations, definitions and conversions for you.
From Spotlight preferences you can exclude specific folders or disk or even web information from getting searched.
- Get Familiar With: AirDrop
AirDrop is an amazing feature that offers to share files between Mac machine and other iOS Devices (iPhone, iPod, iPad etc). The most efficient, fast and secure way to transfer photos, files, videos, documents, websites, locations and much more.

How to enable AirDrop on Mac?
Follow the steps to set up AirDrop on Mac Machine:
Step 1- Tap Finder > Select Go > Choose AirDrop
Step 2- Check AirDrop Settings > Make sure if your Bluetooth or Wi-Fi is enabled or not. If not, then toggle on. AirDrop automatically turns on when Bluetooth or Wi-Fi are enabled.
Step 3- At the bottom of AirDrop Window > Click on “Allow me to be discovered by” to choose your preference, for connecting with the people you want.
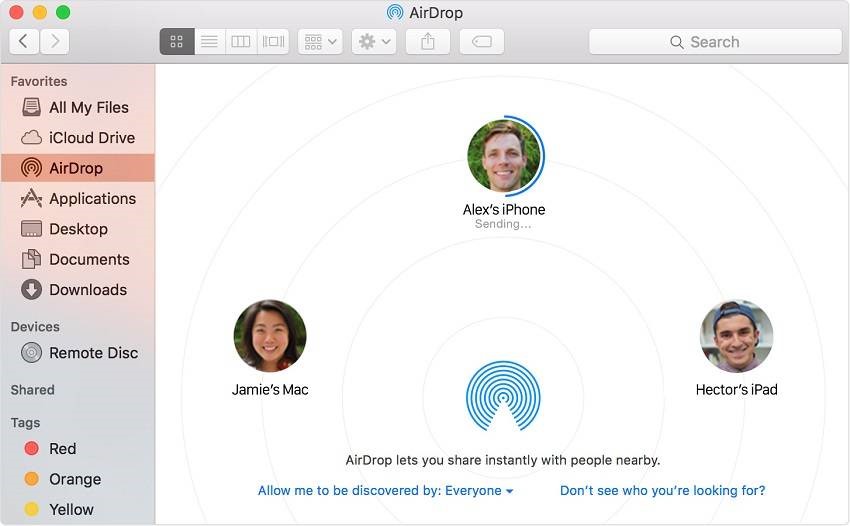
How to Share Files via AirDrop?
Step 1- After your AirDrop is active on both the Apple Devices.
Step 2- In the AirDrop Window > You will find all the devices, tap with whom you want to get connected.
Step 3- Select the items you want to send and drag-and-drop onto the icon of the system you want to send in the AirDrop Window.
Step 4- The files/documents will automatically be sent to the recipient. > Make the other device to Accept the files.
 How to Get Airdrop on Your MacOS Dock?Airdrop is a very frequent for Apple users. For those who are not familiar with how to use Airdrop and...
- Set Up A Backup
Everybody wants to keep their data safe and sound. Amazingly, Mac offers a great application known as Time Machine to backup all your data. The app works with Wi-Fi Router, AirPort Time Capsule built in hard disk and other internal/external disk drives.
How to Use Time Machine?
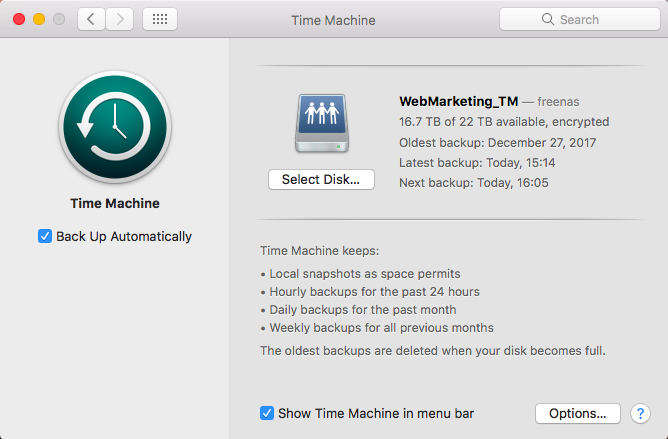
Step 1- Tap on System Preferences > and Click on Time Machine.
Step 2- Flick on Padlock and enter your Admin Password.
Step 3- Tap Select Disk option and pick external disk or network drive you want to take backup of.
Step 4- Tap on ‘Use Disk’ to create backup.
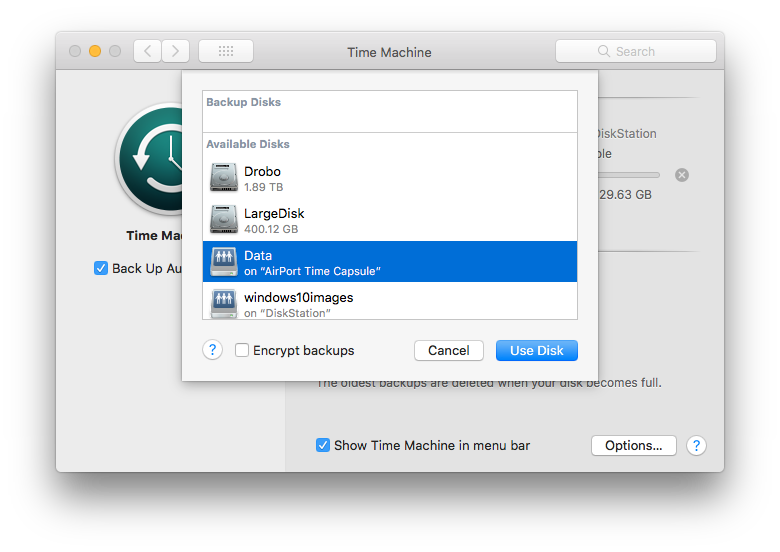
Step 5-Toggle on the option “Show Time Machine in Menu Bar” below, so that you can restore and stop backups anytime you want from the menu bar only.
- Join iCloud
Meet one of the great reasons to switch from Windows to Mac is the Apple ecosystem stoked with iCloud syncing. Similar to Microsoft that has OneDrive, iCloud is available for Apple users to store and access photos, videos, files, documents , movies , music and more all with your iCloud Account.
Setting up an iCloud account is the first step to proceed in Apple ecosystem.
Here’s How to Set up your iCloud?
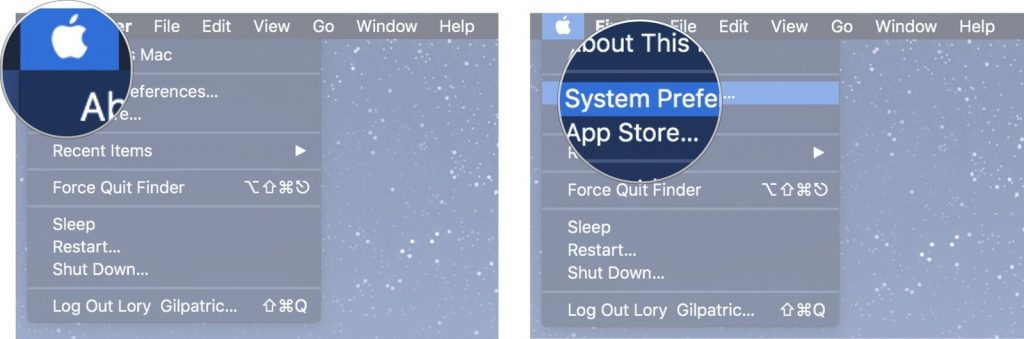
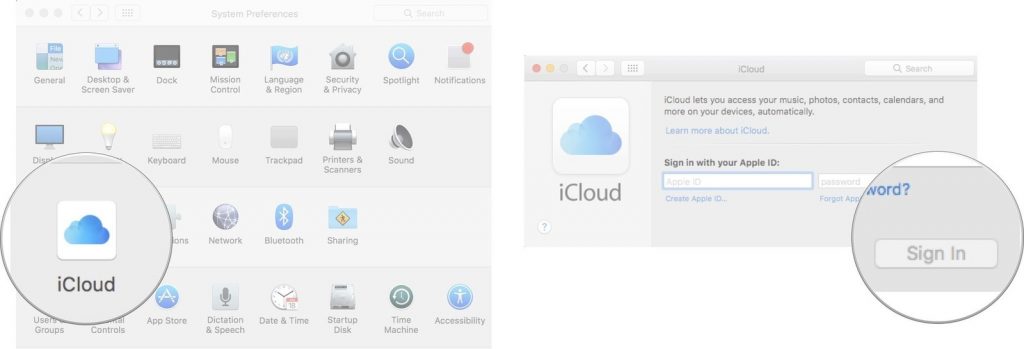
Step 1- Click on Apple icon located at the top-left corner.
Step 2- Select System Preferences > Tap on iCloud > Register your Apple ID & Password.
Step 3- Tap on Sign in!
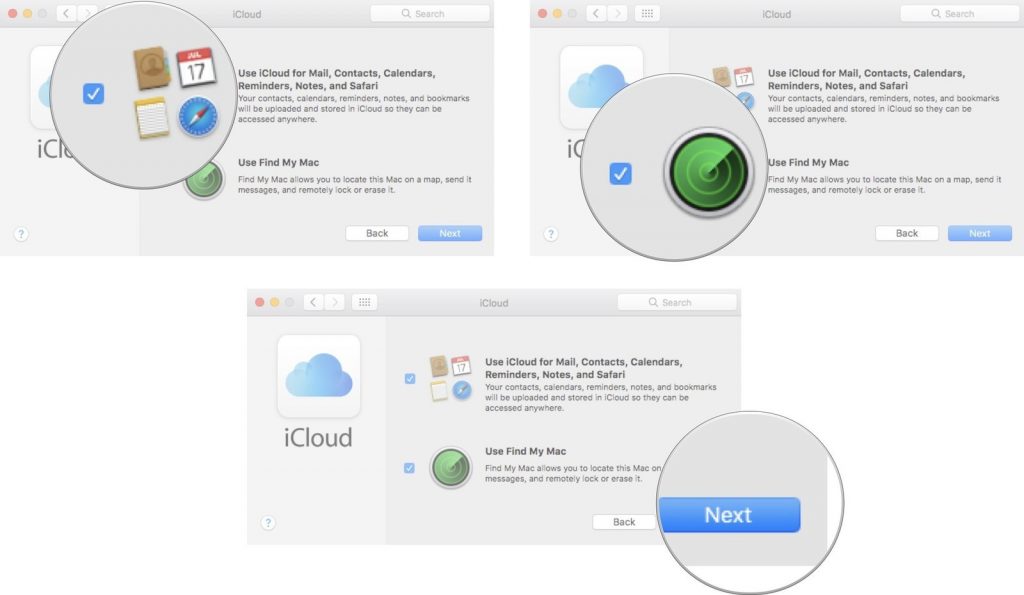
Step 4- Select your options for ‘Use iCloud for’ – Calendars, Reminders, Contracts, Mail, Notes and Safari.
Step 5- Don’t forget to tap on the checkbox next to ‘Use Find My Mac’ > Flick Next > Tap Allow (to allow Mac access your location).
Step 6- Set your iCloud Keychain and enter your Apple ID/ Password.
Step 7- Tap Request Approval from your other iOS Devices as a Trusted Device.
Step 8- Again, submit your Apple ID & Password on your other Apple Device.
Step 9- Tap OK, and you are Done!
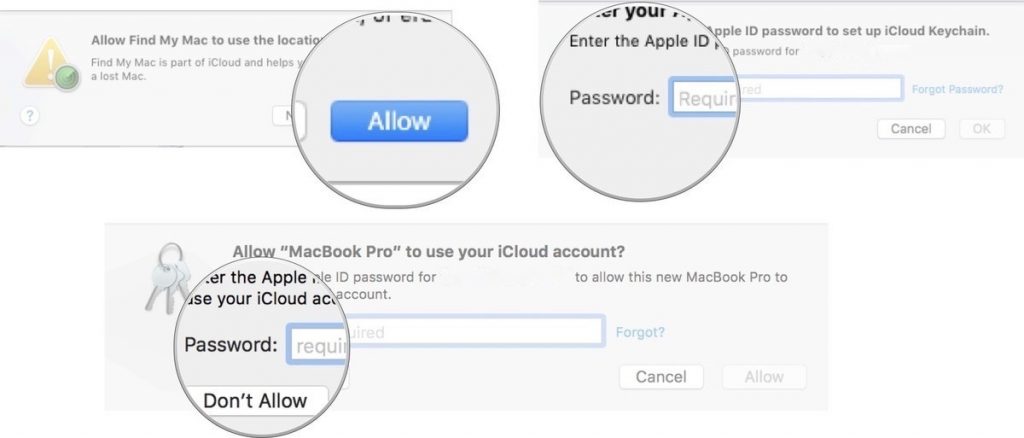
You have successfully set up your iCloud!
- Signing into iTunes: Big Yes!
iTunes is a place, where you store all your music, movies, tv shows, iBooks and much more. It is the best way to organize and enjoy content you already have and shop the ones you want. Buy unlimited latest music, movies, shows etc. and keep up on entertainment like never before.
How to Set up an iTunes Account?
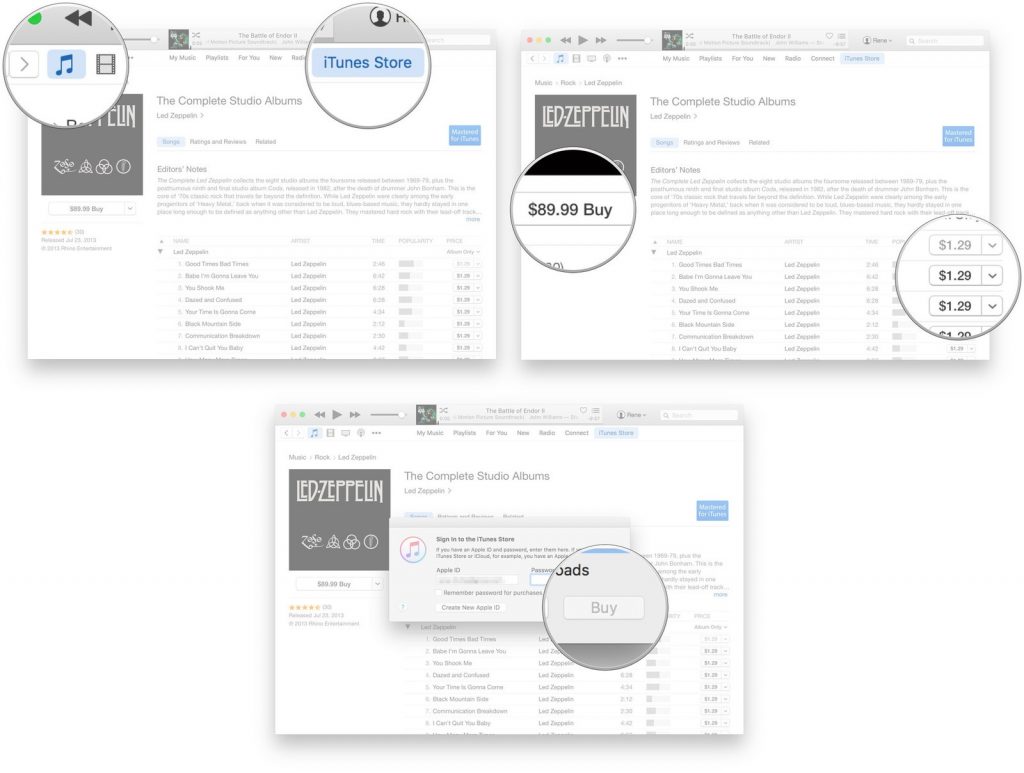
Step 1 – Your Apple ID ties everything together- from buying movie to downloading any stuff, it requires your Apple ID and Password.
Step 2 – Go to iTunes Store > Tap on the Account button > Enter your ID/Password.
Step 3 –Tap Sign in!

Step 4 – Once you’ve logged in > Go to the Music Tab > Look for music and other media you want download or buy.
Step 5 – Click on Price > Submit your Apple ID/Password > Tap Buy.
Stream Unlimited Music, Movies, Shows, and lots of Entertainment. As honestly, there’s no Mac Life without iTunes.
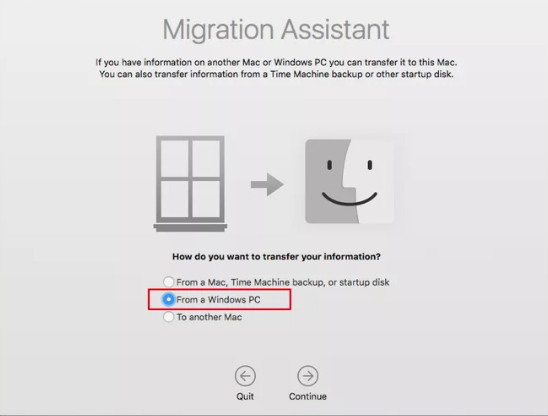
- Transfer Your Files: From Windows to Mac
No big deal, if your Windows has a large collection of your photos, files and other important documents. You can migrate every stuff from Windows to Mac in just few clicks.
Get used to Migration Assistant to transfer all your data from PC to Mac.
Remember: Both OS should have running assistants to execute the transferring of files and other data.
: Migration Assistant comes with OS X Lion and above!
How to use Migration Assistant?
Follow these steps on your Mac-
Step 1- Connect your new Mac and old PC with Ethernet or make sure they are on same Wi-Fi Networks to migrate all your data.
Step 2- Open Finder Window, you can locate the Finder icon at the bottom of your Mac’s Dock.
Step 3- Locate Applications and tap on it.
Step 4- Ctrl+Click on Utilities Folder.
Step 5– Tap on Migration Assistant and Click Continue.
Step 6- Now a menu will appear asking you to choose a source from where you want to transfer your data. Choose “From a PC”. Tap OK!
Follow these steps on your PC-
Step 1- Download Migration Assistant on your PC, if you haven’t already.
After installing it, shoot in on your PC.
Step 2- After firing the Migration Assistant, it will try to connect to its Mac match. A code will appear > Confirm the code on both the devices.

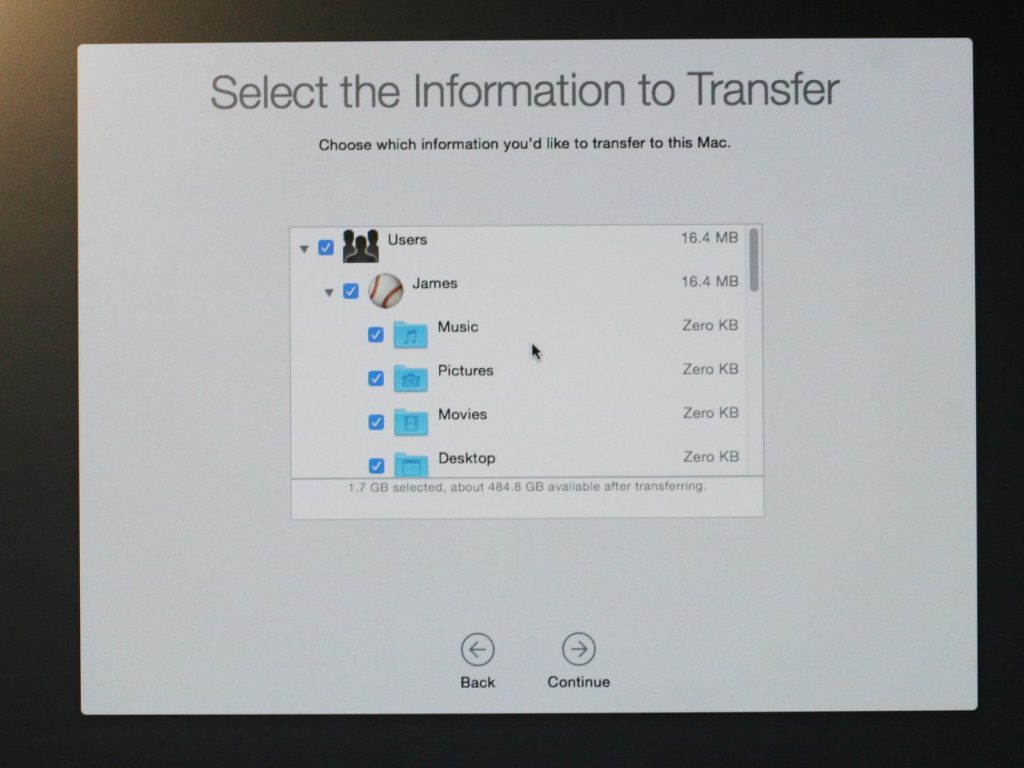
Step 3- Now it’s paired! Select all your data- Files, Folders, Documents, Pictures, Videos etc. you want to transfer on your new Mac.
Step 4- Complete the process, by pressing Continue!
Apart from using Migration Assistant, there are several ways to move all your data, such as using PC Data Transfer Service (get it From Apple Retail Store), portable hard drive, CD or DVD Burner, Shared File Servers, email, or other portable media.
- Attach Printers
Get the most out of your Mac, by connecting peripherals such as mouse, trackpad, keyboard, touch tablet etc. Even installing printers with your Mac is a pretty good idea. You might not need it now, but even you don’t want to rush at the last minute.
It may seem a combination of outdated technology in today’s world, but even these days they are a reliable and efficient way of obtaining physical copies of your work.

Some of the Best AirPrint Printers are:
– Brother HL-L2340DW (See at Amazon)
– HP Laserjet Pro M477fdw (See at Amazon)
– HP OfficeJet Pro 8720 (See at Amazon)
– Epson SureColor P600 (See at Amazon)
Wrap Up!
We hope this blog has helped you to clear all your doubts related to getting started with your new Mac. Still if there are any questions on your mind, regarding the same. Please do drop it in the comment section below, we’ll connect with you as fast as we can.
Till then Happy Switching to Mac! Make the Most out of Your New Mac!
Shashank
Thanks for the wonderful article. This looks like a bit dated. I just installed big sur and some of these don’t work. Also, can you please write something about people moving from Mac to Windows.. I am really looking for an alternate to Finder and Preview on Windows 10.. ThanksMansi Vijay
Hey Shashank, Thank you for your feedback! We will update the post and write a fresh article for users switching from Mac to Windows