
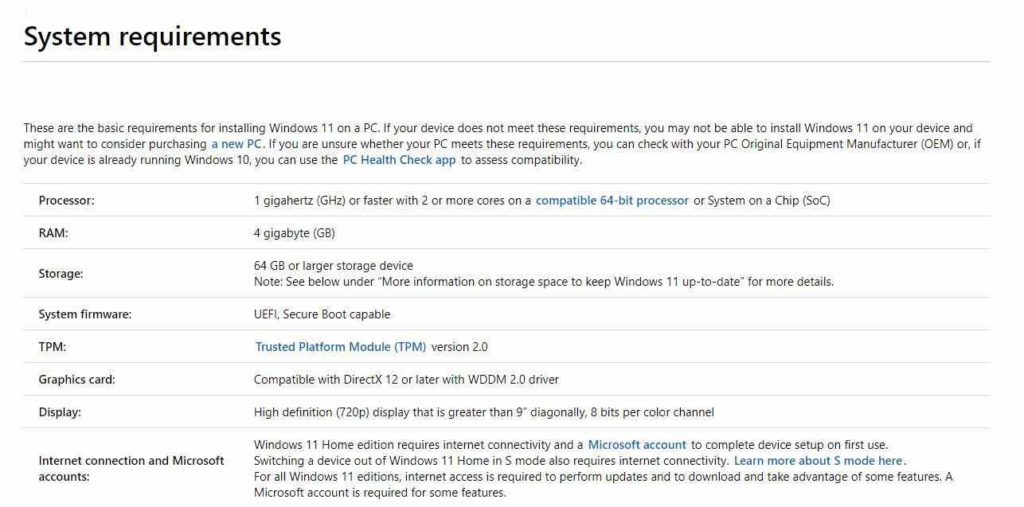
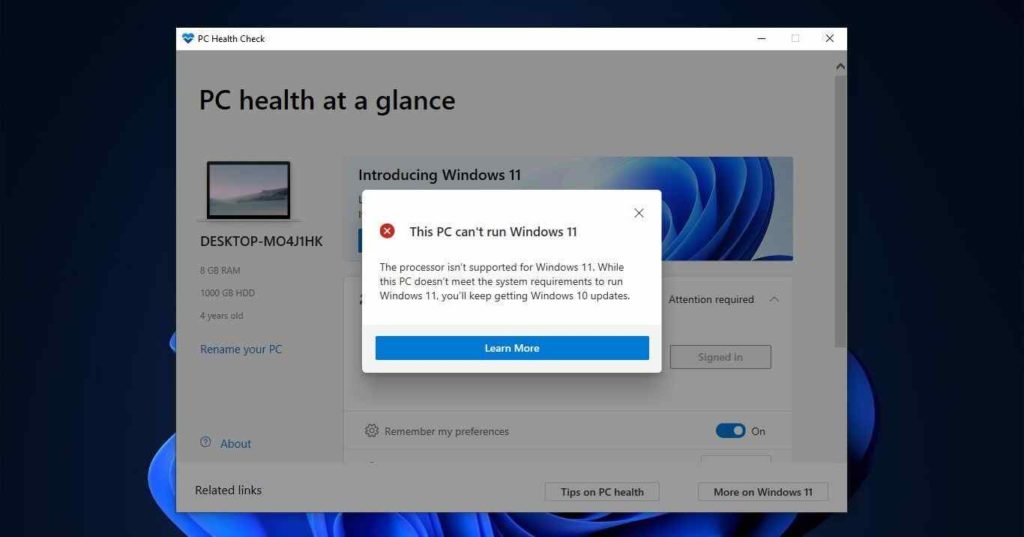
When Microsoft released the next generation Windows 11 Operating System, several users awaited to install or upgrade their computer to the latest version. However, most of us could not install or upgrade our computers to Windows 11 due to its long system requirement list. If you are one of them and got this “This PC can’t run Windows 11” or the processor isn’t supported for Windows 11, then you are not alone.
In this blog post, we’ll learn about getting rid of the error message and whether you should consider updating to the latest OS without having a supported processor and other requirements.
You might want to read: This Windows 11 Build Requires You To Reset Your PC, But Should You Do It? Why/ Why Not
What Causes “The Processor Isn’t Supported For Windows 11” Error?
Every computer is different in terms of processor, RAM, internal configuration, Windows version, etc. So, the leading causes behind the “Windows 11 processor not supported” issue may differ from one PC to another.
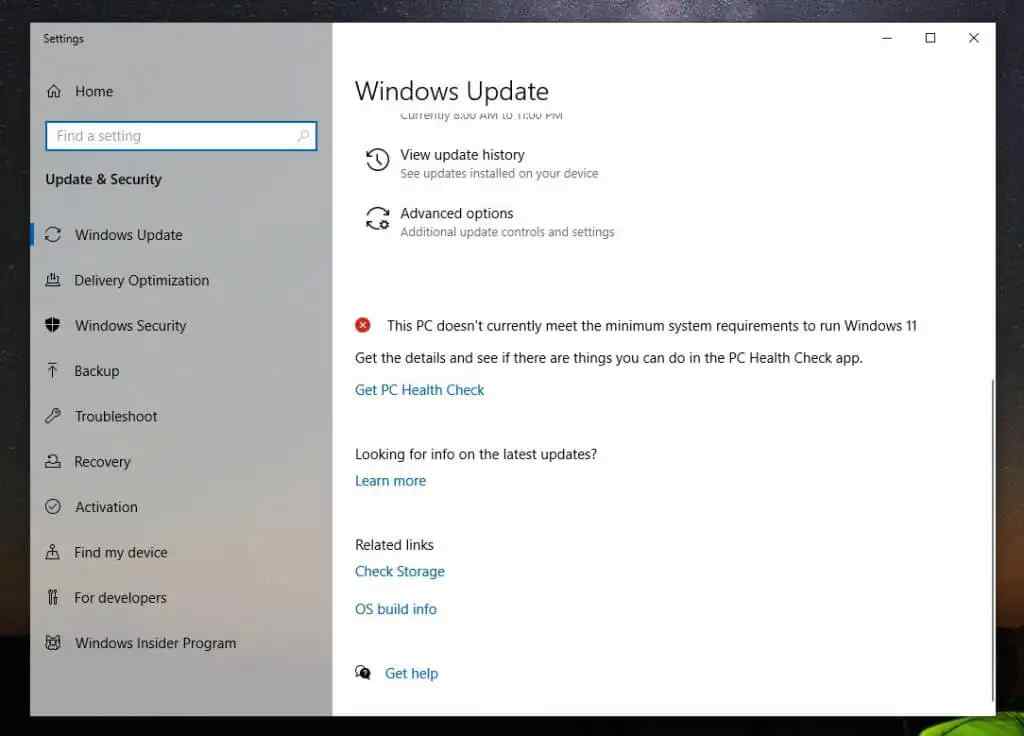
You won’t believe it, but even a Windows 7 computer can be updated if the hardware compatibility requirements are met to get Windows 11 OS. In most cases, an incompatible CPU is the most common reason for the “PC can’t run on Windows 11” error. By opening your Windows settings on your PC and selecting Windows Update from the left menu, you can check whether your PC is compatible or not. You will see the message saying, “This PC doesn’t currently meet the minimum system requirements to run Windows 11”.
| To Learn More About The Error – Run PC Health Check Tool
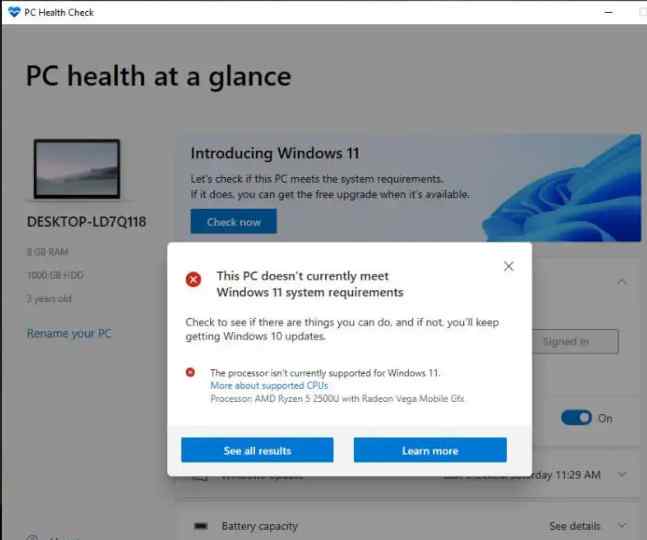
The red X symbol will appear next to the phrase, “This PC doesn’t currently meet the minimum system requirements to run Windows 11.” You’ll see a link to the PC Health Check app under the same. This utility will analyze your machine and provide all the potential reasons why your device is incompatible with Windows 11. Here are the steps to run the PC HEALTH CHECK TOOL- STEP 1 = Launch the tool by clicking on the option “Get PC Health Check” and hitting the “Check now” button to begin the scanning process on your computer. STEP 2 = As soon as the scanning process is completed, you will be displayed the message, “Your System doesn’t meet the minimum hardware requirements,” and the top reasons for your system’s incompatibility will be listed.
STEP 3 = Hit the “See all the results” button, and other reasons for your system’s incompatibility with Windows 11 will be displayed. This may include available RAM, TPM 2.0, secure boot, etc. Now that you know why your system is getting the error. Learn best fixes to resolve “This PC doesn’t currently meet Windows 11 system requirements’ pop-up. |
Must read: Windows 11 Stuck on the Restart Screen? Here’s the Fix!
What To Do If Your PC Doesn’t Meet The System Requirements?
Follow the below-mentioned workarounds if your computer fails to fulfill the system requirements.
1. Bypass TPM 2.0 & Secure Boot Requirements
Even though your system is not compatible with Windows 11 because it does not contain a Trusted Platform Module (TPM 2.0), Windows 11 can still be installed in this case. Nonetheless, some security risks have to be accepted.
| If you’re not aware: TPM is a hardware processor, a physical chip in modern computers that protects your system from malicious software (malware). If TPM 2.0 is not enabled on your computer, it doesn’t mean your PC doesn’t have the feature. A TPM module must be purchased, or the BIOS must be configured to enable it. |
If you don’t wish to get the chip, consider bypassing the requirement by building a bootable Windows 10 USB Stick via Microsoft Media Creation Tool. After making it, access the installation media Source folder and delete the install.wim or install.esd. Next, you need to head towards the Windows 11 ISO and copy the install.wim file.
As soon as you do this, your computer will be tricked into believing that you are installing Windows 10 instead of Windows 11. This workaround doesn’t guarantee a 100% success rate, so don’t get high hopes with this method. But for some users, like us, it did the trick to resolve Windows 11 CPU not supported problems.
You might want to read: Windows 11 Apps Won’t Open – Here Are The Best Fixes
2. Make tweaks in Windows Registry
Following this simple Registry Hack, you can easily update Windows 11 on an unsupported CPU while bypassing the associated error message. All you need to do is:
- Select the Start menu, search “Regedit,” and choose the Registry Editor.
- After the editor opens, traverse it to Computer>HKEY_LOCAL_MACHINE>SYSTEM>SETUP>MoSetup.
- Right-click on the MoSetup folder and select NEW>DWORD, i.e.32 bit value.
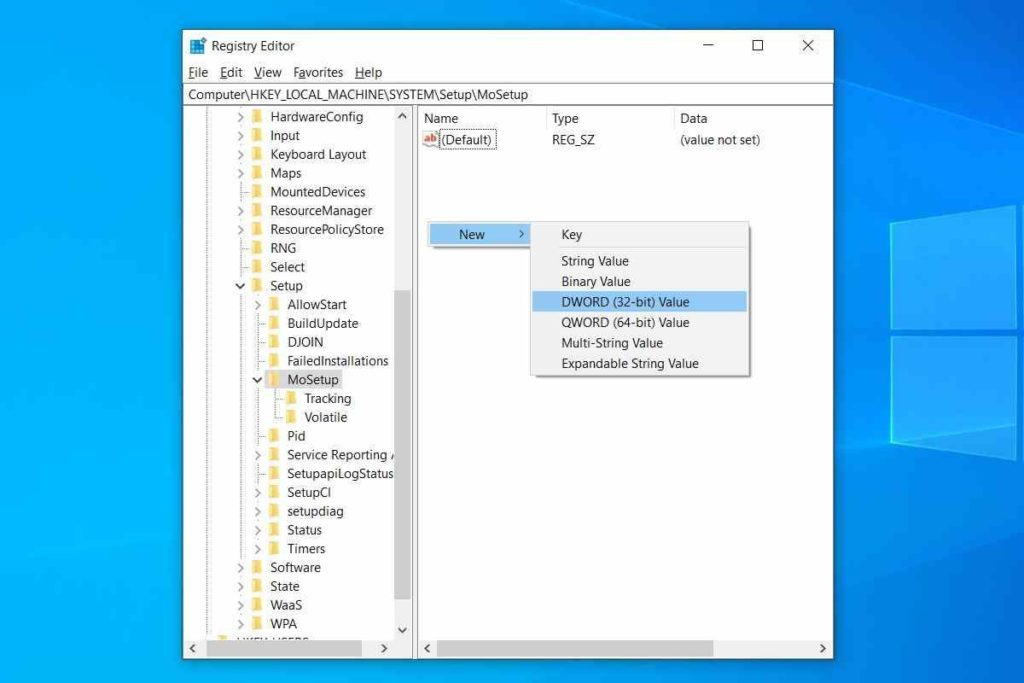
- Give a name to the value ” AllowUpgradesWithUnsupportedTPMorCPU,” double-click on the new value, enter one into the Value field, and select OK.
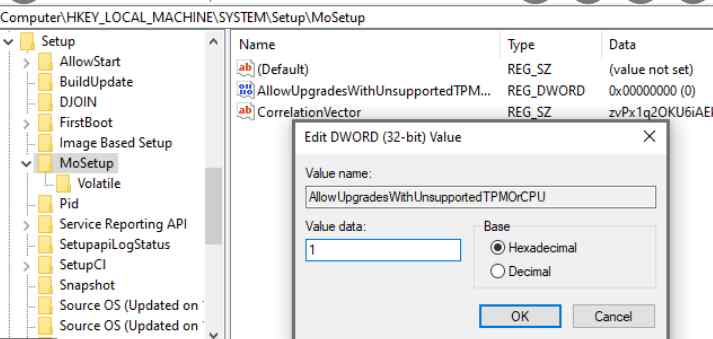
Now close the registry editor, and finally, your computer is ready to upgrade to Windows 11. With these alterations in Registry, you can certainly avoid the CPU version check and run the latest OS without hiccups.
Must read: Windows 11 Desktop Keeps Refreshing? Here’s the Fix!
Straightforward Guide To Install Windows 11 OS On Your PC
We believe you should be all set to install the Windows 11 OS. Follow the instructions stated below to get started.
1. Download The Windows 11 ISO File
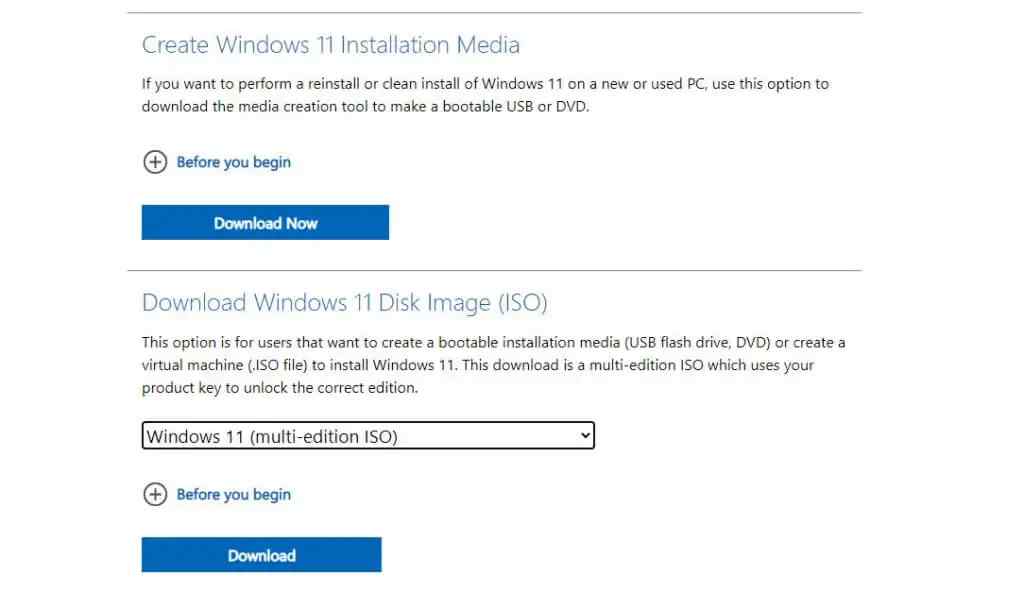
First, download the Windows 11 ISO file from Microsoft’s official website. This installation is for 64-bit processor computers only.
STEP 1 = If you have gone to Microsoft’s web page to download Windows 11, go to the Download Windows 11 Disk image ISO) section, choose Windows 11 from the drop down box, and click the download button.
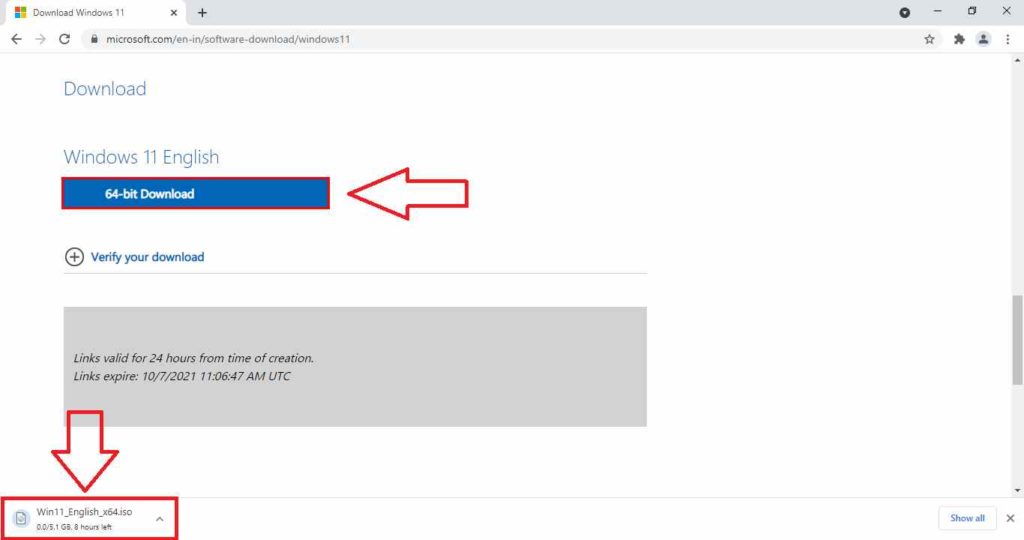
STEP 2 = Select the language and click on the confirm button. Finally, you will see the “64-bit download” button; click on it to download and install the ISO file of Windows 11 to the hard drive.
2. Install Windows 11 Using ISO File
Follow the procedure below to update to Windows 11 once the ISO file is successfully downloaded to your computer.
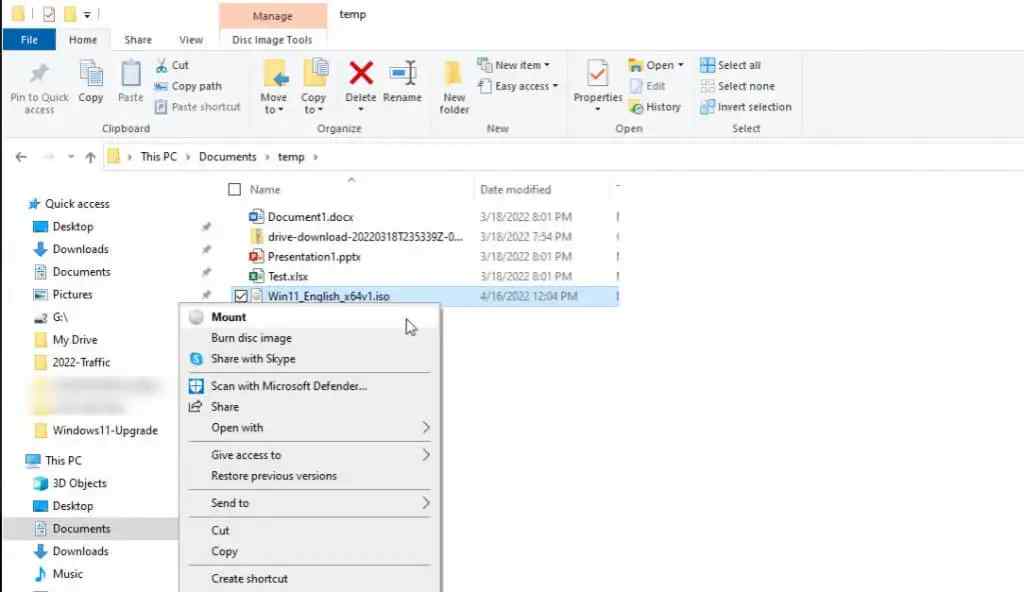
STEP 1 = Click on the ISO file and Choose the Mount option.
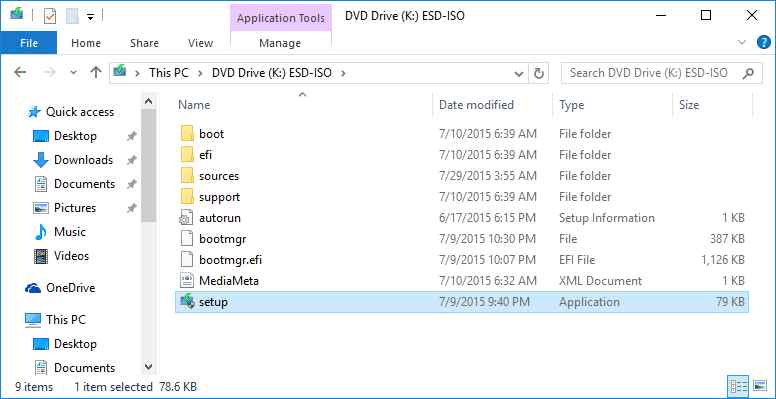
STEP 2 = After choosing the Mount option, a new drive will be mounted in the File Explorer. Select that drive and double-click on the setup.exe file.
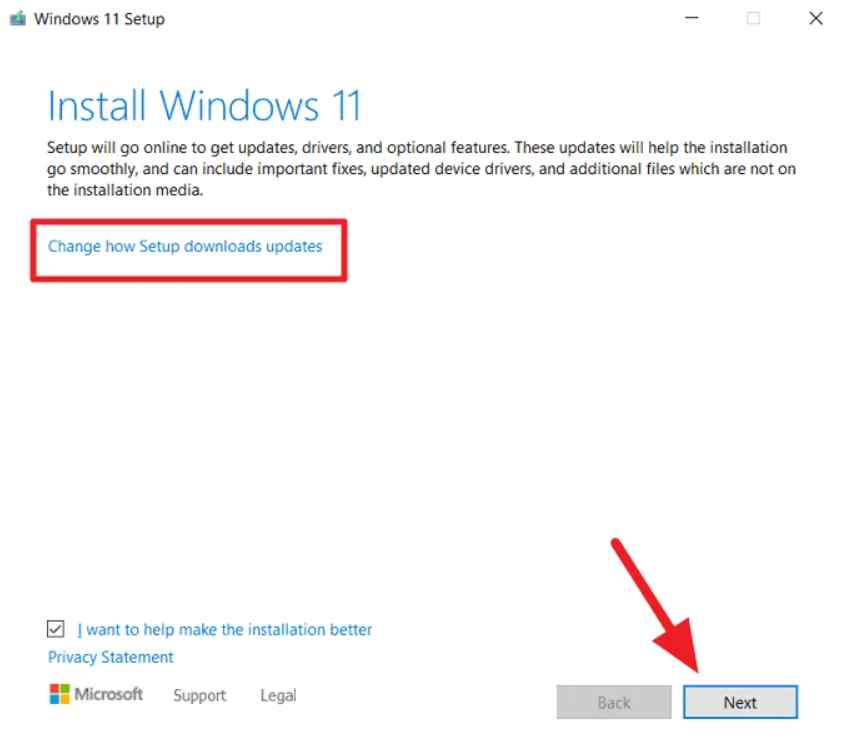
STEP 3 = After this step, Windows 11 installer wizard will be launched on your screen. Select the “Next” option to continue further.
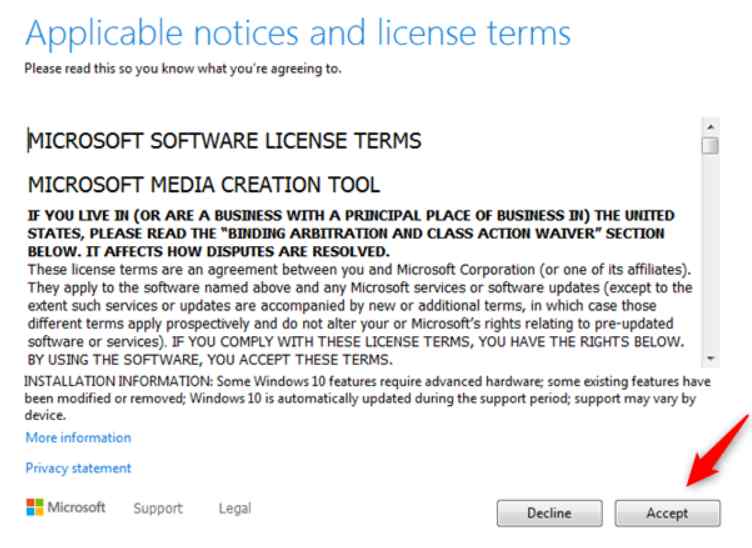
STEP 4 = Select the “Accept” option after reviewing the notices and license terms.
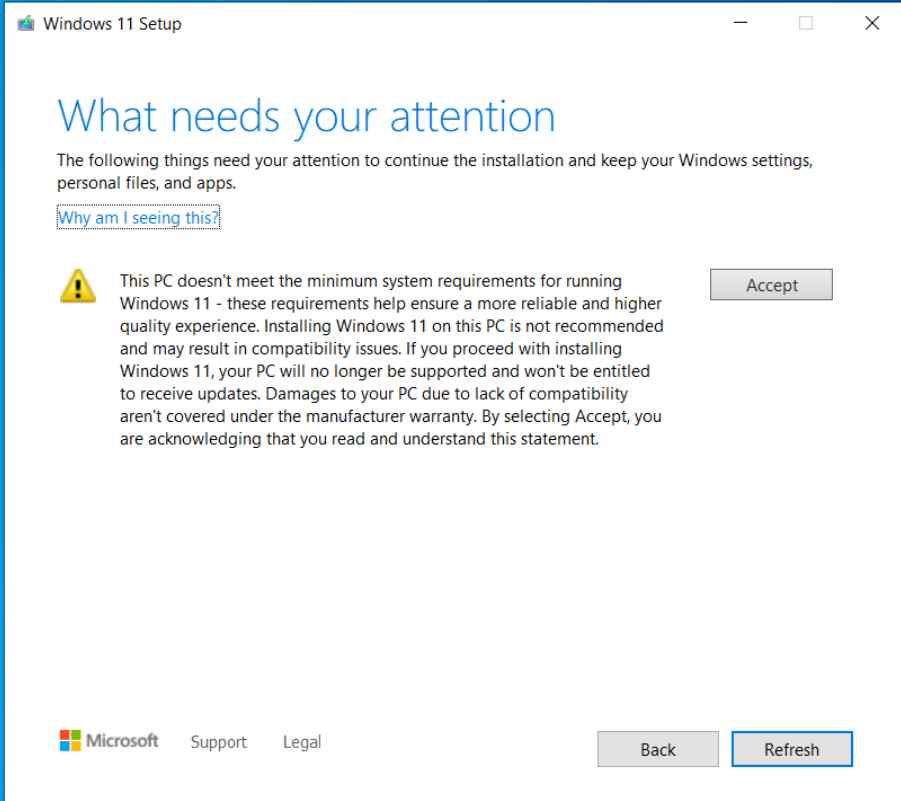
STEP 5 = After the wizard checks the latest updates, you will receive a warning message that your system doesn’t meet the minimum requirements. Just accept it.
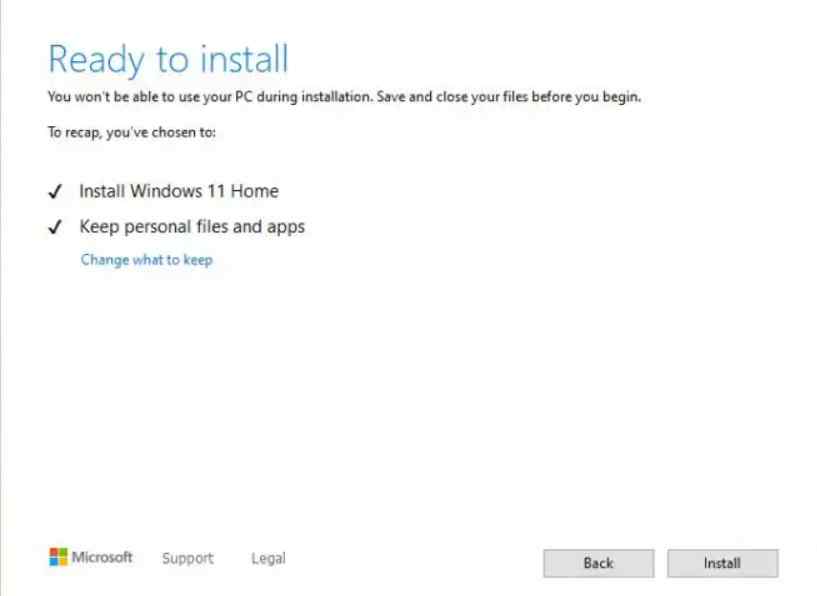
STEP 6 = The Wizard will again start checking for the latest updates, and you will finally see the “ Ready to Install” on your display. Select the “Install” option and continue.
This entire installation procedure may take a few hours. So, leaving your computer turned On and plugged into power throughout the procedure is suggested.
You might want to read: Windows 11 “The Watermark Story” For Unsupported Devices.
Should You Install Windows 11 On An Incompatible System?
If the “Windows 11 processor is not supported” issue only appears due to an incompatible CPU, then there is certainly a low risk of updating to Windows 11. But we cannot deny that your system will be completely free from all the potential errors.
Another major drawback is, initially, you won’t receive any essential updates on Windows 11 if you have installed it on an incompatible system. According to Microsoft, “It is not recommended to install Windows 11 on incompatible PCs, as your PC will not be supported and will no longer be entitled to receive any updates. Damages caused by the system’s incompatibility will not be covered under the manufacturer warranty as well. These damages include computer freezing issues, system crashing, and dozens of Blue Screen of Death (BSOD) errors.
Bottom Line
So, by now, you know how to get rid of the annoying error “The processor isn’t supported for Windows 11”. Once you follow all the steps mentioned in this blog, your PC should restart, and you will be able to see the Windows 11 login screen. Enter the login credentials, and a new desktop will appear. Now, you can enjoy the new features and improved OS performance.
Let us know if this blog was helpful for you all, and share your feedback in the comment section below. You can also get in touch with us on our Facebook, Instagram, or Twitter handle!
Frequently Asked Questions | More About Windows 11 Processor Not Supported (2022)
Q.1. Can you still install Windows 11 if your processor is not supported?
If your system is not compatible with Windows 11 due to unsupported hardware, you may upgrade to Windows 11, but you won’t receive any essential updates. You will have to use an ISO file to install or upgrade manually, but installing through “Windows Update” won’t work.
Q.2. What processors will not work with Windows 11?
For improved security and performance, the PC manufacturers have specified that Only 8th generation processors are compatible with Windows 11.
Q.3. What does the processor isn’t currently supported for Windows 11 mean?
“The processor isn’t supported for Windows 11” means that your PC processor is not included in the list of compatible processors for Windows 11 due to a lack of hardware requirements.
NEXT READ:
- How To Fix Windows 11 Shutting down Automatically
- How To Enable Or Disable Quick Settings On Windows 11 Computer?
- Windows 11 Clock Time Wrong? Here’s the Fix! (7 Solutions)
- How To Fix Windows 11 Blocking Websites Issues
- How to Fix – Can’t Reset Windows 11 PC
- Common Windows 11 Problems and Ways To Fix Them