
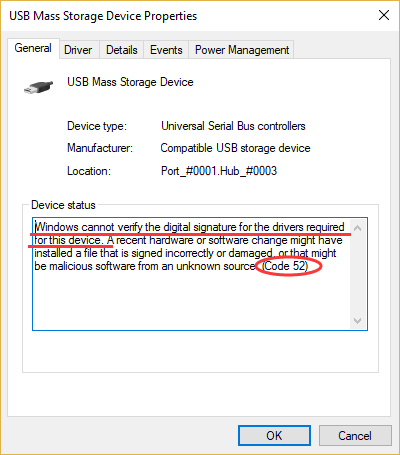
Oftentimes, your USB Ports fail to recognize any hardware connected to your device, you might witness the annoying error code 52 along with the message stated: “Windows Cannot Verify The Digital Signature”. As the name entails, the error is typically related to the Digital Signature and usually appears after upgrading Windows or a driver failure in Device Manager.
What Exactly Is Digital Signature?
Windows uses a valid digital signature to verify the following kinds of information:
- The file, or the collection of files (such as a driver package), is signed.
- The signer is trusted.
- The certification authority that authenticated the signer is trusted.
- The collection of files was not altered after it was published.
To ensure your Windows Operating System runs properly in an optimal shape, all the drivers and programs must be digitally signed. In case, certain utilities and drivers don’t get signed from Windows, you might encounter a plethora of problems, including Error Code 52.
Fix Error Code 52 “Windows Cannot Verify The Digital Signature”?
Well, to be honest, there’s no particular reason for this error, since several factors could be responsible for this, such as Corrupted/Faulty drivers, Problematic filters for USB, Secure boot, and more. Without further ado, let’s start troubleshooting the Windows stop code!
METHOD 1- Update Problematic Drivers
You might not realize but it can be any specific device driver that might be causing the whole issue. Hence, you should update all the drivers, so that no problematic driver gets left. We have already covered the best ways to update drivers on Windows 10 & other versions. However, the safest and most reliable way to update drivers in bulk is through Driver Updater Software.
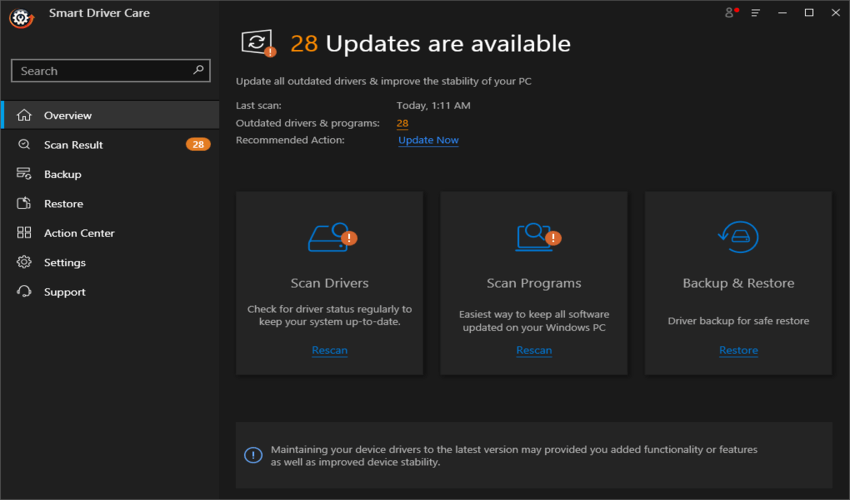
STEP 1- Download, install and launch Smart Driver Care. It is a professional driver updater utility and helps users to download and replace the current faulty device drivers with the latest and most compatible versions in no time.

STEP 2- Using the registered version, click on the Start Scan button from the main screen.
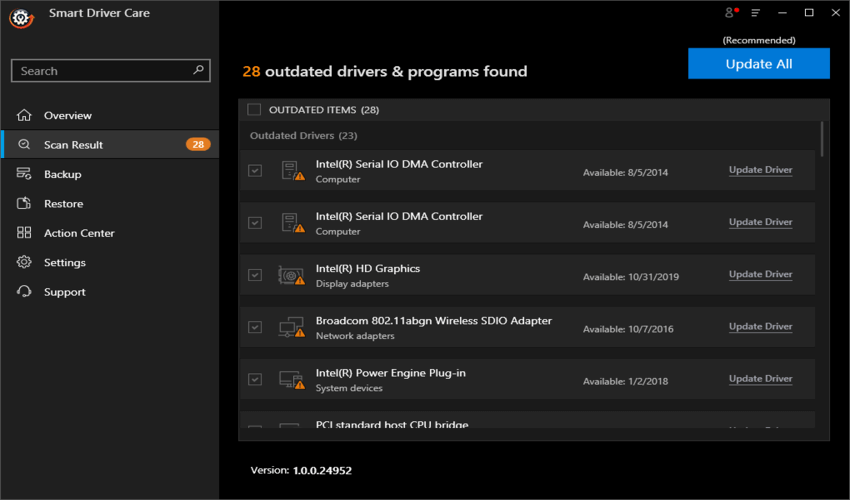
STEP 3- It will take a few moments for Smart Driver Care to scan all the potential problematic drivers and it will list all of them in a tabular format.
STEP 4- You can easily review them and click on the Update All button to install the latest versions of all drivers in one go. Alternatively, you can click on the Update button, next to each driver to get the recent update.
Smart Driver Care is indeed a great solution to get authentic and latest driver versions for your device. It has an easy-to-use and intuitive interface, which probably makes it one of the best driver updater software for Windows 10, 8, 7, and other older versions.
Must-Read: Smart Driver Care vs Driver Finder vs Avast Driver Updater
METHOD 2 – Enable The ‘Disable Driver Signature Enforcement’ Feature
For the majority of the users, updating the system with the latest and authentic drivers will resolve the issue. If the error code 52 persists, it is recommended to Enable the ‘Disable Driver Signature Enforcement’ feature. Here’s what you need to do:
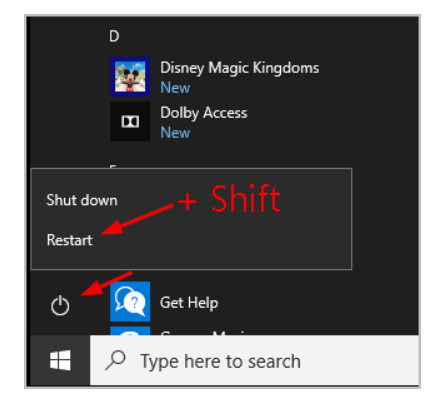
STEP 1- Press the Windows logo key to launch the Start menu.
STEP 2- Hold down the Shift key and click on the Power icon from the Start menu. Complete the process by clicking the Restart button. Your Windows PC will restart into the Boot Menu!
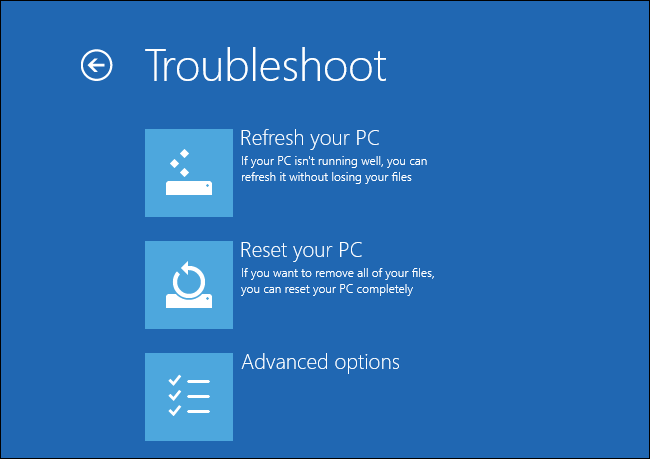
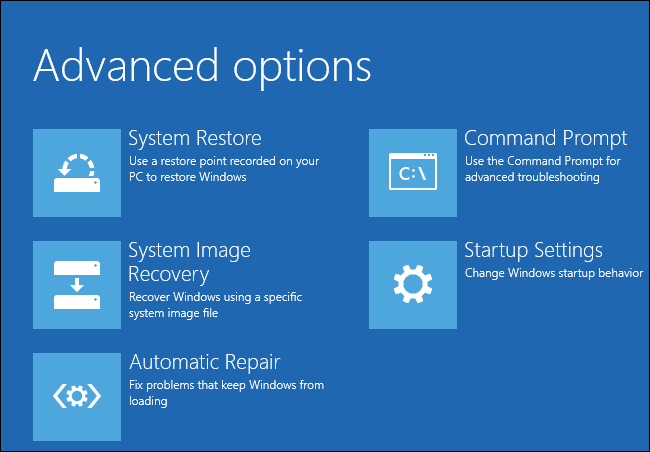
STEP 3- From the new window, click on the Troubleshoot option and navigate to the Advanced options.
STEP 4- At this point, you need to click on the Startup Settings and hit the Restart button.
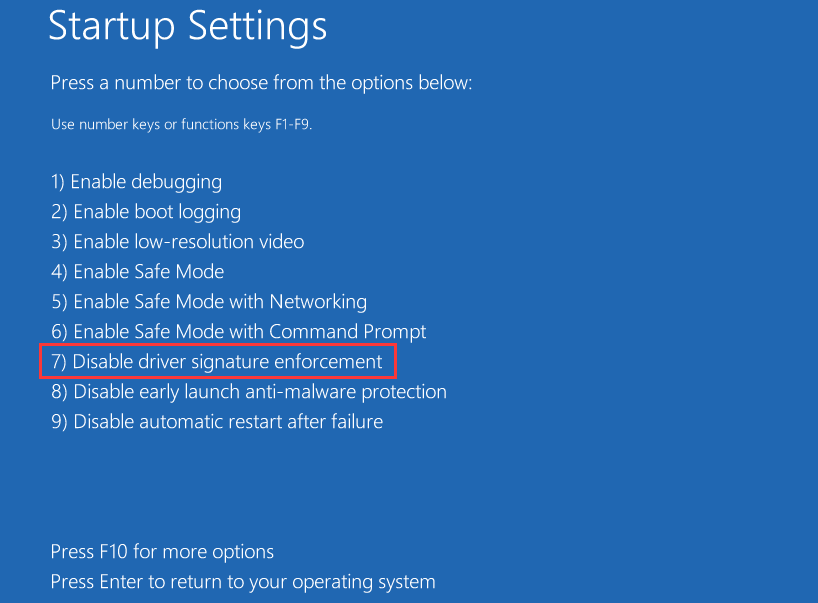
STEP 5- From the Startup Settings window, you need to head towards the seventh option Disable driver signature enforcement. Simply press F7 to reach there!
Now your PC would boot into the normal mode. If needed, you can try updating the drivers again manually or automatically using Smart Driver Care to get the best updates possible. In case you’ve missed our previous guides:
- How To Permanently Disable Driver Signature Enforcement On Windows 10?
- How To Fix Driver Digitally Not Signed Error?
METHOD 3- Disable Integrity Checks
As discussed above, Error Code 52 Windows Cannot Verify The Digital Signature can also occur when Windows tries to verify the digital signature and integrity of the device. Some experts suggest that disabling the option resolves the issue altogether.
STEP 1- Launch the Run window. You can press the shortcut keys CTRL + R to do that.
STEP 2- From the new window, type CMD and press CTRL + SHIFT + ENTER to run the Command Prompt utility as an Administrator.
STEP 3- Execute the following command lines:
bcdedit -set loadoptions DDISABLE_INTEGRITY_CHECKSbcdedit -set TESTSIGNING ON
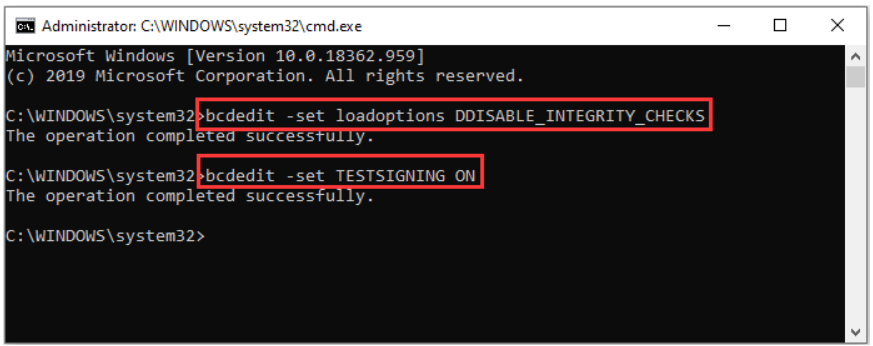
STEP 4- Press Enter button to execute the command lines.
STEP 5- In case the aforementioned command lines don’t get executed successfully, you can try again and type the following command lines, this time.
bcdedit /deletevalue loadoptionsbcdedit -set TESTSIGNING OFF
You’ll probably be free from the annoying Error Code 52 this time on your Windows computer.
METHOD 4- Scan & Fix Corrupt System Files
Sometimes, corrupted or missing system files can also be responsible for triggering Error Code 52 “Windows Cannot Verify The Digital Signature”. To resolve the issue, we suggest using the built-in Windows utility System File Checker and fix all the corrupt system files in one go.
STEP 1- Launch the Run window. You can press the shortcut keys CTRL + R to do that.
STEP 2- From the new window, type CMD and press CTRL + SHIFT + ENTER to run the Command Prompt utility as an Administrator.
STEP 3- On the CMD window, you need to execute the following command line:
sfc/scannow
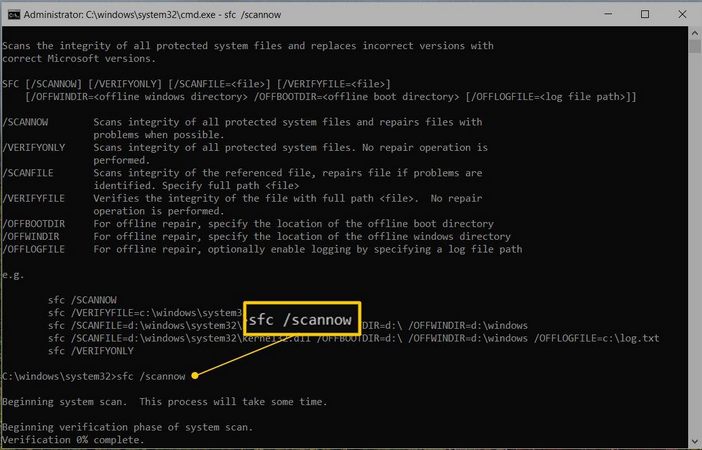
STEP 4- Simply press the Enter button and let the System File Checker utility do its task.
The tool will scan your entire system and replace all the problematic files with a fresh cached copy. Be patient as the process might take a little time. Once the scanning gets completed, restart your computer and check whether the Error Code 52 is still appearing. If yes, go ahead with the next workaround!
METHOD 5- Perform System Restore
At last, you can perform System Restore to bring your Windows back to a previous state where everything was working normally. So, consider this workaround by following the guide below and reset your PC to the last known good configuration.
You can follow the comprehensive guide to learn about creating & using System Restore:
- How To Create Restore Points On Windows 10, 8, 7, Vista, and XP?
- How To Create & Use System Restore In Windows 10?
- Things to Do After Restoring Windows Settings Using System Restore!
So, were you able to resolve the annoying error code 52 Windows Cannot Verify The Digital Signature? If you know of any other solutions, do mention them in the comments zone below!