After upgrading your Mac to macOS 10.13 High Sierra, 10.14 Mojave, or 10.15 Catalina, you may have noticed a new category named ‘Other Volumes in Container’. It is quite similar to a partition in other file systems. For instance, a standard macOS Startup container includes volume such as:
- Macintosh HD: A dedicated volume where macOS software is installed.
- Preboot: A dedicated volume to support the booting This is usually hidden on Macs.
- Recovery: A dedicated volume that includes the recovery system of your machine.
- Virtual Machine: A dedicated volume for supporting your Memory (RAM) to save files like swapfile, sleepimage and more. These files are significantly large in size and take up most of your storage space.
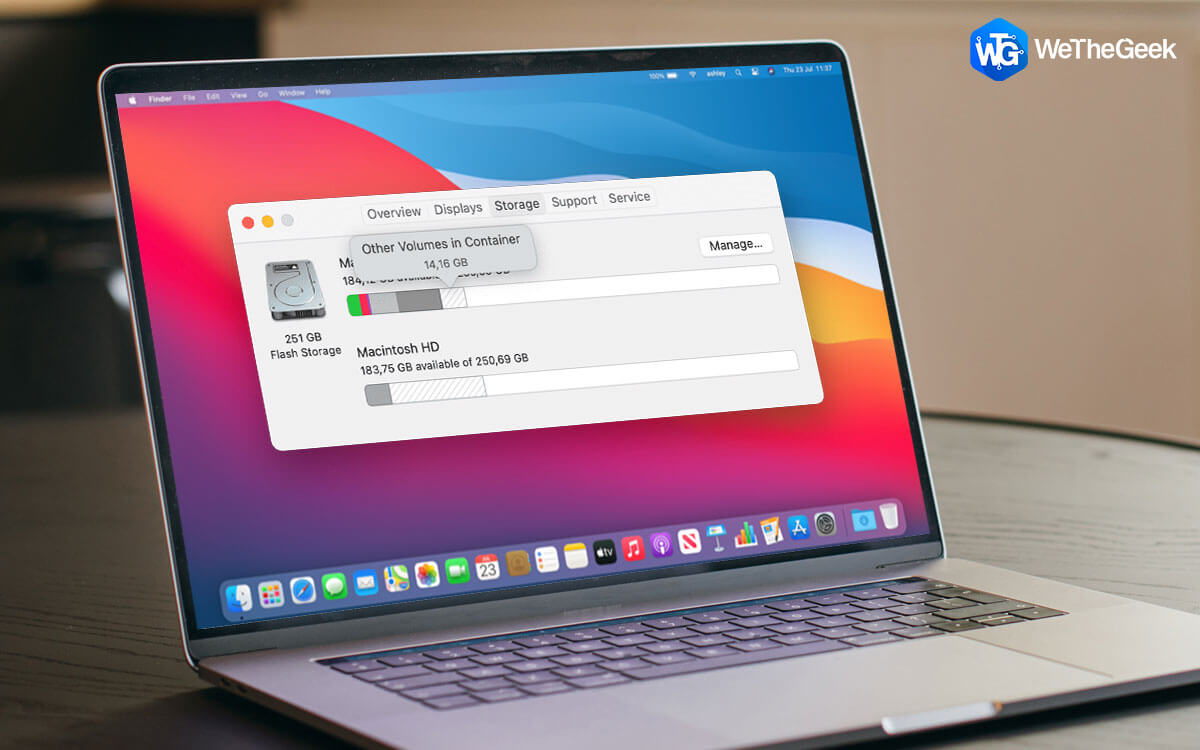
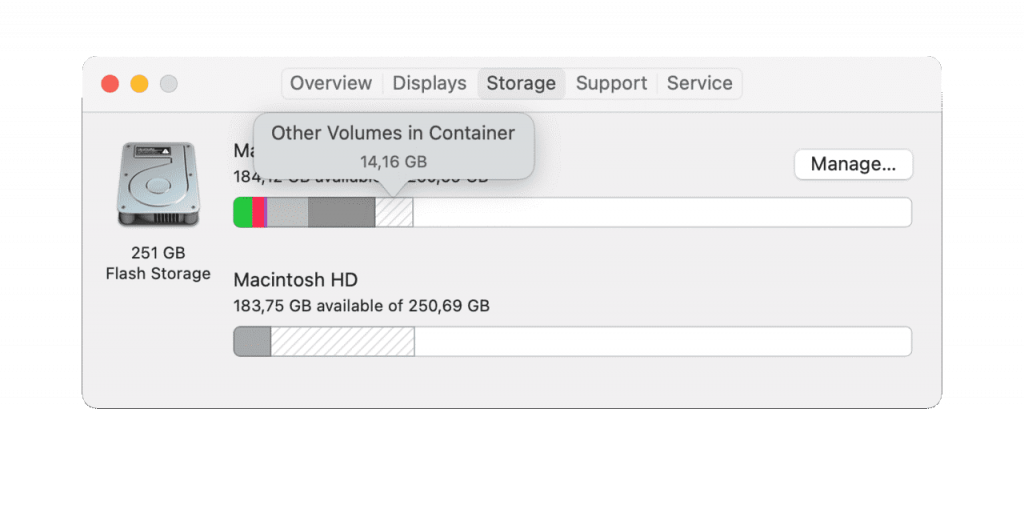
These volumes should not be removed as they are essential for running your Mac smoothly. However, the main problem arises when you get the warning “your disk is almost full”. When you check the Storage on Mac (Hit the Apple logo > Select option About This Mac > Choose Storage) you see that “Other Volumes in a Container” are taking over a significant amount of storage space. Some even observed the size of ‘Other Volumes’ keeps on growing on Macs.
Though we cannot completely delete ‘other volumes in a container’ but there are ways to optimize your storage space:
Thoroughly Clean Your Mac To Release Memory On Mac
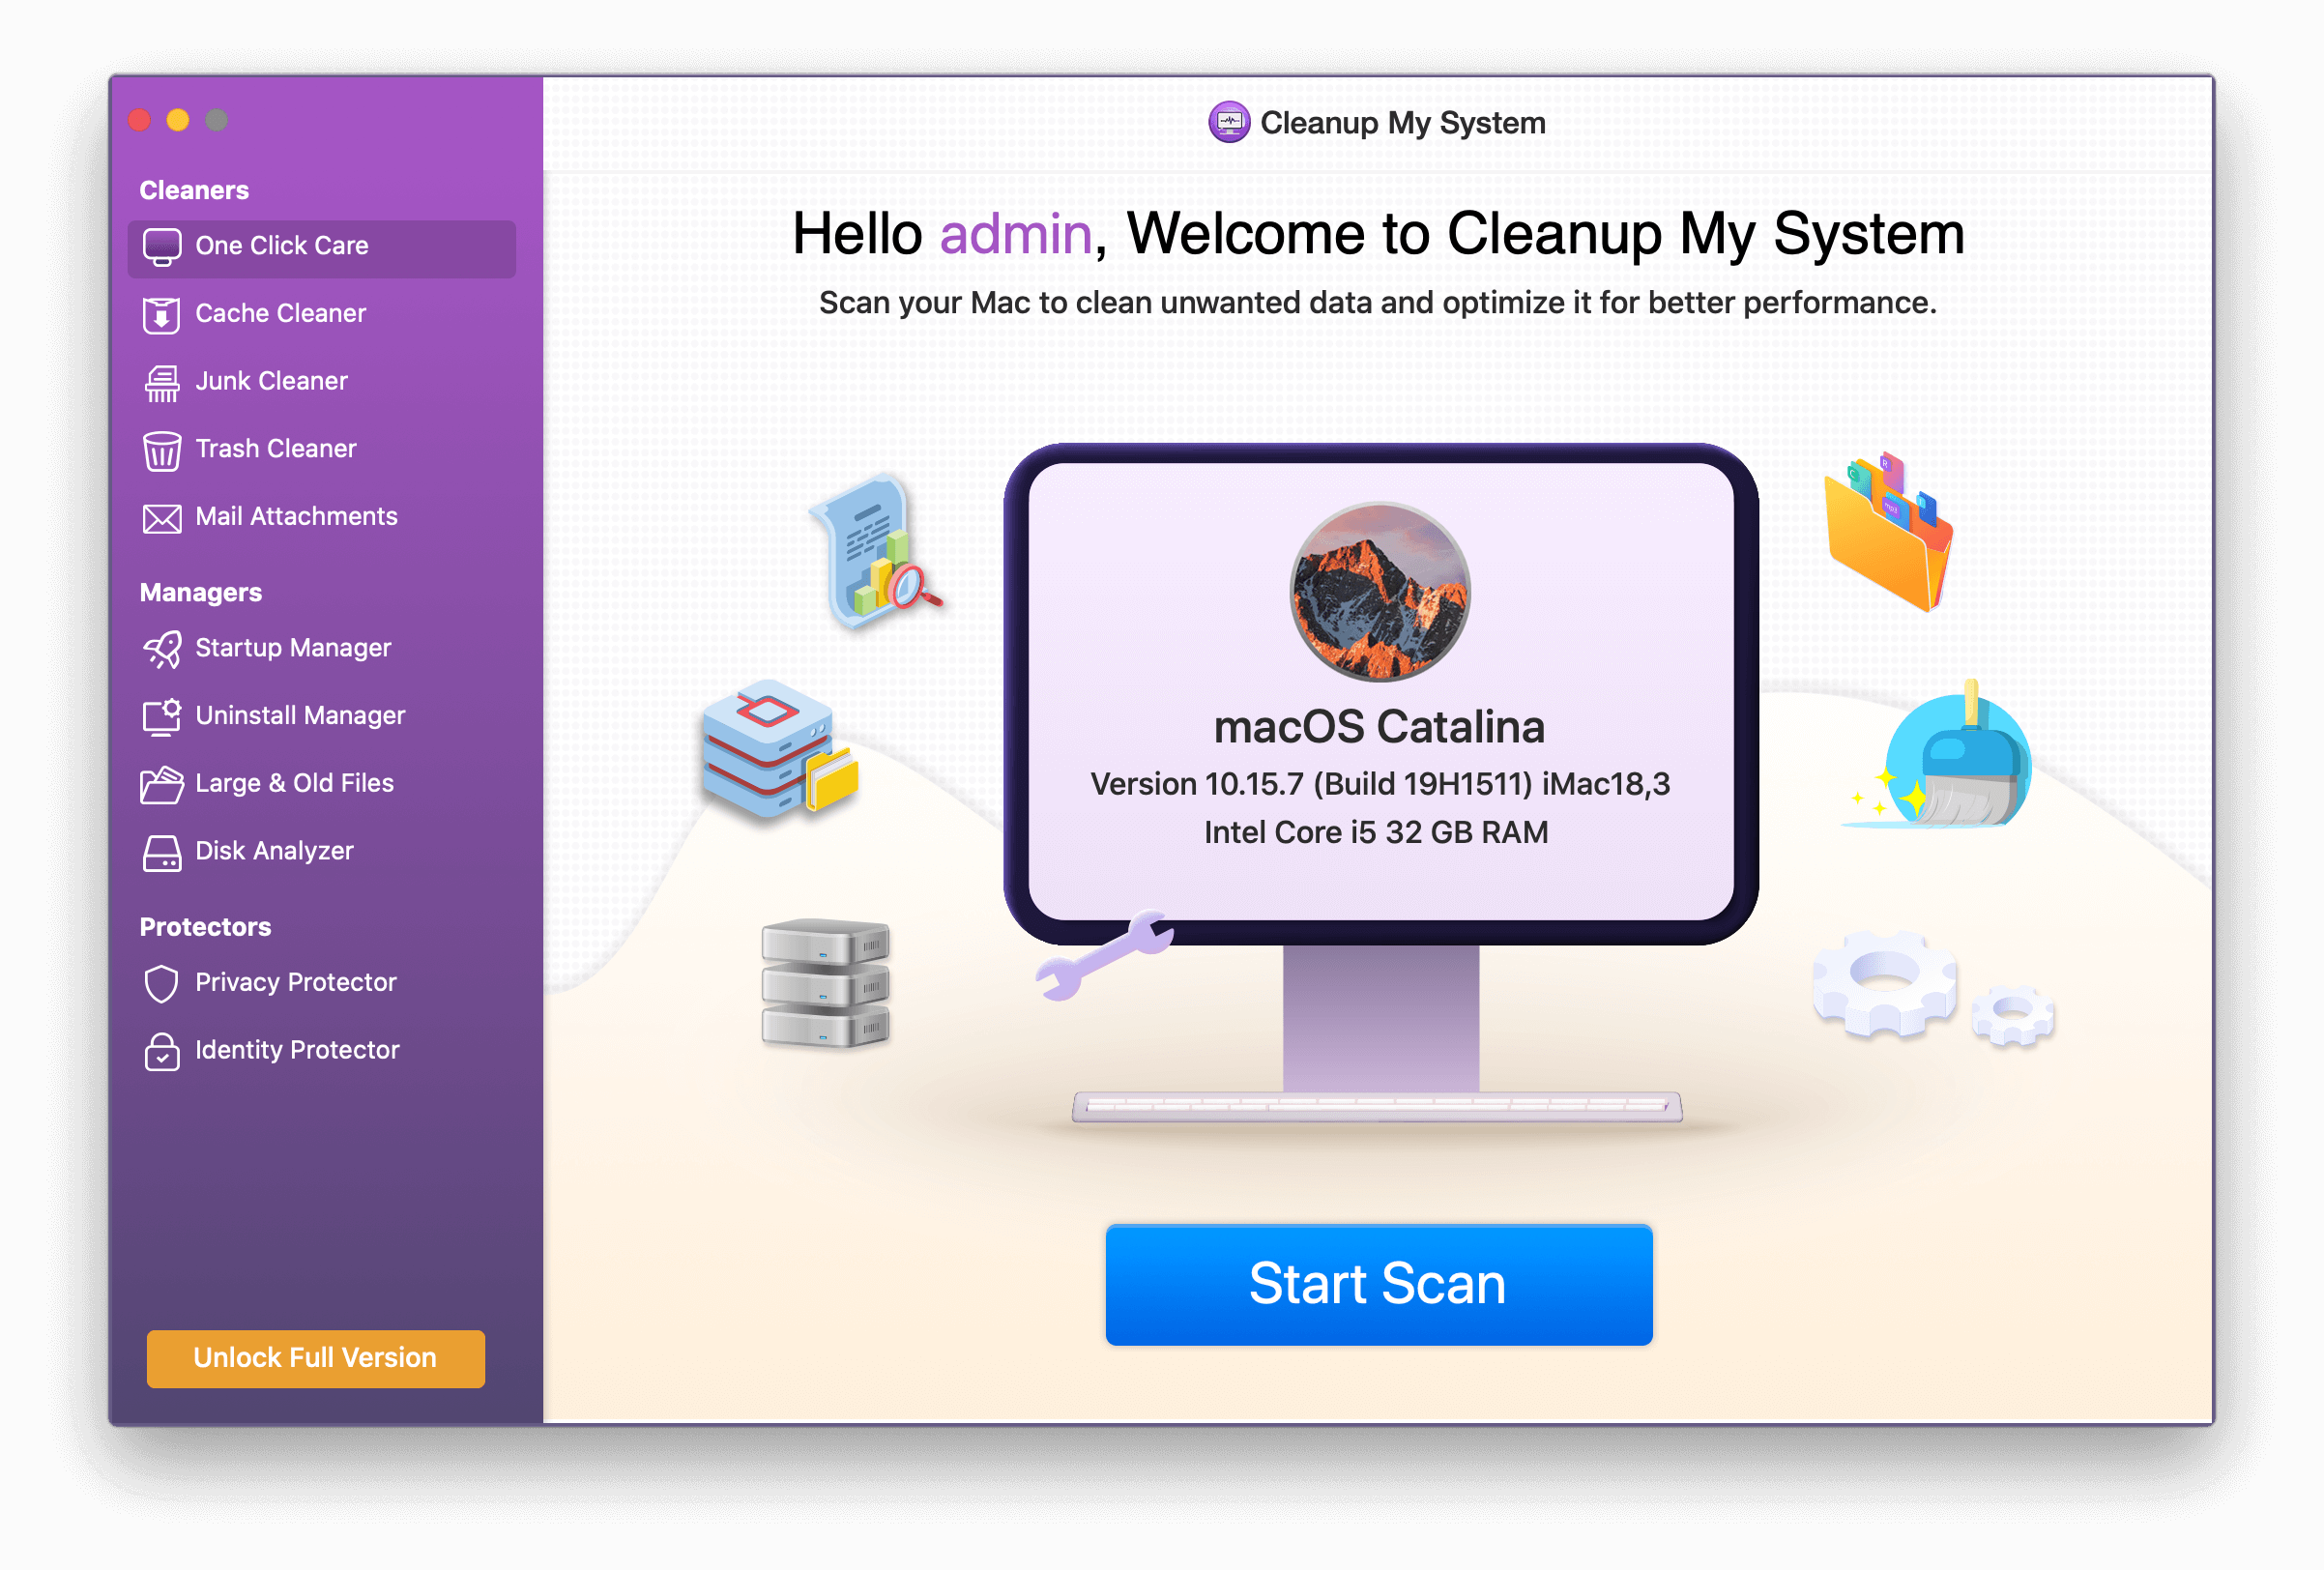
Cleanup My System is one of the best Best Mac Cleaning & Optimization Software. It thoroughly cleans your hard disk and eliminates all the redundant files taking up space on your Mac. It ensures that no junk files, temp files, caches, logs, cookies, and other unwanted large/old files gobble up space on your Mac.
One of the significant features of the Cleanup My System is the ‘One Click Care’ feature. It significantly scans your entire disk and identifies elements that might be responsible for causing low storage space error or simply degrading overall Mac speed and performance. Here’s how it works:
1. Download & install Cleanup My System from the Mac App Store download button given below. The application is compatible with macOS 10.10 or later.

2. After quick installation, you can launch this Mac cleaner & optimizer.
3. Go to the One-Click Care module, hit the Start Scan button to initiate the comprehensive scanning.
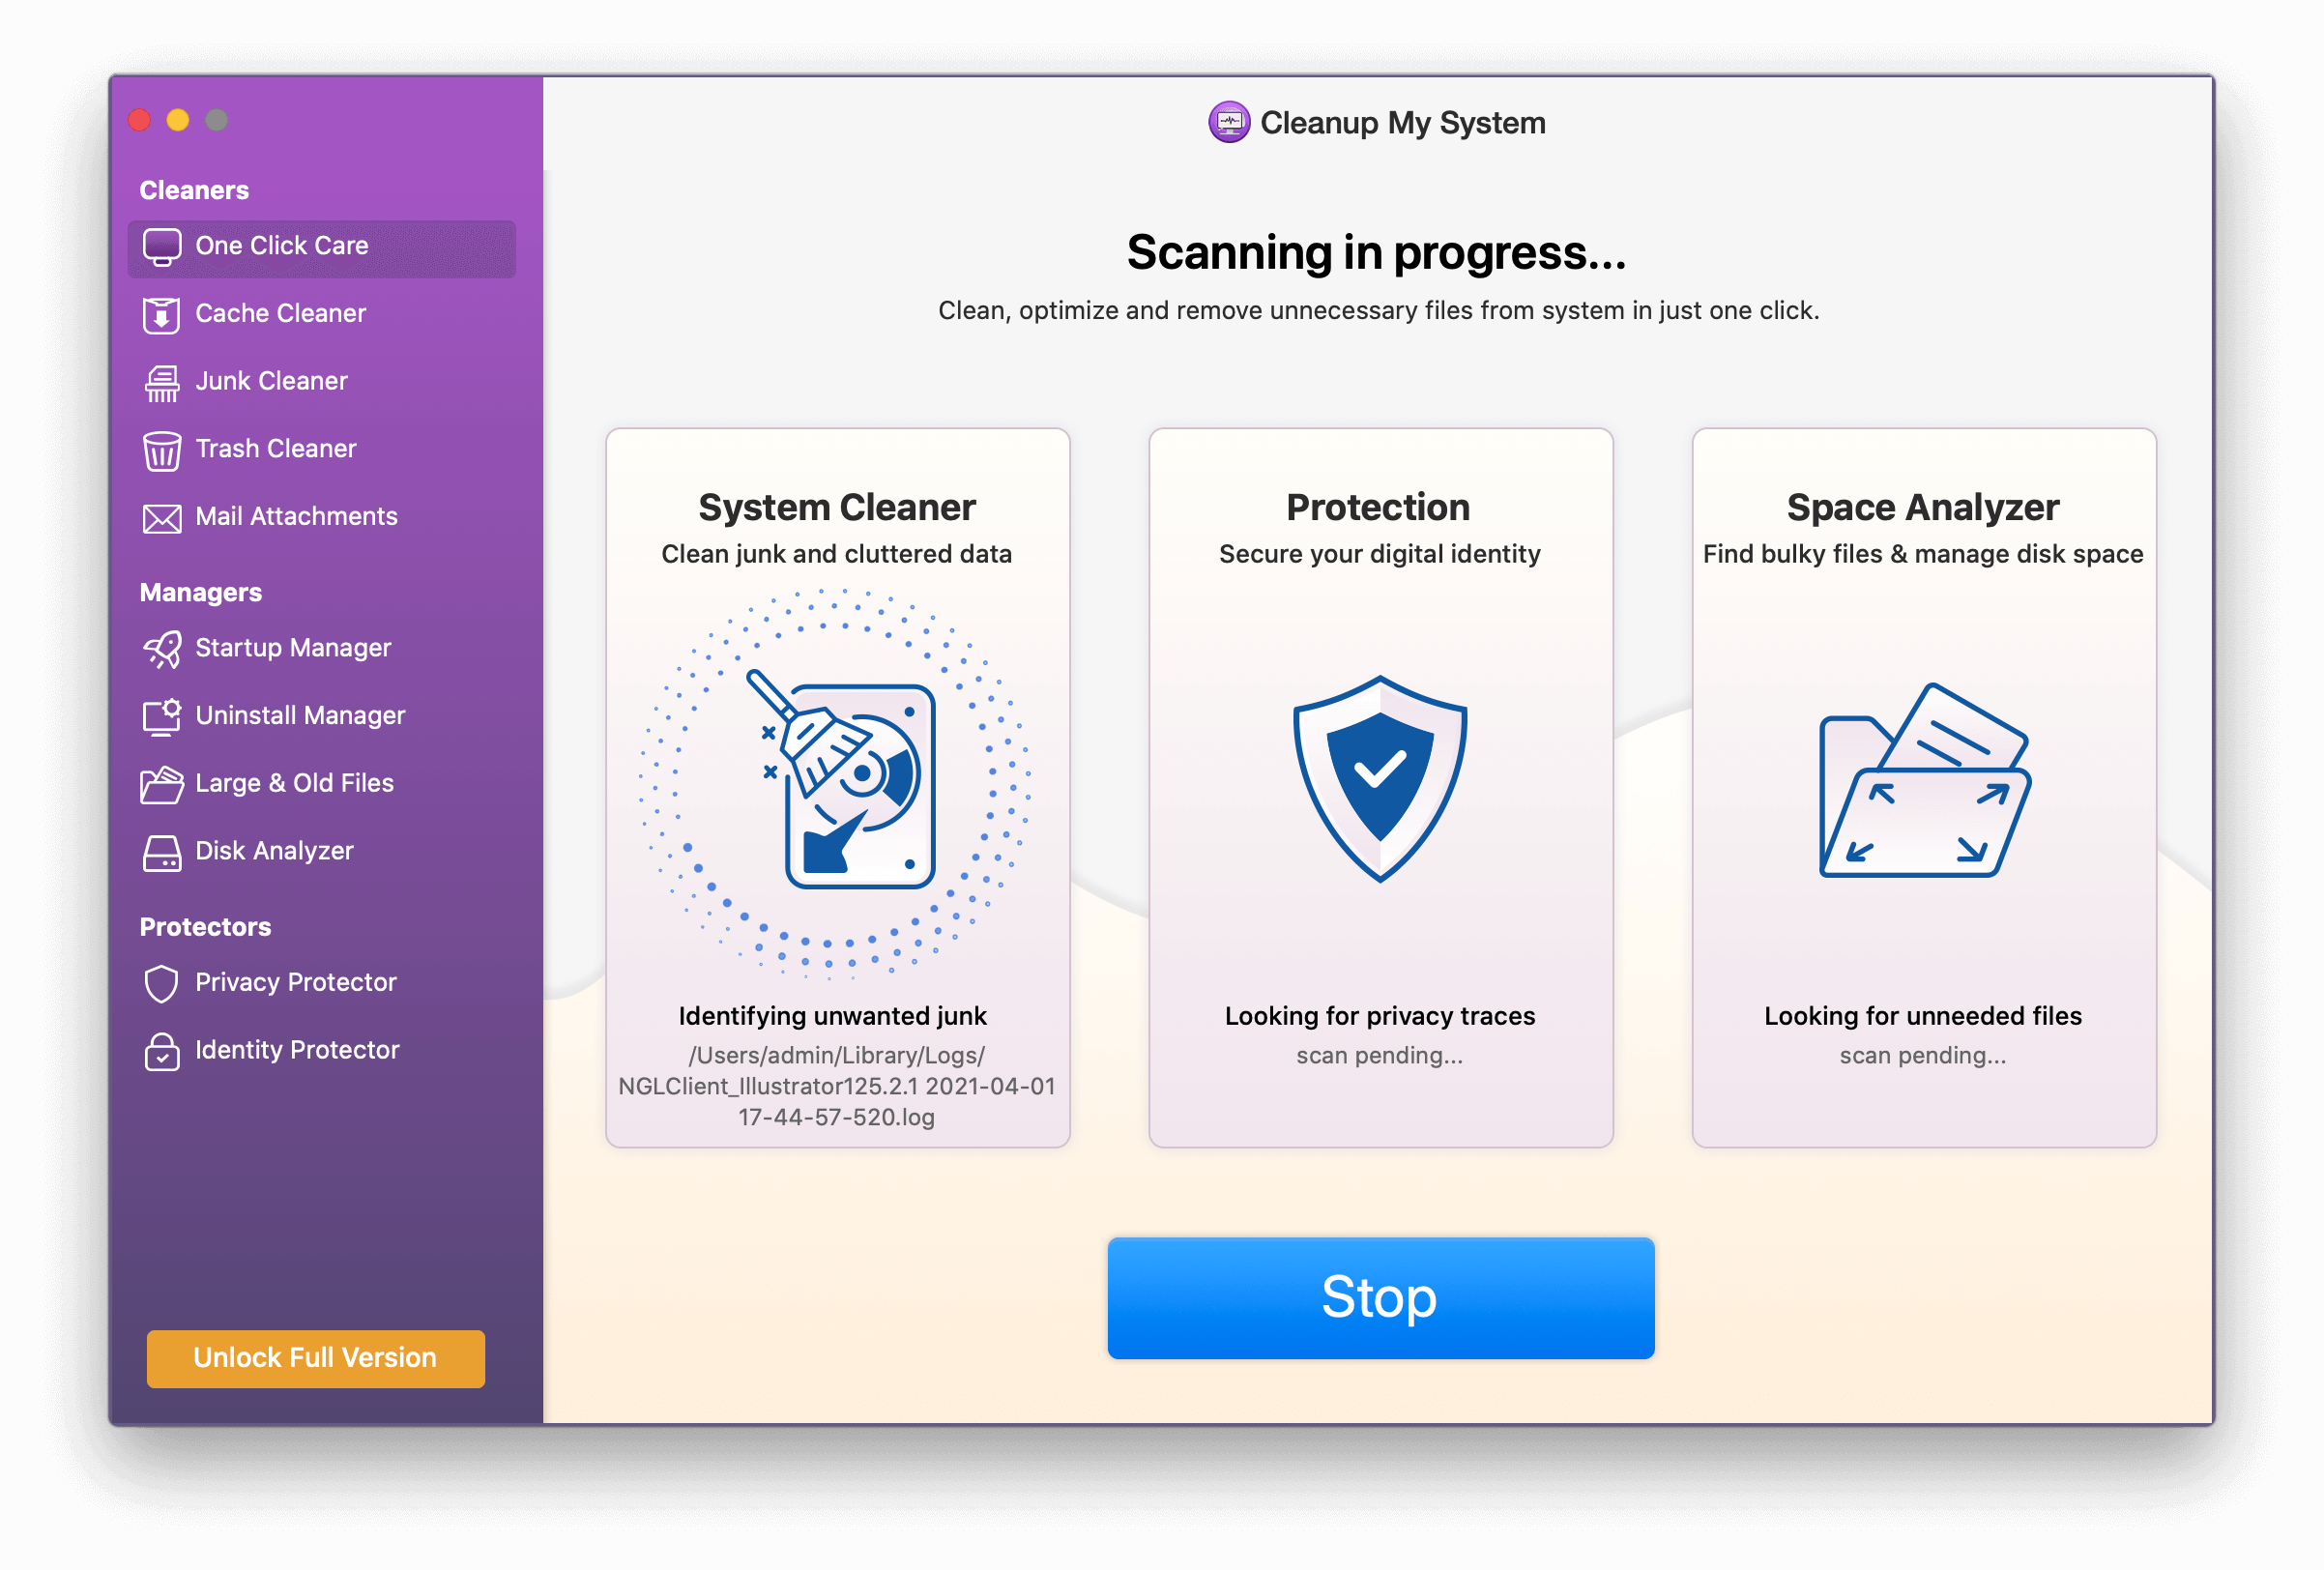
4. Once the scanning process gets completed, the Mac application will identify junk and other residues. It will be showcased under three major categories – System Cleaner, Protection, and Space Analyzer. You can then safely delete the clutter to reclaim storage space. Hit the Clean Now button to start the cleaning process!
Hopefully, the problems with ‘Other volumes in a container’ occupying a lot of space, should be fixed by now. All thanks to the Cleanup My System tool!
Must-Read: 10 Quick Tips to Manage Storage and Tune-Up Mac for Best Performance
How to Remove Other Volumes in a container?
You can give a shot to the following workarounds to fix storage issues appearing due to ‘Other Volumes in a Container’.
1. Make A New User Account
Well, plenty of users have suggested that creating a new user account altogether helped them reclaim storage from ‘other volumes in a container’.
- Click on the Apple logo that appears on the top-left corner of the screen.
- Navigate to System Preferences.
- From the new window, head towards the Users & Groups panel.
- Simply hit the padlock and type in your current Admin username & PASSWORD.
- Click on (+) icon and choose Administrator option that appears in the drop-down menu
- Now, you are all set to add the details of your new
- Once done, simply restart your Mac and log in with your New Account details.
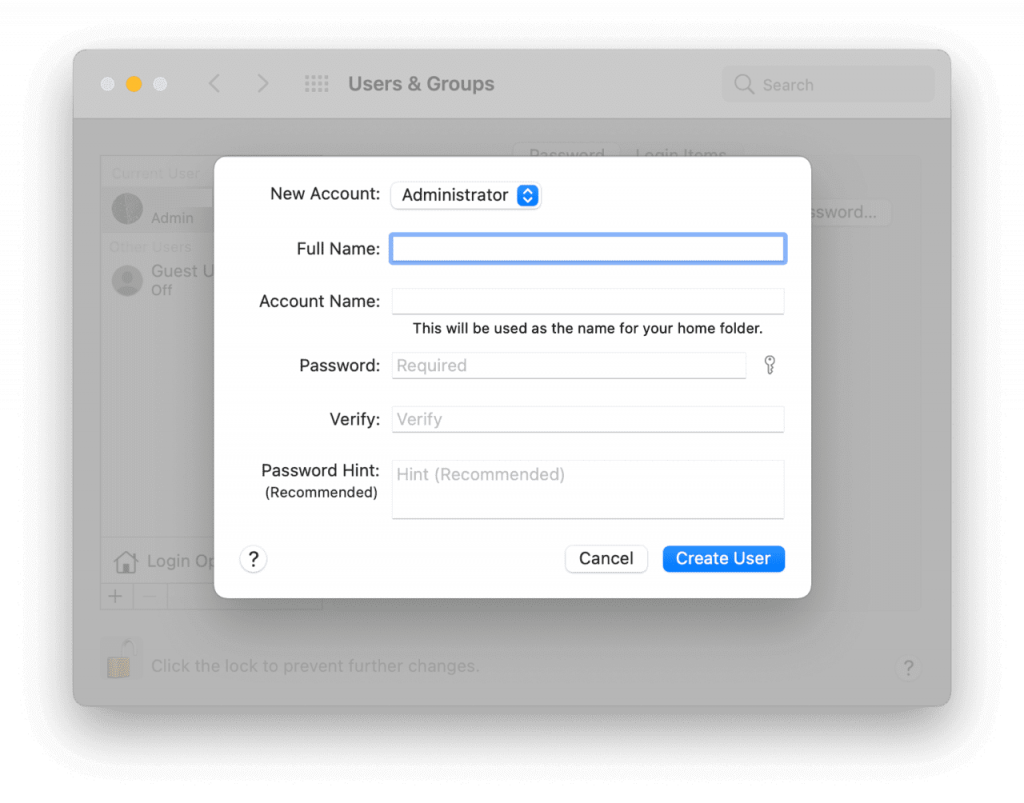
After doing so, you can go and check the storage and find that ‘other volumes in a container’ have gone!
Must-Read: 10 Common MacBook Problems and How to Fix Them
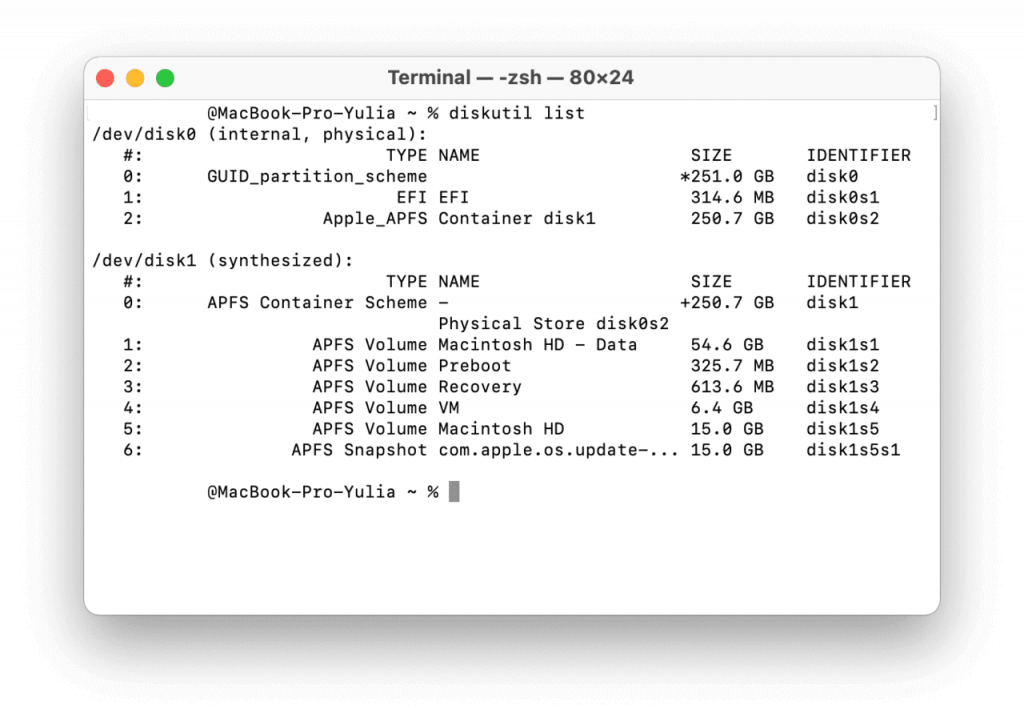
2. Delete The Additional Volume
Well, to delete those extra volumes you need to first find out what your Apple Storage has under the roof. To check out what volumes your drive consists of so that you can take further actions, you need to do the following:
Note: Remember when you delete a volume, all the stored data in it gets erased. So, ensure your backup files to avoid losing any important one!
- Launch Terminal from your Dock or Utilities folder.
- Once launched, type and paste the following command: diskutil list
- Check carefully the breakdown of drives and volumes that appear on your screen.

- If you identify any extra volume which is taking up a lot of your system resources, delete that!
- To delete the volume: Open Disk Utility on your Mac.
- Choose the APFS Volume you wish to remove and hit the Delete button!
 Additional Tip
Additional Tip: If the Delete button is dimmed or shows ‘currently in use’. It means you can’t remove the volume. In such scenarios, you need to take the help of Disk Utility in macOS Recovery mode!
You Might Want To Learn:
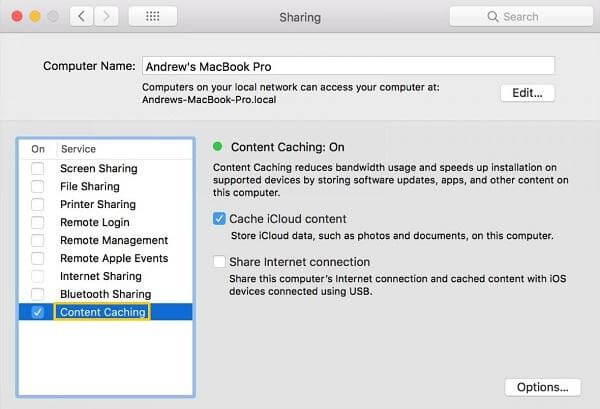
3. Turn Off Content Caching for “Cache iCloud Content”
iCloud content caching is an excellent feature introduced with macOS High Sierra to speed up software updates and so on. If you’ve already switched on the feature, you need to uncheck it to significantly reduce the size of ‘Other volumes in a container’. To do so:
- Click on the Apple logo that appears on the top-left corner of the screen.
- Navigate to System Preferences and click on Sharing option followed by Content Caching.
- Now simply uncheck the option: Content Caching/Cache iCloud content.
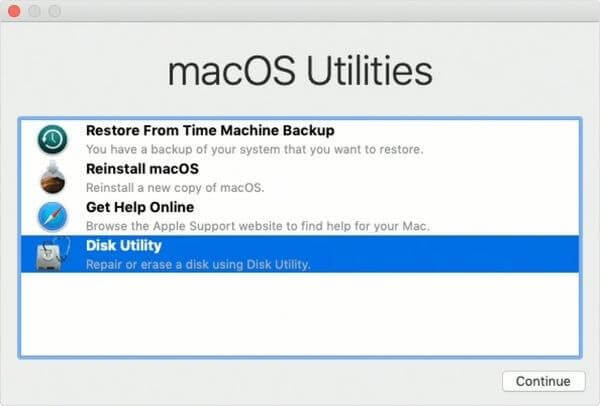
4. Erase Your Disk & Reinstall The Operating System
If nothing works, the last resort is to erase the disk and reinstall the latest macOS version. This will probably help you to fix the ‘other volumes in container” storage problem.
IMPORTANT: Don’t forget to backup all your important data before implementing the following steps:
- To start the process of erasing the disk, you need to first launch your machine in the Recovery Mode.
- Once entered, you need to navigate to the Utilities window and choose Disk Utility.
- Click Continue to move forward.
- At this step, simply select Macintosh HD from the panel and hit the Erase
- Select APFS or Mac OS Extended (Journaled) option and Erase that as well.
- Once the process is complete, start deleting all the volumes that appear on the sidebar.
- Close Disk Utility and start reinstalling macOS like the usual way!
- After it’s done, all the Other Volumes will be gone!
Apart from these effective workarounds, you can try uninstalling third-party software that seems to be suspicious. You can either do it manually or take the help of a Mac Cleaner & Optimizer – Cleanup My System to ease the task for you!
RELEVANT READINGS: