Blog Summary – Are you looking for an easy way to make your photos look professional? Read the blog which will help you learn how to use the right tools to make your pictures appear professional with HDR effect.
Taking pictures is an art, we often capture exuberant images but when compared to others it does not have that spark to it. What are we missing that professional photographers don’t? Photographers use studio management software and many other software to enhance the pictures. Not everyone can use it, be it a novice photographer or a layman like you and me. We still aspire to give the photos an edge that will enhance their beauty. Therefore, with this blog, we will tell you how to make photos look professional at home using third-party software – HDR Effect.
Must Read: Solved: Windows Photo Viewer Can’t Open This Picture
What is the HDR Effect?
Timing, lighting, high-end equipment certainly make a good photograph but the HDR effect will help you catch the maximum details. The HDR effect is the High Dynamic Range of a photograph between its darkest and lightest parts. A digital camera makes a photograph by taking shots of any object reflecting light at timed exposure. But not everyone can make use of professional cameras and therefore we look in another direction to use the HDR effect on photos.
What about the tools which can help you achieve that?
Yes, there are many photo editing tools available to help you fix your photos. Be it removing the background from an image or resizing them. Here, we will talk about how to apply the HDR effect to your photographs. We will use the third-party tool – HDR Effect as it comes with the sole purpose of giving the HDR effect to your pictures. Let’s learn a bit about this application –
HDR Effect highlights-
- Compatibility – Windows 10 & Mac OS X 10.10 and above
- Supported File formats – RAW, TIFF 8-bit, 16-bit, PNG, JPEG
- Import JPG, JPEG, PNG, TIFF, RAW (NEF, CR2, RAF, ARW, etc)
- Export JPEG, PNG, GIF, JPEG-2000, TIF
- Improves color saturation range.
- Increases the luminosity of low-quality images.
- Changes tonal value.
- Edit brightness, exposure, color balance, and sharpness.
- Add color filters.
- Use predefined or customized presets.
- Use a denoise tool.
- Set temperature, tint, and more.
Also Read: How To Recover Raw Photos From Your Camera’s Memory Stick?
How To Make Photos Look Professional At Home
Let’s see how to use this incredible tool to add HDR effect to your photos.
Step 1: Download HDR Effect on your Windows PC from the Microsoft Store link given below –

In case you are using Mac, you can download HDR Effect from the Mac App Store link given below –

Note: the below steps are common for Windows and Mac users.
Step 2: Complete the installation process and then give it the necessary permissions.
Launch HDR Effect on your computer.
Step 3: Add the image you want to edit on HDR Effect.

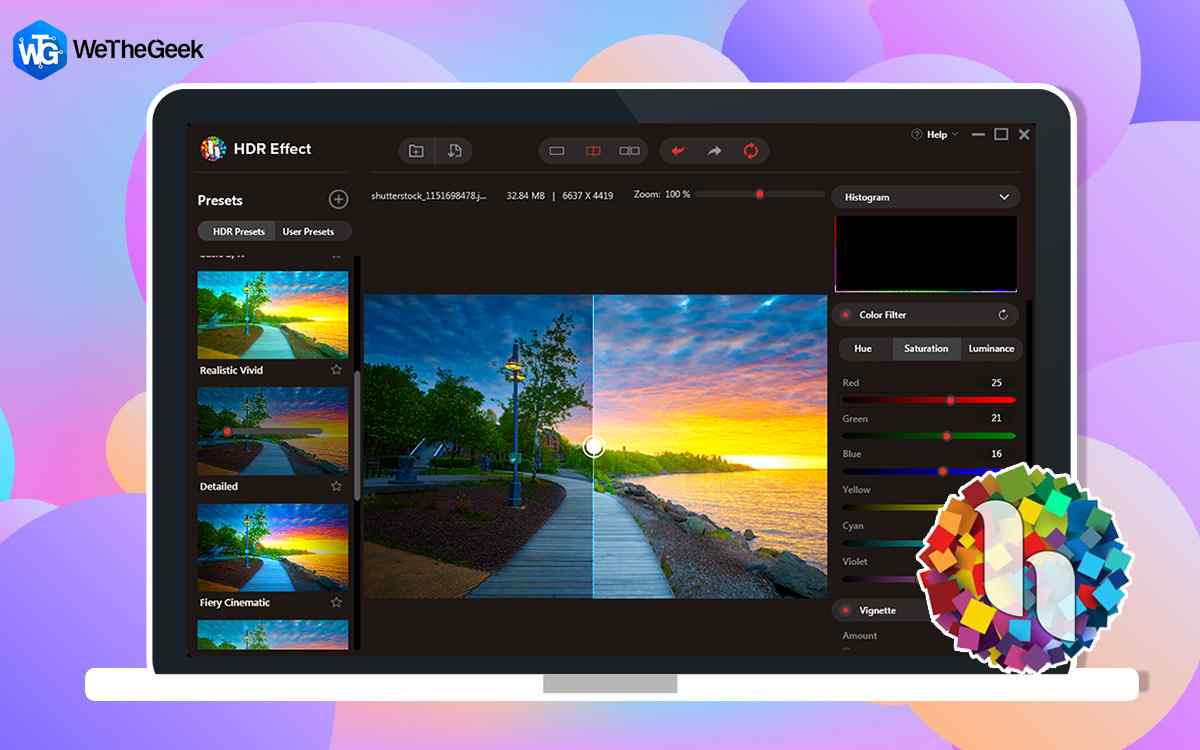
Step 4: Now, you can see the image in any one of the three viewing modes. Single-mode which is turned on as default will show you a single image on the screen. The split mode will show you a slider to view the before and after-effects of the image. The double mode will show the Original image and Edited image adjacent to each other. You can select any of them at your convenience.
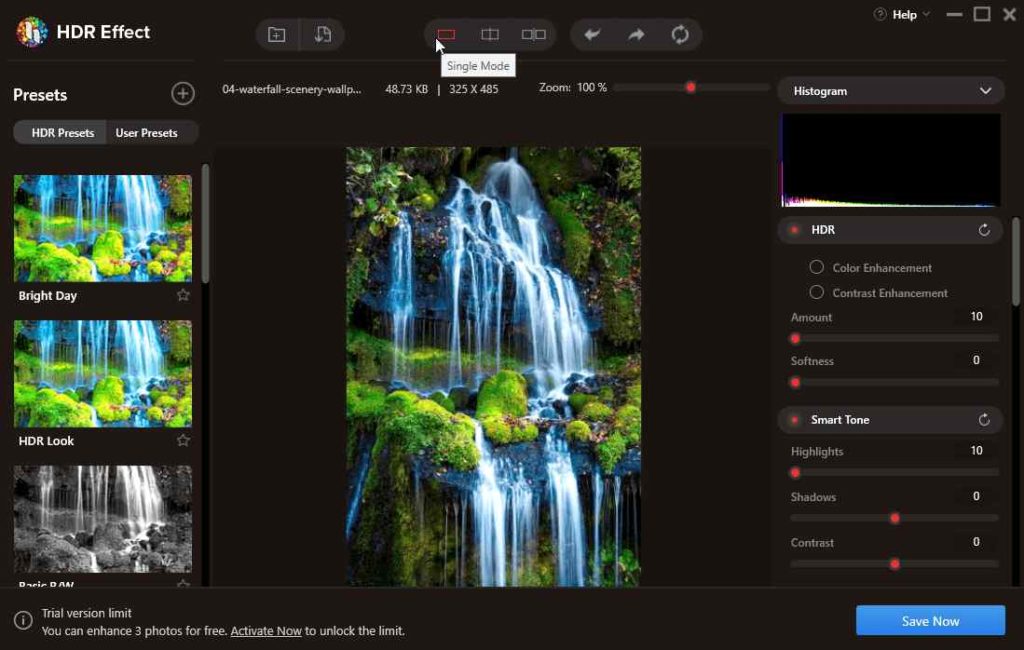
Step 5: Now, it is time to add the effects to the image, for that head to the left side of the tool. Here you will see Presets with HDR presets which are premade effects and you can click on them to quickly enhance pictures.
Another option will have User Presets which can be customized according to you. For this, use the tools on the right side of the application. Here you can change the Highlights, Saturation, Contrast, Brightness, Shadows, etc. Save it to use as the customized preset for further use.
Step 6: Once you are done editing the image, you can click on the Save Now button to save it.
So, this is the simple technique used by the HDR effect which saves your time and gives you wonderful results.
Also Read: How to Use Exif Data to Compare Photos and Improve Photography Skills?
Conclusion –
Yes, it is possible to get the HDR image effect at home and now you know how to do it. There is plenty of HDR photography software available for Windows and Mac. We recommend using HDR Effect by Systweak Software and put your photographs on display for admiration. Not only will this impress everyone around you but you can also use it for your profit. There are several websites to sell your photos online and earn money.
We hope this article will help you learn about how to enhance photos and add HDR effects to them. We would like to know your views on this post to make it more useful. Your suggestions and comments are welcome in the comment section below. Share the information with your friends and others by sharing the article on social media.
We love to hear from you!
We are on Facebook, Twitter, and YouTube. For any queries or suggestions, please let us know in the comments section below. We love to get back to you with a solution. We regularly post tips and tricks along with solutions to common issues related to technology.
Related Topics-
4 Best Free Photo Noise Reduction Tools/Websites (2021)
How To Recover Deleted and Hidden Photos On Android?
How to Blur Background in your iPhone Photos
How To Use The Secret Camera In Your Digital Vault To Hide Photos
Canva Photo Editing Tips For Beginners