
There may be instances when you only need the object in the image without its background. Removing the background from an image might seem a difficult and time consuming task for some of us. You don’t have to worry. You don’t need to master graphics to perform this job.
There are many tools and platforms by which you can easily and quickly remove the background from image and some of them don’t even require to be downloaded. Let us learn some of the easiest ways to remove background from an image.
How to Remove Background from Image using Photoshop
Photoshop offers many tools which allow removing the background of any image. Magic Wand tool removes the background from simple images. Background Eraser tool is more effective and can work on more complex images.
In this article, we will discuss about Background Eraser tool that samples colors and removes pixels of the same colors from the image. Follow these simple steps:
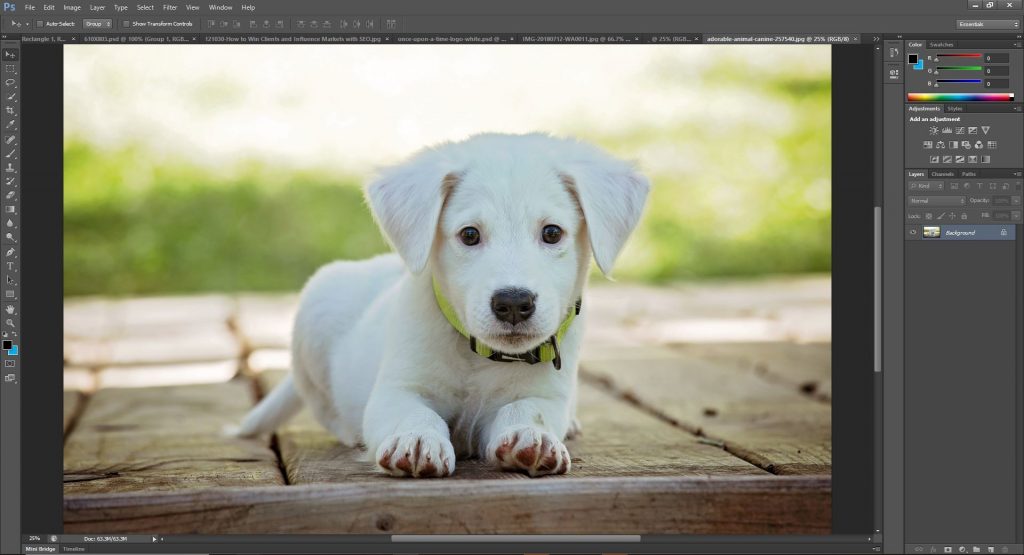
Step 1: Open the image you want to edit in Photoshop
Step 2: Select the Background Eraser tool.
To select Background Eraser tool, go to Photoshop Toolbox and, click and hold the Eraser tool. Now click on the Background Eraser tool from the dropdown menu.
Step 3: Select the Brush option
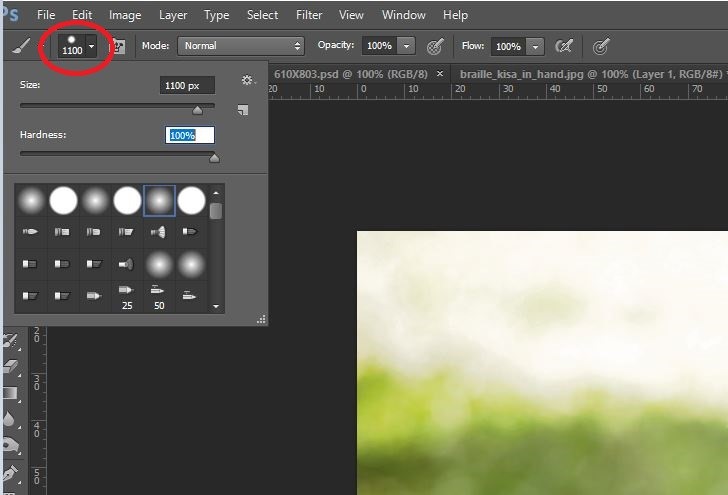
Go to the toolbar at the top of the window, and select Brush option. Set the hardness of the brush to 100%. Also, set the size of the Brush according to the image you are editing.
Step 4: Start Erasing
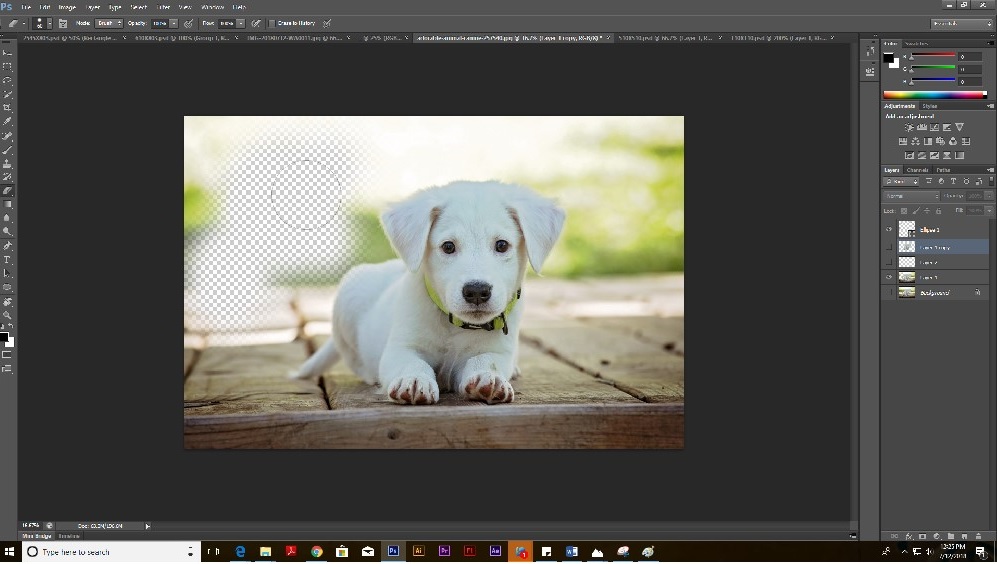
Place the brush pointer on background which is in the form of a circle with cross hair in the center. Click and drag the brush to delete the selected color whenever it falls in the brush area. It also extracts color from the foreground edges to sharpen the foreground and remove color halos.
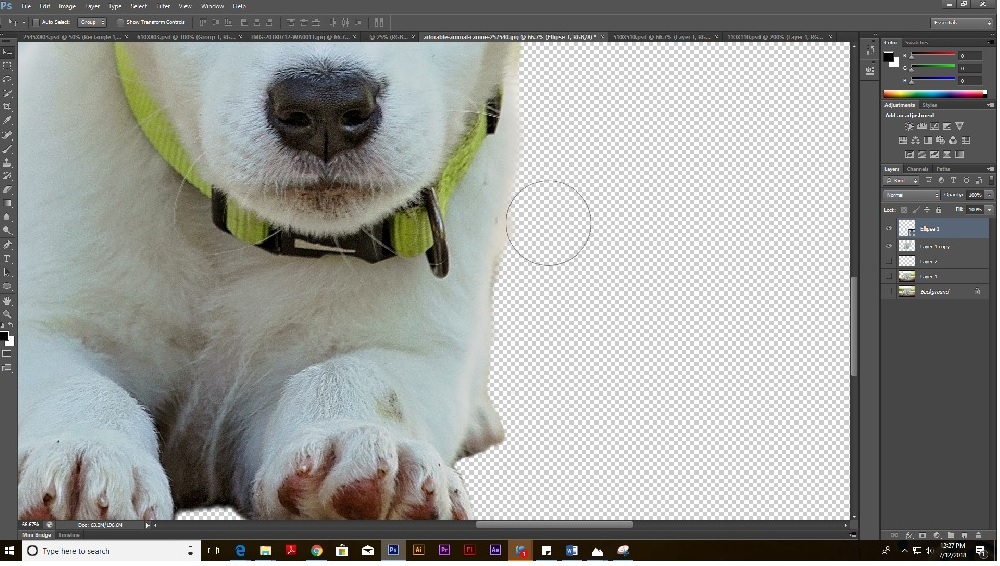
Step 5: Rearrange settings
Adjust the size of brush according to requirement of the image. Also adjust sampling and tolerance as per your convenience.
Step 6: Repair foreground
It is possible that some parts of the foreground are deleted while using background tool. You can repair these by using mask or pen tools. You can also use smudge tool to soften the edges of the foreground image.
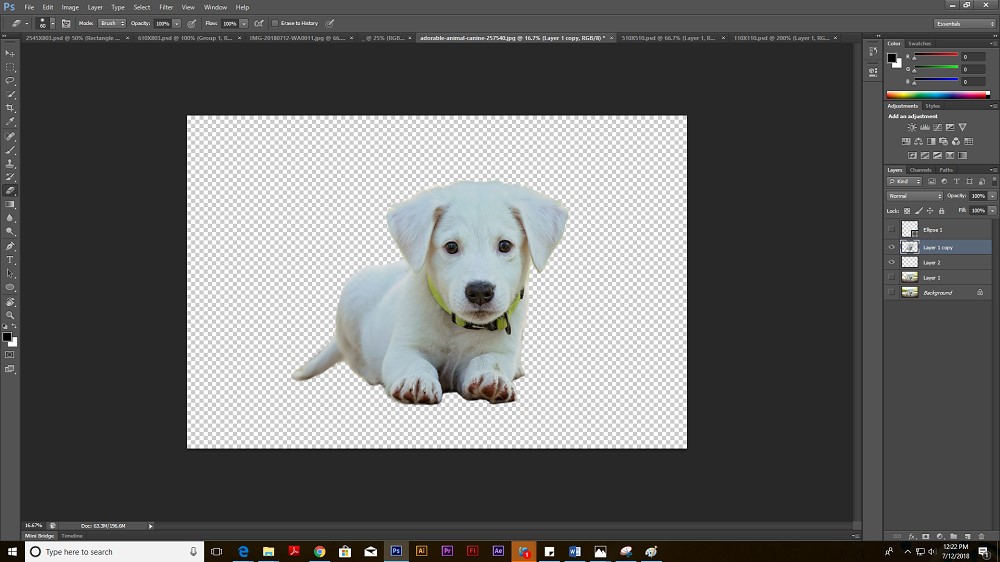
After repairing, the image will look like: –
Step 7: Save the Image
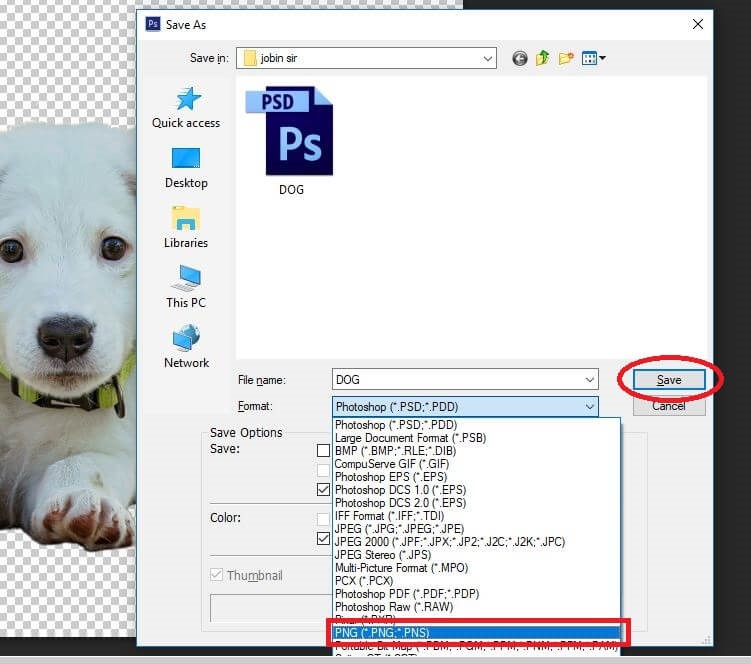
Save the image in PNG format without adding the new background
 10 Best Image Converter Software for Windows PCWhile using Windows, once in awhile you might have encountered the “Image Format not supported” alert. Now fix this on...
How To Remove Background From Image Using MS PowerPoint
MS PowerPoint allows a quick and easy way to remove unwanted backgrounds from the image. It has in-built tools which help you select and delete the background easily. Here are a few simple steps:
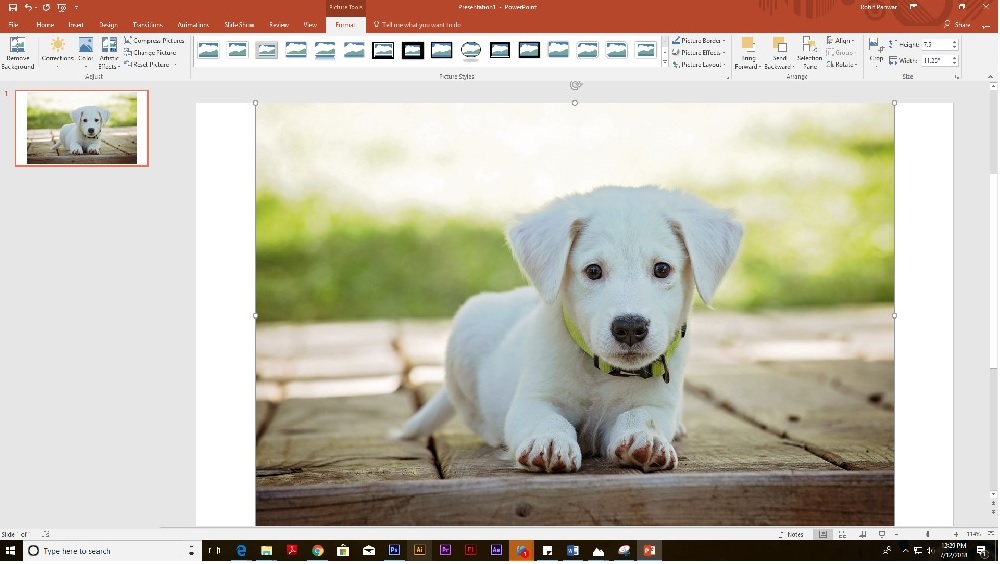
Step 1: Insert the image into MS PowerPoint.
Step 2: Select the image and click on Remove Background option in the Format tab.
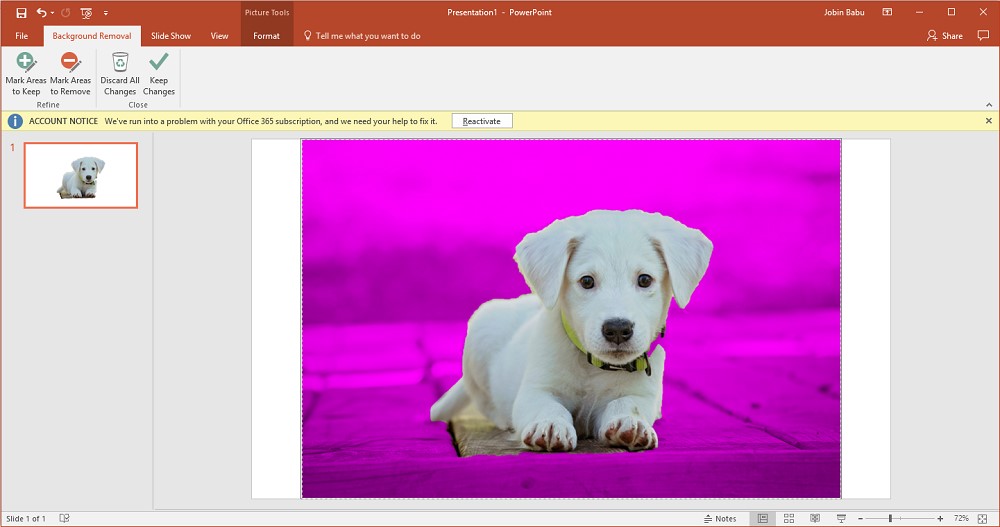
The PowerPoint will automatically select the background and mark it in magenta color. The foreground retains its colors. In some cases you have to adjust areas of the image which you want to remove.
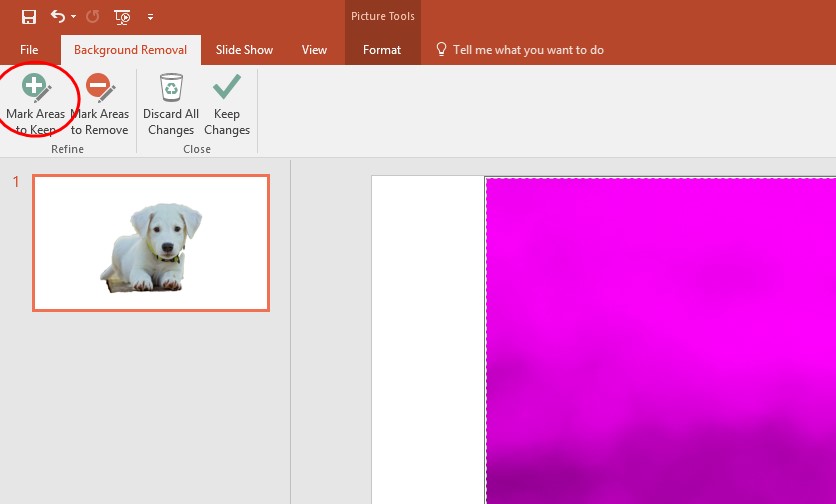
Step 3: Click ‘Mark areas to keep’ on the Background Removal tab and use Drawing Pencil, to mark the parts of image that were selected for removal but you want to keep them.
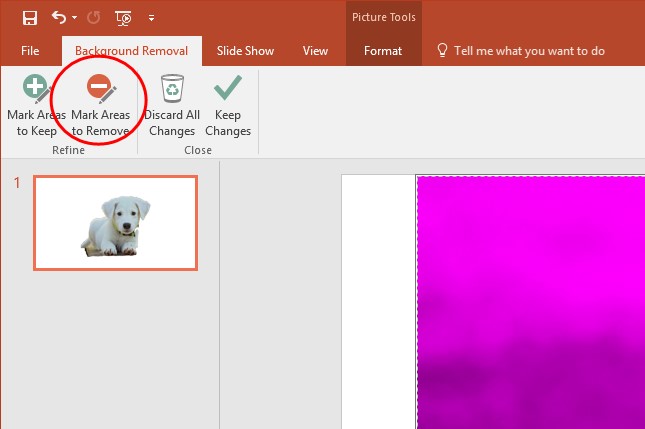
Step 4: Click ‘Mark areas to remove’ and use Drawing Pencil, to mark the parts of image which were not selected for removal but you want to remove them.
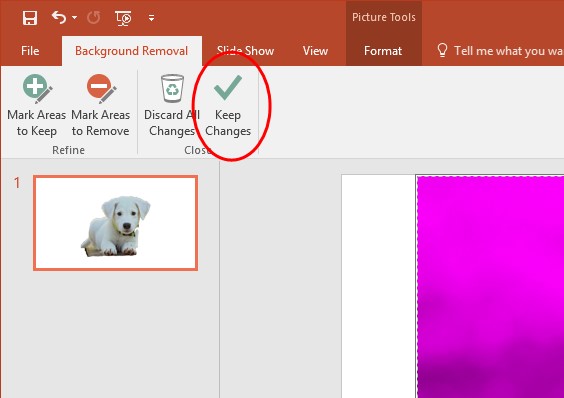
Step 5: Click on Keep changes on the Close group to save the changes to the image.
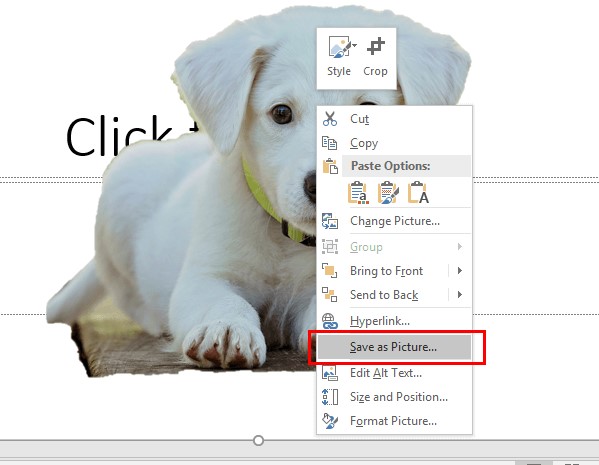
Step 6: Right click on image and select save as picture to save the image as separate file.
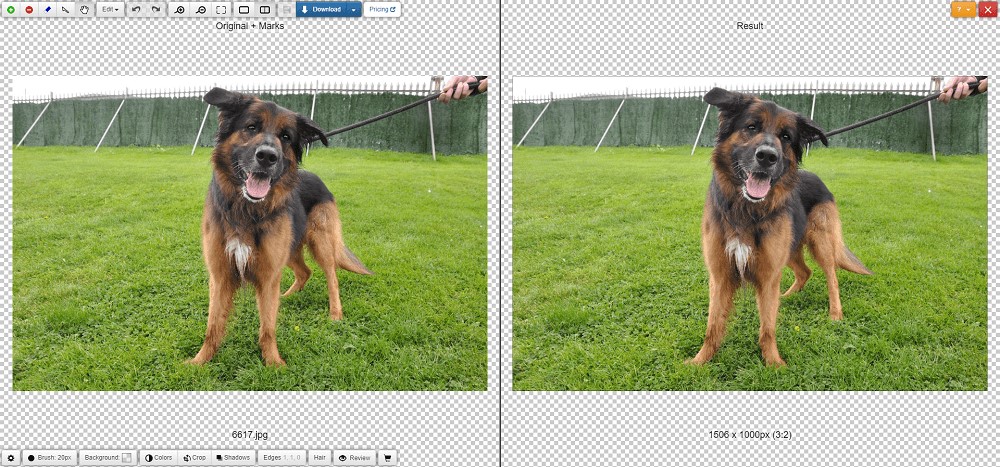
How to Remove Background from Image Online
There are many sites and apps which enable you to remove background from image online. Clipping Magic is the most user-friendly and easy-to-use site that allows you to remove background from image instantly with just few clicks. Complete task is performed by Clipping Magic and you need to perform only minor corrections. The only drawback with the tool is that it’s not free.
Step 1: Upload the image to the site
After uploading the image, two brushes, red and green, appear on the screen. You can change the size of the brushes according to requirement of the image.
Step 2: Mark background and foreground
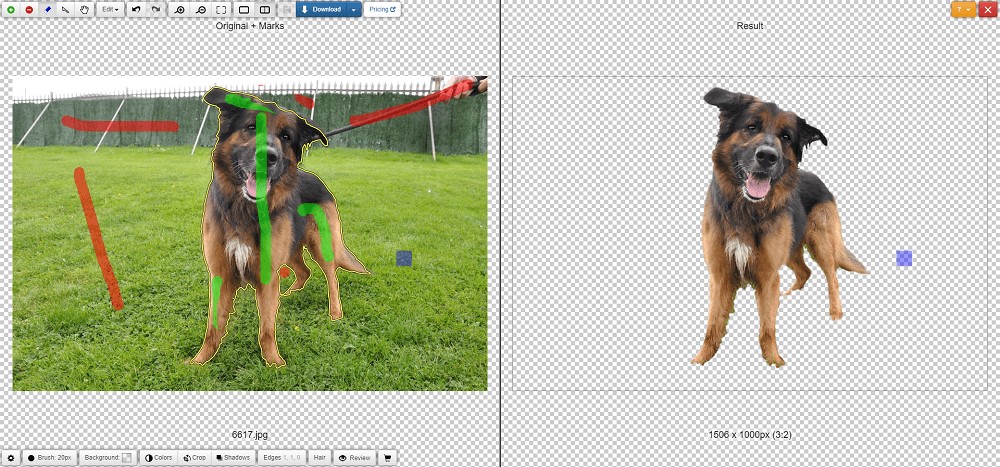
Mark some part of the background with red. Also mark the part of the image, which you want to keep, with green. You don’t have to precisely color the areas but just make a small single stroke. However, ensure marks don’t cross the boundary of background or foreground.
Step 3: Inspect and fix the image
Zoom the image and look for any missing parts. Use the Scalpel tool to correct the edges. You can undo wrong edits or clear all marks to start over again. You can also adjust the edges.
Step 4: Download the final result
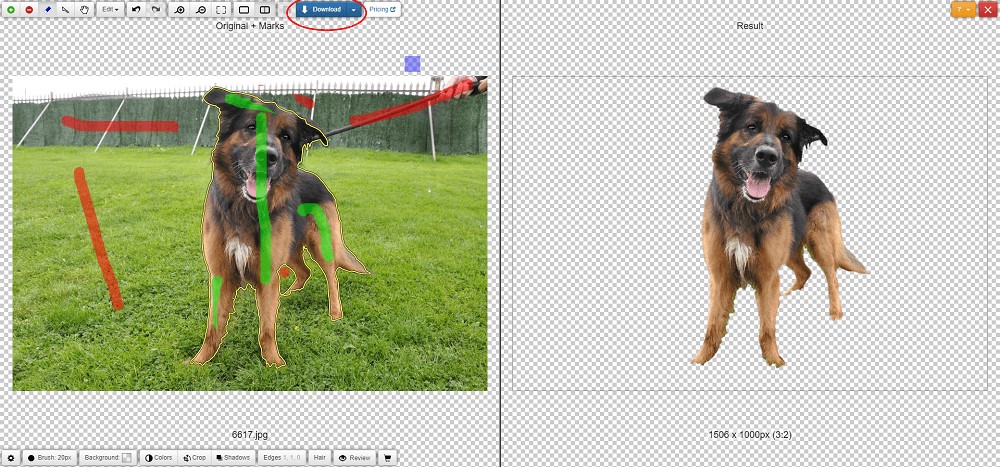
Clipping Magic not only removes the background of an image but also allows you to give finishing touches to the image such as drop shadows, color adjustments, and cropping.
With one of the above methods you can easily remove background from images, even from complex ones. If you work on presentations, collages, or bogs, these tools can help you a lot and you don’t have to depend on others for this easy task. Just overcome stereotype fear and give it a try.