
KNS short for Killer Network Service is a program that runs in the background. It helps monitor processes that use network connections and further helps in optimizing them to enhance your gaming experience. However, for some users, it causes more performance issues such as high CPU usage. In this post, we’ll delve deeper into the Killer Network Service and find out ways to fix its high CPU usage.
Can I Remove Killer Network Service?
Since Killer Network Service is not a Microsoft process or Windows file, it is safe to remove it. And, as has been reported by most users who removed it, after uninstalling it, you won’t see a bad effect on your operating system’s functionality.
How To Fix Killer Network Service High CPU Usage?
A background service called Killer Network Service keeps track of applications that utilize network connections and aids in their optimization for better gaming performance. Here are some of the best ways to fix Killer Network Service high CPU usage in Windows 11/10 –
1. Use Services To Stop
One of the ways you can put an end to Killer Network Service is to stop it using services. Here are the steps to do the same –
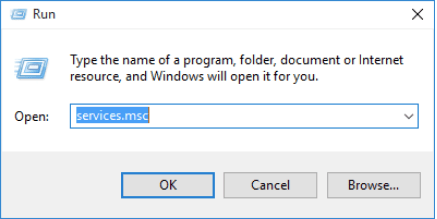
1. Press Windows + r to open the Run dialog box.
2. When the Run dialog box pops up, type services.msc and press enter
3. Locate Killer Network Service and double-click on it.
4. Under Service status click on the Stop button.
2. Uninstall Killer Network Service With The Help Of Command Prompt
Since Killer Network Service is not a core Windows file, it won’t harm your PC even after you have uninstalled it. Moreover, you will be able to fix high CPU usage after you have uninstalled it. So, here are the steps to uninstall Killer Network Service via Control Panel –
1. In the Windows search bar, type Control.
2. Click on Open from the right-hand side.
3. Click on the View by dropdown and select Category.

4. Under Programs, click on Uninstall a program.

5. Under Programs and Features, click on Uninstall a program.

6. Locate Killer Network Manager Suite, click on it and then select Uninstall from the top. Also, uninstall the Killer Wireless Drivers using the same method.
3. Use The Resource Monitor To Put An End To Killer Network Service
In case, Killer Network Service is feeding highly on your system’s resources, Resource Monitor can help you put an end to the process in a hassle-free and swift manner. Here are the steps to use it –
1. Press Windows + R key combination and open the Run dialog box.
2. In the dialog box type resmon and press Enter

3. When the Resource Monitor opens, locate Killer Network Service.

4. Right-click on it and then click on End Process.

4. Use The Restore Health Command
Even though Killer Network Service is mostly safe, just in case, if it causes any harm to your operating system, you can bring into force the Restore Health command and resolve the issue. Here are the steps for the same –
1. In the Windows search bar, type cmd.
2. Select Run as administrator from the right-hand side.

3. When the administrative Command Prompt opens, type DISM.exe/online/clean-image/Restorehealth

4. Press Enter
You should be able to resolve the issue without losing any crucial data in the process.
5. Use A System Restore Point
If the Killer Network Service has started to act up recently, you can go back in time when it wasn’t creating any issues. You can do this by using a System Restore Point, provided you have created one already. If you are new to the concept of creating System Restore Points, refer to these posts on how to create and use System Restore in Windows 10 and Windows 11.

Tip:
Sometimes there are issues in your PC that are hard to get a hold of manually. If you leave them as they are or play with the wrong settings to fix these issues, you will be on your way to causing more damage to your computer.
Enter a specialist tool like Advanced System Optimizer – Which is a powerful PC optimization and cleaning tool that can help you fix issues in a snap. It helps in –
- Scanning your PC for various issues and removing them.
- Fixing registry issues.
- Getting rid of various disk-related problems.
- Optimizing PC for tasks like heavy gaming.
- Better memory allocation.
Download Advanced System Optimizer Now!

Let’s have a glimpse of one of its modules and see how can it be a great tool when faced with a confusing process like Killer Network Service. Here we shall be looking at its Smart PC Care module –

Just in case, you suspect Killer Network Service to be a malicious threat, Smart PC Care of Advanced System Optimizer will bring it to the fore. Also, if it is an unwanted file, you will be notified of the same.
These are just a few of the things Advanced System Optimizer is capable of doing, to know more here is an inside-out review of Advanced System Optimizer.
The Final Word On How To Fix Killer Network Service High CPU Usage?
That brings us to the end of all the methods used to resolve Killer Network Service High CPU Usage. If you were able to resolve the issue and have been able to get rid of Killer Network Service safely, tell us your experience in the comments section below. For more such tech content, keep reading We The Geek. Follow us on social media – Facebook, Instagram, and YouTube.