
For a variety of reasons, we use a wireless mouse along with our laptop. And one main reason is that it’s way better and much easier to navigate in comparison to the trackpad. Even in the case of desktops, people now prefer to get a wireless mouse to get rid of the tangling wires.
A wireless mouse is connected on a system using a Bluetooth USB which is inserted in the system to complete the connection. However, in many instances, users might be prompted with an error – Not Able to Connect to Wireless Mouse. The words of the error message may vary, but the meaning is the same. The computer fails to recognize the device and hence, the connection cannot be completed.
An incomplete or errored connection can cause several issues while working with your wireless mouse. In this piece, we’re going to discuss some of these indications and see how we can fix this problem of “Not Able to Connect to Wireless Mouse”.
Issues that Indicate an Error in Wireless Mouse Connectivity
– Fluctuations in mouse pointer
– Misdirection cursor movements
– Halts and crashes during mouse movements
– Mouse not found or recognized
– Late movement response
– Scroll button not working
Read More: Top 5 Fixes If Mouse Cursor Is Disappearing On Windows 10?
How to Fix “Not Able to Connect to Wireless Mouse” Issue in Windows?
These errors can be fixed, and the entire issue can be resolved by going through a routine check over the device drivers and the startup settings as well. The problems are mostly caused by errors associated with these checks unless the issue is hardware related.
1. Reinstallation of Mouse Driver
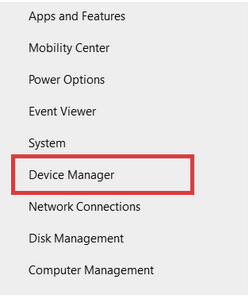
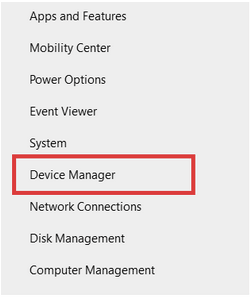
Step 1: Head to Device Manager on Windows 10 by right-clicking on the Start Button.
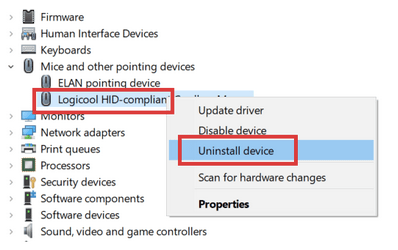
Step 2: Right-Click on the driver associated with the wireless mouse.
Step 3: Click on Uninstall Driver.
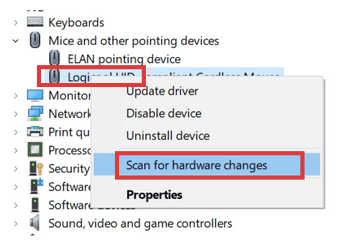
Step 4: Once uninstalled, now right-click once again on the same driver option.
Step 5: Click on Scan for Hardware Changes button. You can also scan for hardware changes by clicking on the relevant icon on the Device Manager taskbar.
Step 6: The driver will be automatically reinstalled. All you need to do is restart the PC for the installation to take effect.
Read More: How To Download Or Update Drivers For HP Printer
2. Update Driver
Now you can update the driver via two options, first is Manual Update
Step 1: Head to Device Manager on Windows 10 by right-clicking on the Start Button.
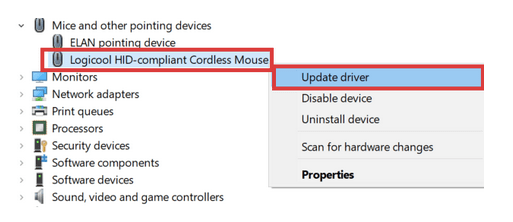
Step 2: Right-Click on the driver associated with the wireless mouse.
Step 3: Click on Update Driver.
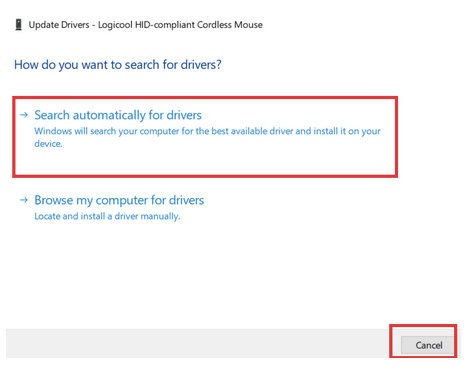
Step 4: You can either go for an automatic driver search or browse a preferred driver. The driver updater here, however, won’t search for any browser for Internet but will search for the same on your computer only.
Step 5: Restart the PC and activate the updated versions of drivers.
Since there is no automatic search option available in Windows 10 anymore, it’s always better to opt for automatic search and download to install new driver versions.
Smart Driver Care is an optimal tool for Automatic Update of drivers on your Windows 10 PC. Smart Driver Care not only automates the search and download of new driver versions, but also allows one-click installation of not just one particular driver, but all the drivers available on the system.
Here’s how Smart Driver Care works:
Step 1: Download Smart Driver Care

Step 2: Click on the Scan Drivers button to begin an automatic scan for potential driver updates.
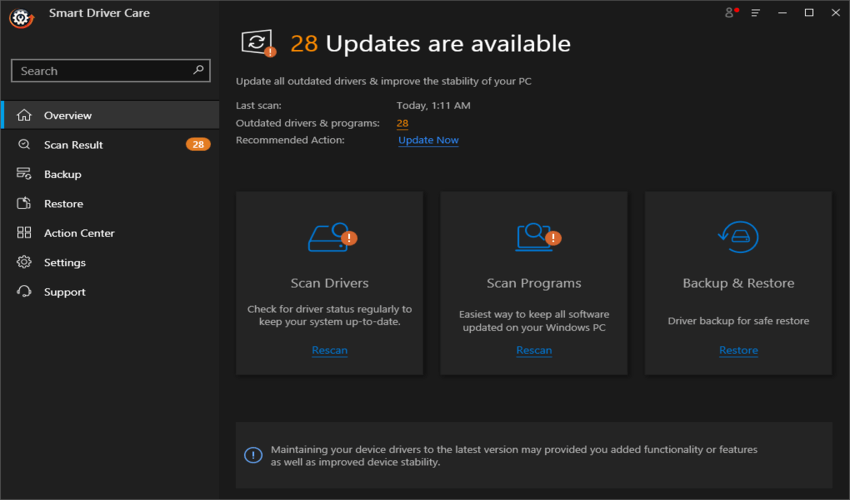
Step 3: The Scan button will start identifying outdated drivers on your Windows 10 PC.
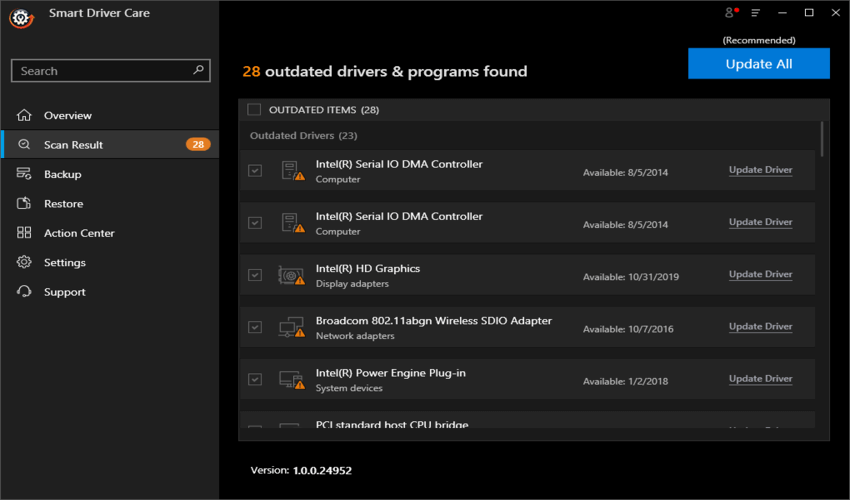
Step 4: Once the scan is complete, you’ll be presented with a list of all outdated drivers and an option to select and update them.
Step 5: Click the Update All button next to start downloading and installing the new driver versions.
Read More: How To Fix Printer Driver Is Unavailable On Windows 10
3. Disable Fast Startup Option
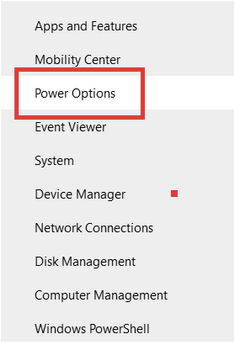
Step 1: Right-click on the Windows Start button.
Step 2: Head to Power Options. And then in Settings head to Additional Power Options.
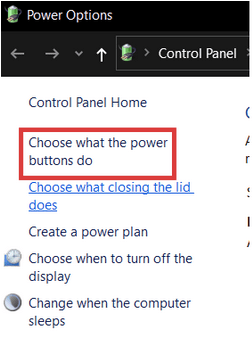
Step 3: In the sidebar, select, “Choose what the power button does”.
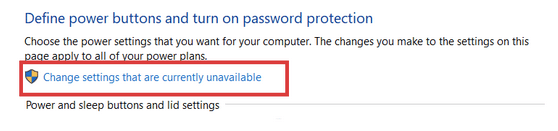
Step 4: Click on Change Settings that are currently unavailable.
Step 5: Uncheck the box for Turn On Fast Startup.
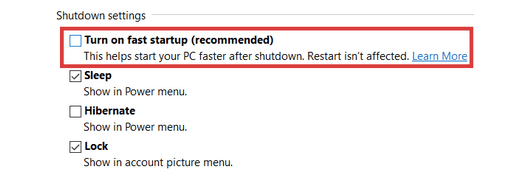
Step 6: Restart the PC. This will cause all drivers to reinitialize on startup now; however, it may increase the startup time of your computer.
Read More: How To Fix Or Update Wacom Tablet Driver On Windows 10
For more tech solutions and updates, follow on Facebook, Instagram and Youtube and get regular updates on your social feeds.