Encountering printer issues on Windows 10 is pretty common. But to deal with common printer errors and bugs, removing the printer is considered the best workaround. Although, if you are unable to remove your printer from the list of installed devices, it can get super frustrating. Isn’t it?
So, if you’re stuck with the “Unable to remove printer from Windows” issue, we have listed some solutions that will allow you to get past this hindrance.
How To Fix Unable to Remove Printer Device In Windows 10
Let’s get started.
#1 Alter Printer Server Properties
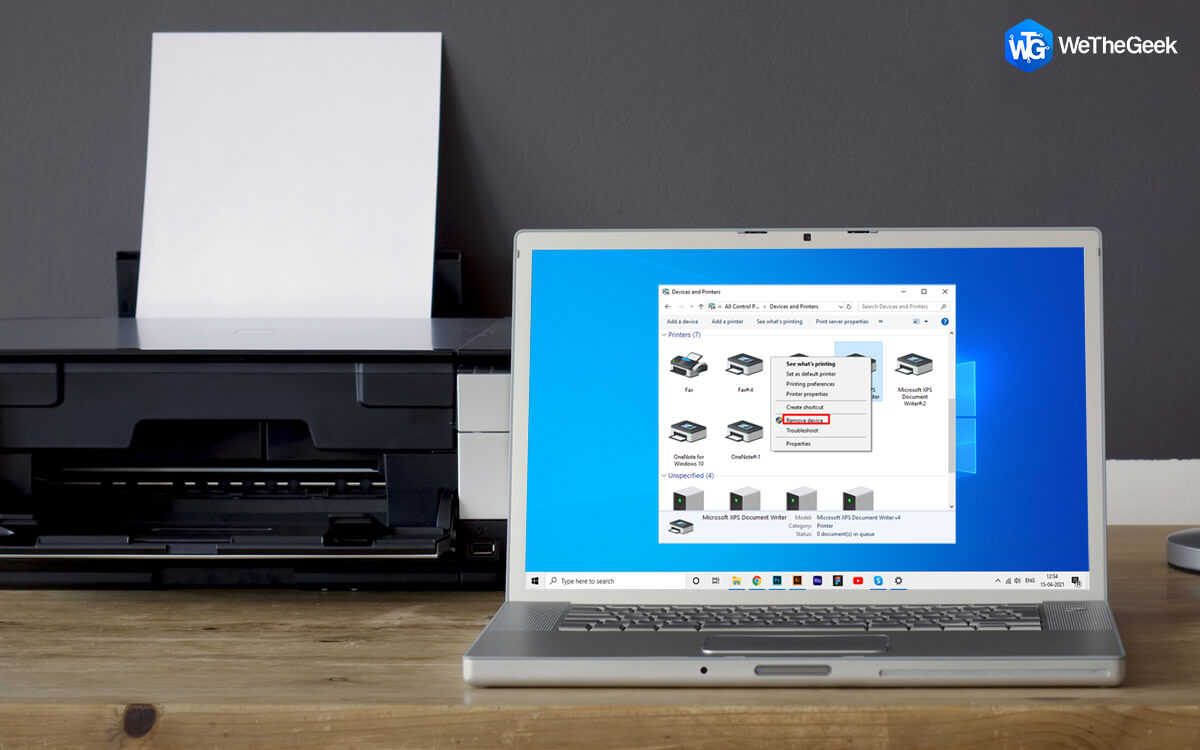
Launch the Start menu search box, type “Control Panel” and hit Enter.

In the Control Panel window, tap on the “Devices and Printers” option. In the Devices and Printers window, tap on the “Printer Server Properties” option placed on the top menu bar.

The Printer Server Properties window will now appear on the screen. Switch to the “Drivers” tab.
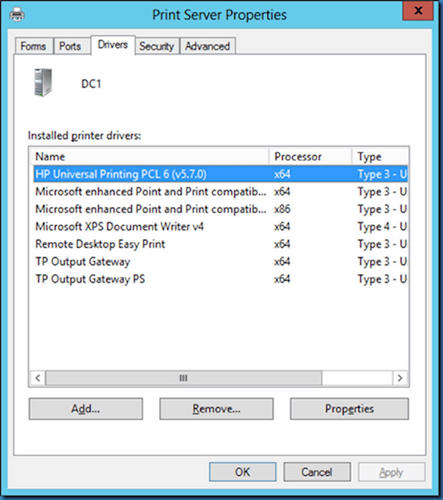
Select your device’s name from the list and then hit the “Remove” button to remove the printer from Windows 10.
Also read: Printer not Showing in Adobe Reader? Here’s the Fix (Windows 10)
#2 Disable the Printer Spooler Service
The next resolution to fix the “unable to remove printer” issue is by disabling the Printer Spooler service. The Printer Spooler app on Windows is responsible for managing the printer jobs and helps in setting up a connection between your device and the printer server. To disable the printer spooler service, follow these quicks steps:
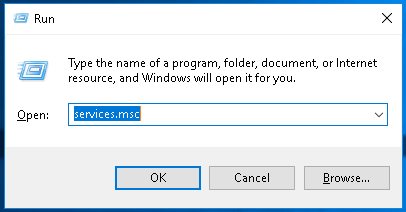
Press the Windows + R key combination to open the Run dialog box. Type “Services.msc” in the textbox and hit Enter.
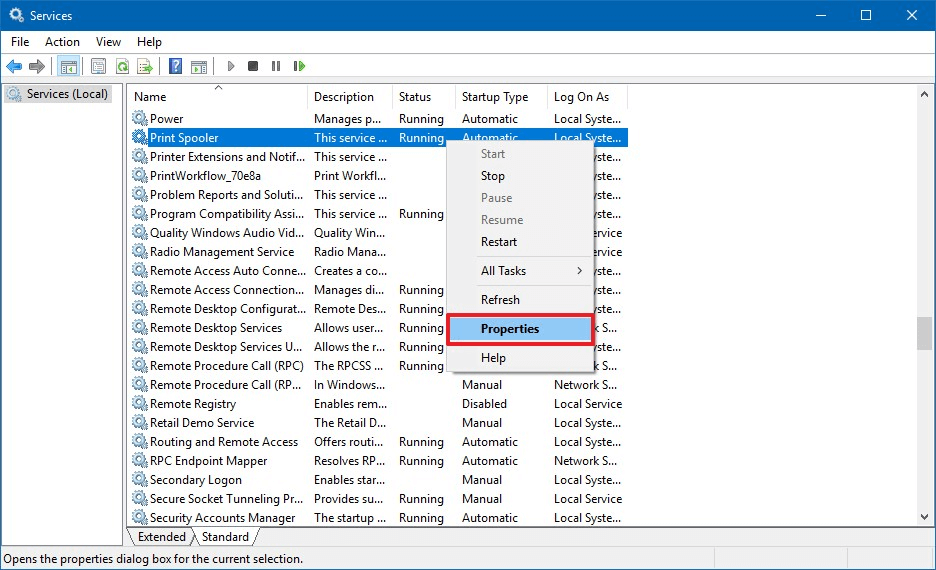
In the Services window, look for the “Printer Spooler” service. Right-click on the Printer Spooler service and select “Stop”.
If you’re unable to stop the service due to restricted admin rights, you might need to navigate to the following location:
C:\Windows\System32\spool\Printers
Delete all the data that is stored in the “Printers” folder. Open the Services window and then right-click on the Printer Spooler service, select “Start” to enable the service again.
Also read: How to Fix Printer Spooler Errors in Windows 10
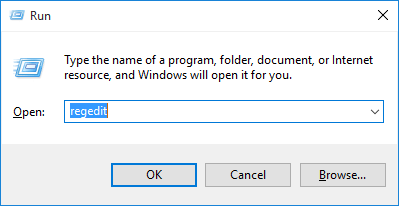
#3 Remove the Printer from Registry Editor
Press the Windows + R key combination to open the Run dialog box. Type “Regedit” and hit Enter to open Windows Registry Editor.
Navigate to the following location:
HKEY_LOCAL_MACHINE\SYSTEM\CurrentControlSet\Control\Print\Printers
Under the Printers section, locate your device’s name that you need to remove. Right-click on it and select “Delete”.
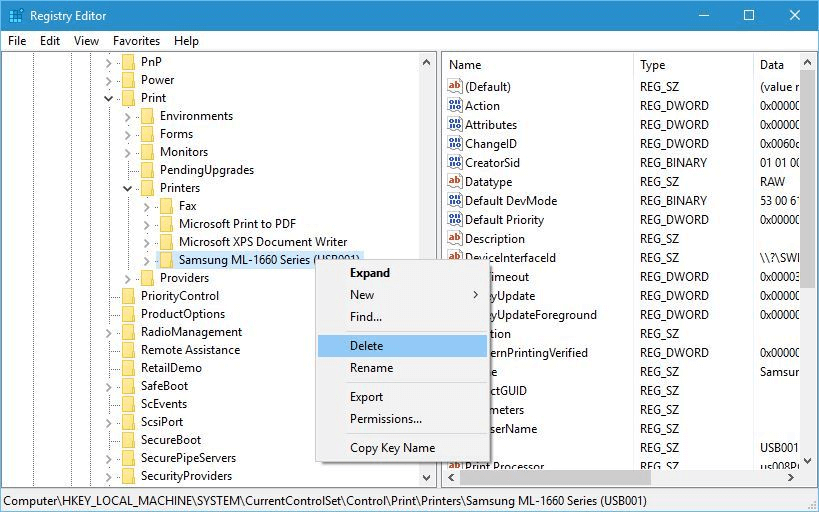
Once the printer device has been removed from the Registry Editor, exit all windows and then reboot your system.
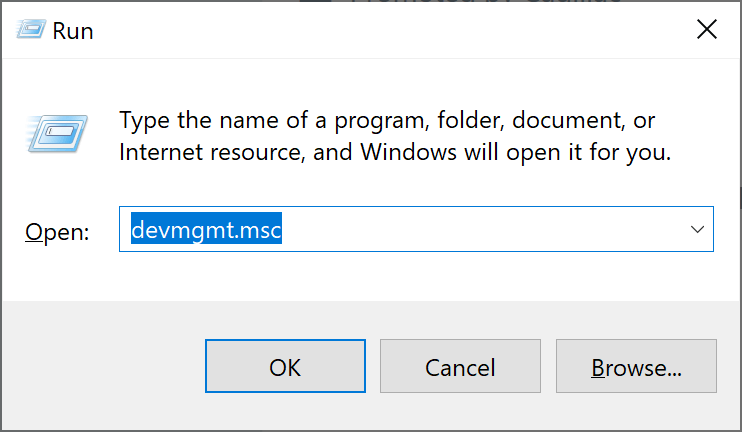
#4 Remove the Printer from Device Manager
Another workaround to remove the printer from Windows is by manually deleting the printer from the Device Manager. Here’s what you need to do.
Press the Windows + R key combination to open the Run dialog box, type “Devmgmt.msc” in the textbox, and hit Enter.
In the Device Manager window, expand the “Print Queues” section. Tap on View> Show Hidden Devices.
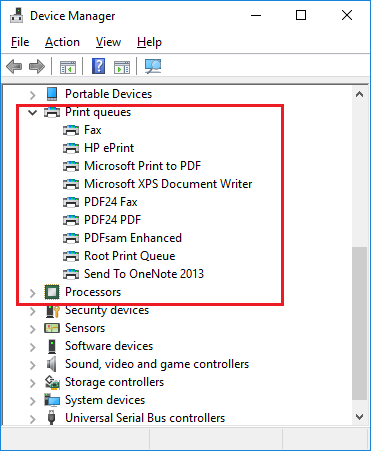
Locate your device’s name and then right-click on it to Delete it. Once the device has been successfully removed from the Device Manager, reboot your machine.
Also read: How To Find Your Printer’s IP Address: Step By Step Guide
#5 Update Drivers
Unable to remove the printer from Windows 10? Well, did you try updating the printer drivers to see whether it fixed the issue? Outdated or corrupt device drivers can also hinder you from deleting the printer from Windows 10. You can either manually update the drivers via Device Manager or use a third-party driver updater tool that helps you get the job done within no time.
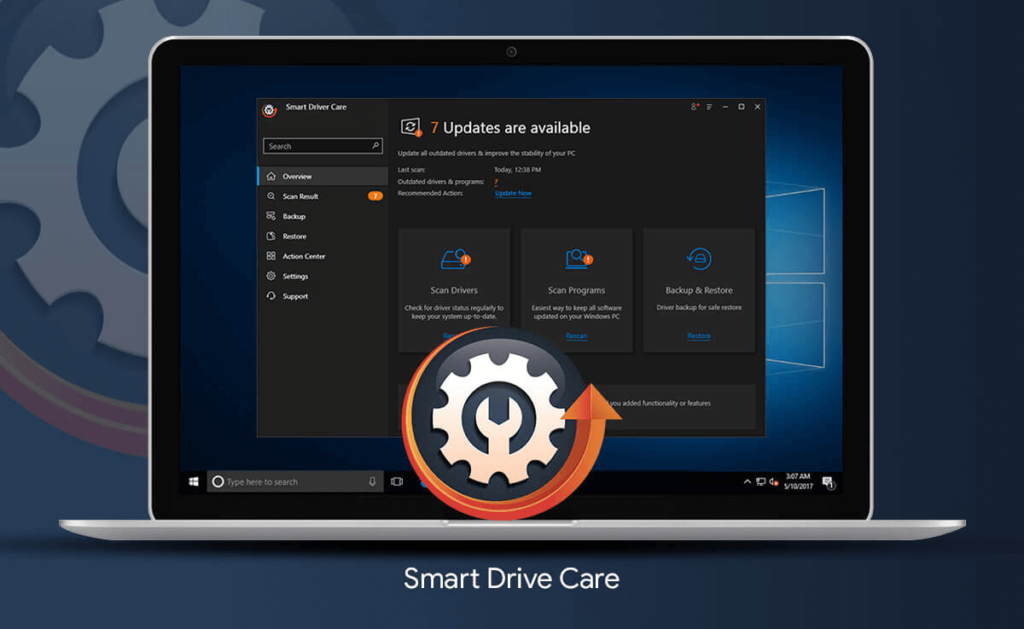

Download and install the Smart Driver Care utility tool on your Windows PC. Smart Driver Care is an ultimate driver updater tool that allows you to update missing/corrupt/outdated system drivers in just one click. Smart Driver Care utility tool scans your device thoroughly to look for outdated system drivers, fetches their latest update from the web, and allows you to update all the drivers in just one click.
#6 Enable Bidirectional Support
By enabling the bidirectional support on Windows 10, you can enhance your printer’s ability to communicate in real-time. To enable bidirectional support settings on Windows 10, follow these steps:
Open Control Panel> View Devices and Printers.

Select the device that you need to remove, right-click on it and select “Printer Properties”.
In the Printer Properties window, switch to the “Ports” tab.
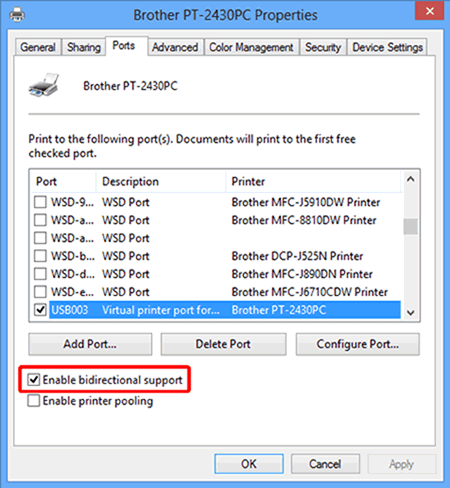
Check on the “Enable Bidirectional Support” option.
Hit on the OK and Apply buttons to save the recent changes.
Also read: How To Fix Printer Driver Is Unavailable On Windows 10
Conclusion
Here were a few ways to remove printer from Windows 10. In case you were facing any troubles in removing the printer, you can use any of the above-mentioned methods to remove the respective printer device from Windows 10.
Was this post helpful? For any other queries or assistance, feel free to drop your thoughts in the comments space!