
Once the Search9+ Infection enters your system, it starts spoiling your web surfing experience. The adware holds strong potential to disrupt your routine searches by bombarding you with useless advertisements and unwanted commercial pop-ups. You might even get redirected to suspicious websites, where you’ll be convinced to download products.
With that being said, this PUP has already been included in the database of reputable antivirus solutions with the name – Win32:PUP-gen and PUP.AD.SEARCH9+. Oftentimes, this adware may also lead to many serious problems. So, you need to keep your machine guarded by removing the Search9+ virus as soon as possible.
Must-Read: 12+ Best Computer Security Software for Windows
What Exactly Is Search9+?
Search9+ is annoying adware infection. The virus holds strong potential to make situations worse when it comes to the safety of your device and data. It secretly collects sensitive information and shares it with third-party applications. One of the most annoying things about this adware is that it changes the start page, currently activated search engine, makes alterations in bookmarks, and also slows down your web experience. Search9+ even makes you vulnerable to other dangerous infections as well. The sole aim of Search9+ adware is to promote the websites of its affiliates and increase visitor rates.
Fortunately, it’s quite easy to detect and remove the Search9+ virus from your computer. Simply follow the straightforward process to do that.
How Do I Remove Search9+ Adware?
If you are concerned about the state of your device and want to safeguard it before the situation gets worse due to Potentially Unwanted Programs, here’s what you need to do to eliminate Search9+.
How To Remove Search9+ Adware Infection
Running a comprehensive malware scanning using a reputable PC Security Software like Systweak Antivirus should be your number one bet to resolve all kinds of threats and fix potential loopholes. The Windows Antivirus Utility has a robust scanning engine and is capable of scanning the entire system, particular folders & files in no time. Previously Systweak Antivirus was able to resolve multiple kinds of issues:
- How Can I Remove IDP.Generic Virus From Your Windows?
- What is splwow64.exe and Why is it Running?
- Fixed: Virus And Threat Protection Is Managed By Your Organization Error!
- What Is Discord Malware & How To Remove It?
- And many more!
How To Safeguard Your PC With Systweak Antivirus & Remove Search9+ Adware?
Step 1= Install and launch Systweak Antivirus on your Windows.
Download Systweak Antivirus

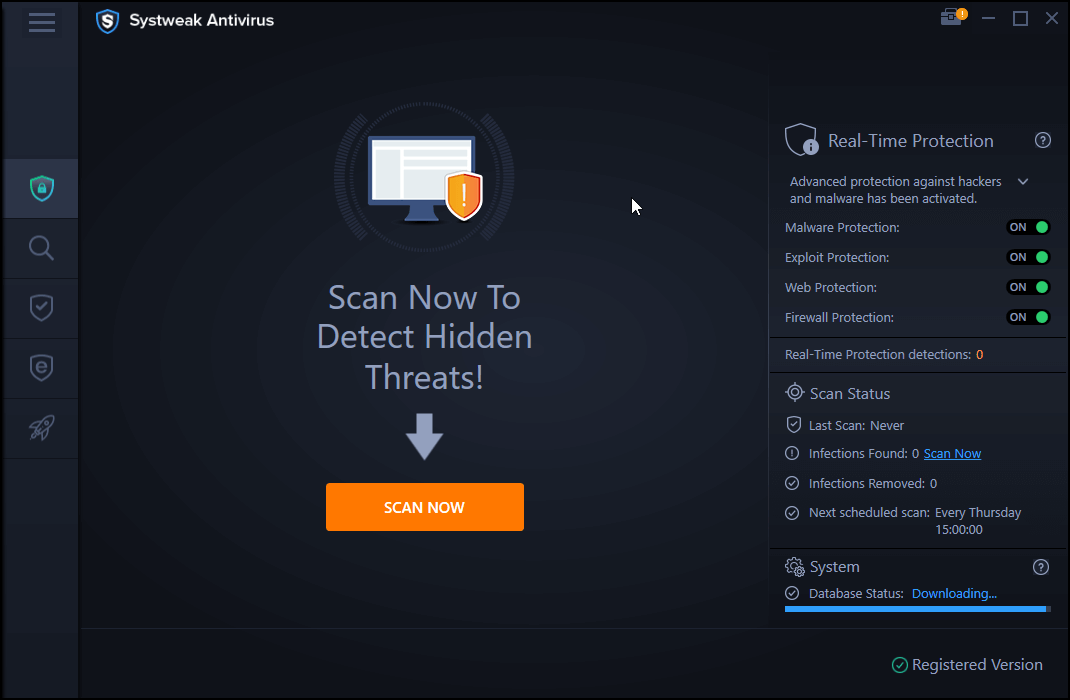
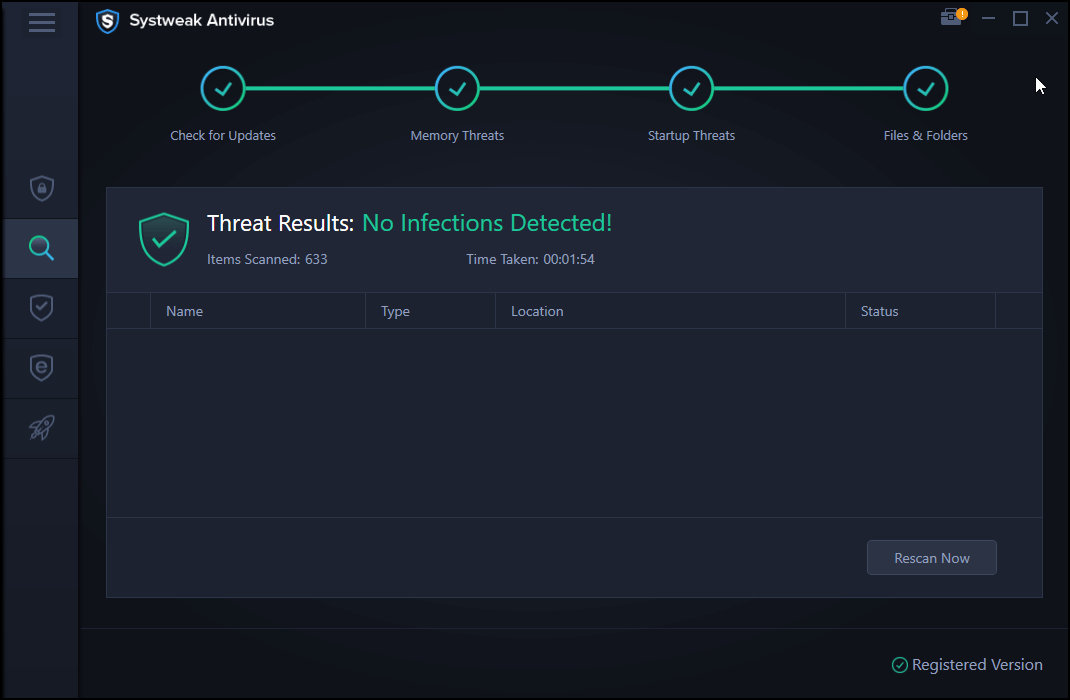
Step 2= From the registered version hit the Start Scan button. Step 3= Choose the desired scanning mode from Quick, Deep & Custom Scanning to scan all the critical areas of the system. Step 4= As soon as the scanning gets completed. All the potential threats and infections will be listed (including Search9+ & related entries). Click on Protect Now button to remove all traces of adware, spyware, virus, and other malicious content.
Compatibility: Windows 10, 8.1, 8, and 7 SP1+
Maximum Devices Covered: Depends on the Pricing Model
| Pricing Models: | Suitable For: |
|---|---|
| $39.95 For 1 Device/1-Year Subscription | Individuals |
| $49.95 For 5 Devices/1-Year Subscription | Multi-Device |
| $59.95 For Up to 10 Devices/1-Year Subscription | Family |

Read the complete review to know all about the strong security solution – Systweak Antivirus!
PART 1- Remove Search9+ From Windows
Follow the instructions below to eliminate the Search9+ issue from Windows:
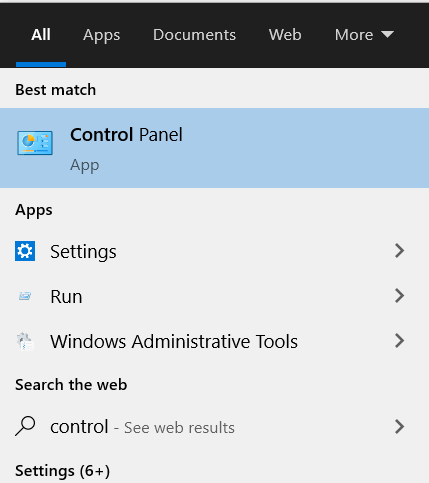
STEP 1- Launch Control Panel. You can use the Search menu to look for the Control Panel.
STEP 2- Navigate to the Programs section and click the option Uninstall a program.
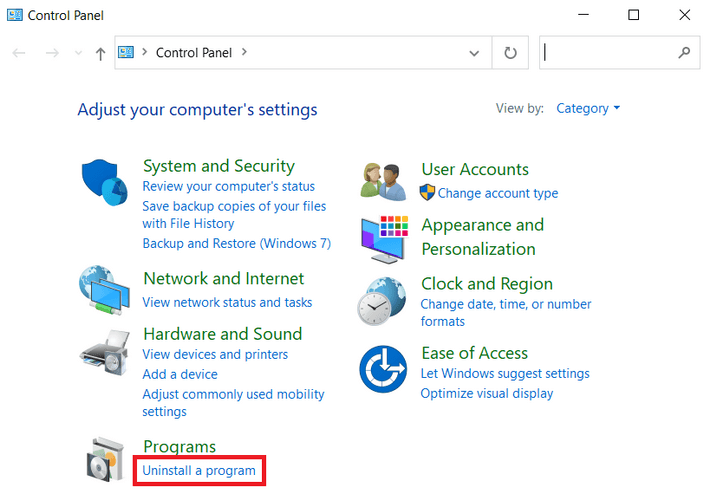
STEP 3- From the list that appears on the screen, look for the entry that says – Search9+ or any other suspicious programs you find, shouldn’t be there.
STEP 4- Once you locate the problematic application, right-click on the same and choose Uninstall option.
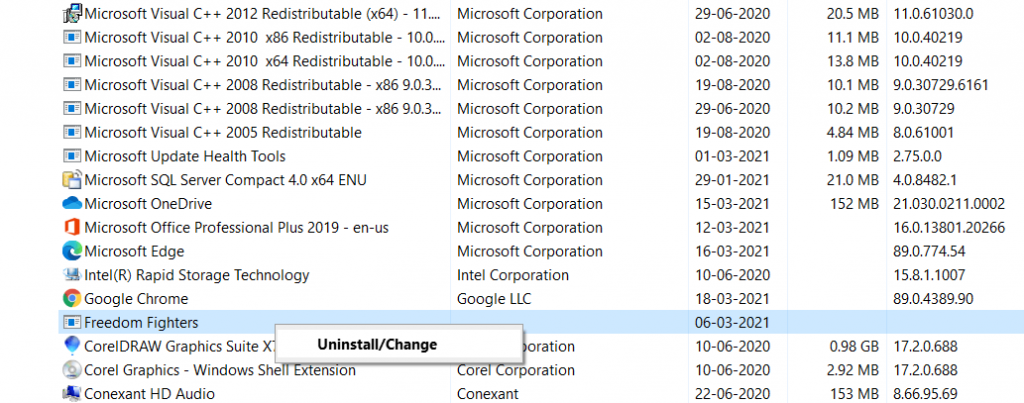
Keep patience and let the uninstallation process get completed. Click OK to proceed!
Must-Read:
- 13 Uninstaller Software for Windows 10, 8, 7 In 2022
- Best & Simple Ways to Remove Browser Cache on Mac, iMac, MacBook
PART 2- Eliminate Search9+ From Mac
Follow the instructions below to eradicate the problem on Mac:
STEP 1- From the menu bar, you need to select Go and choose Applications.

STEP 2- From the Applications folder, look for Search9+ entry and related terms.
STEP 3- Once you detect the problematic app, simply drag it to the Trash.
STEP 4- To completely remove Search9+ entries, you need to access the Application Support, LaunchAgents, and LaunchDeamons folders.
STEP 5- Once you find these folders, you need to navigate to the Go > Go to Folder
STEP 6- From the pop-up window, type the path /Library/Application Support and click the Go button.
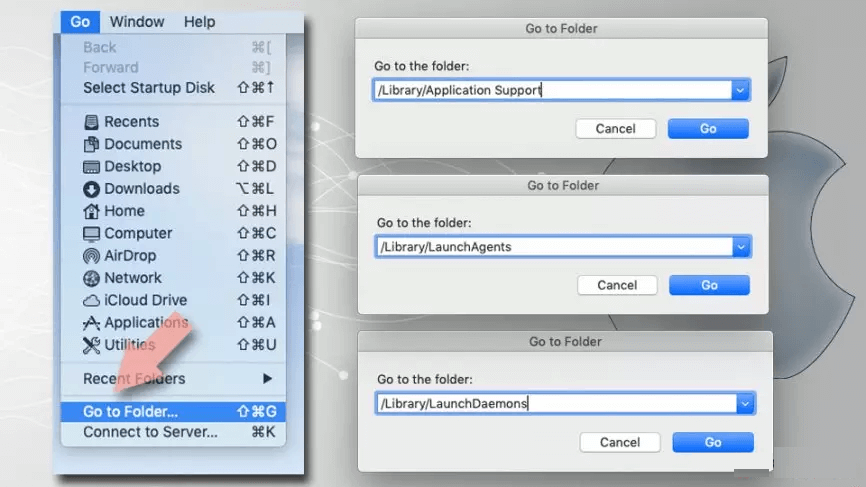
Now look for the dubious entries related to the Search9+ virus. You need to enter the folders – /Library/LaunchAgents & /Library/LaunchDaemons and simply terminate all the appeared entries.
Must-Read: 10 Best App Uninstaller for Mac to Completely Remove Programs in 2022
PART 3- Erase Search9+ From Google Chrome Browser
Follow the instructions below to get rid of the issue on your Chrome browser:
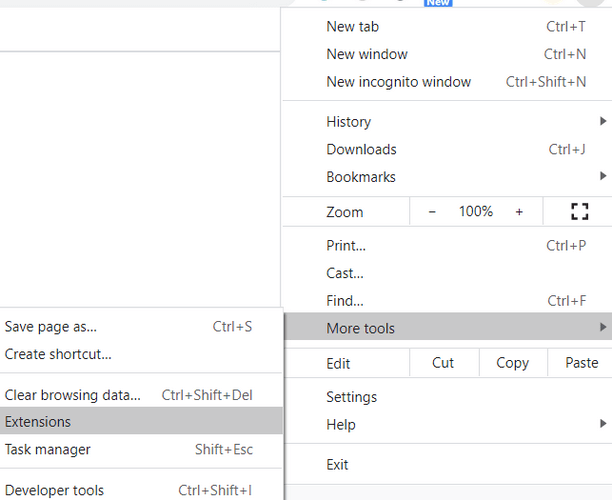
STEP 1- To fix the problem, launch Chrome and click on the three vertical lines icon, located at the top-right corner of the screen.
STEP 2- As soon as the menu opens, click on More Tools and choose the option Extensions.
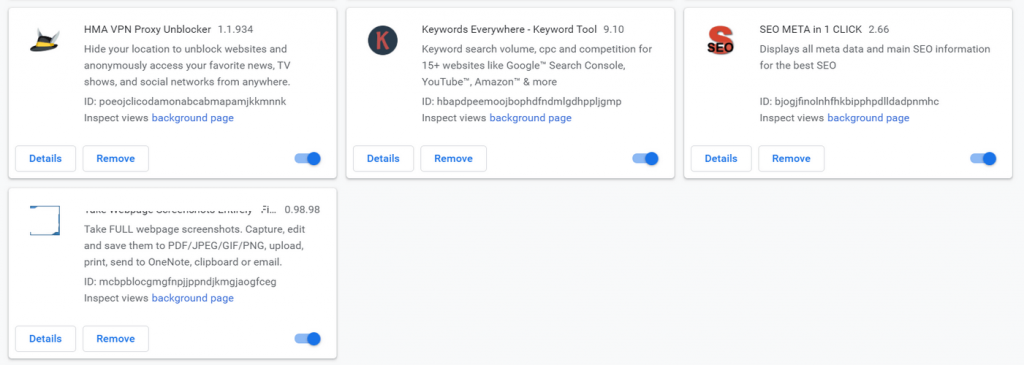
STEP 3- From the new window, a list of all the installed extensions will appear.
STEP 4- Here you need to locate all the suspicious add-ons that you don’t remember installing on your device.
STEP 5- Click the Remove button to complete the process!
Additionally, you can follow our step-by-step guide to remove unwanted accumulated caches, cookies, and other residuals on your Chrome browser.
Must-Read: How To Use Secret Chrome Cleanup Tool: Quickly Remove Browser Malware?
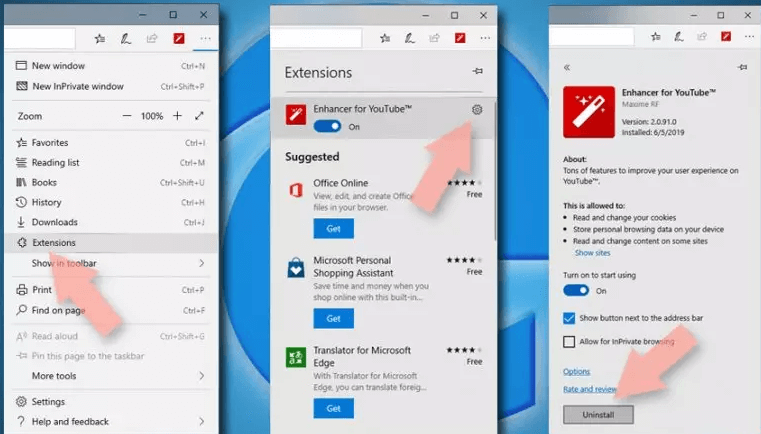
PART 4- Get Rid Of Search9+ From Microsoft Edge
Microsoft Edge users can follow the instructions below to get rid of the problem:
STEP 1- Launch the Microsoft Edge and navigate to the three horizontal dots icon and select Menu.
STEP 2- From the list of options, you need to click on Extensions.
STEP 3- Find all the Search9+ related extensions and hit the Settings options (Gear icon).
STEP 4- Start uninstalling the items you don’t expect to be present in the list.
Make sure you clear all the cookies to get rid of the potential items that may cause damage to your system.
Must-Read: 5 Free Tools To Remove Unwanted Toolbars from Firefox, Chrome & IE
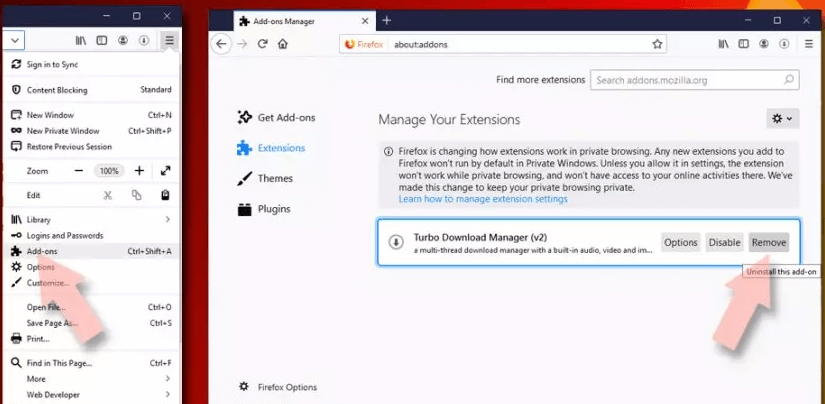
PART 5- Detect & Delete Search 9+ From Firefox
Follow the instructions below to terminate the intruder on the Firefox browser:
STEP 1- Launch Firefox browser and click on the Menu (located at the top-right corner of the screen.)
STEP 2- Select the option Add-ons.
STEP 3- From the new window, select plugins that are related to Search9+ and other unwanted items.
STEP 4- Hit the Remove button to complete the process!
You can also consider resetting the browser to resolve the problem once and for all!
Conclusion – Were You Able to Erase Search9+ Virus?
This is how you can easily remove Search9+ adware from your device. If you have any queries, you can mention them in the comments section below. Additionally, you can prevent the entry of this kind of adware infection if you take the necessary precautions. For starters, install genuine software from legitimate sources. Take the help of trustworthy antivirus solutions like Systweak Antivirus that has a great reputation in the market and holds strong potential to completely scan your system and eliminate all the new and existing threats from your PC.
NEXT READ: 70 Ways To Make Old System Run Faster: Speed Up Your PC