If you are constantly dealing with a slow and sluggish MacBook performance, you can speed things up by reformatting your MacBook. The action will wipe your device completely and help you return the device to its factory settings. It is certainly a great way to give your system a significant performance boost, in case your Mac machine is acting up or you are suspecting a potential virus infection or malware traces. That’s where reformatting the MacBook comes into play.
Additionally, reformatting your device is a good idea if you plan to sell, give away or trade your MacBook. The process carefully clears all the stored content and makes it fresh to use the machine for the other person.
You might want to read: How to Erase and Format an External Hard Drive on Mac and Windows
But Before You Begin Reformatting Your MacBook Pro:
Most people consider the reformatting option because their MacBook starts acting up and performs all the tasks and operations slower than ever before. But what if we suggest you a better alternative? Well, if you are ready to spend a few bucks on comprehensive maintenance tasks for your MacBook, you probably don’t need to reformat it again.
We suggest you use a professional Mac Cleaning software = CleanMyMac X that can perform a variety of optimization and speed-boosting tasks to improve the overall performance of your Mac in one go. The application assists users in finding and removing unwanted junk files, system cache, log files, duplicates, needles language files, mail attachments, trash items, fix broken preferences, and more. Running its System Junk module once will certainly help you to free up gigabytes of storage space in no time.

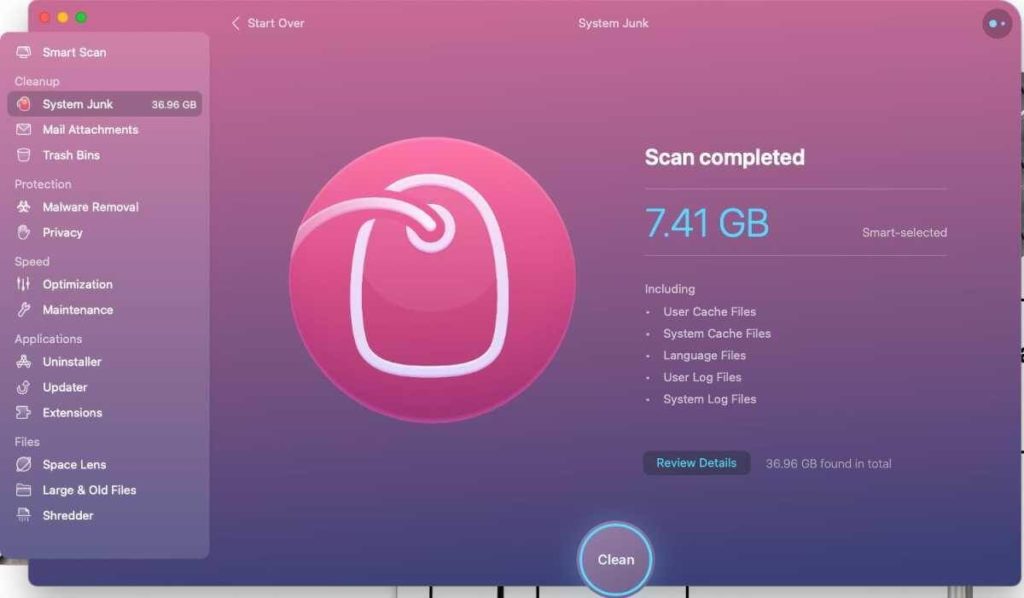
It will certainly solve all the issues related to your Mac’s slow performance, frequent hangs and will also safeguard your device from potential malware, virus, adware, spyware, trojan horse & worms. We hope after using CleanMyMac X on your device, you may not consider the Reformatting your Mac action!
In case you want to still reformat your MacBook Pro, here’re the step-by-step instructions to follow:
How To Reformat Your MacBook Pro?
You must already be aware of the fact that performing reformat action on your Mac will delete all the data stored on your drive. So, in case you have any important files or folders that you can’t afford to lose, take a moment to back them up before you proceed with reformatting MacBook Pro.
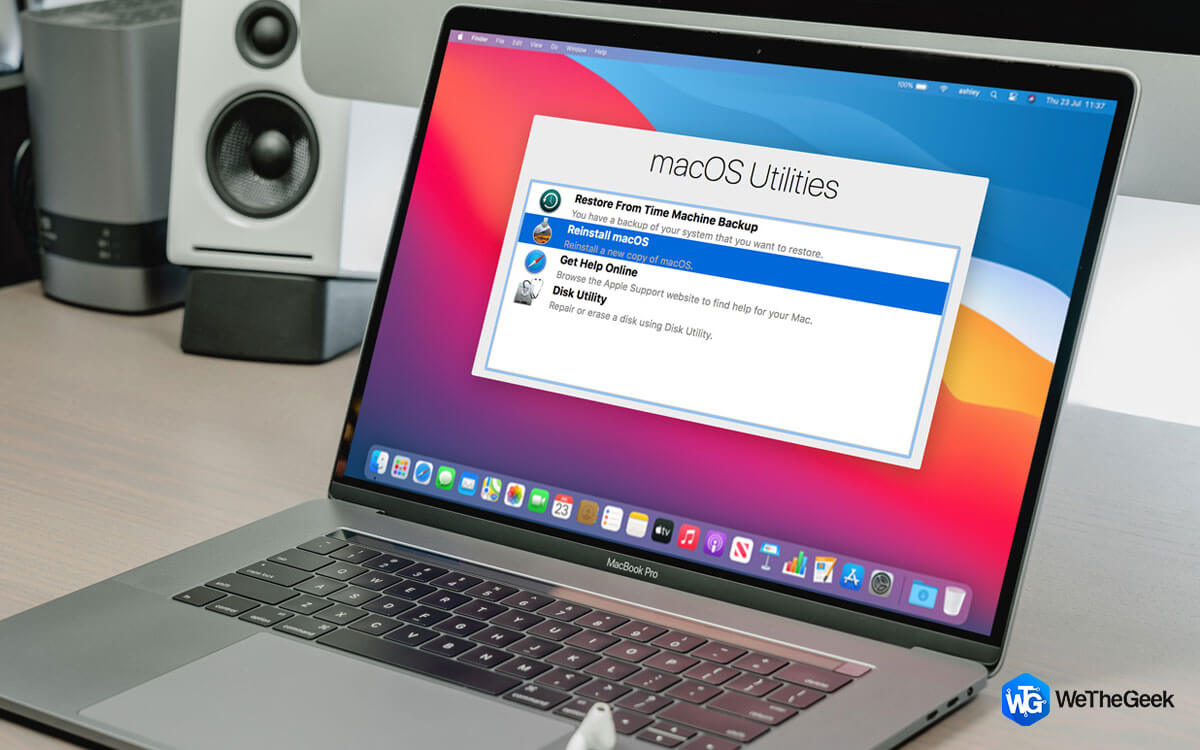
STEP 1 = Get started by turning on your Mac by pressing the Power button & immediately clicking and holding the COMMAND + R keys.
STEP 2 = Release the keys, as soon as you see the Apple logo or a startup screen. The process is called booting the Mac into macOS Recovery mode.
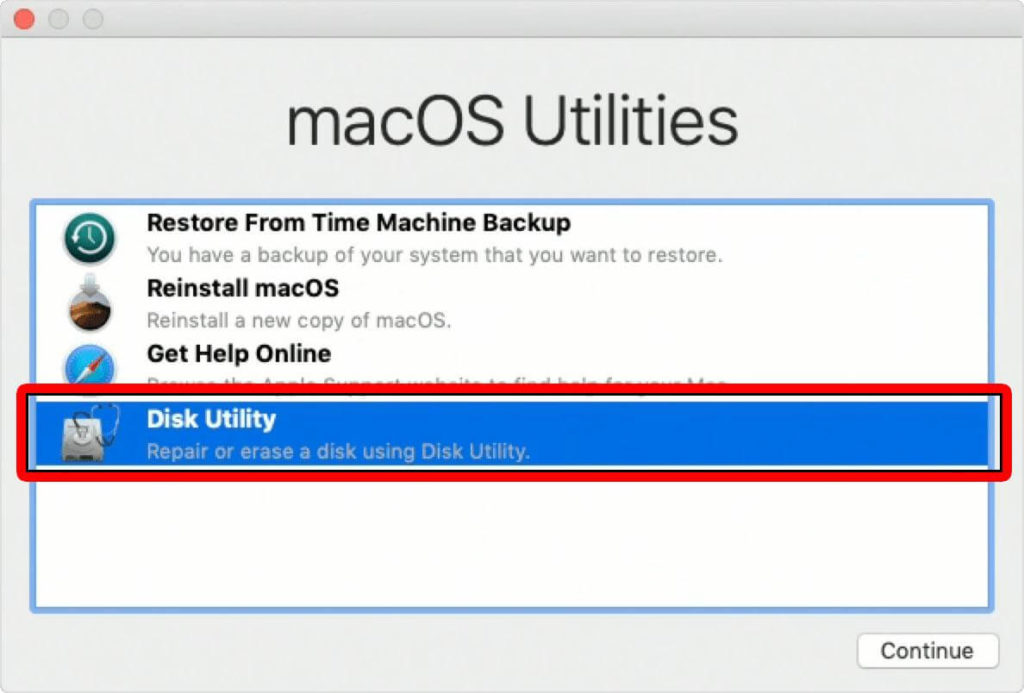
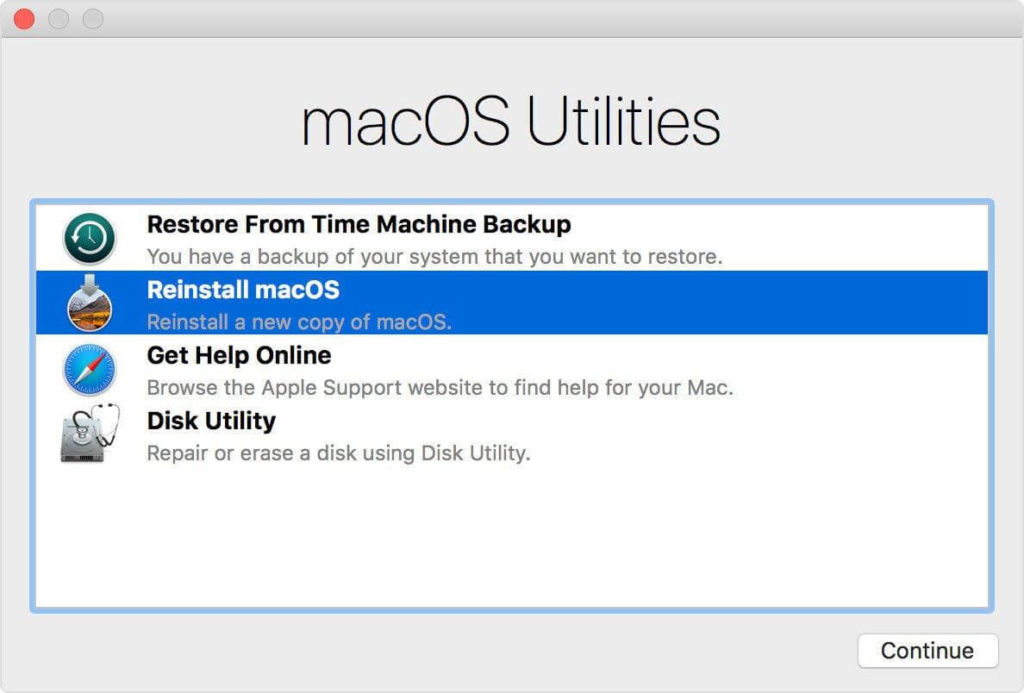
STEP 3 = From the “macOS Utilities” window, click on the Disk Utility option and hit the Continue button.
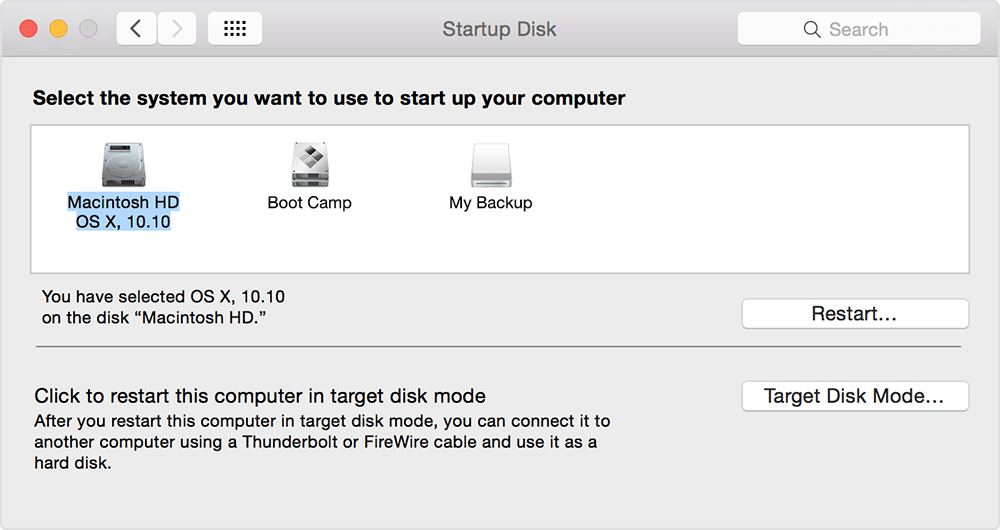
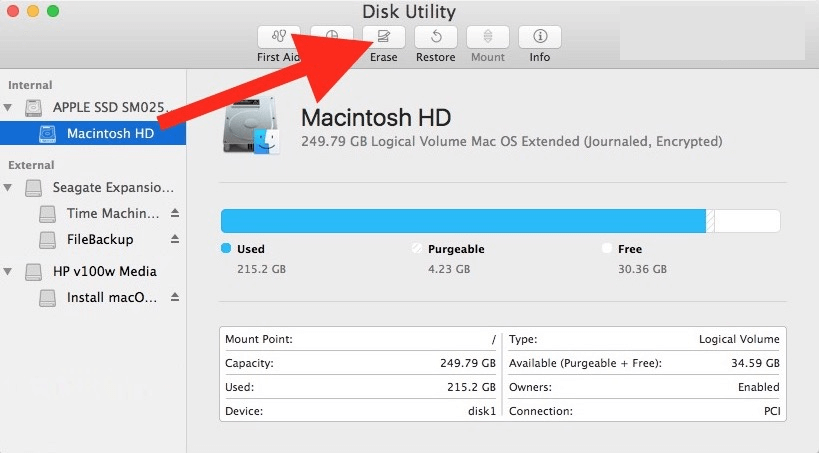
STEP 4 = From the next window, go to the Startup disk and select Macintosh HD. In case you’ve ever renamed your startup disk before, you need to click on the same to proceed.
STEP 5 = Now hit the Erase button, located at the top of the window.
STEP 6 = At the next step, you need to enter the name of the drive you wish to erase and choose a format between APFS or Mac OS Extended (Journaled).
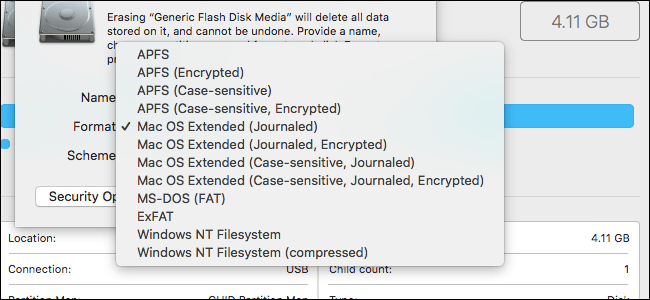
By default, Disk Utility shows the most compatible option. You can go with the same according to your device.
STEP 7 = In case your device asks for the scheme, you can select GUID Partition Map.
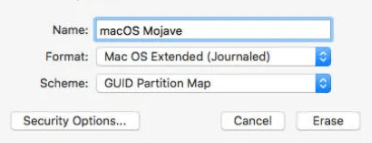
STEP 8 = You can hit the Erase button to initiate the reformatting process on MacBook Pro.
That’s all! From the Disk utility menu, you can choose the option Quit Disk Utility to close it down!
What’s Next? Install A Fresh macOS Version!
Now that you’ve successfully reformatted MacBook Pro, it’s time to install the newest macOS version to get started. Make sure you are connected to the Internet while the installation process is in progress. Follow the instructions shared below start installing a fresh copy:
STEP 1 = Get started by turning on your Mac by pressing the Power button & immediately clicking and holding the COMMAND + R keys.
STEP 2 = Release the keys, as soon as you see the Apple logo or a startup screen. The process is called booting the Mac into macOS Recovery mode.
STEP 3 = From the “macOS Utilities” window, click on the Reinstall macOS button.
STEP 4 = From the next window, go to the Startup disk and select Macintosh HD. In case you’ve ever renamed your startup disk before, you need to click on the same to proceed.
STEP 5 = Hit the Install button to initiate the reinstallation process of the latest macOS version!
As soon as the installation process is completed, your MacBook Pro will automatically restart and will display the setup assistant. You can set your specifications, transfer the files to the machine from an external drive, and get started with a fresh OS!
That’s all for today! Hope our short guide helped you to successfully reformat MacBook Pro without any hiccups. In case you are dealing with any issues throughout the process, don’t hesitate to share with us in the comments section below. You can even write to us at [email protected]
MUST-READ: