
Having an external hard drive is advantageous as you can store tons of data on it. Moreover, it is small, light weight and not attached to your computer. This makes it quite handy and allows you to transfer your data from one computer to another easily.
As you connect your external drive to different computers, it might get infected if the host computer is not secured. And in worst case scenarios, chances are the drive would no longer be recognized by your system.
Well, worry not, we have solution for you. Whenever an external storage device gets infected, it is highly recommended to format the device to make it operable.
In this post, let’s talk about how to erase and format external hard drives on Mac and Windows.
Erase and Format External Hard Drive on Mac
Step 1: Open your Mac and connect your external hard drive with it.
Step 2: Type Disk utility in the spotlight search or click ‘Go’ from the top toolbar and select ‘Disk Utility’.

Note: There is another way to open ‘Disk Utility’, Go to Finder icon > choose Application > Click on utilities > Disk Utility.
Step 3: Choose the external hard drive from the left-hand side which you would like to format.
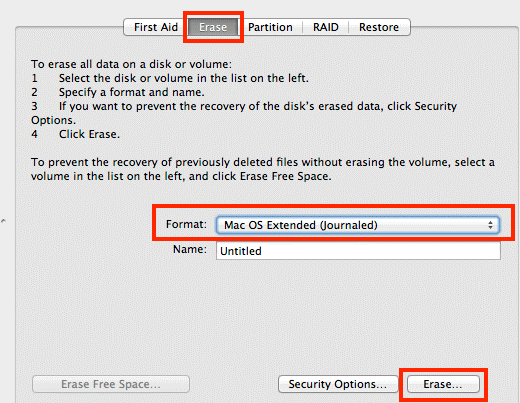
Step 4: Select ‘Erase’ tab.
Step 5: Select ‘Mac OS Extended (Journaled)’ beside ‘Volume Format’.
Step 6: Enter a name for the external hard drive in the Name field.
Step 7: Once you hit ‘Erase’ button it will prompt you “Are you sure you want to erase the disk’, So, click Erase to Proceed.
Now, your external hard drive is formatted and is as good as new.
How to Erase and Format an External Hard Drives on Windows
Step 1: Go to ‘Start’.
Step 2: Right-Click on Computer.
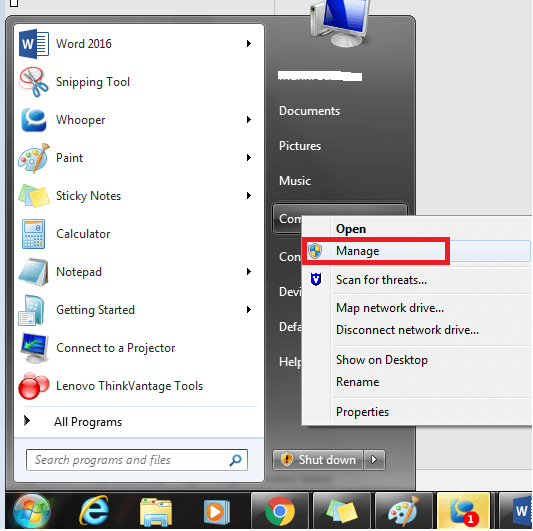
Step 3: Select the second option ‘Manage’ from the right-click menu.
Step 4: On management window, choose ‘Disk Management’ from the storage.
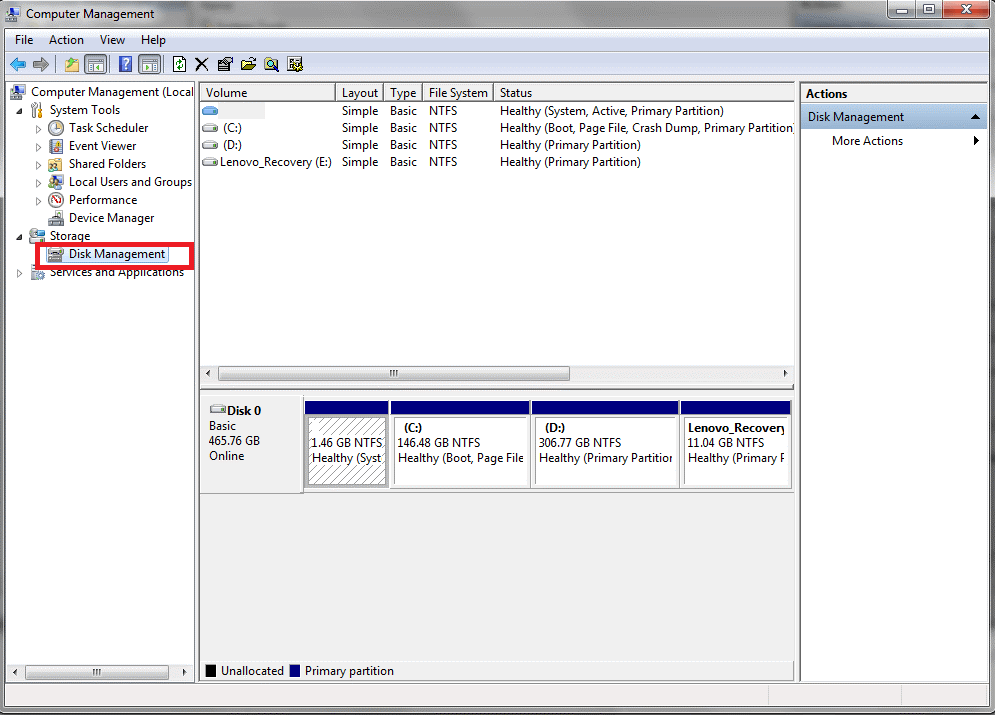
Step 5: Now, select the drive which you would like to erase and format.
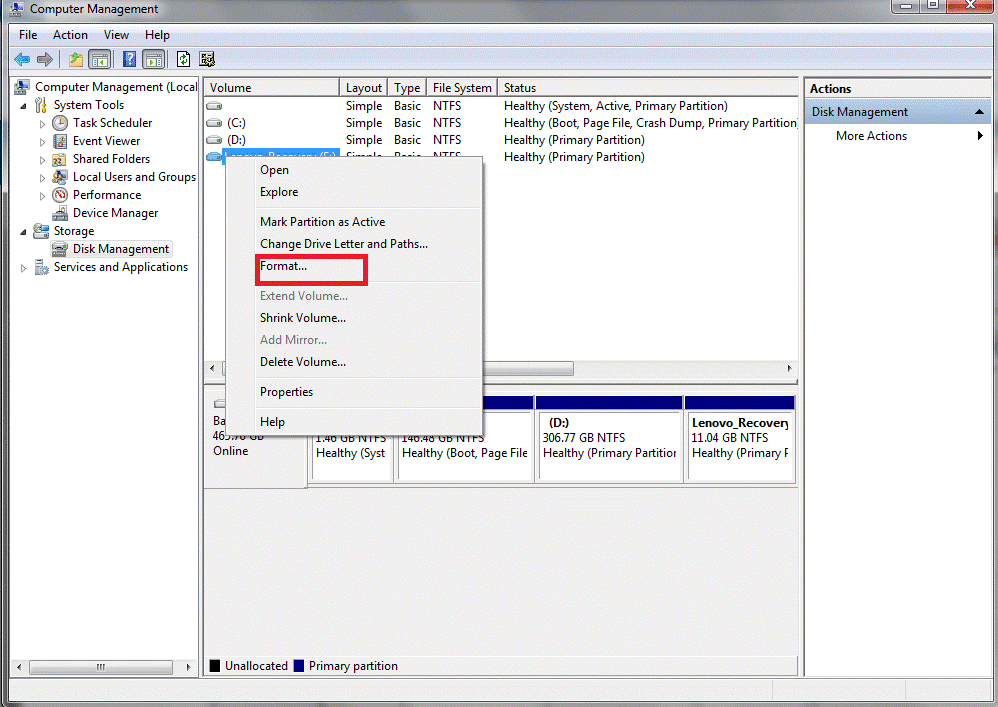
Step 6: Right-click on the drive and select ‘Format’.
Step 7: Choose the ‘File System’, (you can select ExFAT or FAT32).
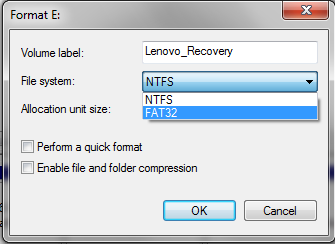
Note: Make Sure, you do not “Perform a quick format” as it doesn’t erase the entire data on drive.
Step 8: Hit ‘OK’. Your machine will prompt you to confirm. After confirmation, your drive will start formatting.
Note: Be patient while formatting your drive, as it might take a bit longer depending upon the size.
Formatting your external hard drive will erase all data available on the drive. In case if you’re formatting a drive that you have used before, don’t forget to copy important files you might require in future.