
If you have a Mac and use storage devices like a USB drive of a different format than that recognized by Mac, you pretty much know that it is difficult to format it. The reason behind this is that most USB drives are designed to work on Windows OS, which runs on the FAT32 system. The Mac devices run on either APFS or Mac OS Extended.
So, if you have a drive that is Mac OS extended or APFS format, you can easily reformat your drive, but if the drive has a FAT32 file format, then you might be in problem. Mac can read and write on the FAT32 file format, but it will definitely give you some quality issues.
But not worry if you have bought a flash drive that runs on a different format than what is preferred by Mac. Below are some easy steps that will guide you to format these drives to Mac OS and APFS.
 Best Data Recovery Software for Mac 2024Accidental file deletions or file corruptions can be a serious problem, especially when we are not relying on cloud services...
How To Format A USB Drive On A Mac?
To format a USB drive, follow these steps: –
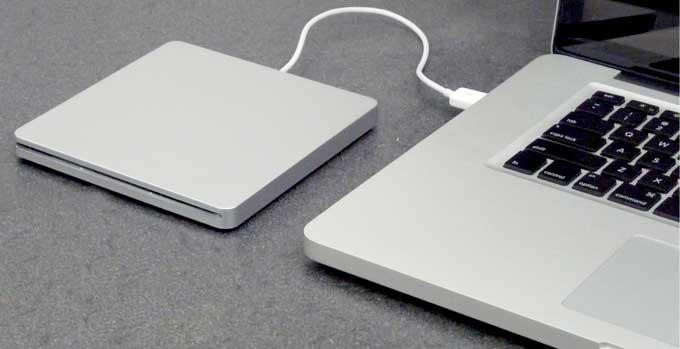
- To format pendrive on Mac, Connect USB drive into the given socket. The latest MacBook Pro or another MacBook has only USB-C type connectors, so if you have the recent Mac’s, you will require an adaptor to convert from USB-C to USB-A.
- Click the fresh Finder window. Then select the drive.
- Next navigate to Applications and select Utilities, then select Disk Utility by double-clicking on it.
- From the sidebar menu, select USB drive. Now select Erase from toolbar that is situated at top of window.
- Next a window will drop down; here type a specific name for formatted drive.
- Next from the drop-down menu, select the type of format you want.
- If the USB flash drive, has some sensitive data, click on Security tab. This will let you choose how securely you want the files to be deleted.
- Just move the slider to right, the further it moves, the more passes the erase feature will make meaning that the files will be removed discreetly. But keep in mind this step will increase the time of the format.
Note: – Formatting will wipe the entire data, so make sure the drive contains no important data on it. Copy any crucial data on your Mac. - Finally, click on OK and then select Erase.
This is a complete process of formatting a USB drive on Mac.
While Reformatting A USB Drive, Which File Format Should Be Used?
Depending on the currently running version of Mac- MacOS high Sierra or older, there are two available choices for file format- Mac OS Extended and APFS. Now, below are some pointers that will help you to select the best format according to your requirements:
- If you have a Mac that runs the operating system (macOS) older than High Sierra, then it is crucial to format a thumb drive using the Mac OS Extended format. The reason behind this is that a reformatted disk in the APFS file format, will not load in the Mac.
- If you are planning to format a flash drive on a Mac, select the APFS format as they are SSD (solid state drive) optimized. Even if you consider reformatting a hard drive, APFS is a better option as it is fast and reliable.
- If you are going to utilize USB drive for Time Machine backups, then go for Mac OS Extended. This is because APFS disk doesn’t support Time Machine backup and even if you use this file format, it will give the option to reformat USB drive with Mac OS Extended.
- However, any APFS formatted drive can be backed up to a Mac OS extended Time Machine drive.
Steps To Format A USB Drive To Fat32 On Mac:
Before we learn how to format a USB drive to FAT32 on Mac, it is necessary to learn why to do? And the reason behind this is as follows: –
- FAT32 format can be read and written to on both the operating system- Mac and Windows.
- There are many people who like to use the drive on both Mac and Windows, and others use it as a device for storage for TV shows and thus reformatting to FAT32 is necessary.
- The only limitation with FAT32 is that the individual files should have a 4GB size and not more which poses a problem when USB drive has bigger size files.
- However, in such cases, exFAT can be used as it no such limitation and can run on OS.
 10 Mac Terminal Commands You Should TryBeyond macOS skin, there’s a whole another world known as Mac command line. This article will describe how to use...
Here Are The Steps You Should Follow To Format USB Drive On Mac : –
- Into your Mac, plug in the USB drive
- Next, select Applications>Utilities and then launch Disk Utility
- From the disk utility sidebar, select the USB drive
- From the disk utility toolbar, chose Erase
- Give the formatted disk a name and select either MS-DOS (FAT32) or ExFat from the format menu.6
- Finally, select erase. Now your disk/drive will be reformatted to either FAT32 or ExFAT depending upon your selection
So, these are steps that you will need to follow while reformatting your USB drive. Remember that before formatting; check the drive for important data so that nothing crucial is deleted. For clarity on any doubts, feel free to connect with us in the comments section below.