Taking screenshots is a convenient way to share and capture information that you want other people to be able to see. The Windows operating system comes with a variety of default choices for taking high-resolution screenshots. These include the Snipping Tool, keyboard shortcuts, etc. Having said that, you may have observed that occasionally the overall quality of an image or screen that you have captured from your Windows 11 or Windows 10 machine seems low. Due to the low resolution, this happens.
To improve the clarity of your subsequent screenshot, make sure to follow these steps if you wish to take high-resolution screenshots with Windows 11/10. The term “resolution” describes how many pixels (or dots per inch, or DPI) there are in an inch of an image. Therefore, higher resolution equates to better quality.
Also Read: 3 Ways Screenshots Improve Your Word Docs, PowerPoints, and Emails
Steps On How To Take High-Resolution Screenshots On Windows 10?
Step 1: Press Win + I to open the Settings window.
Step 2: Double-Click on System icon and then click on Display from the left side panel.![]()
Step 3: Now, on the right side, locate Scale and Layout section and click on Advanced Scaling Settings.
Step 4: In the new window, locate the toggle button under ‘Let Windows try to fix apps, so they are not blurry’ and slide it towards the right side to enable it.
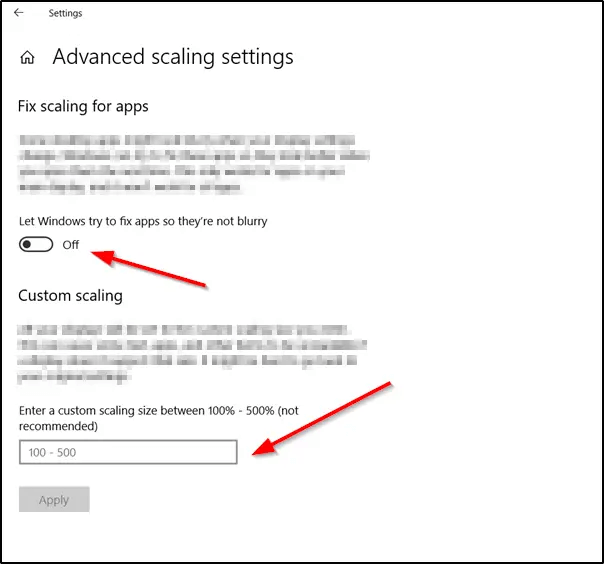
Note: Apps on your primary display will look better as a result. You can also input a custom scaling size between 100 and 500. Displays will then be adjusted to the specific scaling size you specify.
Step 5: When finished, click the “Apply” button to make the changes effective.
Also Read: How to Add Custom Borders to Captured Screenshots in Windows
Steps On How To Take High Resolution Screenshots On Windows 11?
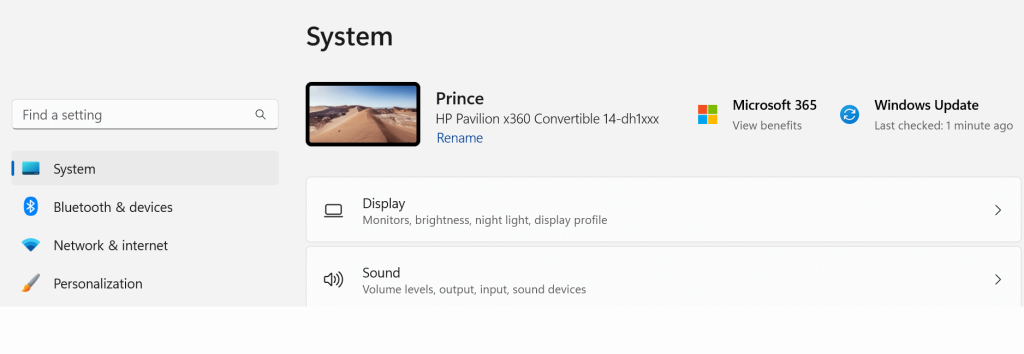
Step 1: Press Win + I to launch the Settings.
Step 2: Click on the System tab in the left panel and then click on Display on the right side.
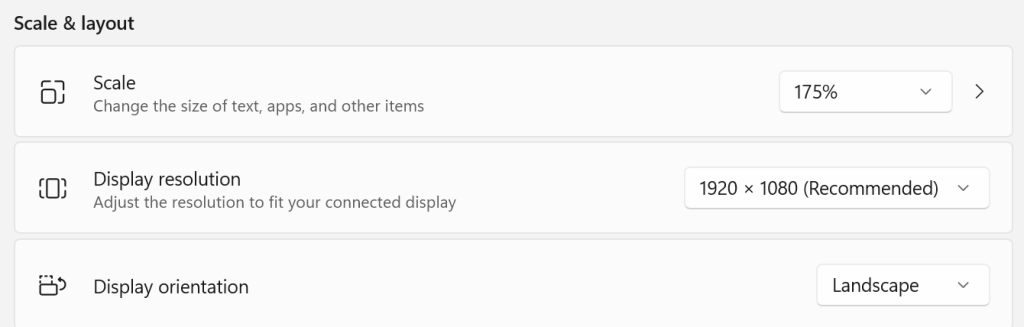
Step 3: Now, click on Display Resolution option on the right side and select the appropriate resolution from the drop down menu.
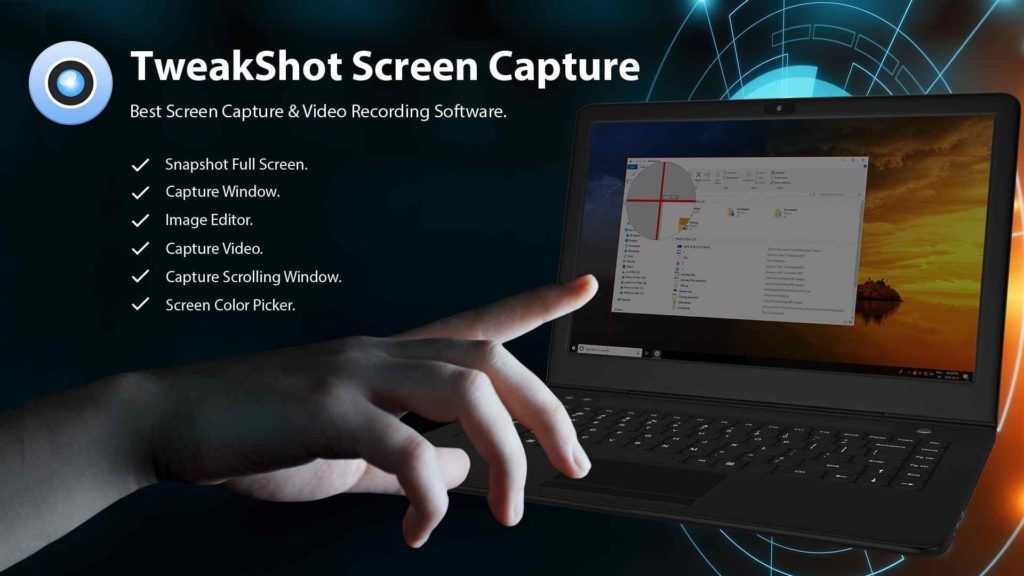
Bonus Alternative: Use TweakShot Screen Capture To Capture Screenshots
You can capture screenshots with TweakShot Screen Capture of an active window, the entire screen, or any rectangular area. It supports some fundamental editing options including cropping, underlining, and scaling. Additionally, it enables users to quickly record screen activity, such as mouse movements and onscreen changes. Other characteristics include:
Choose the region or area you want to capture from the active window.
- Simply scroll the window or webpage to grab everything with one simple click!
- To make designing easier, choose colors from photographs on the screen or copy the color code.
- Choose a specific active window to capture, then let the software handle the rest.
- With the use of this module, users can capture all on-screen activity, including mouse pointer and clicks.
Also Read: How to Enable Google Chrome’s Screenshot Tool
How To Use TweakShot Screen Capture To High-Resolution Screenshots?
Step 1: To download TweakShot Screen Capture, click the download icon below.

Step 2: To start the executable installation file you downloaded, double-click it. Then, to complete the installation, follow the on-screen instructions.
Step 3: After being installed for the first time on your PC, this application offers a fully functional 7-day trial mode. The software must be bought after the trial time.
Step 4: To start the software, click Continue Evaluation for the Time Being. A short bar will ultimately appear on your screen.
Step 5: You can select from a variety of settings using the application interface.
Step 6: Select a window you want to capture by dragging the cursor over it after selecting a menu item.
Step 7: After choosing the current window to photograph, click the mouse to take the picture. It will then open in the camera’s built-in editor where you may make any necessary adjustments.
Step 8: To store your capture in the selected location, click the store button.
Also Read: How To Annotate Screenshots And Images In Windows 11
The Final Word On How To Take High Resolution Screenshots In Windows 11/10?
We hope you can now take High Resolution screenshots using the Windows built in tool. If you want better screenshots then you can opt for TweakShot Screen Capture. This tool takes capturing screenshots to another level with more advanced features.
Please let us know in the comments below if you have any questions or recommendations. We would be delighted to provide you with a resolution. We frequently publish advice, tricks, and solutions to common tech-related problems. You can also find us on Facebook, Twitter, YouTube, Instagram, Flipboard, and Pinterest.
Also Read: How to Change Where Screenshots Are Saved on Windows 10 / 11?