
In Windows 10 and 11, you can snap screenshots in various ways. However, unless enabled, your pictures often do not feature bordered edges. If you add borders, your screenshots will have sharper outlines on websites and documents. This is how you can configure Windows 11’s Snipping Tool to add custom borders to the screenshots.
How to Add Custom Borders to Captured Screenshots in Windows
The snipping tool in Windows 11 is a simple tool for taking screenshots, but it also has a few helpful extra settings. One of these is the Snip outline option, which automatically adds a color border to photos when turned on. You can enable the Snipping Tool setting to take screenshots with borders in the following ways:
Step 1: Type Snipping Tool into the search text box by pressing Win + S.
Step 2: Then, pick Snipping Tool to use that application.
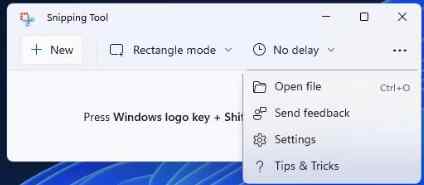
Step 3: Select “See more” from the menu.
Step 4: Enable the Snip outline option.
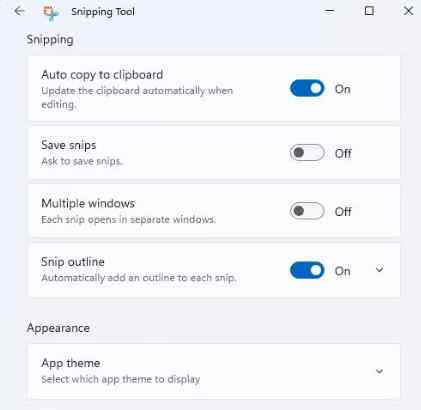
Step 5: To extend that selection, select Snip outline.
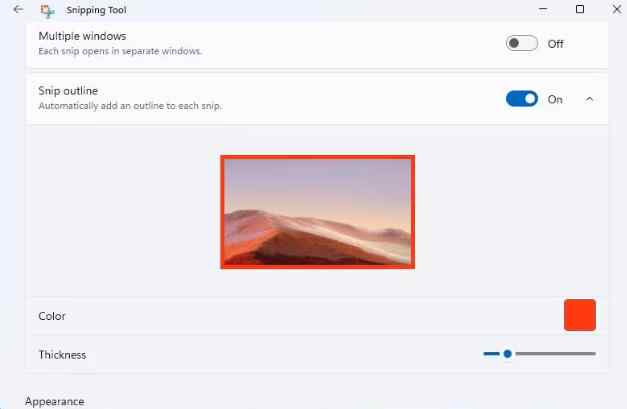
Step 6: To open a palette, click the Color box.
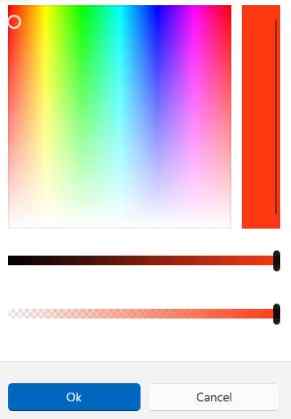
Step 7: Select the OK button after picking the border color you want from the palette.

Step 8: To change the border’s width, move the slider on the Thickness bar.
Now try using the Snipping Tool to take some screenshots. To leave the Snipping Tool’s settings, click the Back button in the tool’s upper left corner. Next, pick Rectangular Snip by pressing New, and drag the mouse to select a snapshot area. As you specified, a border is now present in the captured screenshot.
Bonus Tool: TweakShot Screen Capture
Step 1: Click the download icon below get TweakShot Screen Capture.

Step 2: After downloading the executable installation file, double-click it to start it, then adhere to the on-screen instructions to complete the installation.
Step 3: Upon the first installation on your PC, this application will enable a fully functional 7-day trial mode. When the trial period for the software expires, you must buy it.
Step 4: Click Continue Evaluation for the Time Being to start the software. Eventually, a small bar will appear on your screen.
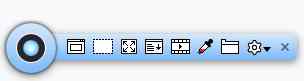
Step 5: This is the application interface, where you can select from a variety of options. There are numerous ways to take screenshots that do not require cropping of screenshots taken by WIN + PRTSCR.
Capture Single Window: Using this option, you can only take a screenshot of a window that is open and active on your screen.
Capture Region: This mode enables users to select a rectangle area of the screen, anywhere on it, and only take screenshots of that area.
Full-Screen Capture: This module enables users to take a picture of the whole screen.
Capture Scrolling Window: With this wonderful option, you can take a picture of a large image that isn’t totally on your screen. It is useful for taking a screenshot of a full web page.
Step 6: Select an option, then drag the mouse to select the window you want to capture.
Step 7: After designating the active window for capture, a mouse click will take the picture and open it in the built-in editor so you may make any necessary adjustments.
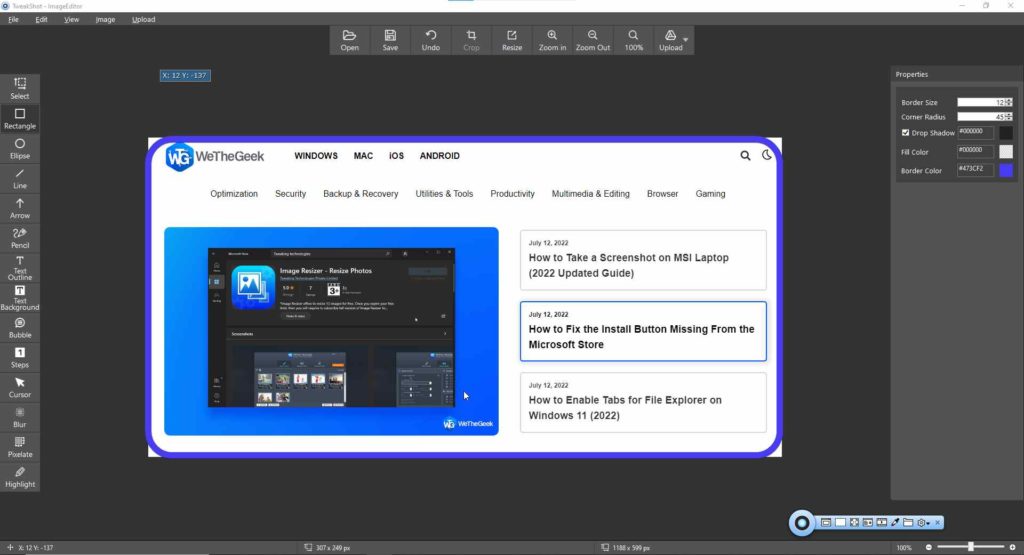
Step 8: Click on the Rectangle option from the left panel.
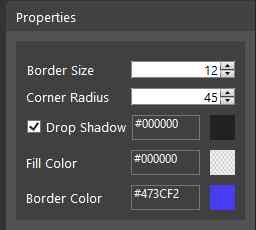
Step 9: Choose the Border Size and Colour from the right panel.
Step 10: Take your mouse pointer to one end of the image, press the left mouse button, and drag the area where you need the border.
Step 11: Click the Save button to store your capture in the selected location.
The Final Word On How to Add Custom Borders to Captured Screenshots in Windows
Both the Snipping Tool and TweakShot Screen Capture make it simple to set up the automatic addition of custom borders to screenshots. The Snipping Tool should be adequate if you are only adding simple outlines. TweakShot ScreenCapture is a superior tool for adding more complex border effects to screenshots.
Follow us on social media – Facebook, Instagram, and YouTube. Let us know of any queries or suggestions. We would love to get back to you with a solution. We regularly post tips, tricks, and answers to common technical issues.