
Windows 10 is one of the best operating systems used in most computers across the globe. However, it is not free from errors and issues, and the most dreaded of all is the Blue Screen of Death or BSOD, which either results in system freezing or crashing. But did you know apart from the Blue Screen, there are certain rare errors with Green Screen and Red Screen in Windows 10? This guide will help you find all the common fixes to try to get rid of the Windows 10 Red Screen.
Steps On How To Solve Windows 10 Red Screen Issue?
Before we jump on to the steps to resolve the red screen windows 10, you need to determine if the computer can restart normally or not. Once you receive the Red Screen on your computer, you must restart it immediately, and if it boots up normally, then move down to the table below and select any method to fix it so that it does not occur again. But if the computer does not boot normally, follow either of these methods to boot it first.
Option 1: Hard Reset The Computer
Step 1: Press and Hold the Power Button of your PC to turn it off.
Step 2: Disconnect the main power cable and battery if possible for at least a couple of minutes.
Step 3: Finally, reconnect the power cable and turn on the computer.
Check if the computer reboots to a normal mode. Else, try the second option to boot in Safe Mode.
Option 2: Boot In Safe Mode
Safe Mode, also known as the diagnostic mode, was inculcated by Microsoft in all Windows operating systems to help users resolve issues by rebooting the OS with a minimal set of drivers and running only the most essential system processes services. Most errors, including red Screen and BSOD, will not occur in Safe Mode. Users can uninstall a recently installed program, update drivers or revert the system to a stable state using a previously created system restore point.
Note: If your system boot normally to your desktop screen, you must consider following these steps mentioned below to ensure that the Red Screen in Windows 10 does not appear again on your PC.
Revert Back Any Recent Changes
Revert Your System From A Restore Point
Method 1: Revert Any Recent Changes
The first step you must take to resolve red screen windows 10 is to remember the changes you have made in the past couple of days and undo them. For example, if you have installed any application, then try uninstalling it. The Windows 10 Red Screen generally occurs after a major change in the system. If you just undo the change, then there is a possibility that the Red Screen in Windows 10 will not occur again.
Method 2: Remove Your Peripherals


Another reason for Red Screen in Windows 10 is that an external device connected, which creates a conflict with your system. To identify this issue and the reason, you must use a trial and error method. Disconnect all the peripherals and external devices except the mouse and Keyboard and check if you are receiving the same issue.
Then attach each device one by one and identify which device causes the Red Screen of Death. You can either replace the device or look for compatible drivers for the device.
Method 3: Run The System File Checker
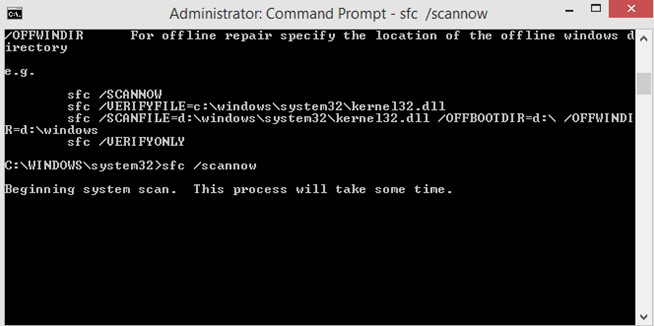
Once you have confirmed that no peripherals are causing this issue, it is time to check your computer’s system files. Microsoft has inculcated the SFC or the System File Checker into the Windows operating system and can be used anytime to check and repair the system files. To use SFC, follow the below mentioned steps:
Step 1: Type Command Prompt in the search box on the taskbar and make a right-click on the Command Prompt in the Best Match result.
Step 2: From the contextual menu, choose Run As Administrator to run the Command Prompt in elevated mode.
Step 3: Now type SFC/Scannow in the black and white window and press Enter.
Step 4: Let the process complete to 100% and then reboot your computer.
Once your computer restart, use the computer for a while and check if you receive the red screen windows 10.
Method 4: Update Your BIOS

The next resolution to fix Windows 10 Red Screen is to update the Basic Input/Output System of our computer. The BIOS is the first screen you see when you turn on the computer, which loads all the system kernel files and boots the OS. It also checks all the hard disks and other devices connected to the system. Updating BIOS will be different for different computers, but the general idea is the same.
Step 1: Press Windows + R to open the RUN box and type msinfo32 in the text space.
Step 2: Press the OK button, and a new window will open where the System Summary will be displayed.
Step 3: On the right side of the pane, locate BIOS Version/Date, which will tell you about the hardware and the date it was last updated.
Step 4: Search for the original manufacturer’s website and open it on your browser. Check the Support or Download section and enter your BIOS model name in the search box.
Step 5: You will find the latest updated drivers and files. Download them and double-click to begin the installation process. Follow the on-screen instructions, and the BIOS will be updated.
Step 6: Restart your computer and check if the Windows 10 Red Screen issue reoccurs.
Method 5: Update Drivers
Another method recommended in troubleshooting the Red Screen in Windows 10 is to update your computer’s drivers. Drivers are an essential component of the Windows operating system and help communicate between the hardware and the software. In other words, if you have specialized hardware like a GeForce RTX 3090 Graphics card but you will not be able to enjoy its full potential until you have the updated and compatible drivers install in your system. For most of us not updating the driver, this state of the art graphic card will function as a normal VGA card.
To update the drivers, you can use the manual method of updating each driver by either downloading the latest version from the OEM website using the Device Manager to detect an updated driver on the Microsoft Server. Both of these methods consume time and effort and require medium technical skills. Instead, you can opt for reliable software to update drivers like Smart Driver Care to help you resolve all your driver issues with the utmost convenience and ease. Updating all drivers in one go can never be done with such swiftness and a matter of a few mouse clicks. Here are the steps to use Smart Driver Care:
Step 1: Download and Install the Smart Driver Care from the link given below:
|
|

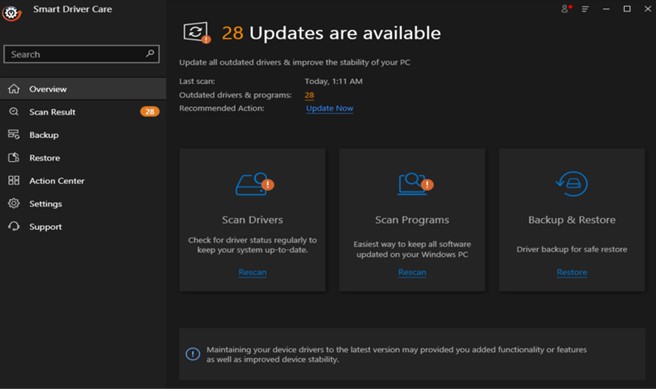
Step 2: Launch the application after the installation process completes and register the program.
Step 3: Next, click on the Scan Now button to commence the scan process on your PC for driver issues.
Step 4: Now, all the potential driver errors will be displayed. Choose the driver you wish to update.
Step 5: Click on Update button to update drivers one by one. However, if you have a premium version, click Update All and wait for the process to complete.
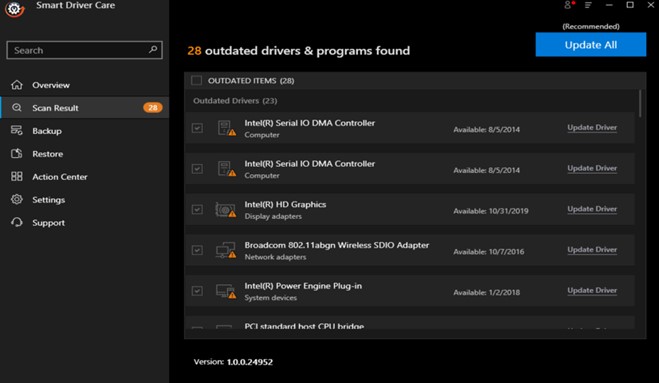
Smart Driver Care will scan your system and replace all the outdated, missing, and corrupt drivers with the most updated and compatible ones from the internet.
Method 6: Revert Your System From A Restore Point
Windows 10 allows users to create and store a snapshot of the settings of the OS and also revert back to the previous stable state. So if you have created a restore point before you faced a red screen error then you can restore to the previous state. Here are the steps to do that:
Step 1: Press Windows + R to open the Run dialog box.
Step 2: Type rstrui.exe in the text space and then press Enter.
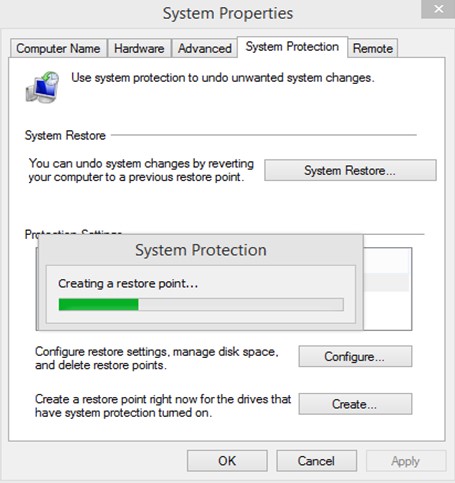
Step 3: A new window will open were you have to click on next and then choose among the dates listed.
Note: Choose a date previous to the time you first saw the Windows 10 red Screen on your computer.
Step 4: Click on next and follow the onscreen instructions to restore your system to a previous date.
Note: You will lose any programs or system settings done after that date you have chosen. However this will not affect your data stored on the computer.
The Final Word On How To Solve Windows 10 Red Screen Issue
Windows 10 Red Screen is not as dreaded as the BSOD which immobilizes the user and does not allow him/her to do anything on the computer. A simple restart in most cases restores your system back to the normal state but it is necessary to follow the above steps to ensure that it does not appear again.
Follow us on social media – Facebook, Twitter, LinkedIn, and YouTube. For any queries or suggestions, please let us know in the comments section below. We would love to get back to you with a solution. We regularly post on tips and tricks, along with answers to common issues related to technology.