
Are you tired of dragging your fingers along an overly-sensitive touchpad? Does your click button lack tactility & bogs down while playing games? Or do you need a super-comfortable ergonomic solution like a wireless mouse or maybe a cost-efficient wired mouse that easily gets plugged into the matching port?
Whatever the reason, maybe you’ve decided to pair a dedicated mouse to your Windows 10 PC or laptop. Here’s your straightforward guide with step-by-step instructions to install a new wired & wireless mouse!
| TABLE OF CONTENTS |
|---|
| PART 1: How Do I Install A New Wired Mouse On Windows 10 PC? |
| PART 2: How Do I Install A New Wireless Mouse In Windows 10 PC? |
| PART 3: What To Do If My Mouse Won’t Work? |
PART 1: How Do I Install A New Wired Mouse On Windows 10 PC?
Follow the instructions properly to connect a wired USB mouse:
STEP 1- Simply connect the USB cable attached with the mouse to one of the USB ports, as shown in the image below.
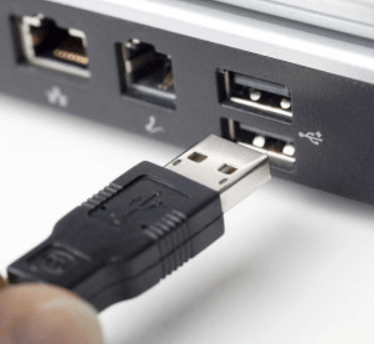
STEP 2- You can find the USB port usually on the back or side of the Windows 10 PC or Laptop. Have a USB Port hub? Connect the mouse cable securely to that and complete the pairing process.
STEP 3- As soon as the wired mouse gets connected, your computer should automatically install the essential drivers needed to work properly without any lags.
Note: Additional software may be required if your mouse has certain special buttons.
This is how you can easily connect and pair wired mice to Windows 10 computers or l00000000aptop. Wireless mouse users can refer to the steps mentioned below!
PART 2: How Do I Install A New Wireless Mouse In Windows 10 PC?
The majority of the wireless mice rely on an onboard transmitter that allows the device to communicate with a receiver inside the PC or Laptop to make suitable connections. However, most of the desktops & laptops have a built-in Bluetooth radio. But in case your device doesn’t support Bluetooth functionality, you need to get a Bluetooth Adapter or choose a wireless mouse with a USB dongle that serves as a receiver.
In the steps below, we are assuming your computer or laptop has integrated Bluetooth radio.
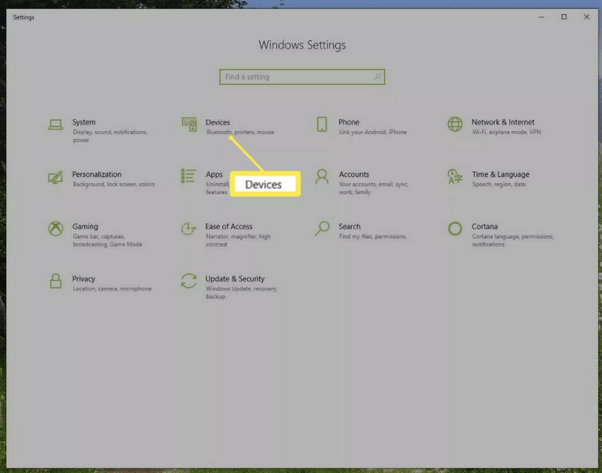
STEP 1- Go to the Settings app & navigate to the Devices section.
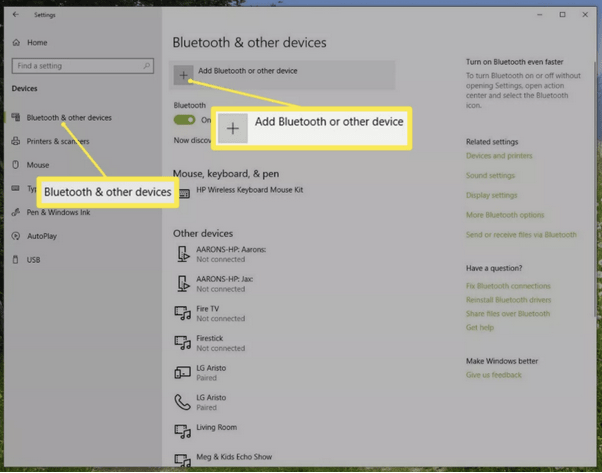
STEP 2- Head towards the Bluetooth & other devices menu and hit the (+) icon to Add Bluetooth or other devices carefully to your PC or Laptop.
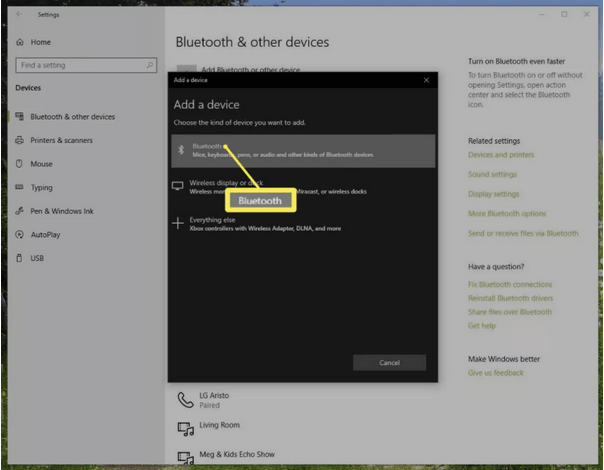
STEP 3- From the next pop-up, you need to click on the Bluetooth option to add your wireless mouse as a new device. (Turn on the mouse if it has a turn on/off switches) Keep patience and let the Bluetooth functionality work and detect the wireless mouse. Once the pop-up appears, click on the Pair button to complete the connectivity process.)
Follow the on-screen instructions carefully and install the new mouse in pairing mode. Once the process is completed, Windows will automatically detect the new mouse and simultaneously add relevant drivers to work smoothly.
Note: Make sure you check the compatibility between your Windows 10 PC/Laptop and Mouse before purchasing it. Keep some batteries aside for your wireless mouse. Usually,
“AA” batteries are used in wireless mice.
Must-Read = Best Free Bluetooth Software for Windows 10 PC In 2020
PART 3: What To Do If My Mouse Won’t Work?
Every new mouse gets discoverable to Windows 10 PC’s & Laptops, depending on its manufacturer. So, make sure you quickly go through the instruction guide with the mouse you are about to install and connect to your computer.
In case you are still struggling with proper functioning, it might be because your new Mouse Drivers are missing or not running the latest or most compatible version. To get through, we recommend our users to get a dedicated driver updater utility like Smart Driver Care. Using this professional Windows drivers installation software, you can get the latest and correct versions of each device driver running on your computer. Refer to this guide to learn how to choose the best driver update tool for your PC?
How To Use Smart Driver Care To Get Latest Mouse Drivers?
Smart Driver Care’s trial version allows users to update two drivers per day. If you want to update more device drivers, you need to switch to the paid version.
STEP 1- Download, install, and launch Smart Driver Care. Register to the paid version so that you can use all the features without any hassles.

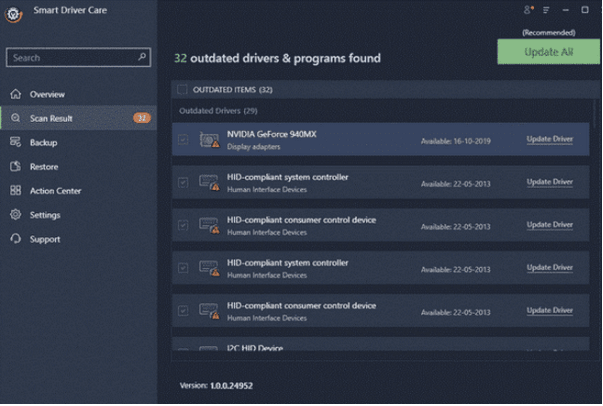
STEP 2- Click on Start Scan now button to let the Smart Driver Care scan and list all the faulty, damaged, missing, and incompatible drivers.

STEP 3- If you see the faulty Mouse Drivers, you can update them individually or simply click on the Update All button.
Note: If you have the trial version of Smart Driver Care, you can update two drivers in a day.
This will ensure you have the latest and most compatible Mouse drivers running on your PC and Laptop. Hopefully, it resolves all the mouse connectivity issues!
Camila Saunders
Wireless mouse are more easy to operate and maintain. Do you think wireless keyboards also have the same features?