
Memory compression is a technology, that helps prevent your RAM from filling up too quickly. By default, Windows enables memory compression, but you can turn it off if you’d like. But what exactly is memory compression, and should you ever turn it off? Let’s examine this feature a little more closely.
Additionally, if you want to enhance your understanding of Windows’ security features, you might find it interesting to explore the concept of: What Is Core Isolation Memory Integrity On Windows?
Why Is Memory Compression So Important?
Windows has a function called memory compression that dynamically shrinks data size before copying it to RAM. This method eliminates the requirement for Windows page files, allowing your computer to store more data in physical memory than it otherwise could. Memory compression is a useful feature because it can considerably reduce paging, which can significantly slow down a computer when RAM is heavily utilized. Other benefits include:
- Your apps will run more quickly and smoothly as your computer can store more data in physical memory.
- Since the disk utilization will be lower, your computer’s memory requirements won’t put excessive strain on your storage drives.
- Reduced disk usage also result in lower power consumption for your computer.
- It might delay the need for a RAM upgrade.
Also Read: How To Reset Virtual Memory On Windows 11
How To Check Memory Compression On Your PC?
If you wish to check the status of Memory Compression on your PC then you can use the inbuilt Task Manager app. Here are the steps:
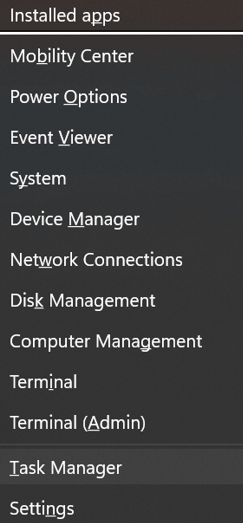
Step 1: Press Win + X to open the Windows Power menu.
Step 2: Choose Task Manager from the list of options.
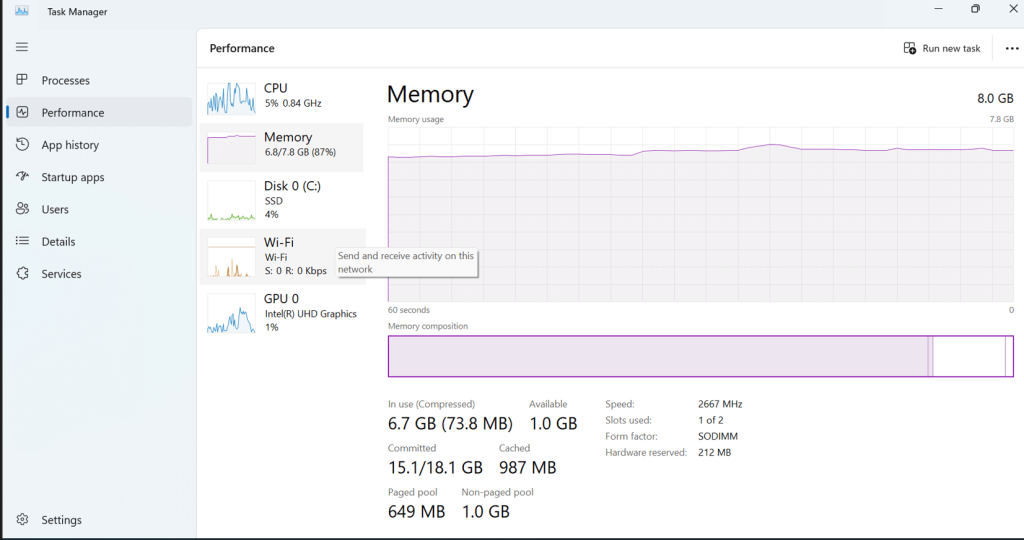
Step 3: A new window will open where you have to click on the Performance tab on the left panel.
Step 4: Click on the Memory sub tab and notice the memory details which also state how much memory is compressed.
Also Read: How To Fix “The Memory Could Not Be Written” Error On Windows
How To Activate Memory Compression On Windows?
Here are the steps to manually enable the Memory Compression feature on your computer. You will need to use the Windows PowerShell for that.
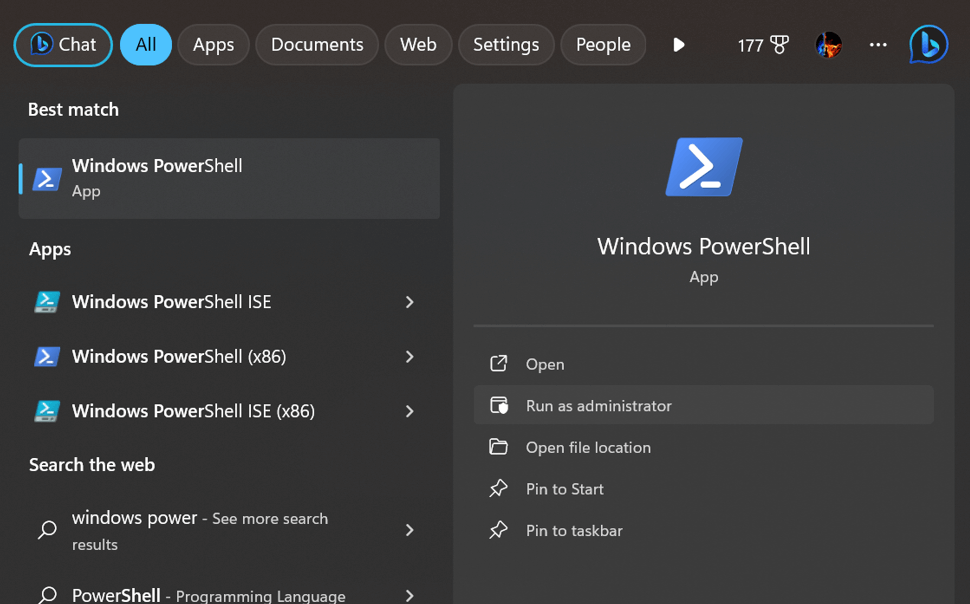
Step 1: Press Win + S to open the Search box.
Step 2: Type “Windows PowerShell”.
Step 3: The Windows PowerShell app will arrive under best match results. You will have to click on the Run As Administrator option to open the PowerShell in elevated mode.
Step 4: Enter the following command:
Enable-MMAgent -mc
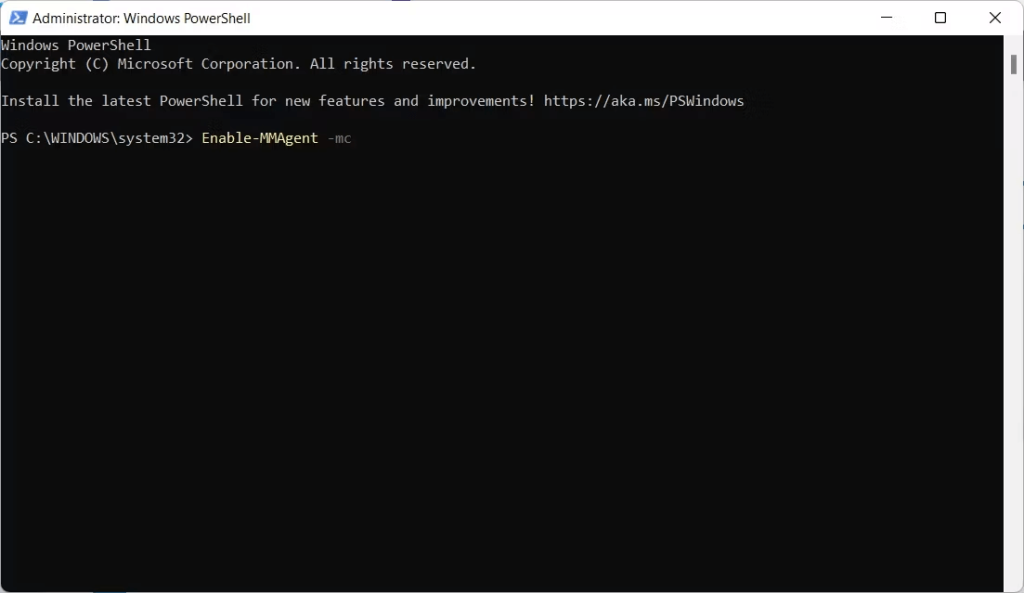
Step 5: This will enable the Memory Compression on your Windows PC
Also Read: How To Fix The GPU Memory Is Full Error On Windows 11
How To Deactivate Memory Compression On Windows?
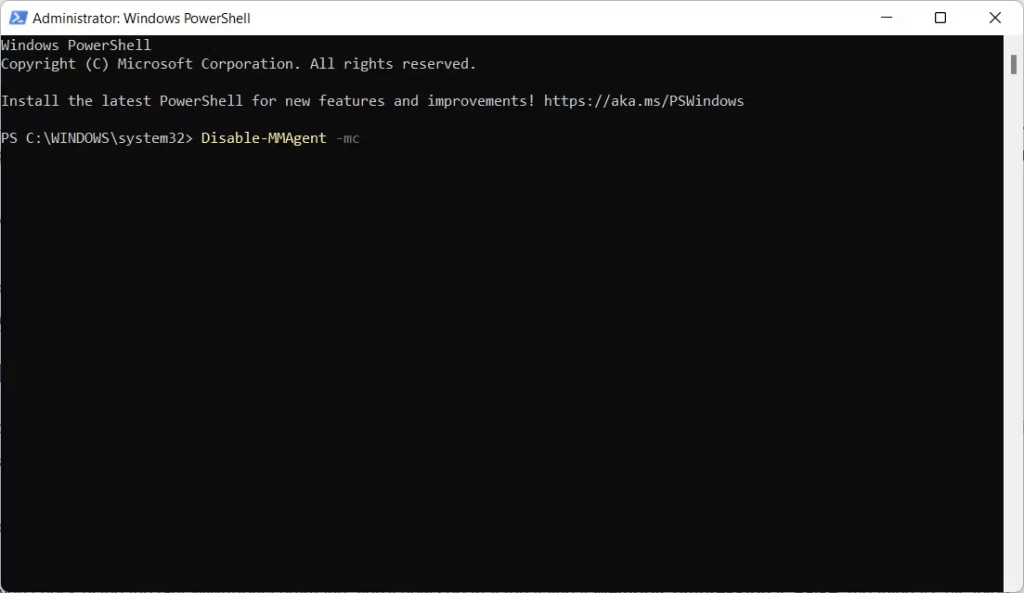
While memory compression is crucial, there may be times when you want to turn it off. For instance, you might not require memory compression if your machine has plenty of RAM, or the feature might interfere with an essential driver or app. Or, you might simply prefer to have it turned off. Regardless of the reason, you can stop memory compression by launching PowerShell as an administrator and entering the following command:
Disable-MMAgent -mc
How To Check If Memory Compression Is On Or Off?
Given that you don’t receive a confirmation message informing you if memory compression has been enabled, you can easily verify it via PowerShell. To do that, launch PowerShell as an administrator, enter the command listed below, and hit the Enter key.
Get-MMAgent
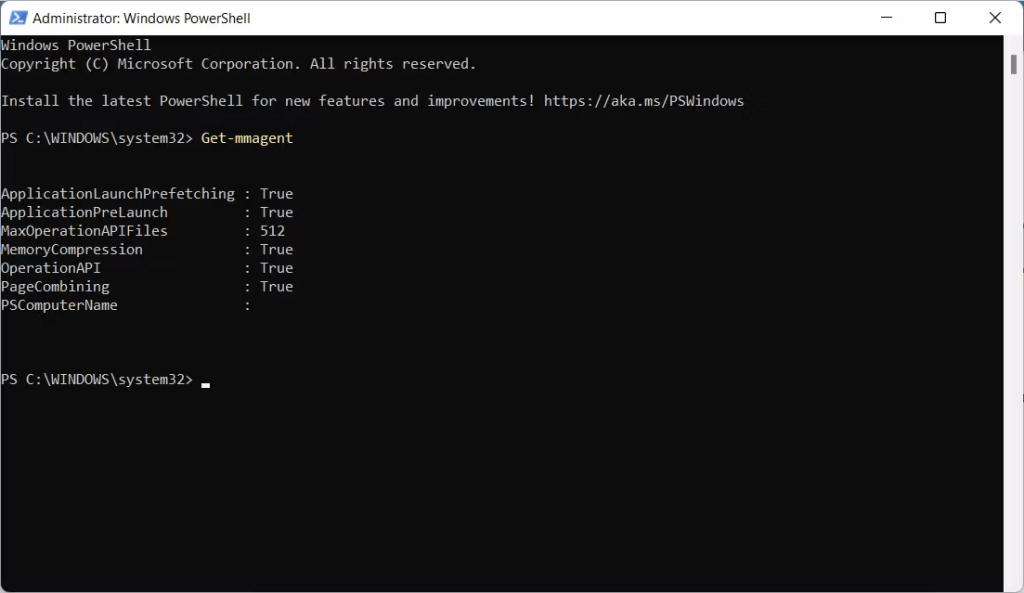
If the Memory Compression is enabled then it will mention “True”, if it has been turned off then you will find “False”.
Also Read: How To Fix The Memory Integrity Feature Grayed Out On Windows PC
Bonus: Use Advanced System Optimizer To Optimize Your Memory
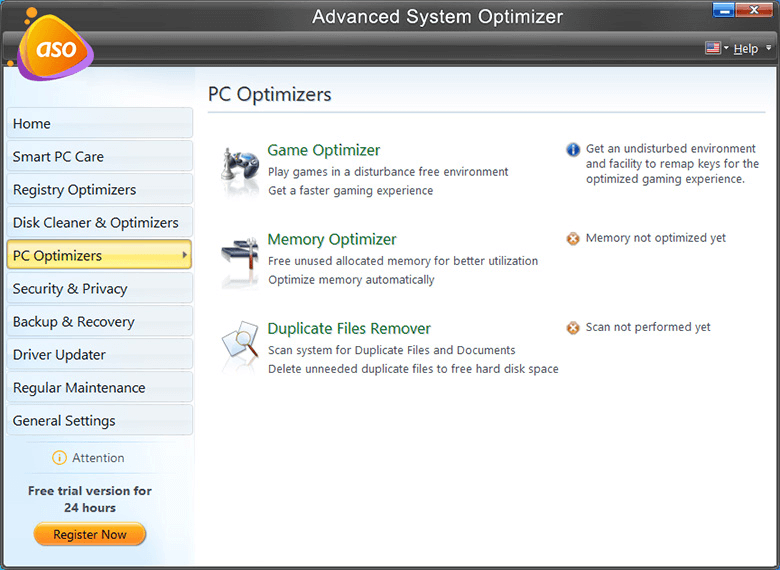
Advanced System Optimizer is a complete PC optimization tool that can maintain your PC by performing thorough cleaning, so that it delivers optimal performance. There are many modules bundled in the Advanced System Optimizer software like duplicate finder, drive update, junk files cleaner, and more. It also features a special module to optimize your memory known as Memory Optimizer. This module helps users to free up RAM from the current process so that they can launch and run new apps swiftly. This module also helps boost the overall PC’s performance and speed.

Maximize Efficiency By Enabling Memory Compression in Windows!
Now that you understand what memory compression is, why it is significant, how to enable or disable it, we strongly advise against turning it off Memory compression plays a crucial role in freeing up RAM for optimal performance. It assists you in preventing bulk of issues that can arise when your physical memory is exhausted. The feature ensures your computer doesn’t have to store files in secondary storage when they’re not immediately needed.
Please let us know in the comments below if you have any questions or recommendations. We would be delighted to provide you with a resolution. We frequently publish advice, tricks, and solutions to common tech-related problems. Follow us on social media – Facebook, Instagram and YouTube.
Next Read:
Your System Has Run Out of Application Memory; How to Fix?
How To Fix The “Not Enough Physical Memory Is Available” VMware Error In Windows