Core isolation is a security technique that keeps Windows operating system functions isolated from the operating system and its devices, protecting them from malware. Windows makes this possible through virtualization. Only high-security processes are isolated from the rest of the system by memory integrity, a component of core isolation, preventing malware from reaching them during an attack.
Also Read: How To Reset Windows Security In Windows 11
How To Enable/Disable Core Isolation Memory Integrity on Windows?
There are two different ways to turn on and off the Core Isolation Memory Integrity on Windows. We have covered both ways in detail. You can choose anyone and expect the same result from both of them.
Method 1: Windows Security Application
Step 1: Press Win + I on your keyboard to open Windows Settings.
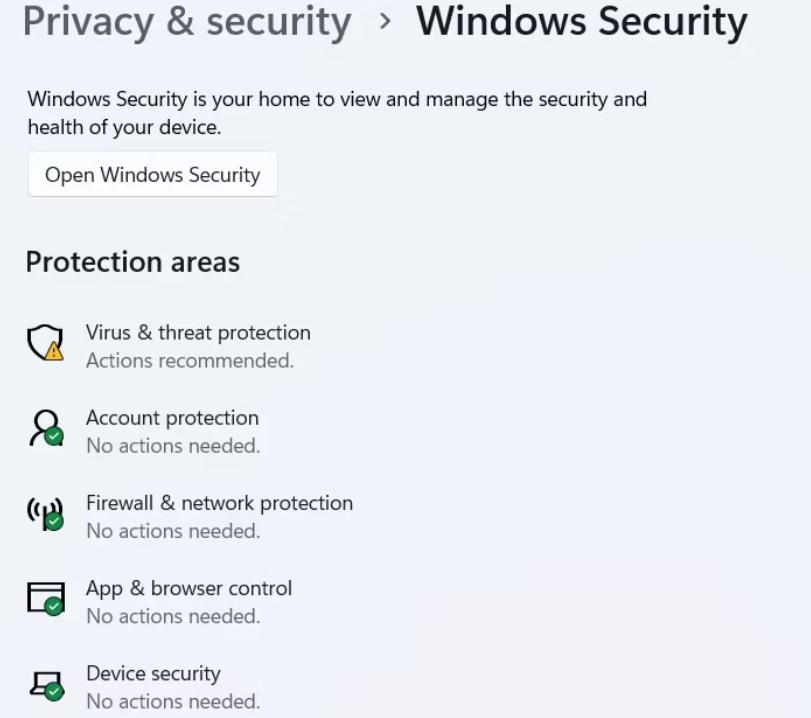
Step 2: Next click on Privacy & Security tab in the left panel and then click on Windows Security on the right side.
Step 3: Next, click Open Windows Security and the app will open.
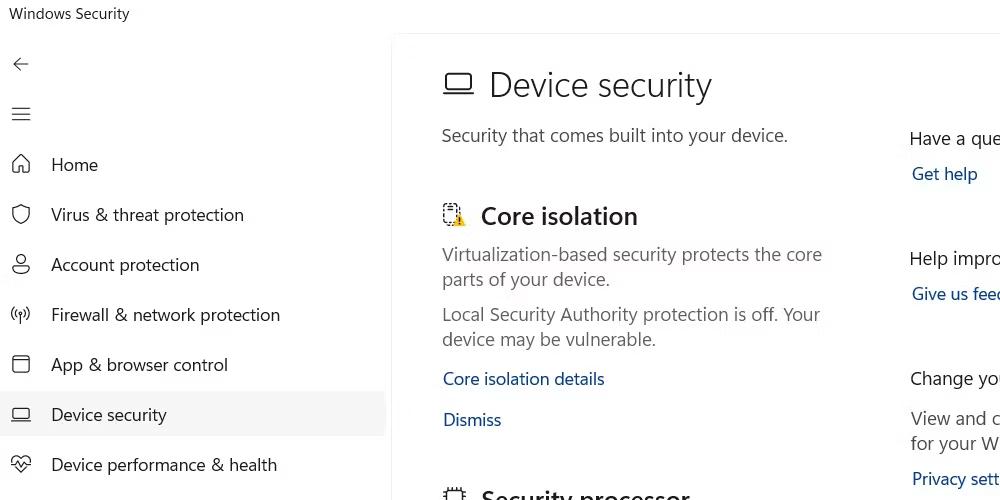
Step 4: Once the app launches, click on the Device Security tab on the left panel of the tab.
Step 5: Now click on Core Isolation Details on the right side.
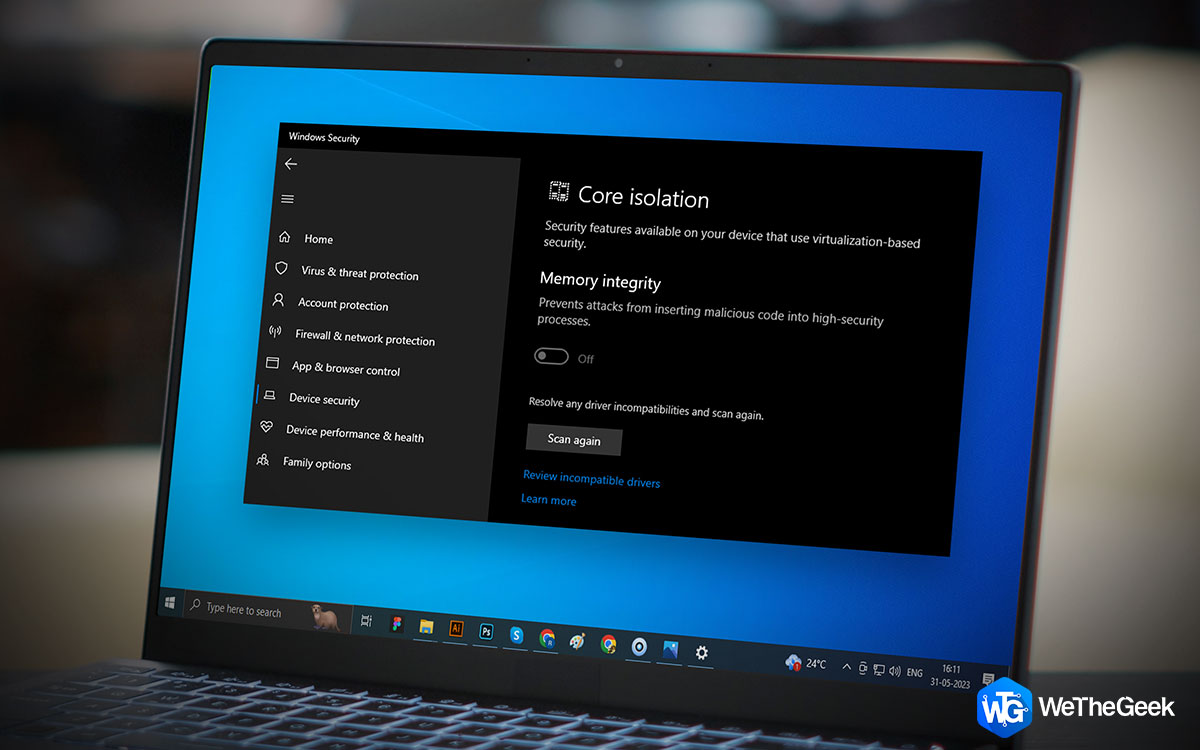
Step 6: You will now find the Memory Integrity option with a toggle button.
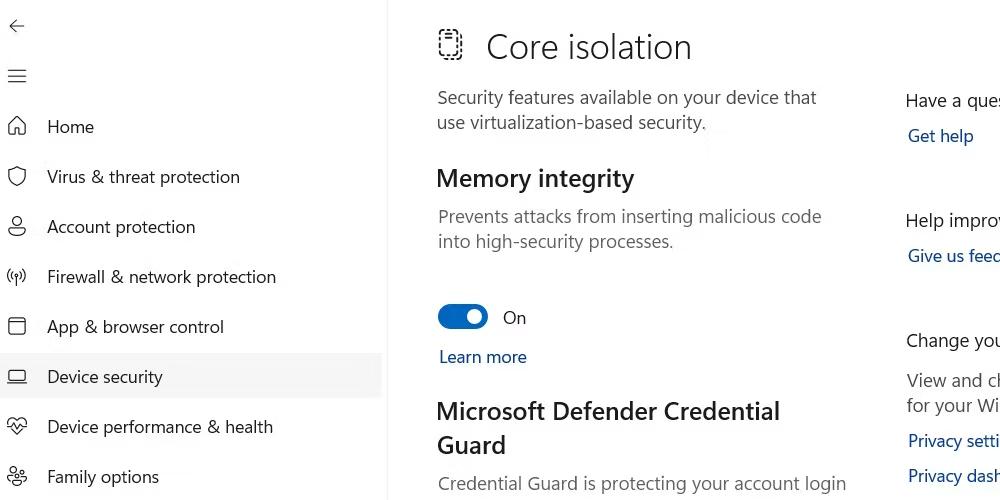
Step 7: You can slide the toggle button towards the right to enable it and vice-versa.
Step 8: Reboot Your PC.
Also Read: How To Fix Windows Security Showing Blank Screen in Windows 11, 10
Method 2: Windows Registry Editor
Note: It is important to take a registry backup before making any changes to any registry entries.
Step 1: Press Win + R to open the RUN box.
Step 2: Type regedit in the text space and hit the OK button.
Step 3: Click Yes on the User Account Control prompt box.
Step 4: Now, copy and paste the following path into the address bar of the Windows Registry Editor:
HKEY_LOCAL_MACHINE\SYSTEM\CurrentControlSet\Control\DeviceGuard\Scenarios\HypervisorEnforcedCodeIntegrity
Step 5: Look at the right panel of the Registry Editor and locate the Enabled key. Double-click this value to edit it.
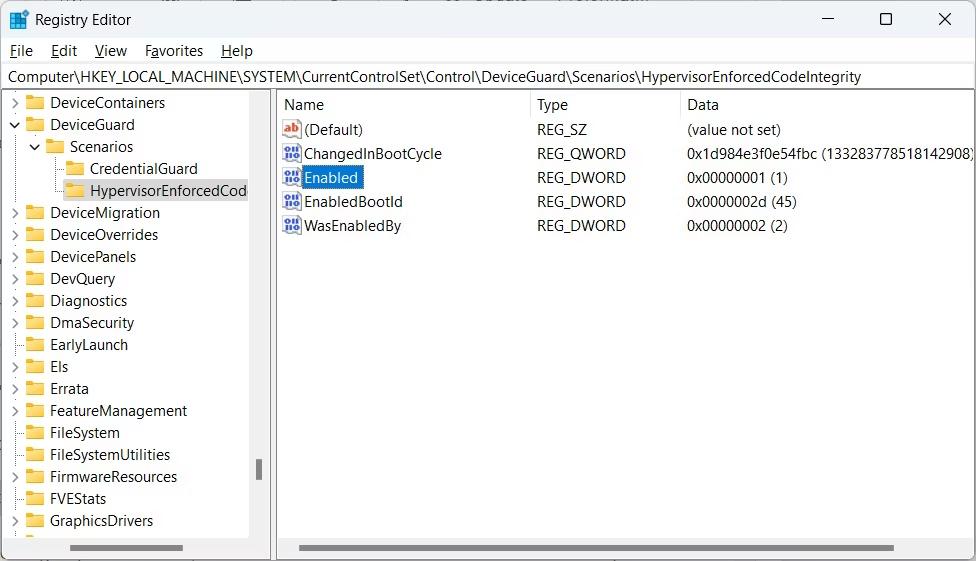
Step 6: To enable the Core Isolation Memory Integrity on Windows, you need to enter “1” under the Value Data field. To disable, enter “0”.
Also Read: How To Fix The “Your IT Administrator Has Limited Access” Windows Security Error
What to Do if Core Isolation Memory Integrity Won’t Turn On
If you get an error message stating that “Memory integrity is off”, you should head to the Windows Security app to alter the settings. However, you may discover that the toggle for core isolation and memory integrity is grayed out when you try to enable it in the Windows Security app. Sometimes it won’t be greyed out, but no matter how many times you click it, it won’t turn on. In that situation, you should try using the Registry Editor to turn the feature on and off.
Also Read: Windows Security App not Working? Here’s the Fix! (Windows 11/10)
Bonus Feature: Use T9 Antivirus To Protect Your PC On Real-Time
There are many antivirus apps to protect your PC in the app market. But we have discovered a real-time antivirus that is monitoring your PC at all times and detects malware and other infectious files and apps. This app offers a bundle of other features as well in addition to malware and exploit protection:

StopAllAds. You can install an ad blocker at no cost.
Startup Manager. Remove apps that launch at boot and improve your PC restart time.
Web Protection. Protects users from phishing websites and monitors inbound traffic.
Remove Junk. Delete junk and obsolete files to gain the lost storage space and make the PC faster.
Shred Files. Permanently remove sensitive files or shred them to make them unrecoverable.
Also read: T9 Antivirus 2023 Is It A Good Antivirus? (Full Review)
The Final Word On What Is Core Isolation Memory Integrity on Windows?
An additional layer of malware defense is provided by a feature called Core Isolation Memory Integrity. You must choose whether you want to give up some performance for a more secure Windows PC because it comes at a performance cost. Whatever you choose to do, however, it’s very simple to enable or disable the feature.
Please let us know in the comments below if you have any questions or recommendations. We would be delighted to provide you with a resolution. We frequently publish advice, tricks, and solutions to common tech-related problems. You can also find us on Facebook, Twitter, YouTube, Instagram, Flipboard, and Pinterest.