
Are you struggling with a slow and unresponsive Windows 11 PC? It might be due to an overloaded virtual memory. Virtual memory is an essential component of your computer’s performance, but when it gets full, it can cause your system to slow down or even crash. The good news is that you can reset virtual memory on Windows 11 with just a few simple steps.
In this guide, we will show you how to reset your Windows 11 virtual memory, allowing your computer to run more smoothly and efficiently. So, let’s get started and boost your PC’s performance.
What is Virtual Memory on Windows PCs?
Virtual memory is like an extra storage space that your computer uses when it runs out of its regular storage space (RAM) while running programs or applications. It is a space on your hard drive that the computer uses as if it were extra memory. When your computer needs more memory than it has, it moves some of the information that it’s not using at that moment from the regular memory (RAM) to the virtual memory on the hard drive. This helps your computer to run multiple programs at the same time and handle more tasks efficiently.
Virtual memory is crucial for running programs smoothly, but it can harm performance. When RAM runs out, it uses the hard drive to store data, which slows down your computer significantly. In short, while virtual memory is useful, it can impact your computer’s speed and efficiency.
With that said, let’s take a look at how you can reset virtual memory on Windows 11.
Reset Windows 11 Virtual Memory
Method 1: By Utilizing System Properties
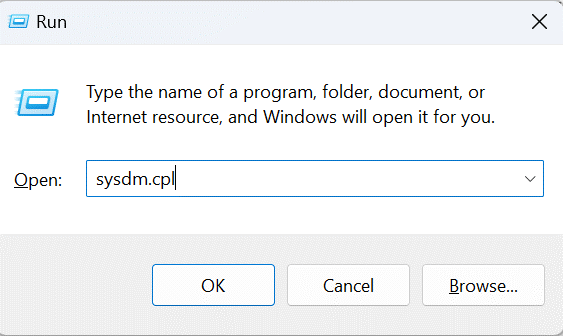
1. Press the Windows key with the key R to open the RUN dialog box.
2. Now type sysdm.cpl and press the Enter key.
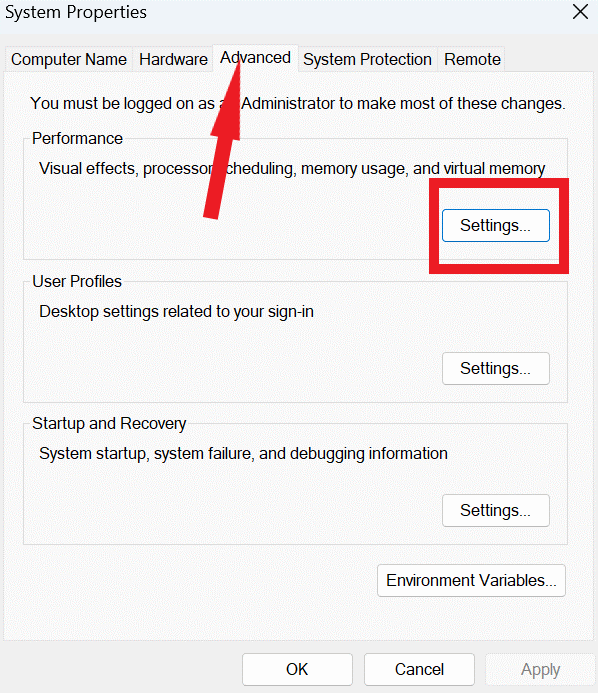
3. The System Properties window will appear in front of you. Click on the Advanced option from the top.
4. Now under the Performance section click on Setting.
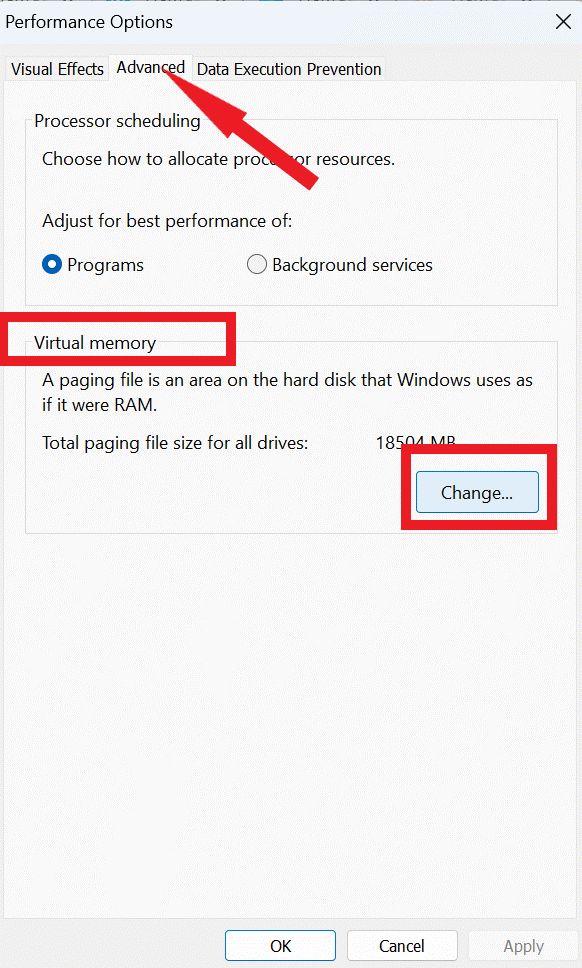
5. A Performance Options window will appear, click on Advanced.
6. Under the Virtual Memory option click on Change.
7. Deselect the checkbox on the top that reads Automatically manage paging file size for all drives. Choose the drive where you want to reset virtual memory. In most cases, this will be the drive where Windows is installed.
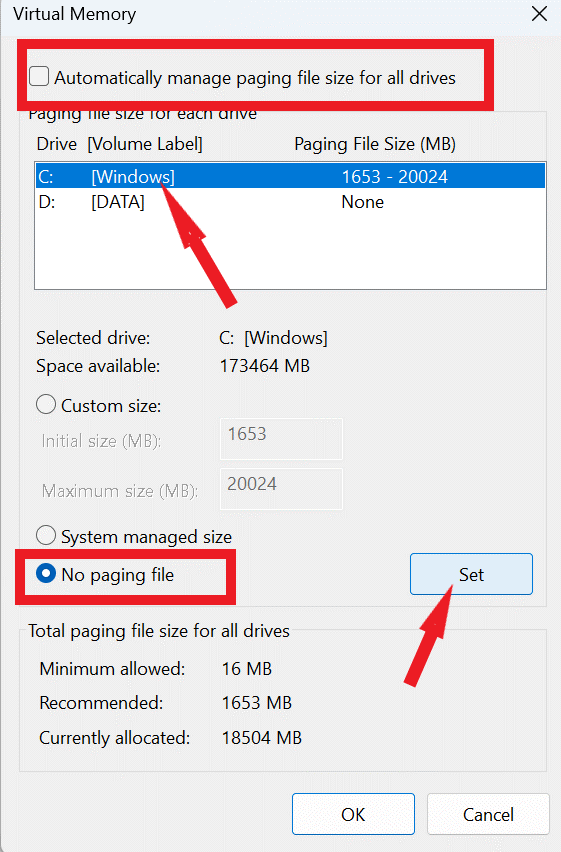
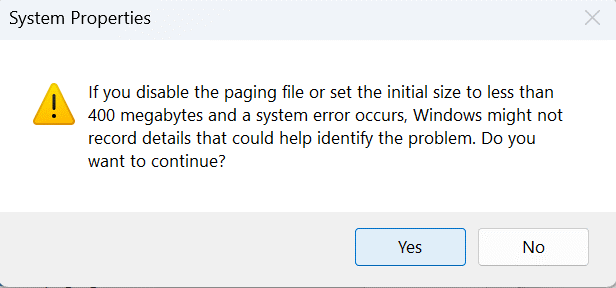
8. Next, select the No paging file option, then click on If a warning message pops up, click Yes.
9. Finally, click on OK to save the changes you’ve made.
After completing the above steps, close all windows and restart your computer. The changes you made to the virtual memory settings should now take effect.
Method 2: By Using Group Policy Editor
1. Press the Windows key with the key R to open the RUN dialog box.
2. Now type gpedit.msc and press the Enter key.

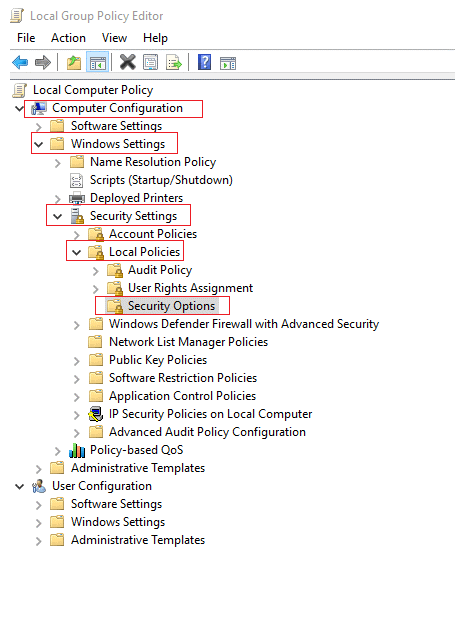
3. Go to this exact path:
Computer Configuration > Windows Settings > Security Settings > Local Policies > Security Options.
4. Scroll down, find, and double tap on Shutdown: Clear virtual memory pagefile.
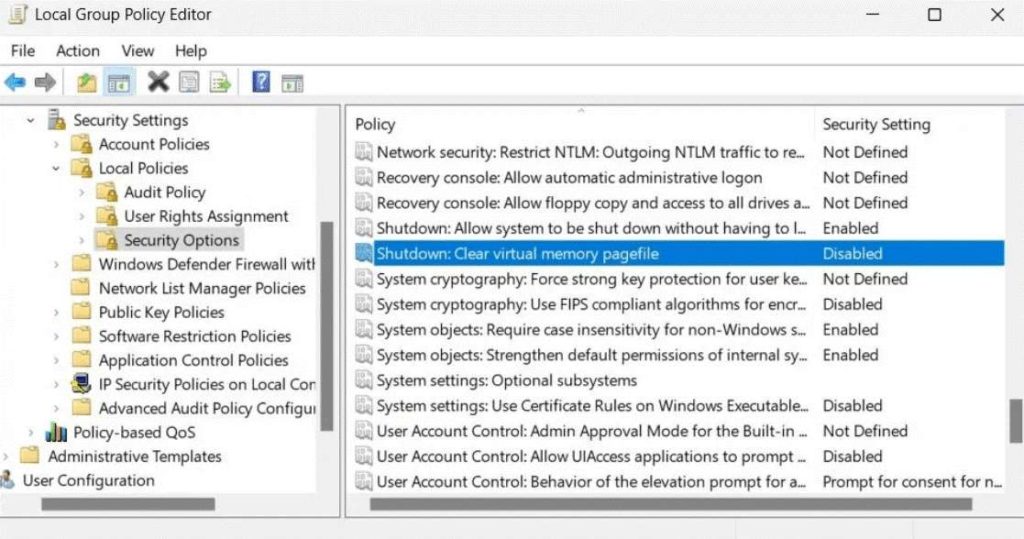
5. To enable the feature, choose Enabled in the Properties window, then click Finally, click OK to save the changes.
Read Also: 8 Ways to Open the Local Group Policy Editor in Windows 11
Method 3: Via Registry Editor
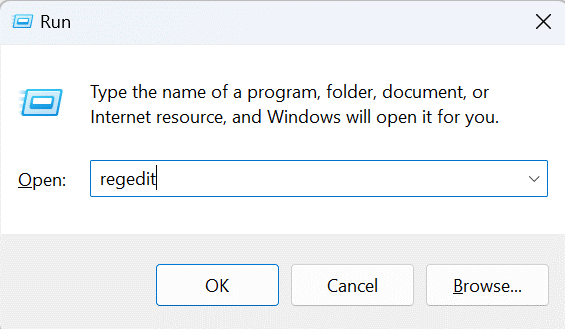
1. Press the Windows key with the key R to open the RUN dialog box.
2. Now type regedit and press the EnterKey.
3. Go to this exact path:
HKEY_LOCAL_MACHINE\SYSTEM\CurrentControlSet\Control\Session Manager\Memory Management
4. Set the value of the ClearPageFileAtShutdown key to 1 by double-clicking it.
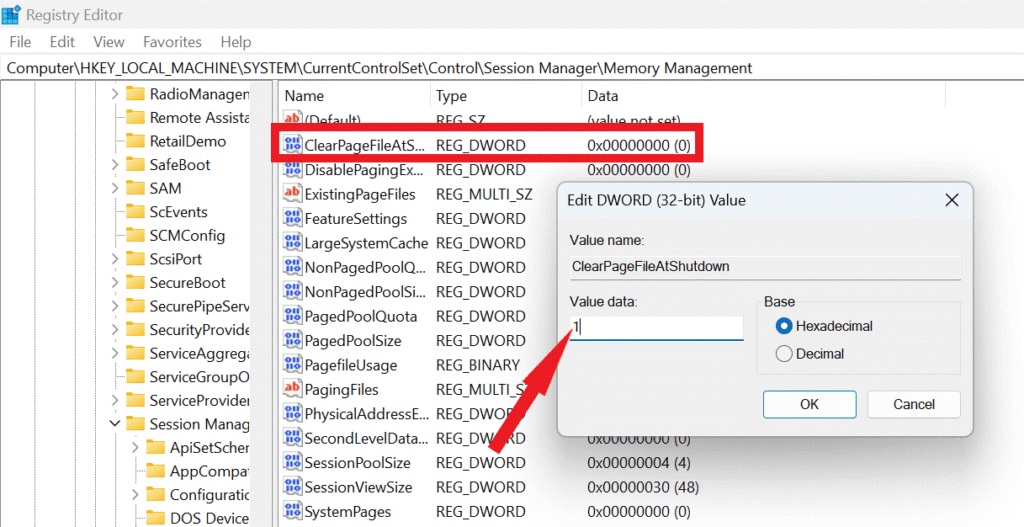
5. Click OK to save the changes you’ve made.
Read Also: How To Fix Registry Editor not Working on Windows 11
To Enhance the Performance of your Computer, Resetting Virtual Memory can be Helpful
Resetting virtual memory can help improve your computer’s performance by freeing up space and reducing the load on your RAM. By following the above steps, you can easily reset the virtual memory on your Windows 11 computer and optimize its speed and efficiency.
For more such troubleshooting guides, listicles, and tips & tricks related to Windows, Android, iOS, and macOS, follow us on Facebook, Instagram, Twitter, YouTube, and Pinterest.
Next Read: