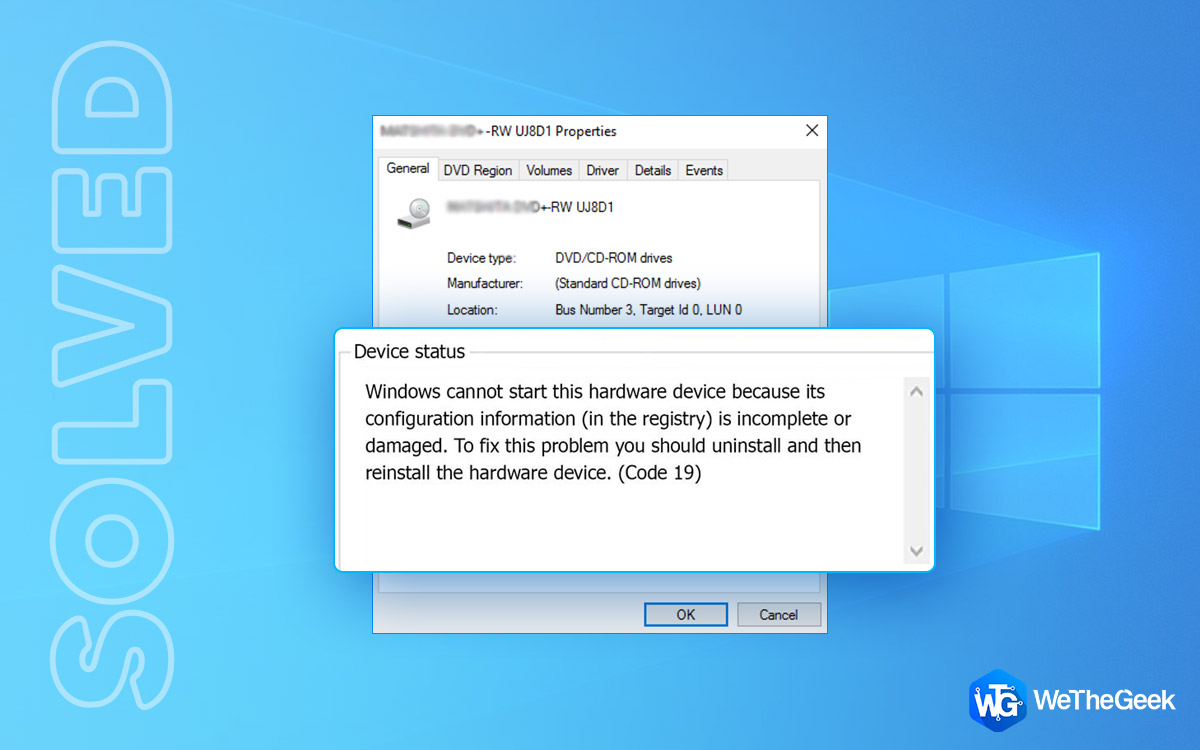
The Code 19 errors are pretty common on Windows OS. There may be a variety of reasons that can trigger Code 19 errors on your device which majorly include corrupt/invalid registry entries, outdated device drivers, hardware incompatibility, and other issues.
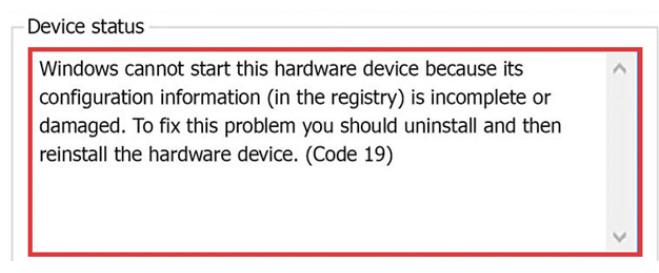
Code 19 errors are majorly encountered when you connect a USB drive or portable disk, insert a CD/DVD on your device. It comes followed with the message stating “Windows cannot start this hardware device because its configuration information is incomplete or damaged”.
So, wondering how you can fix the Code 19 errors on Windows 10? Luckily, you’ve come to the right place. Here are a few workarounds that can help you fix the Code 19 errors via simple troubleshooting.
Also read: How to Fix Error Code 0x80070005
How To Fix Code 19 Errors in Windows 10
Let’s get started.
1. Make Changes in the Registry Editor
To fix the Code 19 error, one of the most effective solutions is to delete invalid Registry entries. We will try making some quick changes in the Windows Registry Editor to get past this issue.
Press the Windows + R key combination to open the Run dialog box. Type “Regedit.exe” in the textbox, hit Enter.
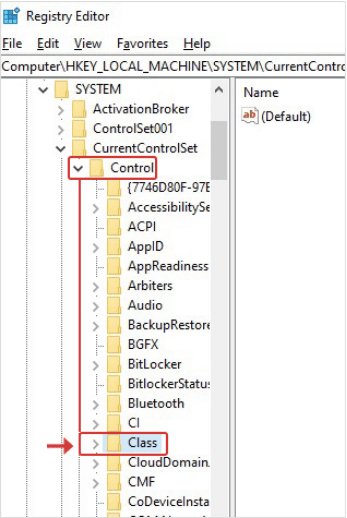
In the Registry Editor window, tap on the “HKEY_LOCAL_MACHINE” option and then hit on the “System” folder.
Navigate to System> Current Control Set> Control> Class.
On the right menu pane, look for a class labeled “36FC9E60-C465-11CF-8056-444553540000)”. As soon as you find it, right-click on it and select “Delete”.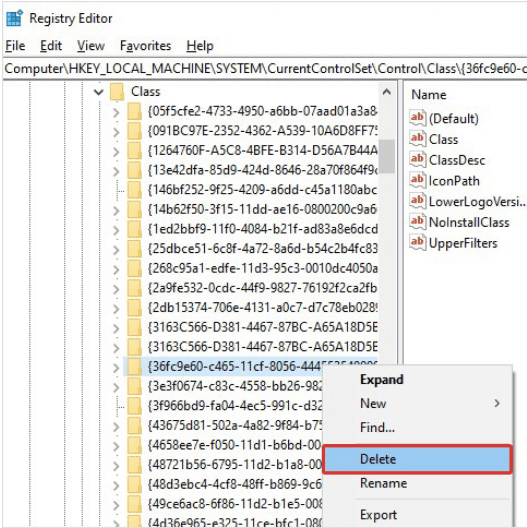
The Registry Editor will now prompt another window on the screen. Delete the “UpperFilters” and “LowerFilters” values as well.
Exit all windows, reboot your device to check if you’re still encountering the Code 19 error on your PC.
Also read: Windows 10 Error Code 45 In Device Manager
2. Update Device Drivers
The next step to fix the Code 19 error instances on your Windows PC is to update the device drivers installed on your system. Follow these quick steps to proceed:
Press the Windows + R key combination to open the Run dialog box. Type “Devmgmt.msc” in the textbox, hit Enter.
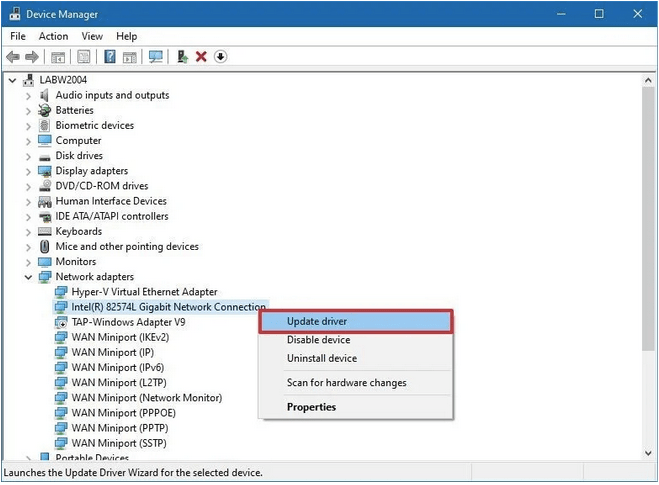
In the Device Manager window, you will see a long list of categories. Tap on each category to see the expanded set of options. Right-click on the device driver, select the “Update Driver” option from the context menu.

Follow the on-screen instructions listed on the wizard and fetch the latest updates of device drivers from the web.
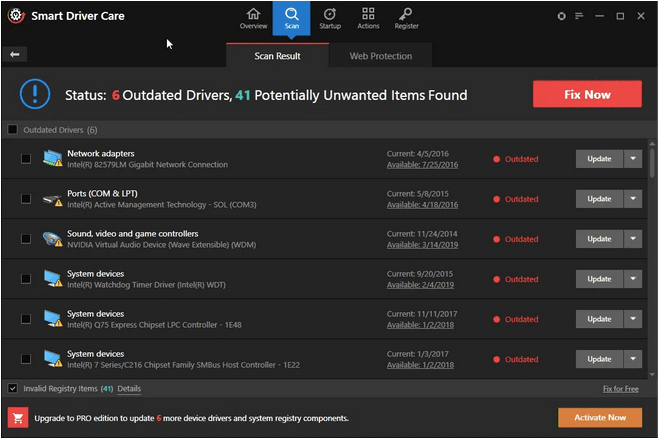

Manually updating the device drivers is a tedious task! To save yourself from all the hassle, you can download and install the Smart Driver Care utility tool. Smart Driver Care is one of the best driver updater tools that automatically scan your device to hunt for corrupt/outdated device drivers and fetches their latest update. With just one click, you can update all the updated device drivers with the help of this nifty driver updater software.
Also read: 7 Best Driver Updater Software For Windows 10, 8, 7 PC
3. Run the Hardware Troubleshooter
You may not be aware of it, but Windows 10 comes packed with a handful of security features, and the Hardware Troubleshooter is one of them. To fix the Code 10 error on Windows,
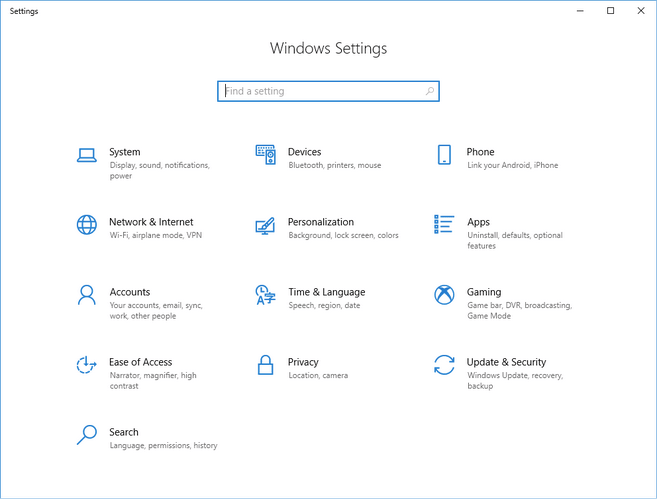
Press the Windows icon placed on the Taskbar. Tap the gear-shaped icon to open Settings.
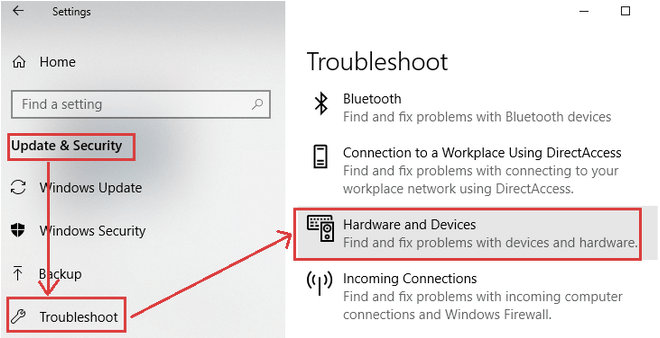
Select “Update and Security”.
Switch to the “Troubleshoot” section from the left menu pane.
Windows 10 offers you a variety of Troubleshooters that you can use to fix common errors and bugs. Tap on the “Hardware and Devices” category as we’re dealing with the Code 10 error in this post. Hit the “Run the Troubleshooter” button placed underneath.
Run the Hardware Troubleshooter on your Windows device. Once the job is done, exit all windows, reboot your device, and check if you’re still facing any issues.
4. Use the System Restore Feature
If the above-mentioned troubleshooting hacks did not offer any luck, you can use the System Restore feature. By using the System Restore feature, you can roll back your device to a previous checkpoint to undo all the recent changes. Here’s what you need to do.
Launch the Start menu search box, type “Create a Restore Point” and hit Enter.
In the System Restore Properties window, switch to the “System Protection” tab and tap on the “System Restore” button.
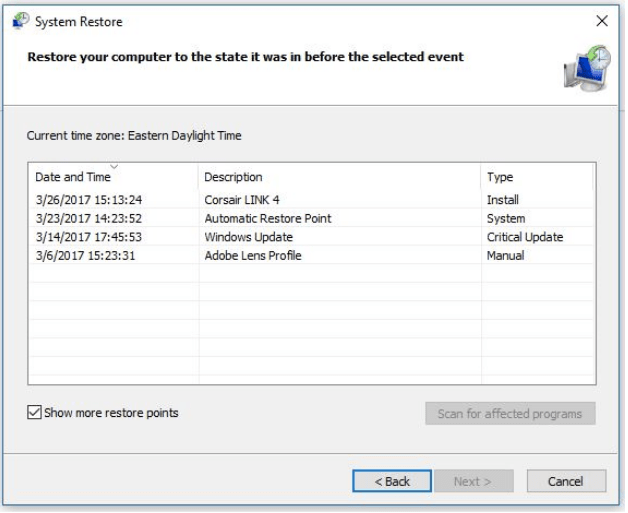
Pick any checkpoint that has been created by your device. Hit on the “Next” button to proceed.
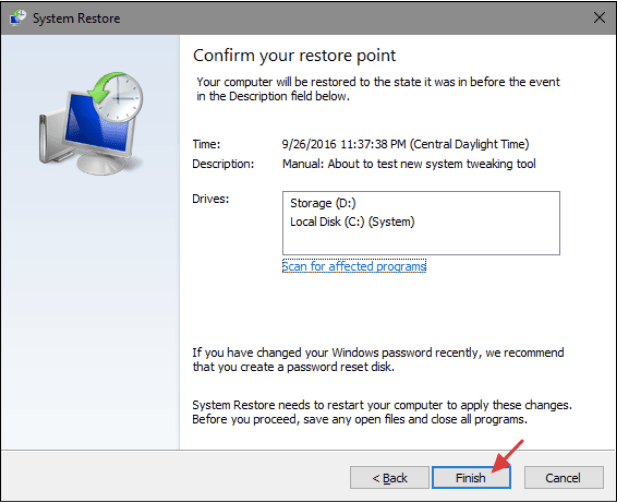
Confirm the Restore Point and then hit the “Finish” button.
Also read: How To Use System Restore In Windows 10
Conclusion
So, folks, this wraps up our quick guide on how to resolve Code 19 errors on Windows via simple troubleshooting. The Code 19 errors are majorly associated with faulty or corrupt device drivers and registry entries. You can use any of the above-mentioned solutions to get past this hindrance.
Do let us know which method worked out the best for you! Feel free to share your thoughts in the comments space.