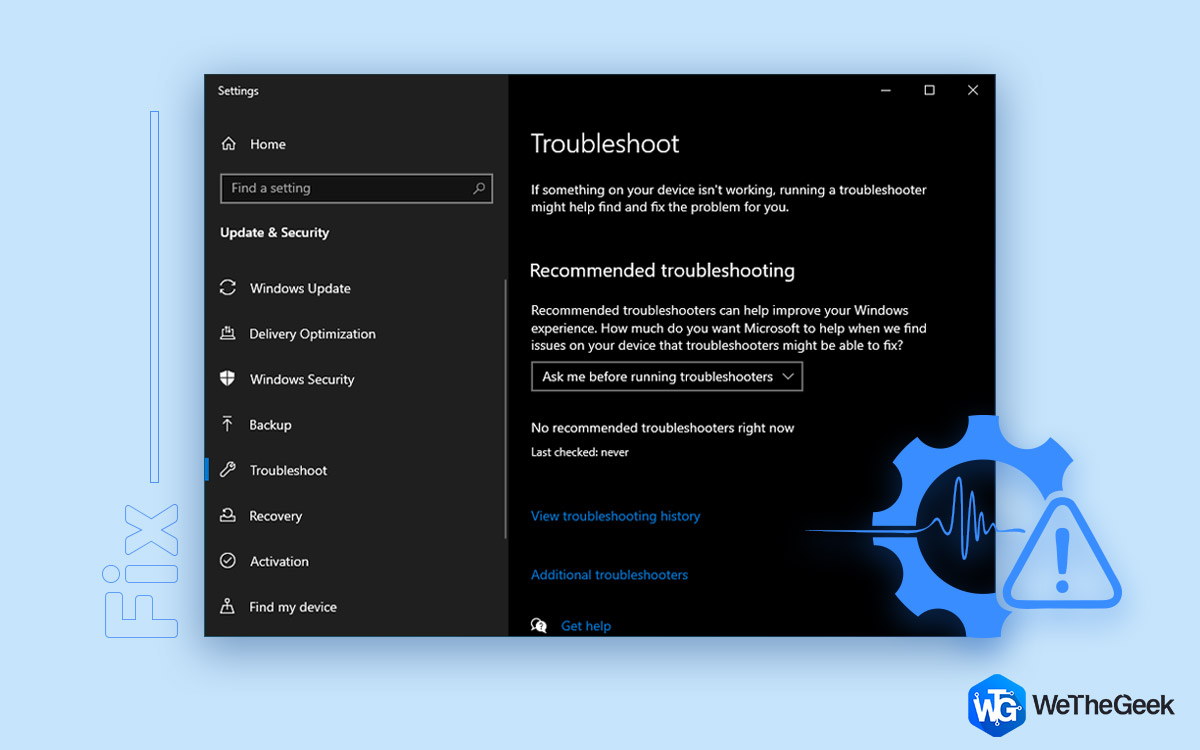
Windows Troubleshooter not working? Don’t worry! You can easily fix the Troubleshooter by making a few quick changes in your device’s settings.
Here you go!
Also read: How To Fix Unknown USB Device Error In Windows 10
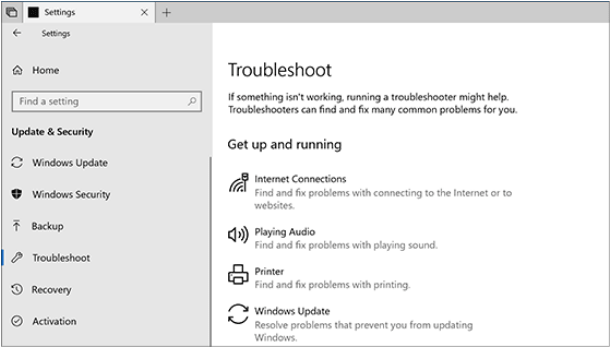
How to Fix Windows Troubleshooter has stopped working
#1 Check the Environment Variables
To make sure whether the TEMP and TMP variables are well set for the C: drive, here’s what you need to do.
Launch the Start menu search box, type “Control Panel” and hit Enter.
In the Control Panel window, type “Environment” in the search box placed at the top-right corner of the screen.
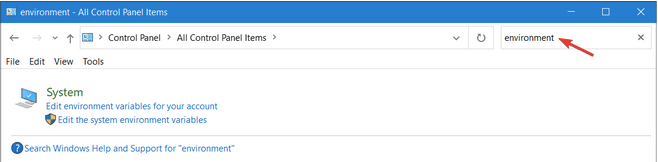
You will see the desired results on the screen. Tap on the “Edit the system environment variables” option.
Now here you need to check whether the value for TEMP and TMP is set or not. If you don’t see any respective variable set, then double-tap on it. Hit the “Edit” button.
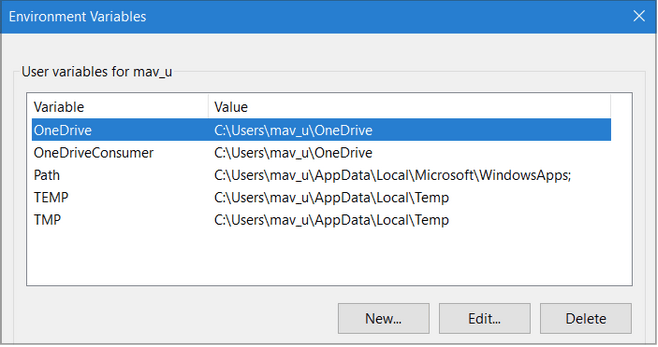
In the Variable Value textbox, type “C:\Temp” and hit the OK button.
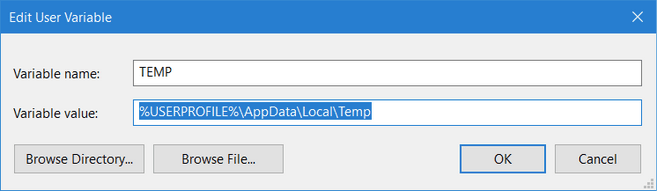
Repeat the same set of steps to assign the value for TMP as well.
Hit the OK button to save the recent changes. Exit all windows and try running the Troubleshooter again to check whether the issue was fixed.
#2 Switch to Safe Mode
Booting your device in Safe Mode is one of the most secure ways to make any changes in system settings, as it loads your device with a minimum set of drivers and resources. To fix the “Windows Troubleshooter not working” issue on your device, we will now try to boot your device in the Safe Mode with Networking.
Tap the Windows icon placed on the Taskbar, select the gear-shaped icon to open Settings. Tap on “Update and Security”.
Switch to the Recovery option from the left menu pane. Tap the “Restart Now” button placed under the Advanced Startup section.
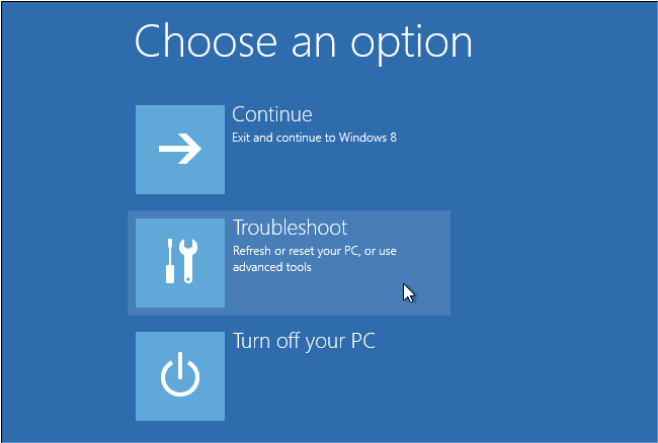
Navigate to Troubleshoot> Advanced Options> Startup Settings.
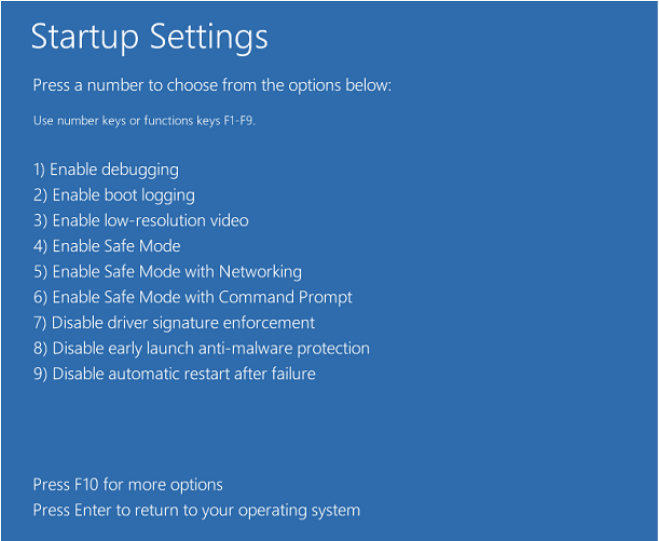
On the Startup Settings page, you will see a variety of options listed with numbers. Hit the Restart button placed at the bottom and when your device restarts choose F5 to pick Safe Mode with Networking.
Once you’ve enabled Safe Mode, try running the Windows Troubleshooter again to see if the issue persists.
Also read: How to Boot into Windows 10 Safe Mode
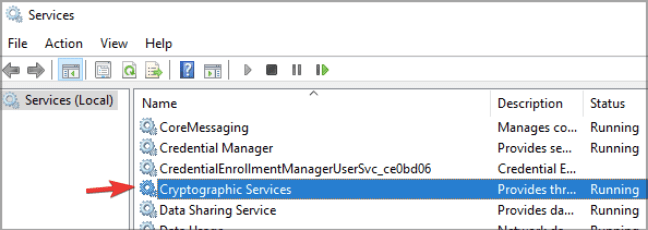
#3 Enable the Cryptographic Service
To make sure that the Windows Troubleshooter is working fine, you need to ensure that the Cryptographic Services are enabled in system settings. Follow these quick steps:
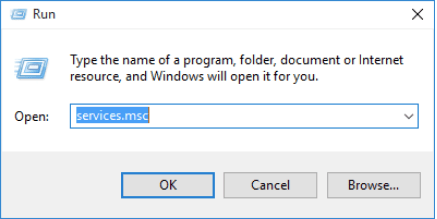
Press the Windows + R key combination to open the Run dialog box.
Type “Services.msc” in the textbox, and hit Enter.
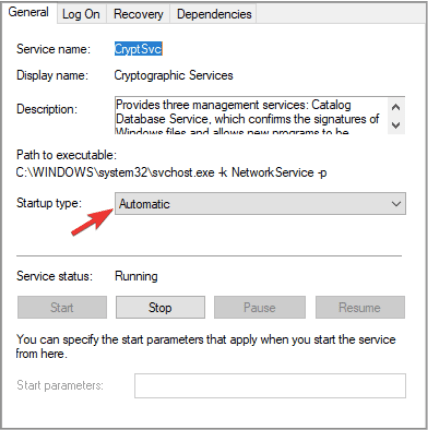
In the Windows Services list, scroll down to look for “Cryptographic Services”. Double-tap on it to open Properties.
Select “Automatic” value as Startup type. Also, if the service is disabled by default, tap the “Start” button to activate it. Hit the OK and Apply button to save the recent changes.
Also read: Why & How To Disable Microsoft Services On Windows 10
#4 Flush the DNS Cache
Our next workaround to resolve the “Windows Troubleshooter not working” issue is by flushing the DNS cache via Command Prompt.
Launch the Start menu search box, type “Command Prompt”, right-click on its icon, and select “Run as Administrator”.
In the Command Line Terminal, type the following command and hit Enter.
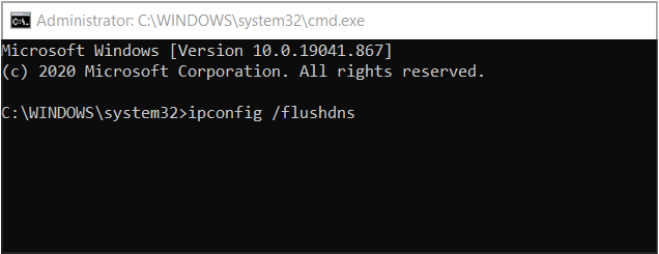
ipconfig /flushdns
Exit all windows, reboot your machine and check if it fixed the Troubleshooter.
Also read: How To Find And Clear DNS Cache On Mac Completely
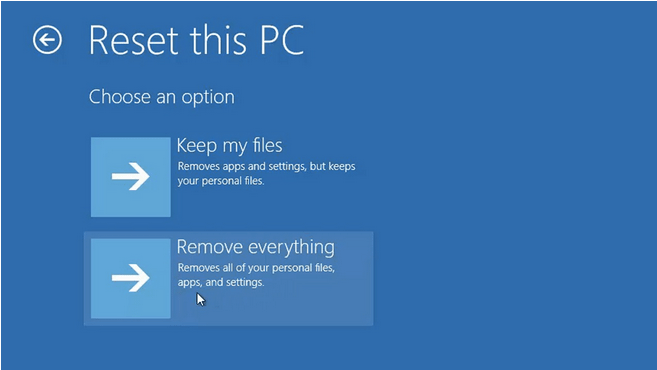
#5 Reset Windows
Tried the above-mentioned solutions and still no luck? Well, as a last resort, you can try resetting your Windows PC. And yes, you don’t have to worry about losing your data. Windows offers you two choices when you Reset your device. One is where you can choose to keep all your data and the other option where you can erase all your files and start afresh.
To reset Windows 10, follow these steps:
Open Windows 10 Settings. Tap on “Update and Security”.
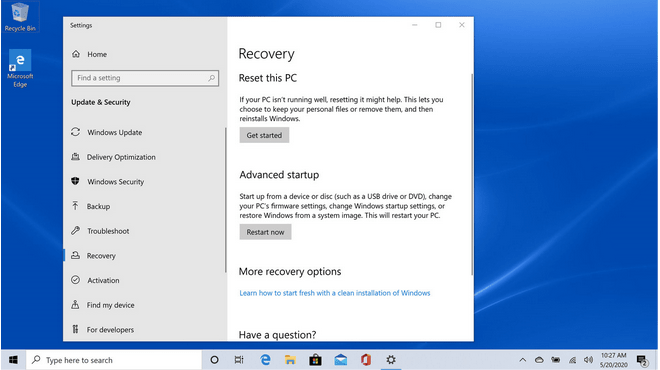
Switch to the “Recovery” section from the left menu pane. Hit the “Reset this PC” button under the “Get Started” section.
Pick your option whether you want to keep your files or erase everything. Follow the on-screen instructions to reset your device.
Also read: Multiple Ways To Factory Reset Windows 10: PC Formatting Guide (2021)
Conclusion
Here were a few troubleshooting hacks that can help you fix the “Windows Troubleshooter not working” issue. Windows Troubleshooter is a crucial built-in security feature that offers a lot of ease to scan and fix common Windows errors and bugs. We hope the above-mentioned steps help you in getting the Troubleshooter up and running again. Good luck!
Marcurios
Nothing worked here, not even resetting, luckily i had a system backup from 5 months back, that did work.