What is DNS Cache?
DNS Cache refers to the temporary storage of information. This means when you give a command to your Mac, it knows which website to open.
In simple words, it is a list of domain names related to the previously visited website, usually defined in numerical. When a website shifts from one domain to another DNS address changes, but if it is not updated in the Mac record, you might get an unreachable site error. Therefore, clearing macOS DNS Cache from time to time is required.
Note: DNS Cache is not the same as recent online history.
Additional Information: Use The Best Mac Cleaning & Optimization Software
Well, using a Mac Cleaning & Optimization utility to clean Cache, Cookies, Logs, Browsing History, Trash Files and other redundant data is probably the best bet. Keeping optimization software on your Mac ensures smooth and stable performance. We recommend using Cleanup My System for this purpose. The Mac application provides a plethora of modules to clean, speed up and reclaim significant storage space in no time. It’s an amazing solution if you are someone who regularly struggles with slow and sluggish Mac performance. Cleanup My System’s single scan will help you to remove junk files, useless mail attachments, large/old files, and more without any hassles.
It can also show you a storage visualization with its newly added module – Disk Analyzer. Moreover, it provides you with the necessary Privacy and Identity Protection with its dedicated modules. It will remove any online traces and save your digital trackers.
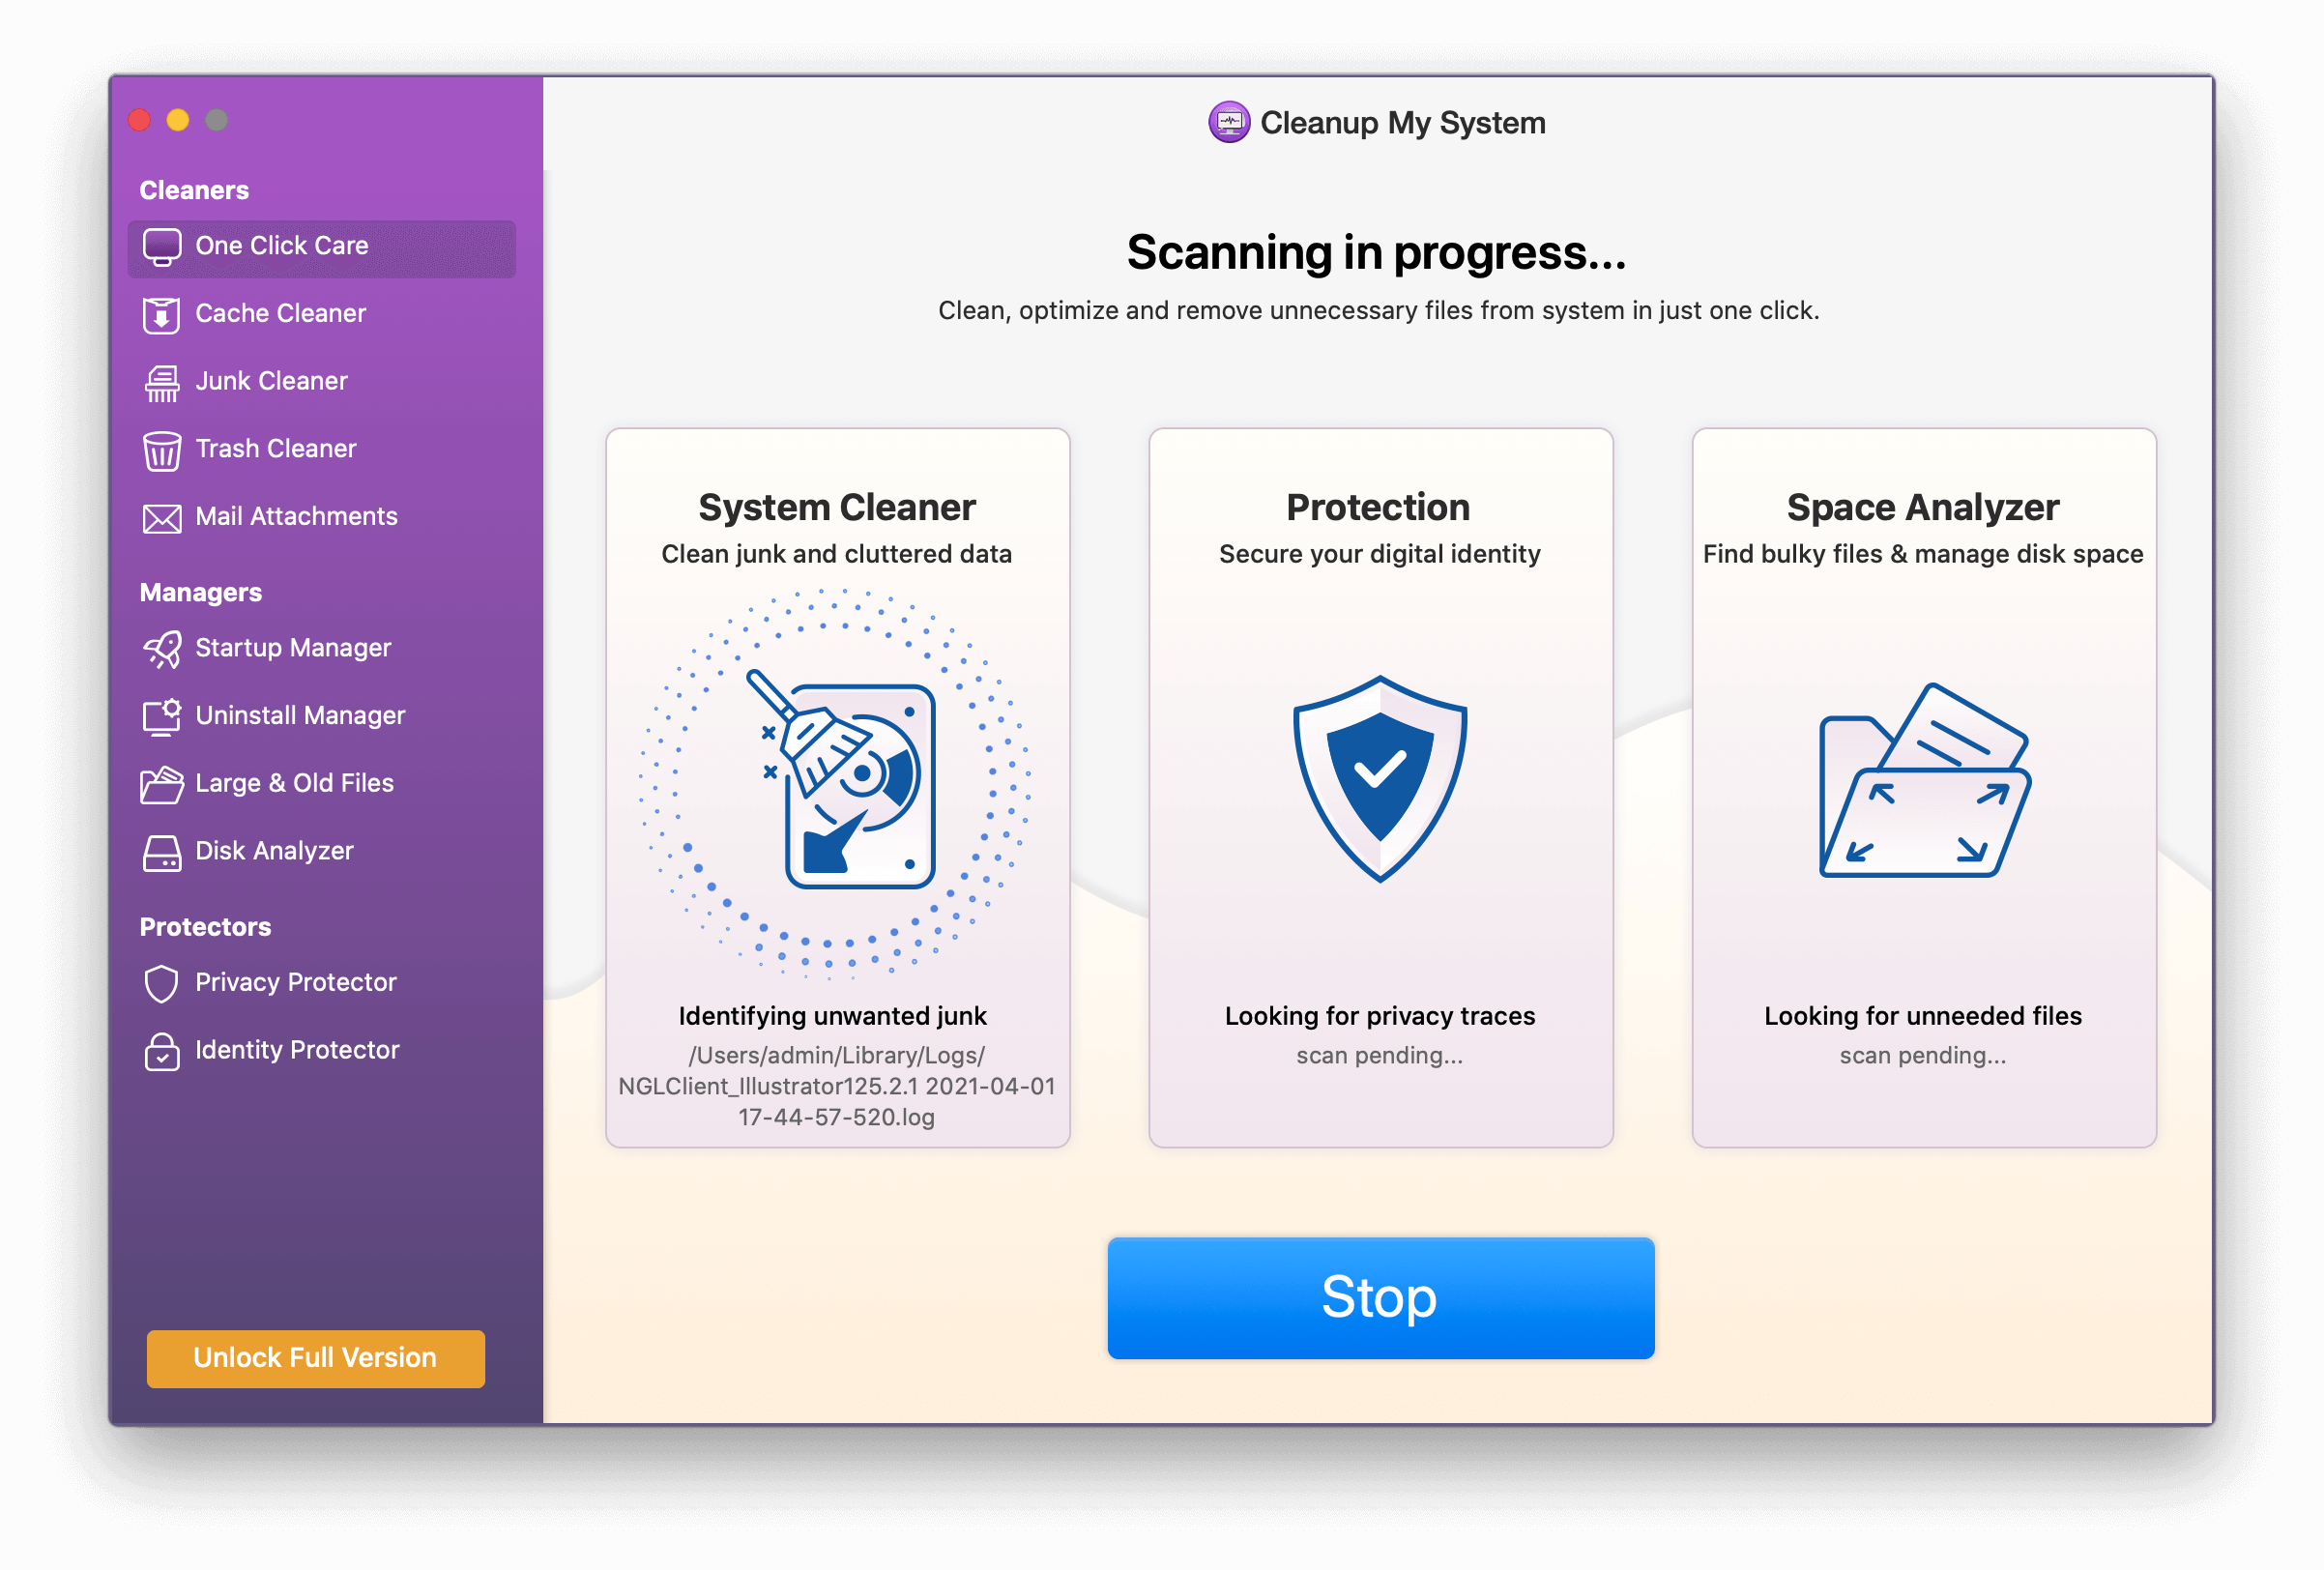

Moreover, the app uses minimal system resources and can be run on macOS 10.10 or later. To know more about its modules, click here to read the full review!
Manual Way to Flush DNS Cache on Mac
Steps to Clear DNS Cache on macOS Catalina/Mojave
1. Type Terminal in the Spotlight and click Enter. Or you can open LaunchPad in the Dock and type Terminal.
2. Here enter, the following command: sudo killall –HUP mDNSResponder; sleep 2;

3. Press Return, enter the password, and press Return again
4. You will now see a message macOS DNS Cache reset
5. Close Terminal
6. DNS Cache is now cleared from macOS Catalina/ Mojave.
Note: You’ll not receive any notification for the process completion. However, if you want to hear the audio notification, you can type some text after the first command. For example, sudo killall -HUP mDNSResponder; say task successfully completed.
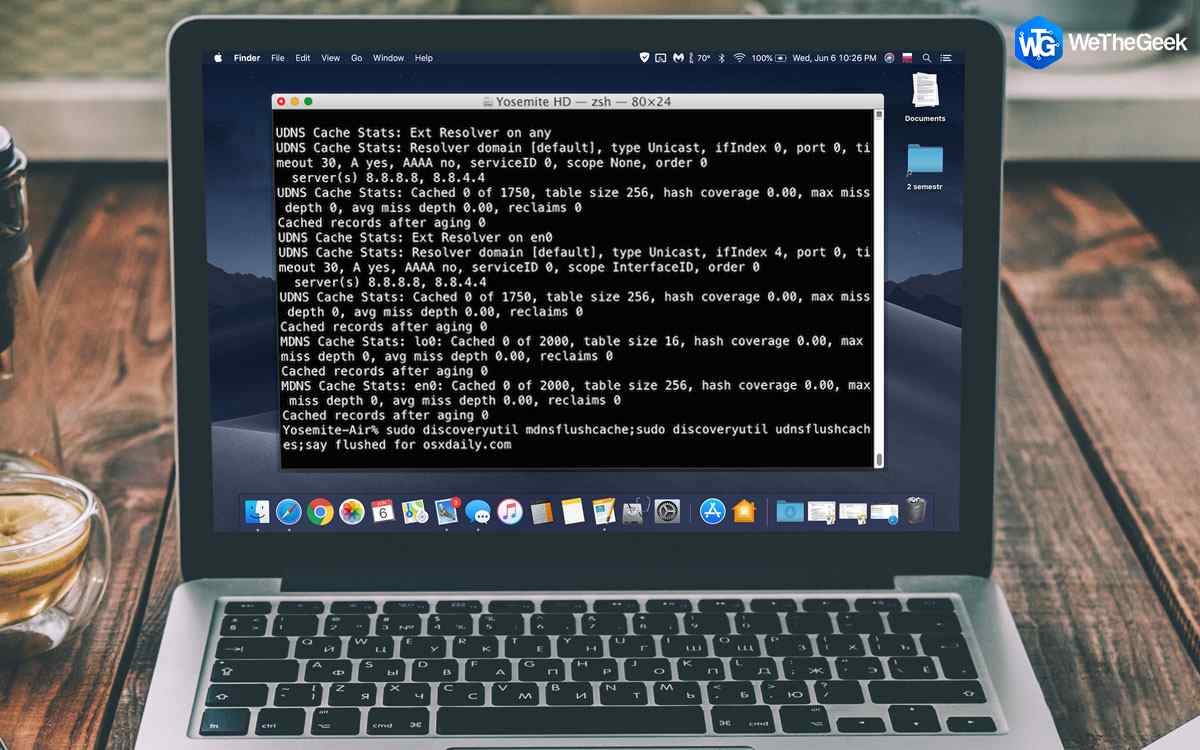
Steps to clear DNS Cache on macOS Sierra, macOS X EI Captain and Yosemite macOS Versions
The command you need to enter on macOS Sierra to flush DNS is sudo killall -HUP mDNSResponder; say DNS cache has been flushed.
To clear DNS Cache in macOS X EI Caption and Yosemite, use: sudo dscacheutil -flushcache;sudo killall -HUP mDNSResponder; say cache flushed
Using these simple steps, you can easily flush DNS from both the old and latest versions of macOS.
In addition to this, if you run Windows machines and would like to clear DNS from there also. Follow the steps below:
1. Type Command Prompt in Windows search bar
2. From the search result, select Command Prompt and click Run as administrator from the right pane.
3. Here type: ipconfig /flushdns and press Enter.
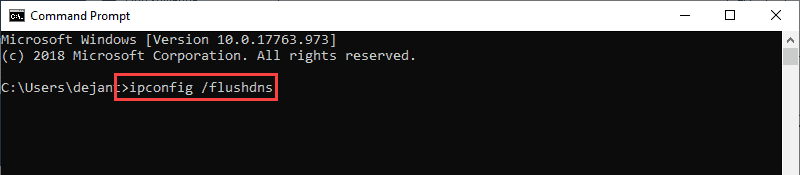
4. This process won’t take too long. Once done, you will see the confirmation message.

This means the DNS cache database on the Windows machine is now cleared. You will now get correct and updated IP mapping from DNS servers.
Now that we know how to clear DNS Cache let’s get an answer for some
Frequently Asked Questions
1. When should I reset DNS Cache?
When you face problems opening a website that can be accessed on another system, flushing DNS Cache is required. This can also be done if you face a problem with network speed. Resetting DNS Cache will help fix both the issues.
2. What happens when I flush DNS Cache?
Flushing DNS refreshes the data. This means you won’t face a problem when you try to access a website. But surely, you might notice it loading slowly.
3. Is there an alternate way to Flush DNS Cache on Mac?
If you don’t want to use the Terminal command, you can try refreshing outdated DNS by deleting the browser cache. This can be easily done with the help of Cleanup My System. This best Mac optimizer in just a single click will clear both browser cache and cookies, all of which slows down web page loading.
This is all from our side on flushing DNS on Mac. Indeed, you don’t need to flush DNS Cache often, but it helps when you face a problem with the website or network. Using the correct command also does the job, but sometimes you don’t feel comfortable using Terminal. In such a case, using Cleanup My System will do the job for you.