
Are you getting the ‘Windows cannot run disk checking on this volume because it is write protected’ error on your computer? Don’t worry, we have solutions for you to fix it, but first, let’s find out the reason behind it. It usually occurs because of the following reasons: damaged disks or drives attributed to read-only.
We can find out about the bad sectors in the drive using the CHKDSK command on the command line. If there is an issue with any file folder or drive on your PC, you will get the error and figure out which Drive is Write Protected or Corrupted. If you find an error, it means you cannot add new files to that drive or cannot make changes to already existing files.
Reasons for “Windows Cannot Run Disk Checking on this Volume Because It Is Write Protected” Error
One can also consider the write-protected status of the disk or drive as the read-only option. It means you have the read access only but cannot add files or make changes to the existing ones. There can be below possible reasons for this:
- The hard drive has the write protection tab. Check it for disk enclosure. If it is, switch this off.
- The partition file system is damaged or corrupted because of a virus or other reasons. Such a damaged file system can be a reason for the file to be read-only.
- The drive has the respective attribute as read-only. You might have done it unknowingly and be unaware of it.
These are some reasons Windows cannot run disk checking because it is written protected” if you face this CHKDSK error, let us discover how to fix it. In the upcoming section, you will learn various solutions to fix this issue.
Solutions to Fix “Windows Cannot Run Disk Checking on this Volume Because It Is Write Protected” Error
Below are the various solutions to fix the Write Protected Error. You can have a go on any of them as per your requirements.
Fix 1: Remove Write Protection Error using Diskpart
Using the Diskpart option, remove the write-protected mode from the disk. You need to follow the below steps on the command prompt.
Step 1: Type Windows key and search diskpart.
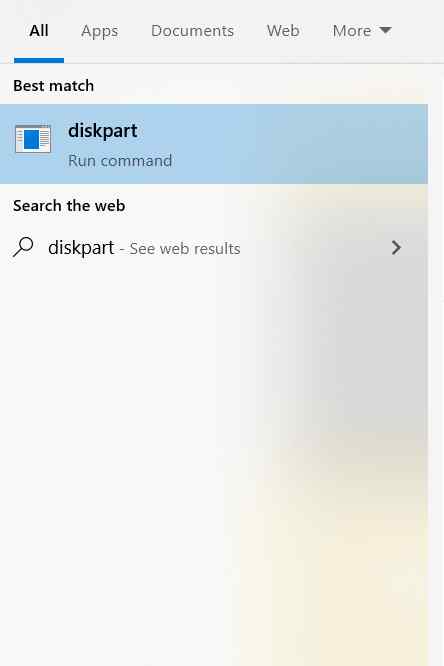
Step 2: Click on Yes in the notification prompt to open it.
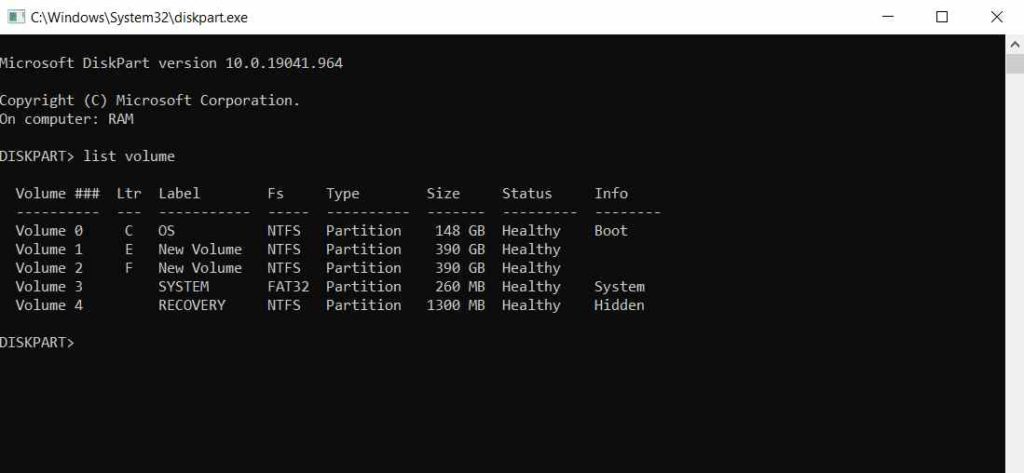
Step 3: Once Diskpart opens, enter the following command –
list volume
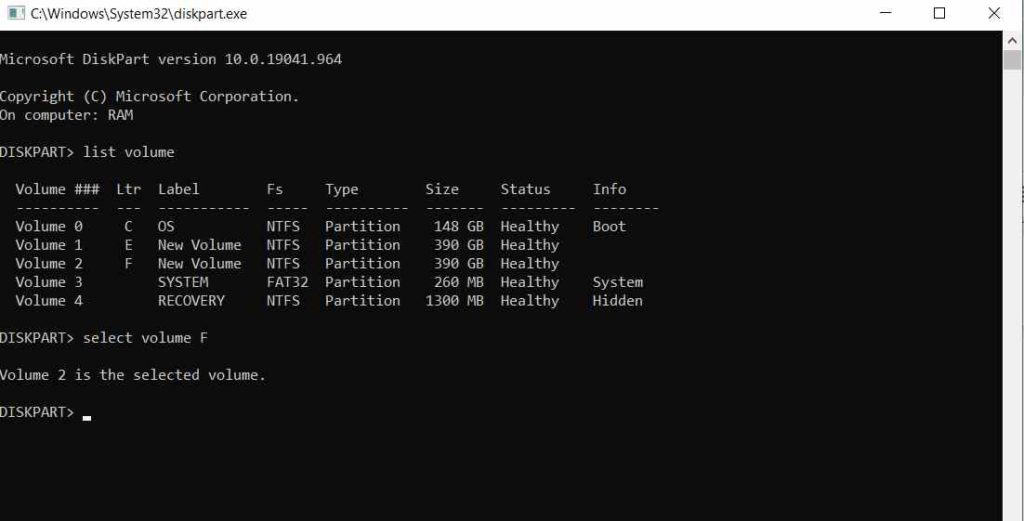
Step 4: Type the below command:
Select volume <X>
Here, X represents the drive letter.
Step 5: Now type
“attributes disk clear readonly”
Then press Enter.
Step 6: “Disk attributes cleared successfully.” message will appear.
Also Read: Clean and Format Disk Using DiskPart On Windows 10
Fix 2: Use EaseUS CleanGenius
If you are not used to accessing the command line, using third party software can help you. EaseUS CleanGenius can help you resolve the WriteProtected Hard drive, USB, External Drive, or SD Card issues.
It provides a perfect alternative to the command line fixes for ‘cannot run chkdsk because it is write protected’ error. It offers a graphical-based solution for users unfamiliar with the command line.
Read the full review of EaseUS CleanGenius here.
Follow the below steps to use EaseUS CleanGenius and replace the above-given methods using the command line:
Step 1: Download EaseUS CleanGenius from the download button given below and finish the installation.

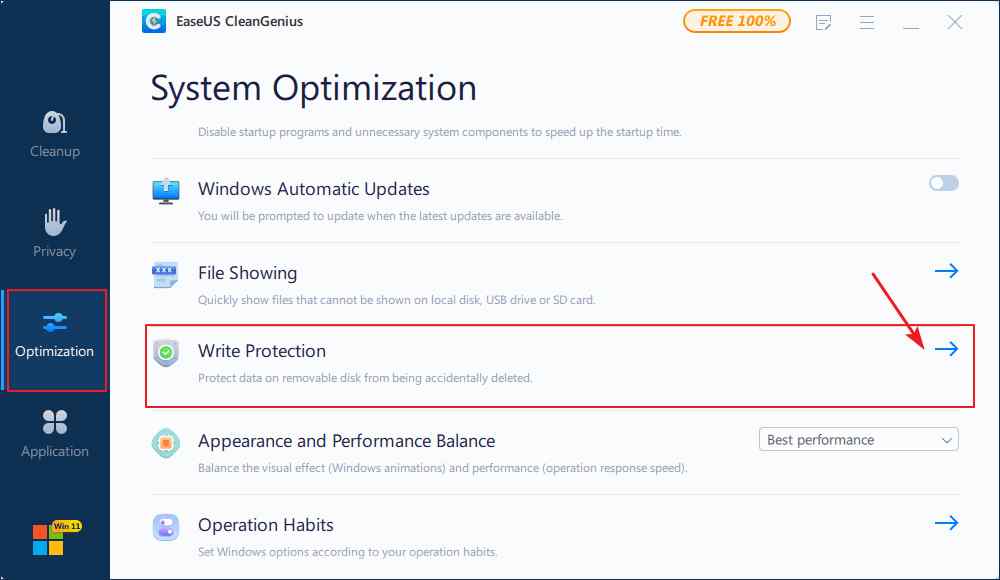
Step 2: Launch EaseUS CleanGenius. Select the Optimization from the left toolbar and click on the Write Protection option.
Step 3: Select the device or the drive that is Write Protected, and click on disable the option to remove it.
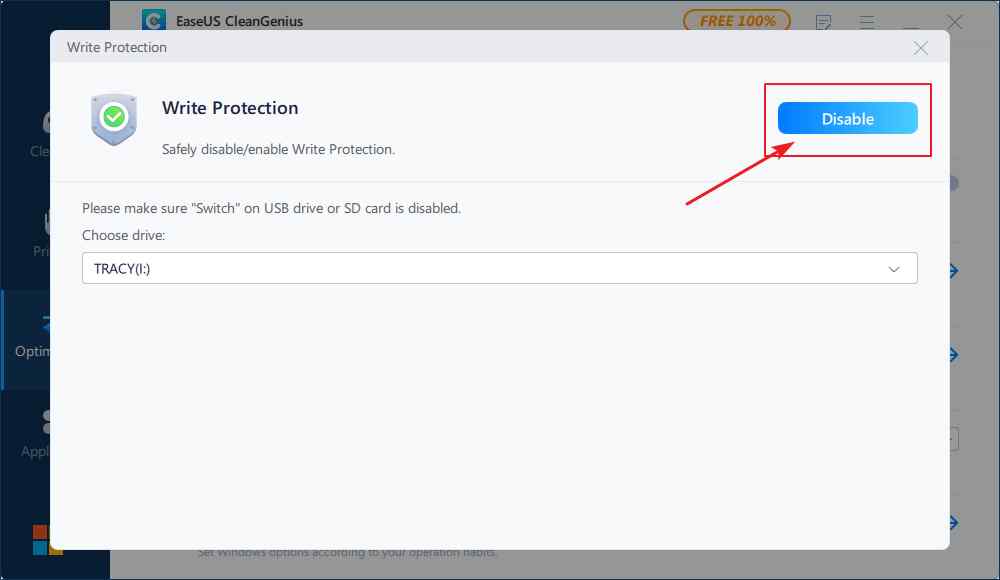
That’s it! EaseUS CleanGenius makes your tedious job of fixing the error easy in 2 steps.
Fix 3: Fix the CHKDSK error in the CMD
If the previous method does not work for you, you can try this method.
Step 1: Press the Windows key and search CMD in the search bar.
Step 2: Open the command prompt with the Run as administrator option.
Step 3: Run the below command:
Chkdsk F:/f/r/x
Here you can replace F with the drive letter in your PC, USB drive, or SD card.

The above steps will unmount the drive or disk you entered in place of F and remove the write protection mode. As a result, the error saying “Windows cannot run disk checking on this volume because it is write protected” will get resolved.
In case the error still materializes, try other methods.
Fix 4: Modify Attribute using Registry
If the above two methods do not work, use Windows Registry to remove the “Windows cannot run disk checking because it is write protected” error. Follow the below steps to perform the same.
Note: Follow the steps carefully as Windows Registry may cause critical issues, such as losing important data or complete system failure. Also, remember to take a backup of all the important data you need before proceeding with the steps. Open Registry Editor, click on File>Export and select a safe location to save this file. If things go wrong, you can always import the .reg backup, (Open Registry Editor, click on File>Import, and select the previously saved file.)
Step 1: Press keys Windows + R. Run window will open.
Step 2: Type regedit in Run to open the Registry Editor window.
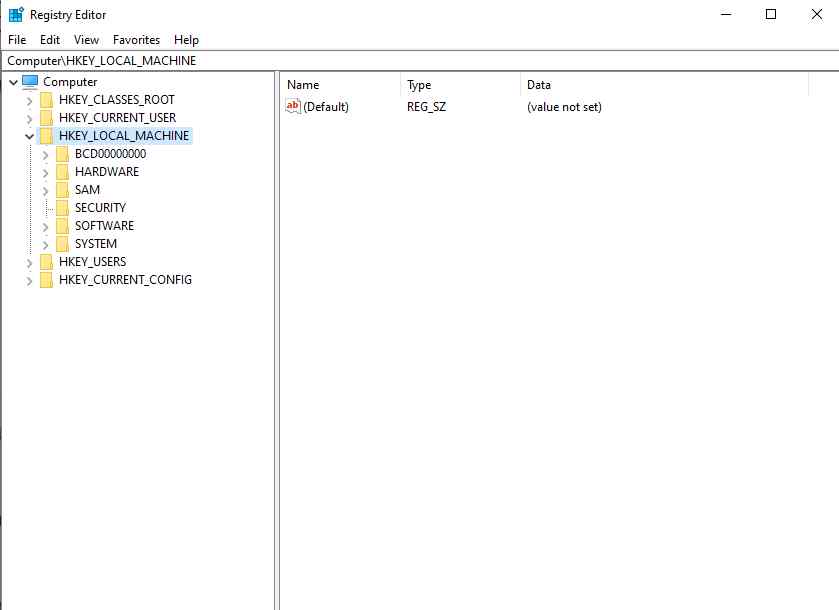
Step 3: Enter the below address in the address bar:
HKEY_LOCAL_MACHINE\SYSTEM\CurrentControlSet\Control\StorageDevicePolicies.
Step 4: Double-click on the WriteProtect key and update its value from 1 to 0.
In case the StorageDevicePolicies folder is not present, follow the below steps:
Step 1: Open the Registry editor window and paste the below address in the location bar:
HKEY_LOCAL_MACHINE\SYSTEM\CurrentControlSet\Control
Step 2: In the Mid Pane, right-click and select the options New > Key.
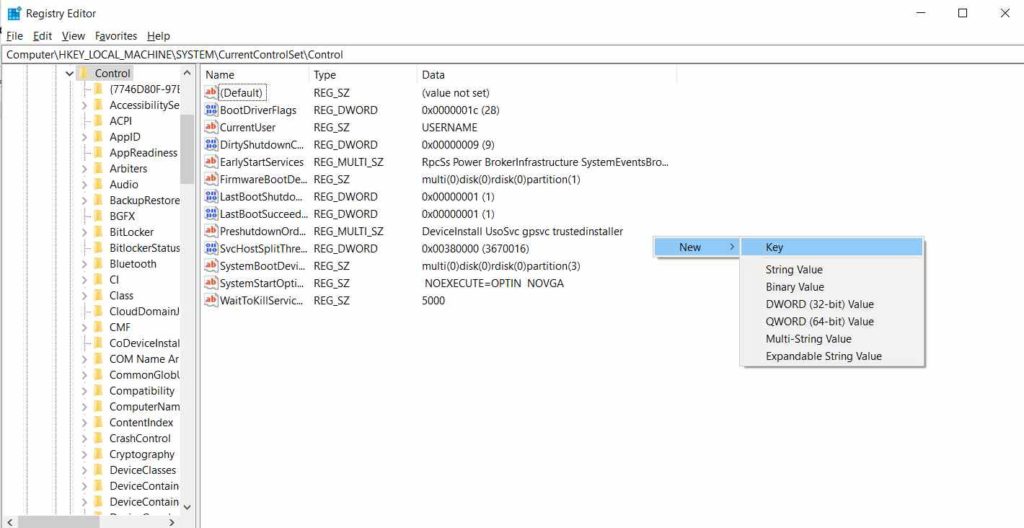
Step3: A new folder will be created with the name StorageDevicePolicies.
Step4: Highlight the new folder just created. Again, right-click in the Mid Pane, and select the option DWORD (32-bit) Value.
Step5: Rename it as WriteProtect and set its value as 0.
Fix 5: Format the Write Protected Volume
There are different ways to format a hard drive. You can follow any method or go for the steps written below:
Step 1: Open the folder named This PC.
Step 2: Right-click on the drive you want to format.
Step 3: Select the Format option.
Step 4: On the Format window, set the options and click on Start.
Fix 6: Scan the drive to check if it is corrupted
If the above methods do not work for you, you can go for the below ones:
Follow the steps to go ahead with this method:
Step 1: Open the folder called This PC on your PC.
Step 2: Right-click on the drive causing the problem and choose the Properties option from the menu thus opened.
Step 3: Select the Tool tab, and click on the Check button.
Step 4: Click Yes if the dialogue appears. Wait so that the scan completes.
Frequently Asked Questions –
Q1. How do you fix “Windows cannot run disk checking on this volume because it is write protected”?
This article discusses several solutions, such as using registry, diskpart using cmd, or formatting the drive. You can implement any of these methods to fix this error.
Q2. How do I run chkdsk if the disk is write-protected?
If the disk is write-protected and you run chkdsk, you will get the error “Windows cannot run disk checking on this volume because it is write protected.”
Q3. I cannot run chkdsk because the drive is locked. What does it mean?
Drive is locked implies that you have no access to the drive. In such a case, if you run the chkdsk command, you will get the write-protected error saying “cannot run chkdsk because it is write protected”.
Q4. How do I remove write protection from the command prompt?
To remove the write protection using a command prompt, follow the below steps:
Step1: Open the command prompt as an administrator.
Step2: Run the below command:
Chkdsk F:/f/r/x
Note: Write the drive causing the problem in place of the letter F.
Also Read : Common Windows 11 Problems and Ways To Fix Them
Conclusion –
CHKDSK error is a common error that can occur due to many reasons, as discussed in this article. You need first to check the cause of the error in your PC and try the solution accordingly to fix it. We have discussed various solutions to fix this.
If you are not comfortable using the command prompt solutions, use EaseUS CleanGenius. As it offers a quick solution to the problem.
We hope the article was helpful to you in resolving the CHKDSK error. We would like to know your views on this post to make it more useful. Your suggestions and comments are welcome in the comment section below. Share the information with your friends and others by sharing the article on social media.
We love to hear from you!
We are on Facebook, Twitter, Instagram, and YouTube. Please let us know of any queries or suggestions in the comments section below. We love to get back to you with a solution. We regularly post tips and tricks and answers to common issues related to technology.
Related Topics –