
Because A Sorted Photo Bunch Can Help You Especially In A Crunch.
What are the best ways to organize photos on an external hard drive and why do I need to learn how to do that? External hard drives are one of the best storage mediums to store files. They are portable and come with a great deal of storage space. Sure, you have cloud storage mediums as well where you can keep your photos, but, external hard drives can come in handy and prove to be a life savior in situations where you have no access to the internet and when you need data immediately.
Also, in the case of cloud storage mediums, you may have to sign up for premium variants of a cloud storage medium to get more space. That being said, we aren’t against cloud storage mediums, in fact during the blog, we are going to throw light on how they can be used to organize photos.
Now, whether you are already using an external hard drive to store photos or planning to buy one, knowing how to organize photos on an external hard drive is a great skill to have. By sorting photos the right way you can easily find the photos you need quickly and get rid of those which are unneeded and which are just hogging your hard disk’s storage space.
Best Ways To Organize Photos On External Hard Drive?
Before you dump all your memories inside your external hard disk, do bookmark this page and keep it as a reference-
1. Keep Backups

Assuming that you use a variety of devices – smartphone, laptop, and desktop to download images from the web, store images from other places and even access them, keep backups at two or three places. Let’s say, the first backup location can be your cloud storage drive and the second backup location could be your computer. The backups will ensure that even if something happens to your external hard drive, you will at least have your backed-up photos safe.
Also, it will be easy for you to pick important photos from these backups and transfer them to the external hard drive than transferring photos from various folders and spending more time. Now, dump all photos inside your external hard drive.
2. Get Rid of Duplicates
You might not read this at many other places but, one of the best ways to organize photos on an external hard drive is to get rid of duplicate photos. Let’s face it after you have dumped all your photos, there might be several copies of photos. So, to remove those unwanted duplicates, you can use a dedicated third-party tool to remove duplicate photos. Duplicate Photos Fixer is one such tool that can be of great help in this regard. Here is an inside-out review of Duplicate Photos Fixer Pro.
How To Use Duplicate Photos Fixer Pro To Remove Duplicates From External Hard Drive:
Removing duplicates is undoubtedly one of the crucial aspects to consider when you want to arrange your digital photos neatly. Removing unwanted clutter will speed up the search process of finding the right image.
1. Download and run Duplicate Photos Fixer Pro


2. Click on Add Photos or Add Folder button
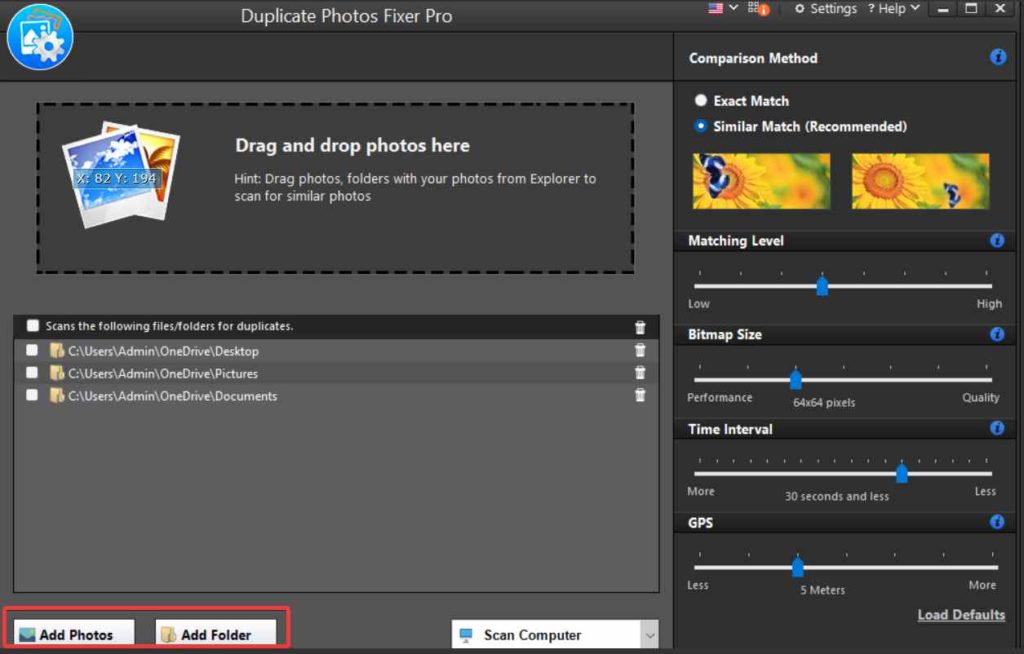
3. Select individual files for comparison or select complete folders to look for duplicate images
4. You can tweak the filters on the right-hand side to look for exact duplicates or even similar-looking photos and by that, we mean those photos which have minute differences
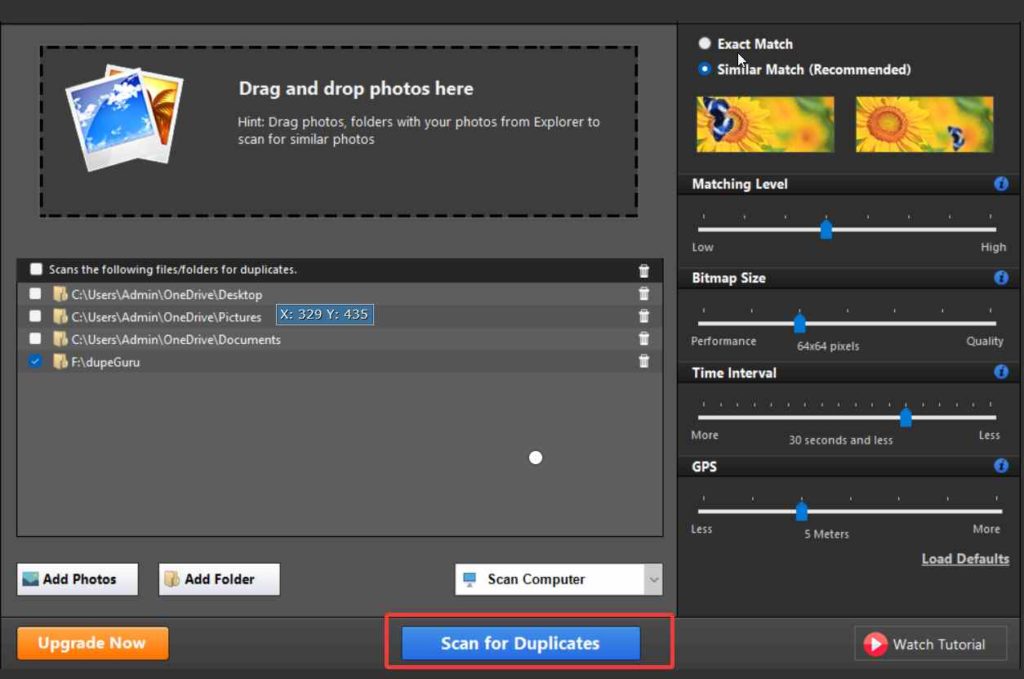
5. Click on Scan for Duplicates
6. For faster results, click on the Auto Mark
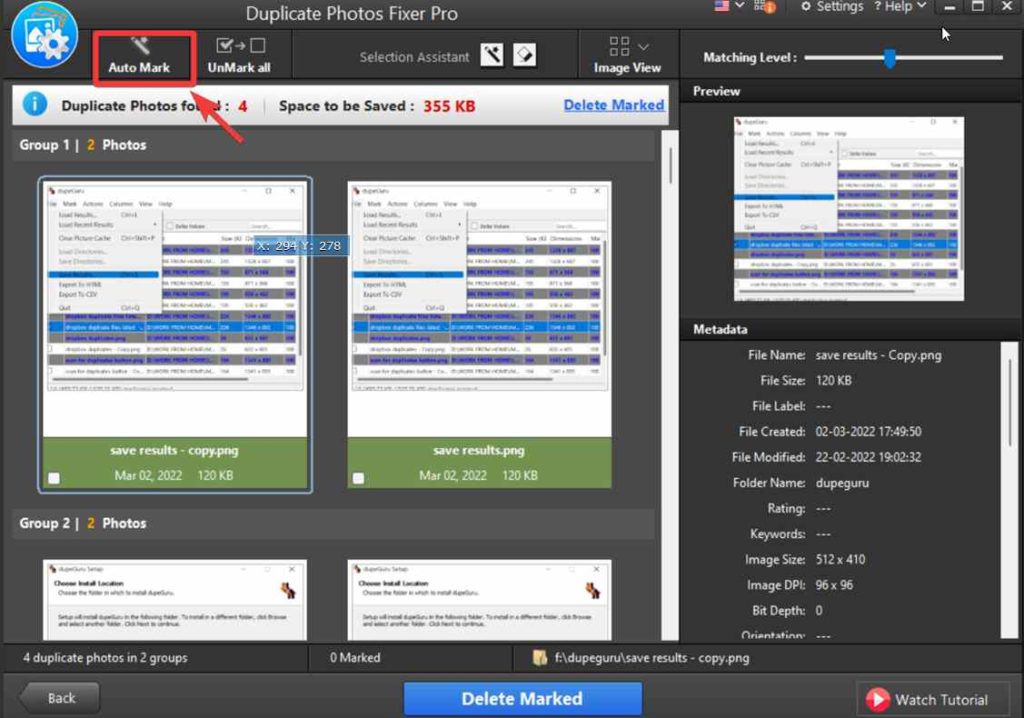
7. Now from the bottom click on Delete Marked
Undoubtedly, Duplicate Photos Fixer Pro is a fantastic utility to de-duplicate your entire photo collection in a couple of clicks. In case you are looking for more such brilliant tools to identify and remove duplicate snaps on Windows, Mac, Android, and iOS, follow this article – – 13 Best Duplicate Photo Finders and Cleaners
3. Set Up Folder Structure Based On Date, Events, File Size & Tags
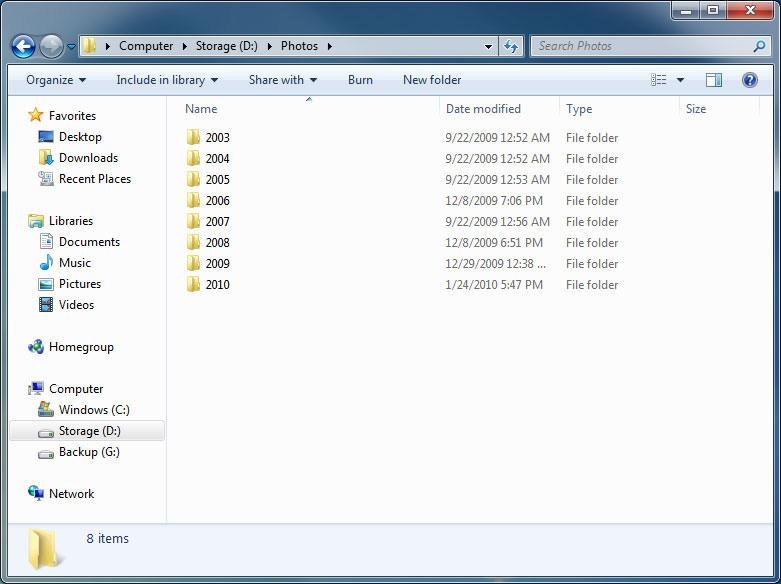
Now that your external hard drive is duplicate-free, it’s time to distribute the images in multiple folders and follow a protocol to sort your collection based on date, events, file size, tags, etc. Based on your convenience, you can set the folder structures, and it should be something that can help you maintain uniformity in the long run. For example –
- You can start by first creating and renaming folders by the year photos were taken. If you are a professional photographer who captures a large swath of snaps daily, you can further subdivide those folders into months, weeks, or days.
- The next way to organize photos on a hard drive is based on events, including weddings, Parties, Holidays, Friends gatherings, etc. You can follow a combination approach, organize your collection by year, and add group photos to particular events. This way you can easily find your Florida vacation pictures in 2019 without navigating through other event folders.
- Sorting folders based on file size is certainly one of the best ways to organize photos on the hard drive, especially if you are a photographer. This way, you will be able to find snaps taken at a higher resolution with larger file size than pictures taken on a smartphone with a lesser resolution.
Note: When placing files inside folders, follow a naming convention. For example, you could name your photos on the path – Folder name_date_vno_year. Knowing how to rename multiple files at once can help you maintain uniformity and make it easy for you to filter out photos faster.
- You can even take thehelp of metadata to organize photos on a hard drive by adding the right tags so that you can filter your favorite photos more specifically.
Note: If you are unaware, Tags are keywords you can add to a photograph to make it easier to locate using your PC’s search functionality. For instance, images captured at your friend Ginny’s birthday party can be tagged as ‘Ginny’ or ‘Birthday party.’
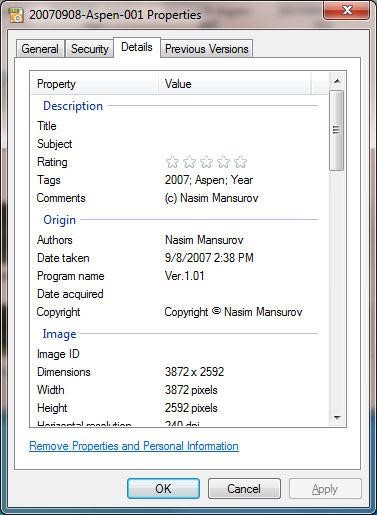
Windows 10 certainly makes it effortless to add tags to your pictures. All you need to do is just right-click on the photo you wish to tag, go to its Properties and navigate to the Details tab. Here, you will find the tag entry box under the Description header.
Besides this manual method, plenty of professional tools allow users to add quickly, edit, and delete metadata. Those nifty tools are undoubtedly useful for erasing confidential and critical metadata like geolocation information; a device used to take the picture, time, and more, which is confidential to your profession (in case some settings are exclusive to the kind of photography you do).
If you want to get your hands on such excellent metadata editing tools, we recommend using Photos Exif Editor by Systweak Software. The application provides an effortless way to change and remove EXIF, IPTC, and XMP Metadata information for thousands of digital photos. To learn how this brilliant software works to add/remove metadata, organize digital photos on the hard drive, and more, simply refer to the blogs attached below:
- Reviewing Photos Exif Editor: Modify Metadata Without Hassle
- How To Use An Image Metadata Editor
- How To Obtain Valuable Information from Images Using Exif Editors?
Wrapping Up Our Guide On How To Organize Photos On External Hard Drive?
So, how do you prefer to arrange your digital photos on an external hard drive? Share your workflow with other readers and us in the comments below. Follow us on social media – Facebook, Instagram, and YouTube.