
After you have captured photos with your smartphone or DSLR, you wouldn’t just leave them on the device to create a mess. . You would probably transfer photos to your computer (Mac or Windows) so that valuable space can be saved to capture more photos & store other items. If you are an Android and Windows user, here are some great tips to organize photos on your computer and Android smartphone.
However, if you are a Mac user, this blog post is for you. After you have followed the tips and tricks in this post, managing a photo collection on your Mac will become effortless. You will –
- Be able to quickly find your photo as and when required.
- Be able to save precious storage space.
- Be able to get rid of unwanted & duplicate photos.
So, without further ado let’s begin –
Best Ways To Organize Photos On Your Mac
Before we begin, the steps below demonstrate an ideal workflow that one can introduce to sort their photos on Mac. Any workflow as long as it is easy to follow can be used –
Method 1. Set Up Folders In Your Albums
Every month or every year, you probably take hundreds or even thousands of photos, probably on different occasions – While traveling or at a significant event like marriage, birthday, or anywhere else.
If you just throw every random click at one place, you probably wouldn’t even want to look at this clutter, would you? How about neatly segregating these images in folders and giving context to them?
So, one of the first things that you can do to organize photos on a Mac is to set up folders. You can get as creative and meticulous as you can be. You can start by creating folders year-wise, then you could add subfolders month-wise. Further add subfolders containing images taken at a particular occasion.
To create a folder, click on the + next to My Album and click on Folder. You can subsequently create sub-folders by following the same process.

Method 2. Create Smart Albums
Since we are dealing with Albums here, how about going in for a smart magical move?
Your Mac’s Photos app has the ability to create Smart Albums. Wondering what’s the difference? While in a regular album, you create a new album, give it a name and manually drag photos into it. And, you have to manually delete photos from the album. This can be tedious at times. Enter Smart Albums. The photos are automatically sorted based on the criteria you have set.
There is something even more interesting that we’ll discuss a little later. But, first, let’s have a look at the steps to create a New Smart Album –
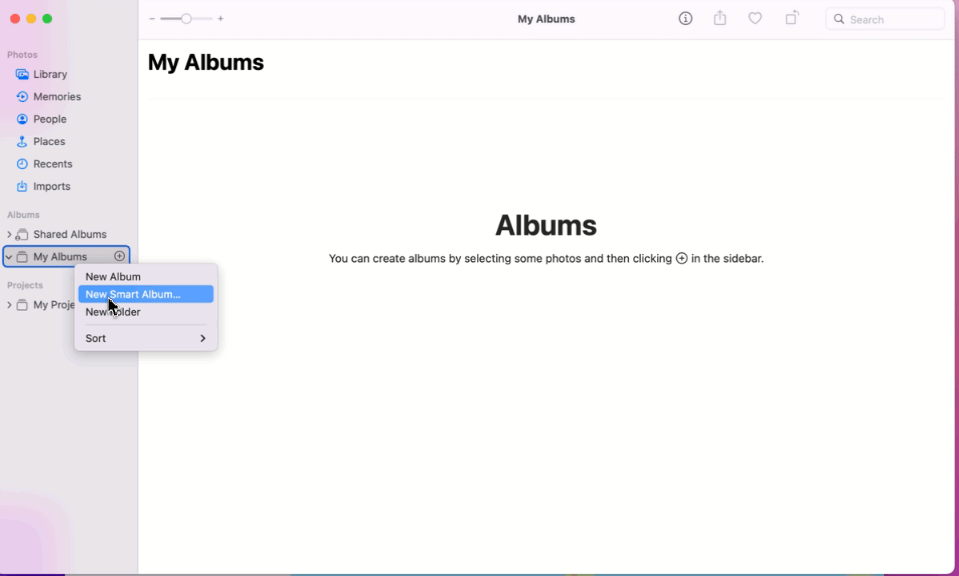
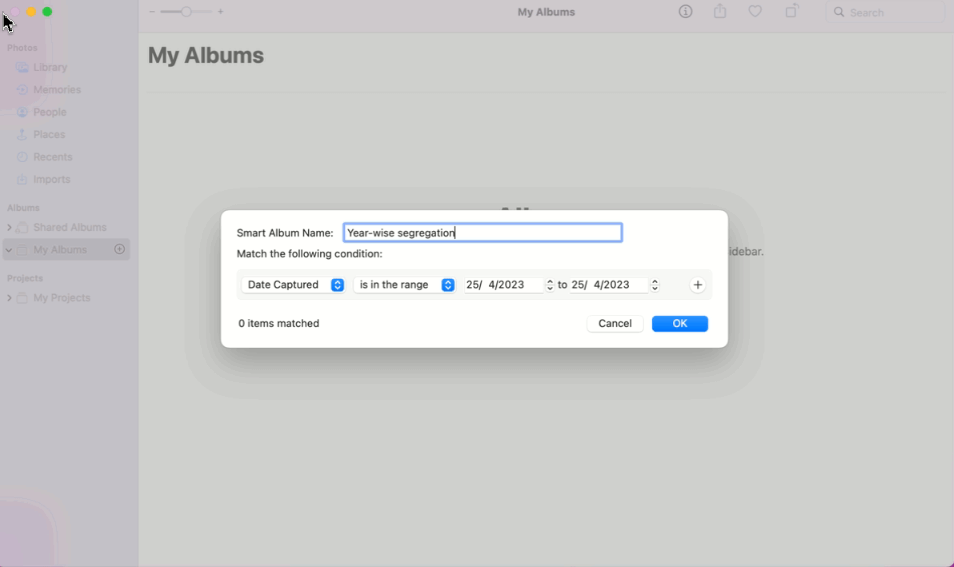
- Click on the + sign next to My Albums or right-click on My Albuyms and click on New Smart Album, and give it a name.

- Under Match the following condition, click on the dropdowns and select criteria.
- You can also Command + click on the Smart Album you have created and select Edit Smart Album to edit it.
Like we were saying – there is something interesting about Smart Albums. We meant, they are highly dynamic. This means, as you add new photographs to your Library, your Smart Folder will also be updated with the photos that meet the criteria you have set.
Method 3. Use A Duplicate Photo Removal Tool
When organizing photos on Mac, one problem that users often run into is dealing with duplicate photos. And, you can’t just haphazardly delete duplicates. Having said that, it is also not possible to examine each and every photo, and delete duplicates.
Here a wise move is to use a duplicate photo removal tool. Take Duplicate Photos Fixer Pro for example. It runs a thorough scan, helps detect and remove exact and similar-looking photos in just a few clicks. It automatically arrange duplicates group-wise, so that you can further auto-mark a duplicate photo in each group in a single click.


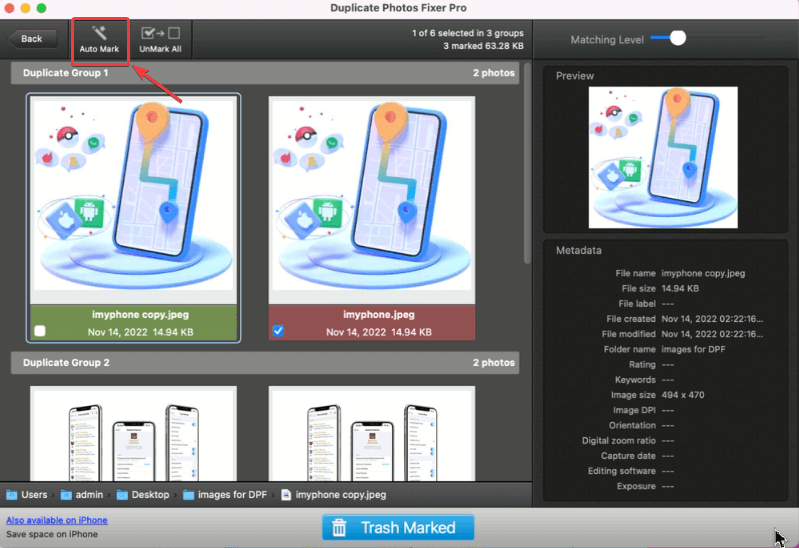
Here’s how you can remove duplicate photos on Mac with Duplicate Photos Fixer Pro.
Method 4. Use A Photo Management App
If you take a look at these photo management apps for Mac, you will realize that they are not just restricted to organizing your photos. With the help of these tools, you can –
- Perform editing tasks.
- Organize photos based on image quality, tags, faces, and other criteria.
- Convert images of one format to another
- Edit EXIF information and do so much more.
Method 5. Backup Your Photos
It is advisable that once in a while you should back up your photos so that in the event something goes wrong, you will at least have a fallback option in the form of a backup. You can use the Time Machine or take the help of a backup software for Mac.
Some of the most reliable options are listed here: Best Backup Software For Mac – iMac Online Backup Software
Method 6. “Favourite” Your Photos From Time To Time
This is a great way to organize photos on Mac. When you favorite a bunch of photos you can cut down a large collection of photos to a few. This way you won’t have to look at several thousand or more photos at once.
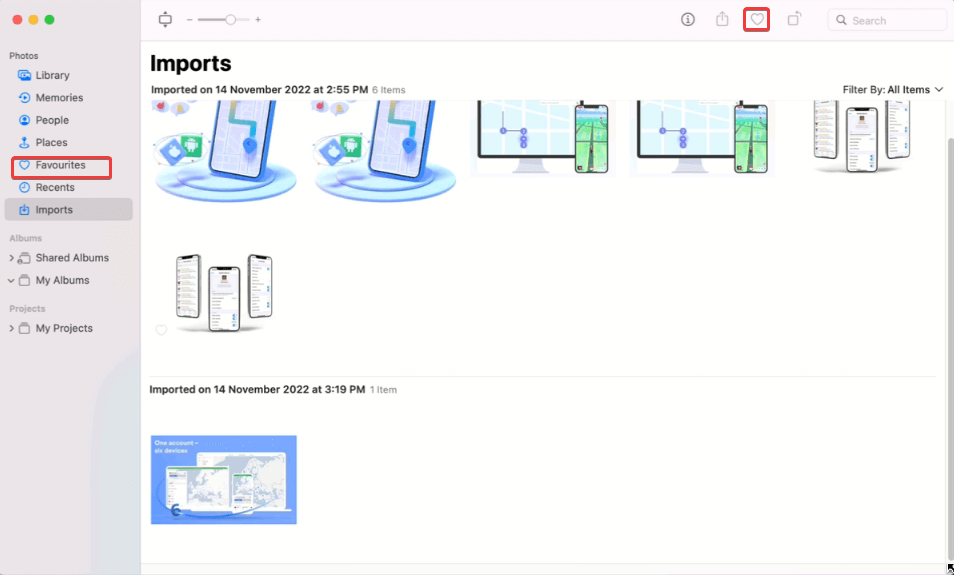
So, whenever you come across a photo that you’d like the most and that you’d like to keep separate, select the photo and click on the heart icon in the bar at the top. You can also position your cursor over an image’s thumbnail and click on the heart at the bottom left corner to favorite it.
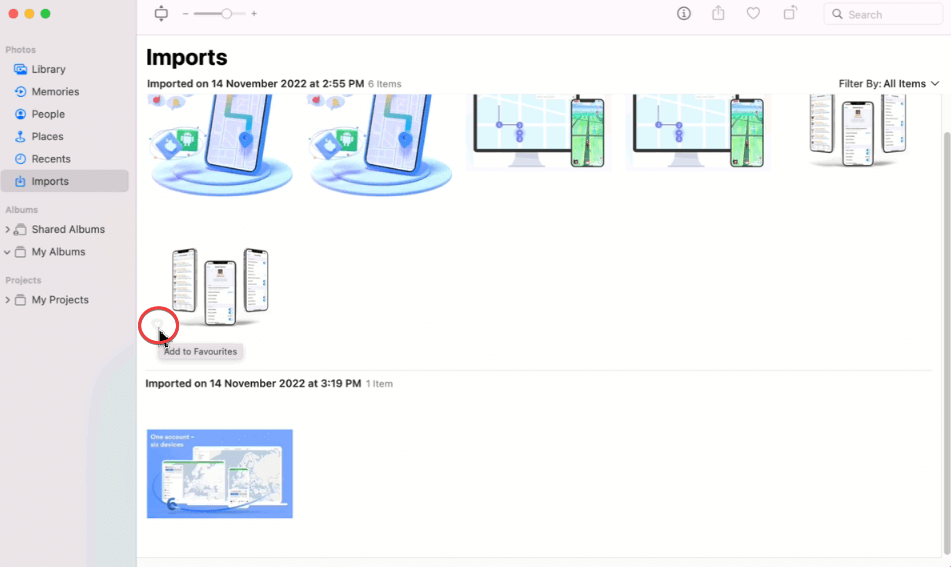
To access your favorite photos, click on the heart icon at the top-right corner of the screen or click on the Favourites option (this option will only appear on the left-hand pane when you have added one or more photos to Favourites).
Embark On A Journey To Organize and Simplify Memories
Organizing photos on Mac goes a long way. It helps you easily access photos as and when you need them. For instance, if you are into photo editing, and say, one of your clients or friends asks you to process a particular bunch of photos, you would instantly be able to pick the right photos and start working on them without wasting any time.
With that, we’d love to know what’s your intent for organizing photos on Mac and what workflow you follow to keep your photos neat and sorted. Do let us know in the comments section below. For more such content, keep reading WeTheGeek.
You can also get in touch with us on YouTube, Facebook, Pinterest, Twitter, and Instagram.
