
According to studies, blueish light in the evening can make it difficult to fall asleep. To mitigate these potential effects, Windows 11 provides a feature called “Night Light,” which allows you to change your display to a more yellowish tone. The Night Light function in Windows 11 protects your eyes from continual blue light exposure, which is especially important in dark or dimly lit environments.
Enabling Night Light changes the color of your screen to a warmer tone, which reduces eye strain. Although the concept behind this tool is fantastic, its consistency has been hit or miss. And hence we have listed all the possible ways to fix the Night Light feature not working in Windows 11.
How To Fix the Night Light Feature Not Working in Windows 11
Examine The Brightness Of The Night Light
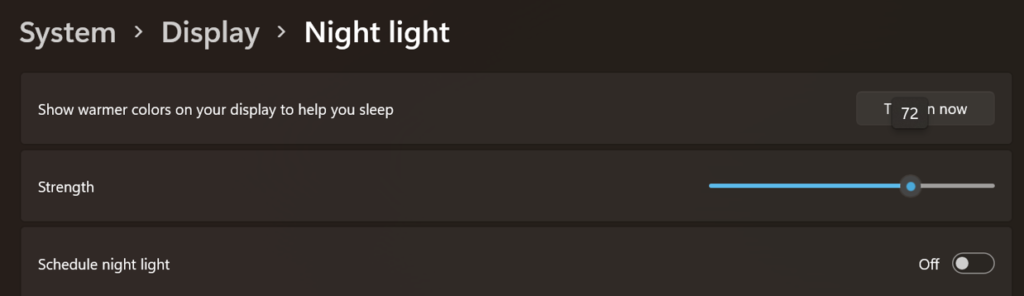
The Night Light’s power may be adjusted, allowing you to choose how intense you want the impact to be. When the Night Light turns on, if you have it set too low, you will hardly notice it. As a result, double-check that the Night Light strength is set to the appropriate level. To modify the intensity of the night light, follow these steps:
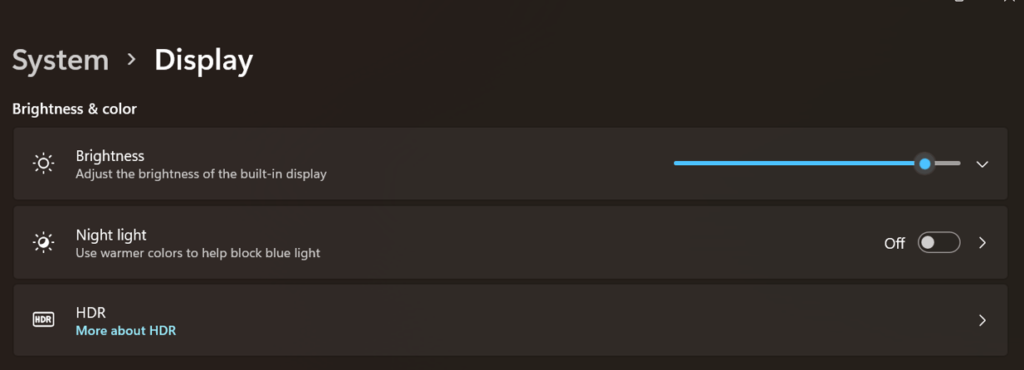
Step 1: To access the Settings panel, press Win + I.

Step 2: Click Display in the right pane.
Step 3: Under the Brightness & color option, select Night light.
Step 4: Make sure the Night Light is on. If it isn’t already turned on, do so immediately.
Step 5: To change the warm color tone, use the Strength slider.
Ensure That Your Graphics Drivers Are Up To Date
After doing a Windows upgrade or installing new updates, Night Light may cease operating. If this is the case, make sure you have the most recent graphics card drivers installed. Programs or functions related to the display can be affected by missing or obsolete graphics card drivers. To update your graphics drivers on Windows, follow these steps.
Step 1: To access the Device Manager menu, press Win + R and type “devmgmt.msc” followed by Enter key.
Step 2: The Device Manager window will appear on your screen.
Step 3: Expand the Display adapters section in Device Manager.
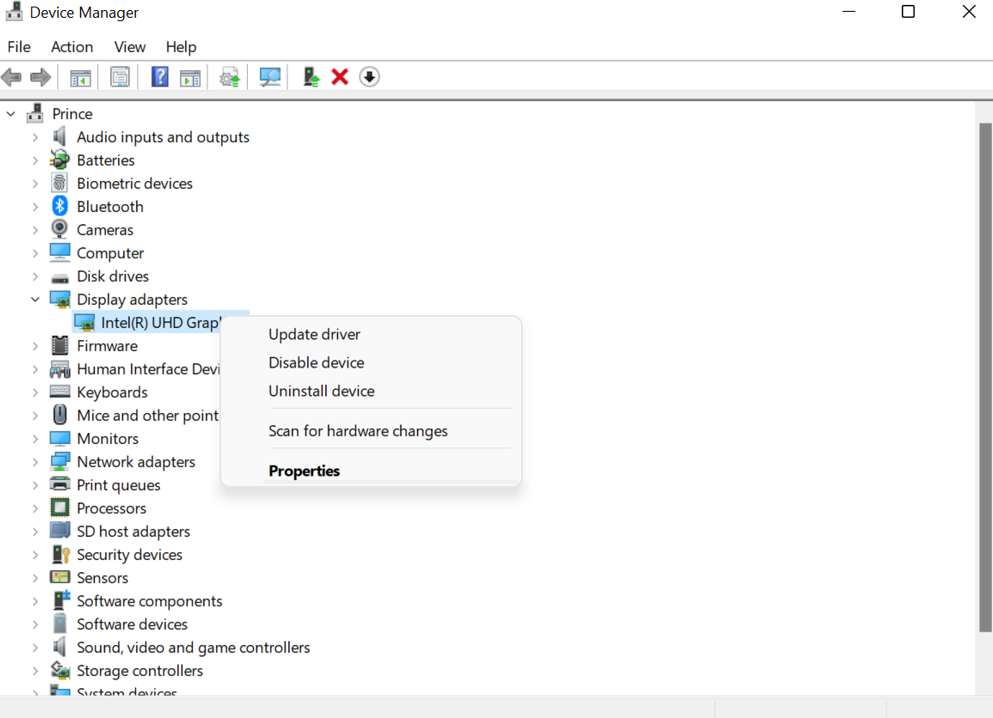
Step 4: Select Update from the right-click menu on your graphics card device.
Step 5:Select Search automatically for updated driver software in the Update box. All of your display device’s pending driver updates will be downloaded and installed by Windows.
Alternatively, you can use Advanced Driver Updater, which is an amazing driver updater software that automates your updating driver task with a few clicks of the mouse.

Using The Registry Editor, Reset The Night Light Settings
In the Registry Editor, you can manually reset the Night Light setting. This is useful if none of the other solutions are successful in resolving the issue. Also useful if the Night Light option in Settings is grayed out. To restore the Night Light settings, follow these steps:
Step 1: To open Run, press Win + R.
Step 2: To open the Registry Editor, type regedit and click OK. If User Account Control prompts you, select Yes.
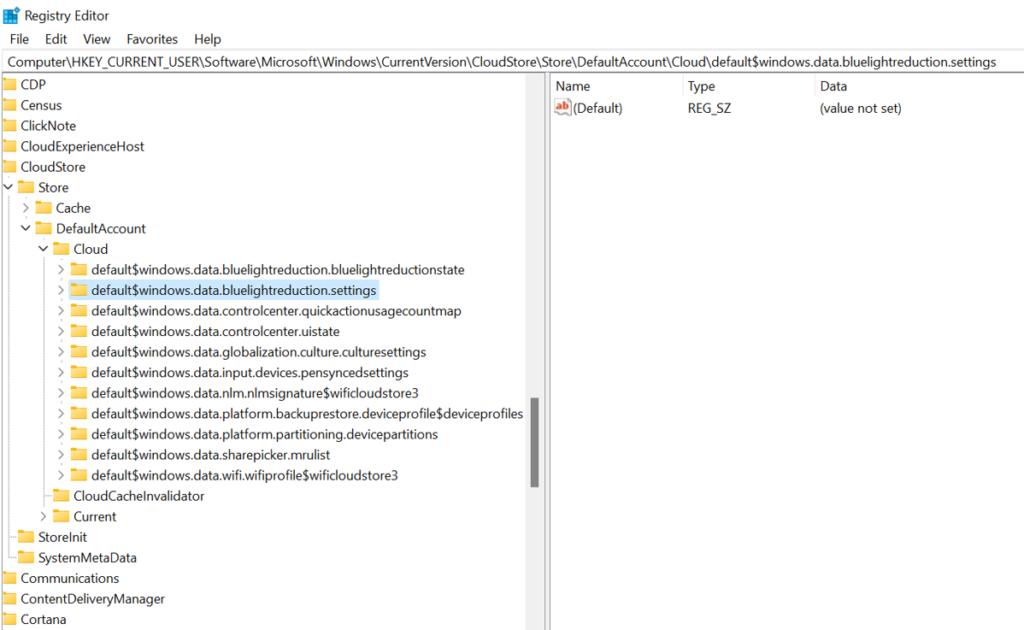
Step 3: Navigate to the following place in the Registry Editor:
HKEY_CURRENT_USER\Software\Microsoft\Windows\CurrentVersion\CloudStore\Store\DefaultAccount\Cloud
Note: You can copy and paste this path in the Windows Registry Editor search box.
Step 4: Locate the following keys under the Cloud key:
$$windows.data.bluelightreduction.bluelightreductionstate
$$windows.data.bluelightreduction.settings
Step 5: Select Delete with a right-click on the first key. Carry on in the same manner with another key.
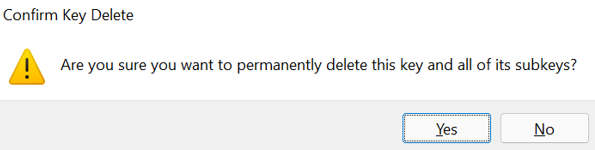
Step 6: Close Registry Editor once you’ve eliminated both keys.
Step 7: Restart your computer and reinstall Night Light to get it working again.
Note: If an error occurs while deleting the registry keys, you must take ownership of the registry keys and try again.
Examine Your Computer’s Date And Time Settings
Night Light can be set to turn on and off automatically at specific times. Incorrect date and time settings, on the other hand, can result in a delayed start or turn-off. Check the date and time in the Taskbar to be sure (bottom right corner). Here’s how to alter the date and time on your computer if it needs to be changed.
Step 1: To open Settings, press Win + I.

Step 2: In the left pane, select Time & Language.
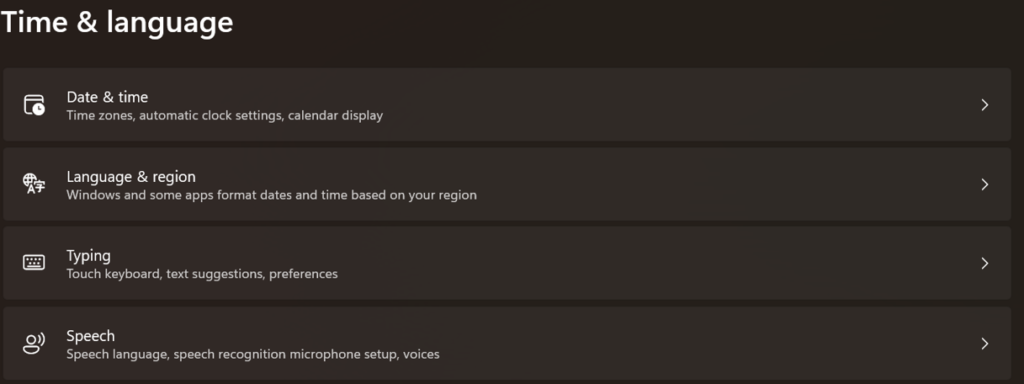
Step 3: Then select Date & Time from the menu.
Step 4: To turn it off, toggle the switches for Set time automatically and Set time zone automatically.
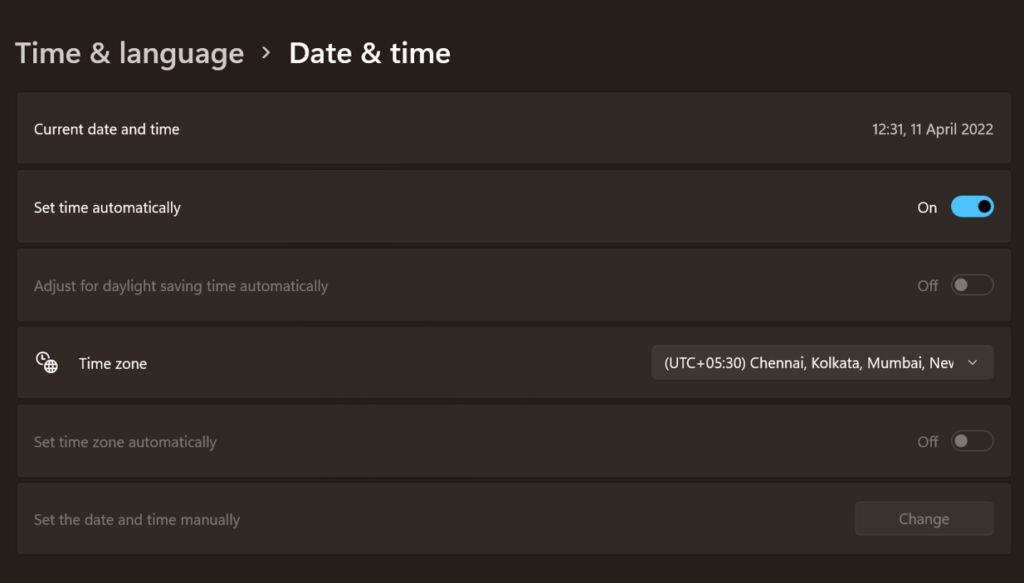
Step 5: To change something, click the Change button. Manually set the date and time. After that, make your adjustments and click Change.
Step 6: After that, make sure the Set time automatically and Set time zone automatically options are turned on.
Enable Location Services
When your system’s location service is turned on, the Night Light function can help. This is crucial if you’ve set Night Light to work at specific times. You can turn off the location service and enable Night Light manually if you wish. To enable location for your computer, follow these steps:
Step 1: To open Settings, press Win + I.

Step 2: In the left pane, click the Privacy & Security tab.
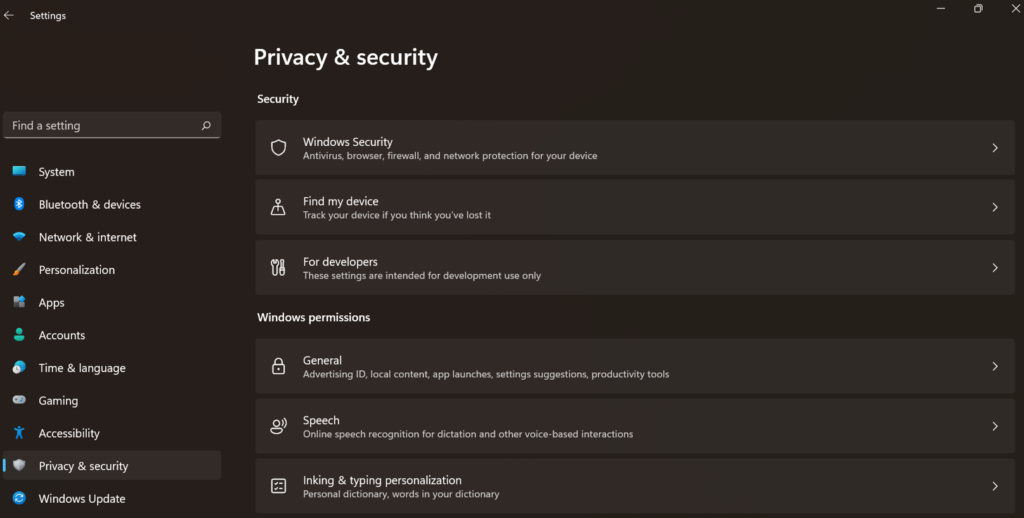
Step 3: Scroll down to the App permissions section in the right pane.
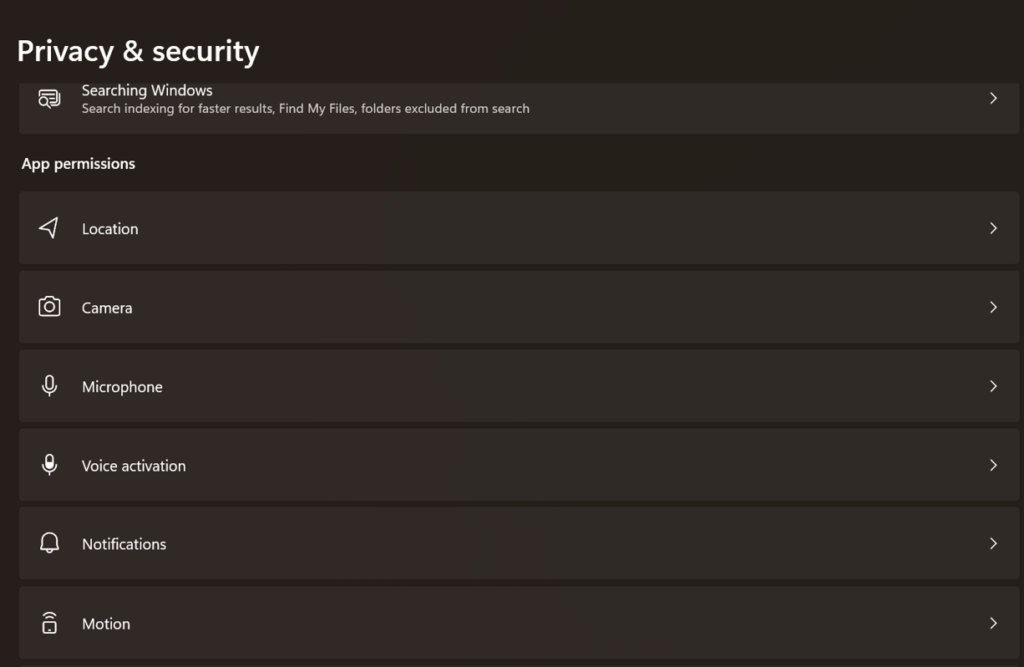
Step 4: Select Location.
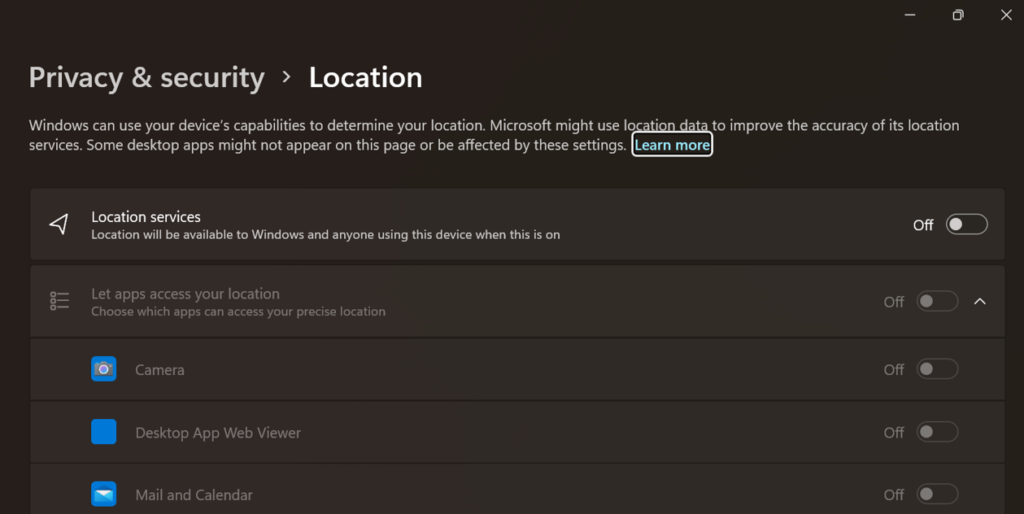
Step 5: Toggle the Location services and switch to the On position. After that, try using the Night Light option.
Windows Update
A Night Light problem was said to exist in earlier versions of Windows that prevented it from working properly. Check to check if a new update for your Windows version is available and see if that solves the problem.
Step 1: Click on Windows + I to open the Settings window.
Step 2: Click on Updates & Security.
Step 3: Click on Check for updates to update Windows.

Make Use Of Third-Party Night Light Substitutes
Consider using a Night Light option while you wait for the bug to be rectified. You may adjust the hue of your screen to warm using third-party programs like f.lux and SunsetScreen. You can further personalize them to change according to the time of day.
The Final Word On How To Fix the Night Light Feature Not Working in Windows 11?
The above methods will help users to enable Night Light in Windows 11 and fix issues if any. You can carry out the steps in one method and check if your issue has been resolved. This way you need not follow all the methods and ignore the rest once your problem has been resolved.
Follow us on social media – Facebook, Instagram, and YouTube. For any queries or suggestions, please let us know in the comments section below. We would love to get back to you with a solution. We regularly post tips and tricks, along with answers to common issues related to technology.