MSI laptops are said to be one of the best computers for gaming and enhancing productivity. Whether you are a gamer who wants to capture wins or someone who needs to grab snapshots for professional work, you need to learn how to screenshot with MSI Laptop.
This article will walk you through the step-by-step process of taking a screenshot on an MSI laptop. So, without any further ado, let’s get started!
Worth A Read: Tips and Tricks For Better Screen Captures On Windows 11/10
Why would someone need to capture their screen?
There are certain times when you can’t download necessary information or images from a website. In such cases, the need for taking a screenshot arises to save the required information. Capturing a snapshot way to save images or information presented on the screen.
| Additional Information:
Various methods capture screenshots on your MSI Laptop. Be it the entire screen, a specific portion of the window, or an active window. Further, you may crop, edit and refine the final output according to your preferences using the software. |
4 Ways to take a screenshot on MSI Laptop (2024)
Taking screenshots with MSI Laptop is quite an easy process, try any of the workarounds shared below to get the task done.
Solution 1: Using the Print Key (PRT SC)
This approach can capture screenshots on practically any laptop. It’s probably the most prevalent technique for novice and pro computer users to take screenshots on an MSI laptop.
Step 1: Navigate to the screen you want to capture.
To capture a screenshot, you must head toward the window you want to capture. Please ensure that your MSI laptop is set to full screen so you can have a snapshot of the whole screen.
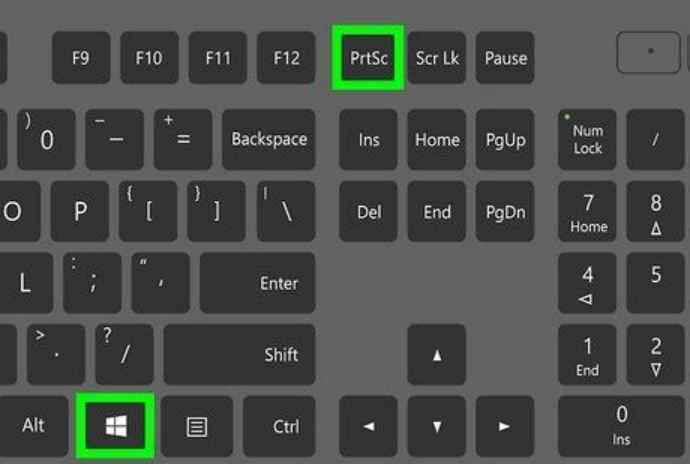
Step 2: Press the Print Screen key
This key is located in the top-right corner of your keyboard. Depending on the size of your keyboard, the Print Screen may appear as PRT SC.
You may capture the screen by hitting the Windows and PrtSC keys together. Your screen will blink for a moment, and the snapshot will be taken.
Step 3: Locate the Screenshots
To see your captured screenshots, simply navigate to the Pictures folder in Windows Explorer. Here, you need to locate the folder ‘Screenshots’ where all your captured images are saved.
Must Read: How to Annotate Screenshots and Images in Windows 11
Solution 2: Using the Snipping Tool
If you wish to take a screenshot of MSI laptop’s specific parts of the screen, consider taking help of the Snipping tool.
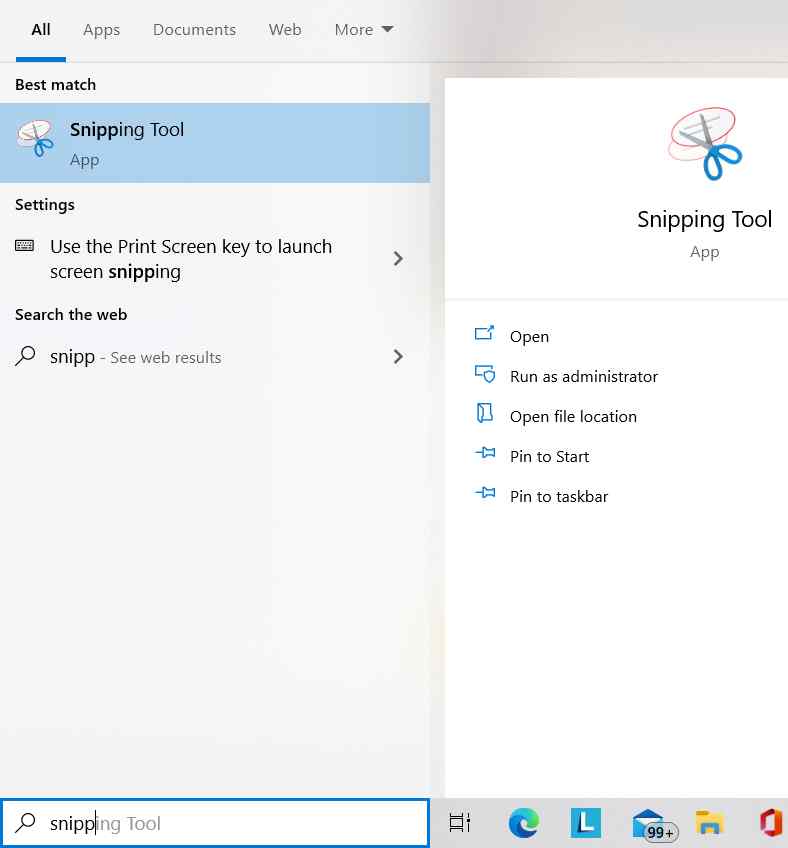
Step 1: Launch the Snipping Tool
Navigate to the Windows search option and type Snipping Tool. Click on the first result and on the next window you will see a scissors icon pop-up. When you click it, the snipping tool program will launch.
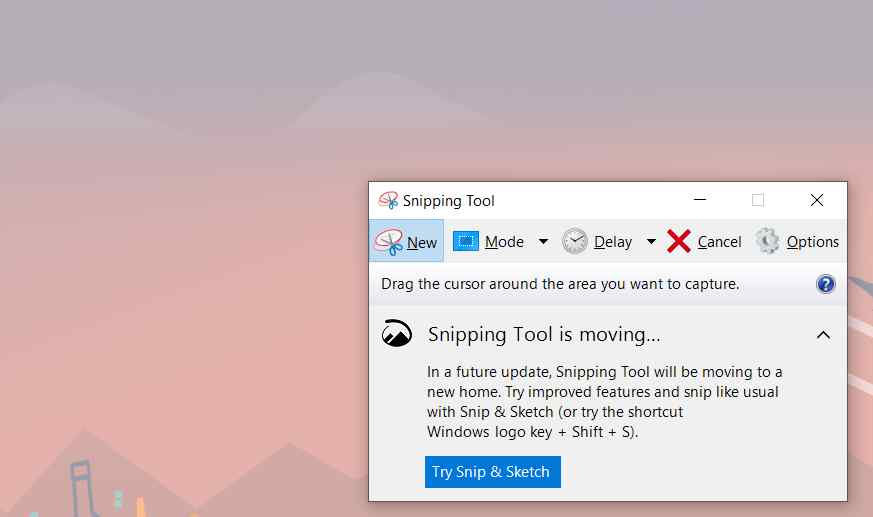
Step 2: Working with the Snipping Tool
On the Snipping Tool window, you may see various options to choose from. To capture a screenshot, a new tab must be clicked. A highlighted rectangle window will appear on your screen. Simply press the left mouse button and drag your cursor to select the area you want to capture.
Step 3: Save the Screenshot
After you’ve captured the desired snapshot in the tabs, click on the file. Then select the ‘Save as’ option, and choose the desired location on your laptop.
This is how you can take a screenshot on an MSI laptop with built-in utility. Alternatively, you can try the below-mentioned methods to get the job done flawlessly.
You might want to read:
Solution 4: Snip and Sketch
Windows 10 also comes with a Snip and Sketch tool to take screenshots. This utility allows you to take snapshots effortlessly. It even features a three (3) or ten (10) second countdown before taking a picture of your MSI computer screen.
Follow the steps below to take the screenshot MSI laptop using the Snip and Sketch tool:
Step 1: Launch the Snip and Sketch App.
To access the Snip and Sketch tool, press Windows + Shift + S simultaneously. A small window will appear at the top of the screen with four options.

Step 2: Take a screenshot on MSI Laptop.
Drag the pointer over the MSI windows screen to capture the appropriate area.
A pop-up notification will show you the taken snapshot once you release your hand.
Step 3: Preview & save your screenshot.
You can preview and save the captured screenshot accordingly.
This is how Snip & Sketch works. If you are someone who needs to edit and refine the final output, take the help of reliable third-party screenshot capturing software.
Solution 4: Use TweakShot Screen Capture (Recommended Screen Capturing Tool)
TweakShot Screen Capture is the most efficient method for capturing your screen and editing photos to get professional results. The software allows users to take snapshots of an active window, entire screen, scrolling webpage, or any rectangle region of the screen. It even supports basic editing functions like cropping, highlighting, pixelating, etc. Here are some of the significant advantages of using this software:
- Allows you to capture different screenshots per your choice.
- Gives you the option to include the mouse cursor in the capturing process.
- Comes with a picture editor that includes basic editing functions such as cropping, resizing, applying blur/pixelate effects, and more.
- Makes annotating screenshots easy. You can draw arrows, lines, and steps on the photographs, trim, highlight essential parts, etc.
- TweakShot is a brilliant tool that helps to create demonstration videos and screenshots for teaching, learning, or enhancing efficiency while working.
- A specialized screen color picker allows you to select colors from the screen and photos. You can also copy color codes to speed up your design process.
You might want to read: What To Look For in the Right Screen Capture Software
Want to know how it works, read on !
Follow the steps mentioned below to install and use this software:
1) Go to the official website and download the latest version of TweakShot Screen Capture.

2) To begin the installation, double-click the downloaded tscsetupipg_tweaking-site.exe setup file. To complete the installation, follow the on-screen instructions.
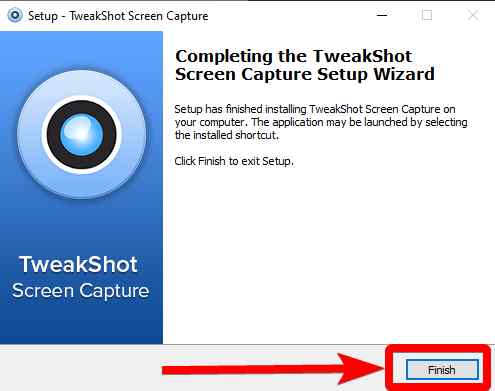
3) Depending on your settings and the operating system, you might see a UAC prompt asking you to approve or reject the activity. To proceed with the installation, click Allow.
4) TweakShot Screen Capture will be successfully installed on your PC.
5) When you launch TweakShot, a shortcut of the app (Big Eye icon) will appear in the system tray. This screen capturing tool allows you to capture an area, a single window, the entire screen, a scrolling window, record video, and use a color picker.
Simply select the preferred option and complete the task of capturing screenshots on the MSI Laptop.

Learn more about TweakShot Screen Capture: TweakShot: Best Screen Capture & Video Recording Software
Frequently Asked Questions-
Q1) How to take a screenshot on an MSI gaming laptop?
Follow the steps mentioned below to know how to take a screenshot on an MSI laptop:
Step 1: Open the window for which you wish to capture screenshots.
Step 2: Now, To bring up the “Gamebar,” press “Windows” + “G” at the same time.
Step 3: To capture screenshots on the MSI laptop, use the screenshot feature.
Step 4: This screenshot image can be found in the “screenshot” folder.
Q2) How to take screenshots on a laptop?
One of the best ways to take a screenshot on a laptop is by using reliable screen capturing software like TweakShot. It features all the essential utilities to grab various screenshots, record videos, and edit them.
Q3) How to take a screenshot in Windows 10 with Snipping Tool?
Follow the steps mentioned below:
Step 1: Press the Windows logo key + Shift + S simultaneously. While you pick an area for your snapshot, the desktop will darken.
Step 2: Rectangular mode is the default setting. Choose any other pattern if you want.
Step 3: The snapshot is transferred to your clipboard automatically.
Q4) How to save a screenshot as a file in Windows 10?
You can save a screenshot by pressing Windows + Print Screen together. By holding down the Windows logo key, you can tap the Print Screen key, also known as Prt Sc.
It’s never difficult to take screenshots using the right tool. We have listed four methods on how to screenshot MSI laptops. TweakShot Screen Capture is one of the most user-friendly and convenient ways to capture screenshots on an MSI Laptop. If you know or use any other screenshot-capturing software, share your opinion and suggestion in the comments below!
Follow us on social media – Facebook, Instagram and YouTube.