Isn’t it annoying when you try to update your program or transfer data on a local network & end up being unsuccessful? The “network resource unavailable” error is one of the primary causes of such problems. Besides this, there are a variety of reasons due to which the resource or file you’re trying to access becomes no longer accessible.
- This usually happens when your Internet connection is not stable.
- Sometimes, your firewall or antivirus program may prevent users from accessing particular network resources.
- It is also possible that the software you’re trying to upgrade has some internal problems or bugs that are to blame for the mistake.
We’ll take a deeper look at the potential fixes for the Windows network resource unavailable problem.

Also Read: How to Fix Remote Desktop Gateway Server is Temporarily Unavailable
What Are the Solutions to Resolve the “Network Resource Unavailable” Error?
Having encountered numerous instances of this error during my professional journey, I fully understand the frustration it engenders among users and their quest for successful resolutions. Rest assured, the following remedies have been thoughtfully curated to alleviate this issue and restore seamless access to desired resources and files within a network.
Method 1: Check Your Network Connection
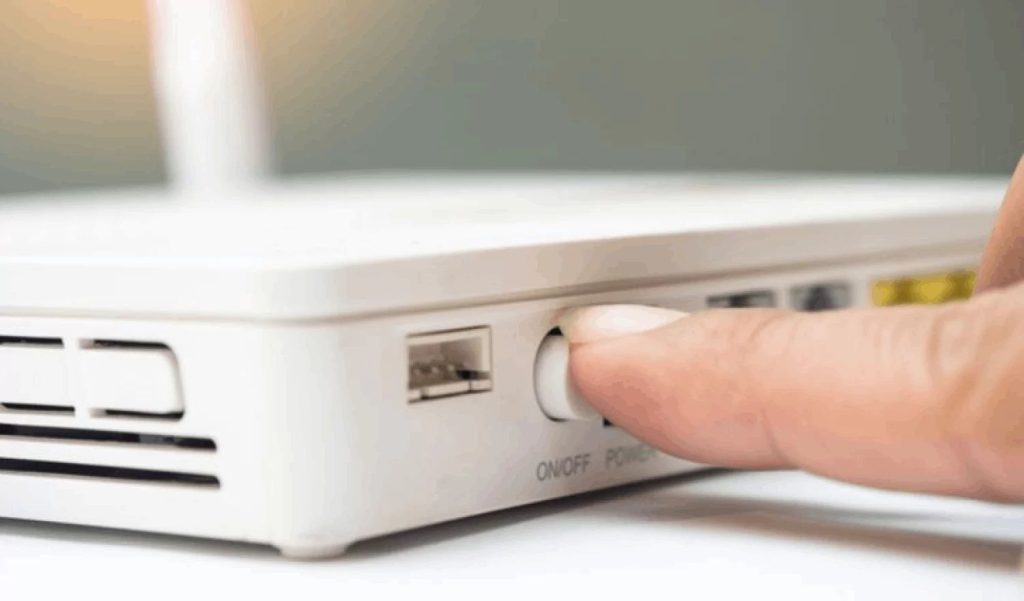
The first thing you should do whenever a network-related mistake occurs is to examine your internet connection. Try restarting your modem or router if that doesn’t work. Make sure the Ethernet or Wi-Fi wire is connected properly as well. And if the problem affects your other devices as well then it might be good to ask your internet service provider for any network outages.
Also Read: How to Fix “You Are Not Connected to Any Networks” on Windows
Method 2: Disable Your Antivirus Temporarily
Your Antivirus might block some of your network connections unduly assuming the incoming connections as false positives. To make sure this is not the case, you can temporarily disable your antivirus and then check if you can access the files or apps on a different device.
Disable your third-party antivirus program through its settings or dashboard if you use one. Keep in mind that disabling your antivirus program can put your computer’s security in danger. Therefore, after using the resource, turn on your antivirus software again.
Also Read: Network Connections Folder Empty on Windows 11? Try These Solutions!
Method 3: Delete Windows DNS Cache
Any outdated or damaged resource information saved on your computer can be removed by clearing the DNS cache. This ensures that your computer makes a fresh connection to re-fetch the resource. To delete the DNS cache on your computer, just adhere to these easy steps:
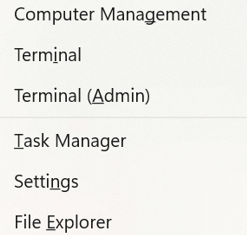
Step 1: Press Win + X to launch the Windows Power menu.
Step 2: Select Terminal (Admin).
Step 3: Click Yes on the UAC window.
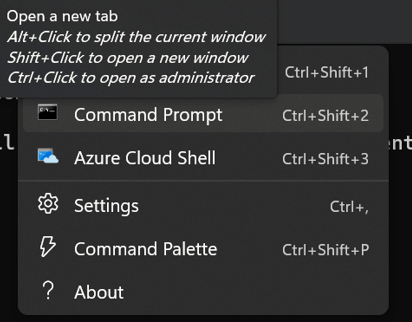
Step 4: Make sure that you have the Command Prompt window open. Else, click on the dropdown option in the tab and select Command prompt.
Step 5: Type the following command in the command prompt window.
ipconfig /flushdns
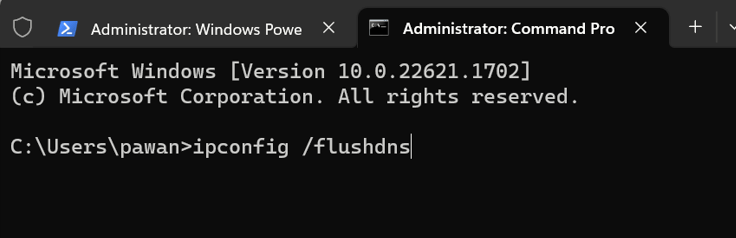
The DNS resolver cache will be cleared and the command will be carried out. You can now attempt to share files over the network once more.
Also Read: How To Fix The Network Adapter Error Code 31
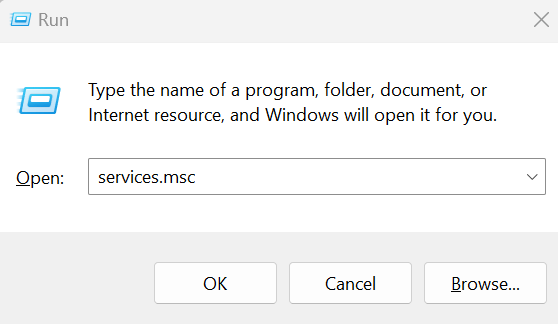
Method 4: Reset TCP/IP Settings
TCP/IP is a network protocol that enables online file downloads and uploads. Rebooting the TCP/IP NetBIOS Helper service will help fix any network glitches within your PC. Reset the TCP/IP settings by using the following steps:
Step 1: Type Win + R to open the RUN box.
Step 2: Type Services.msc in the text space and press the Enter key.
Step 3: Next, scroll down to find the TCP/IP NetBIOS Helper service. Make a right click on it and choose Restart from the context menu.
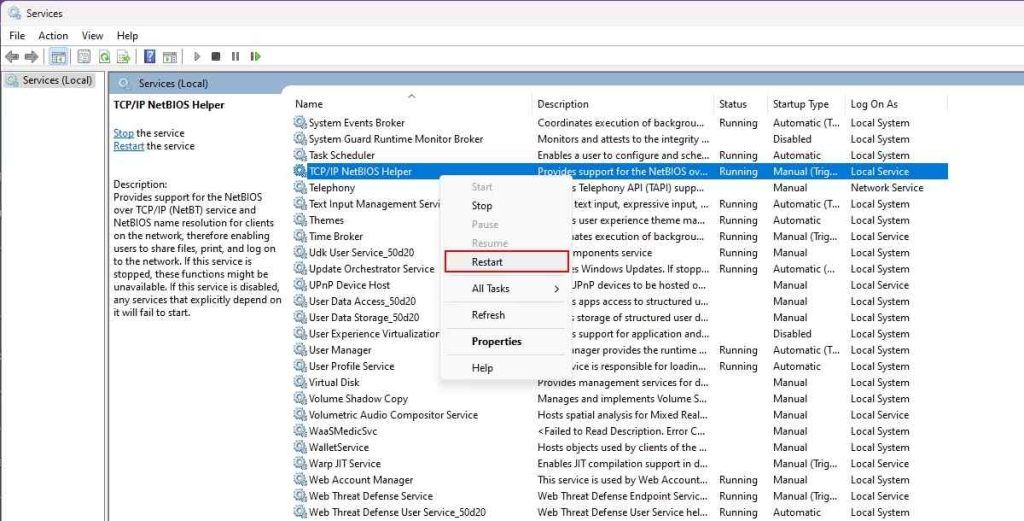
Step 4: Now, reboot your router and check if the issue persists.
Also Read: How To Rename A Network Adapter On Windows 11
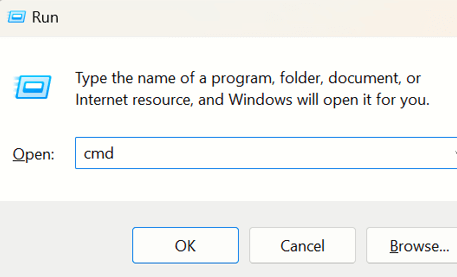
Method 5: Delete ARP Cache
Every device in your network has a distinct identification ID that is saved in the Address Resolution Protocol (ARP) cache. This facilitates effective communication between your computer and external devices. An issue with the availability of network resources can result from an obsolete or inaccurate ID in the ARP cache. Therefore, flushing the ARP cache removes such incorrect or corrupted IDs.
Here are the steps to accomplish that:
Step 1: Press Win + R to open RUN box.
Step 2: Type CMD in the text space and then press Ctrl + Shift + Enter to open the command prompt in administrator mode.
Step 3: Now type the following command in the command prompt window:
netsh interface ip delete arpcache
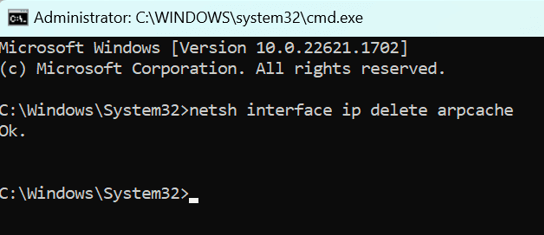
Step 4: Press the Enter key to execute the command.
Also Read: How To Fix Windows Could Not Find a Driver for Network Adapter
Enjoy Seamless Network Connectivity Beyond The “Network Resource Unavailable” Error On Windows 11/10 PC
We hope that you are now able to fix the “Network Resource Unavailable” Error on your Windows PC using the aforementioned methods. Please let us know in the comments below if you have any questions or recommendations. We would be delighted to provide you with a resolution. We frequently publish advice, tricks, and solutions to common tech-related problems.
You can also find us on Facebook, Twitter, YouTube, Instagram, Flipboard, and Pinterest.