
All of your network adapters are given generic names by Windows by default. You can easily modify them later if you feel those names to be unclear. It is simpler to recognize your network adapters if you give them descriptive terms. Here are distinct ways for Windows 11 users to rename a network device.
How To Rename A Network Adapter On Windows 11
1. Use The Settings App To Rename The Network Adapter
Through the Settings program, renaming a network device on Windows 11 is the most straightforward process. It was not possible to do this with earlier Windows versions. The steps that you must take are listed below.
Step 1: To open the Settings app, open the Start menu and click the gear-shaped symbol.
Step 2: Utilizing the left sidebar, select the Network & internet tab.
Step 3: Select Advanced network options by clicking.
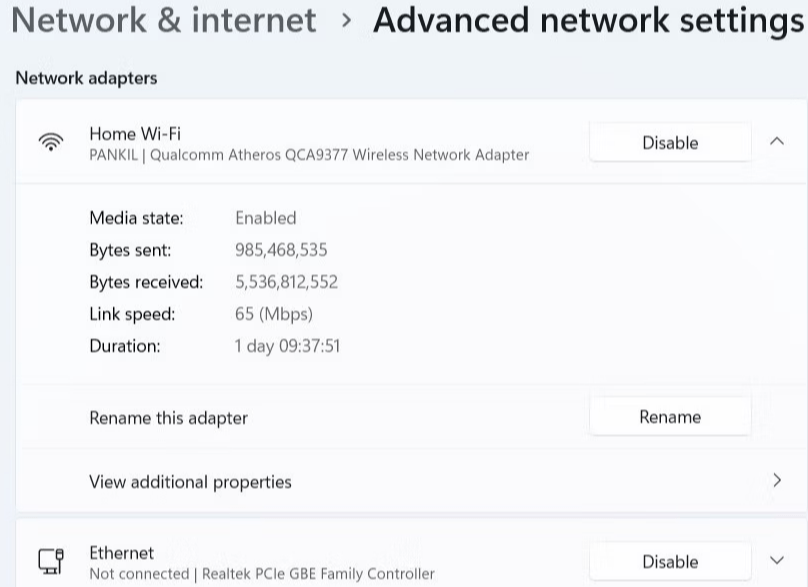
Step 4: The Ethernet or Wi-Fi adapter you want to rename should be expanded.
Step 5: Select Rename from the menu.
Step 6: For the network adapter, type a new name. You can name your network adapter using letters, hyphens, and numbers.
Step 7: Select Save.
2. Changing the Network Adapter’s Name by Utilizing the Control Panel
Another method for renaming the network adapter in Windows is through Control Panel. You may already know this technique because it resembles the Windows 10 network adapter settings.
Step 1: For the search menu to appear, press Win + S.
Step 2: Search for the “control panel” and choose the first item.
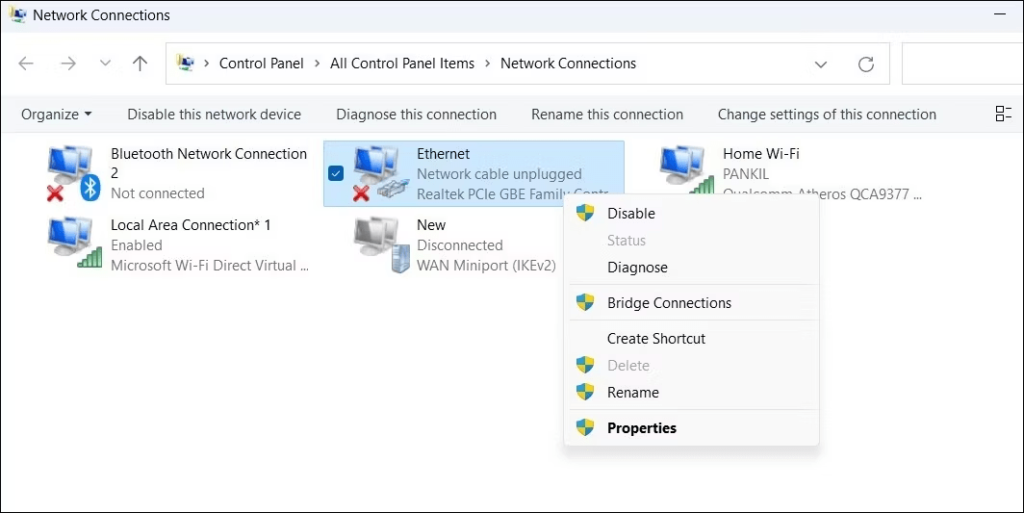
Step 3: Change the adapter settings to Network and Sharing Center.
Step 4: Right-click on your network adapter in the Network Connections window and choose Rename from the context menu.
Step 5: Press Enter to save the updated network adapter name after entering a new one.
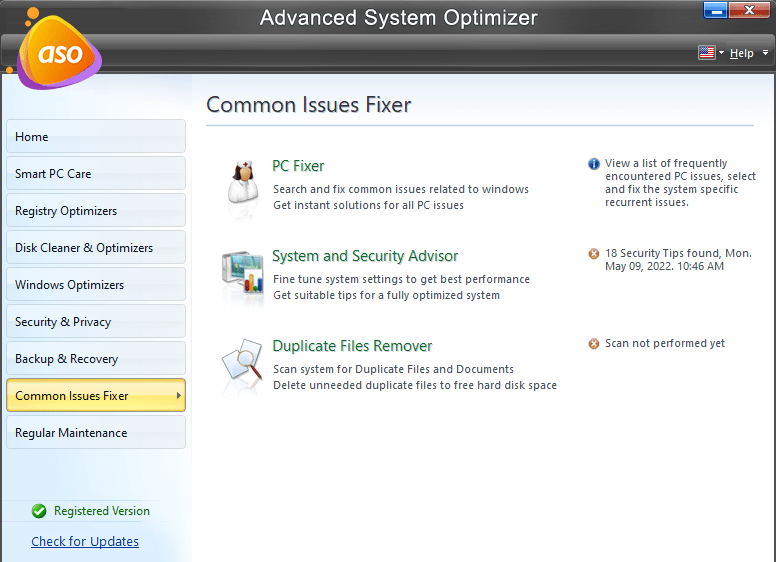
Bonus: How To Fix Control Panel Issues If Not Accessible?The most effective program for clearing out PC clutter is Advanced System Optimizer. It offers a speedy, affordable solution to your Windows optimization needs. Clean the hard drive to speed up the machine. Backup copies of essential data, including movies, music files, photographs, and documents, are also made in addition to retrieving lost data. Here are the steps to fix Control Panel Issues. Step 1: Download and Install Advanced System Optimizer from the button below. Step 2: Launch the application and click on the Common Issue Fixer tab on the left side of the app interface. Step 3: Now click on the PC Fixer option from the center of the app interface screen.
Step 4: A new app interface screen will launch on your PC. Click on the List Issues tab on the left panel. Step 5: Click on Control Panel under Categories and select the issue you currently face with your Control Panel, followed by a click on the Repair button.
Step 6: Follow the onscreen instructions and let Advanced System Optimizer fix your issue. Note: Your computer might restart once. |


3. How To Use The Command Prompt To Rename The Network Adapter
Running a few commands on Windows will allow you to rename the network adapter if you prefer to work with the command-line interface. Thankfully, it’s not as scary as it might sound. To rename a network adapter using Command Prompt, follow these steps:
Step 1: To access the Power User menu, right-click the Start icon or press Win + X on your keyboard.
Step 2: From the selection, choose Terminal (Admin).
Step 3: When the User Account Control (UAC) prompt appears, click Yes.
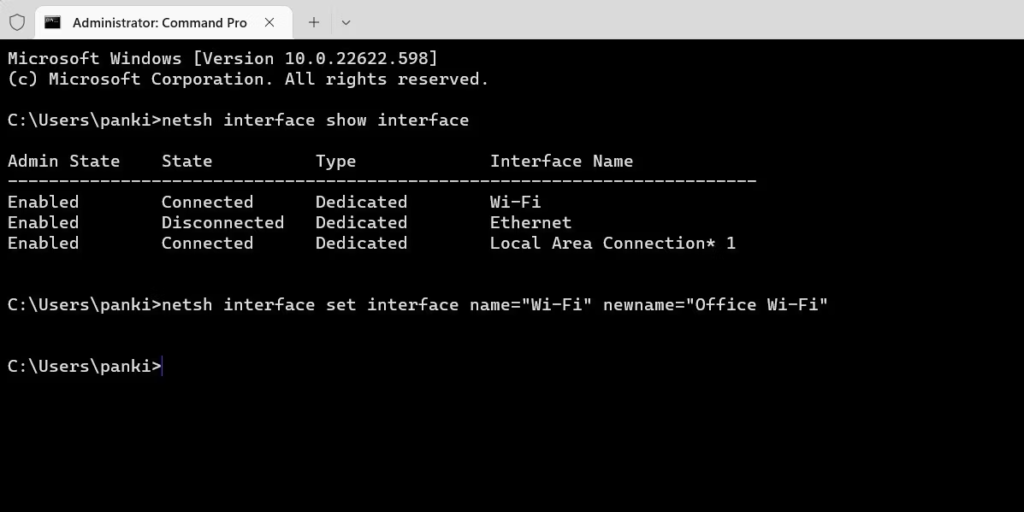
Step 4: Run the following command in the console to examine your computer’s list of network adapters.
netsh interface show interface
Step 5: From the Interface Name column, make a note of the name of the network adapter you wish to rename.
Step 6: To change the name of your network adapter, run the command below:
netsh interface set interface name="OldName" newname="NewName"
Step 7: The current name of the network adapter noted in the previous step should be substituted for OldName in the command above.
Similarly, replace your desired name for NewName in the command above.
Step 8: For instance, the following command would be appropriate to rename the network adapter from Wi-Fi to Office Wi-Fi:
netsh interface set interface name=" Wi-Fi" newname="Office Wi-Fi"
The Final Word On How To Rename A Network Adapter On Windows 11
A network adapter is a crucial piece of hardware that enables the communication between various devices and your computer. To keep things organized, if your system has multiple network adapters, you might want to give each one a meaningful name. Fortunately, Windows 11 provides a variety of options for renaming network adapters. Eliminating outdated network adapters, you are no longer using is a further technique to keep track of your active adapters.
Follow us on social media – Facebook, Instagram, and YouTube. Please contact us with any questions or ideas. We would be delighted to provide you with a resolution. We frequently publish advice, solutions, and guidance for common technical problems.