Since most of the tasks are being done digitally, the overall use and price of printers have dropped significantly. Today, you can pick any decent printer for just less than $50 and an excellent quality laser printer under $100 pricing models. But this certainly doesn’t make printers any less important. Hard copies of documents and photographs are still needed and preferred by several businesses.
However, the thought of setting up & adding a printer intimidates most individuals. But once you know the instructions, it’s fairly easy to do. Let’s learn how to install various types of printers: Wireless Printer, USB Printer, Network Printer, Bluetooth Printer, etc.
You might want to read: How To Print To PDF On macOS
How To Add A Printer To A Mac
Step-By-Step: Add A Wireless Printer To A Mac
To connect your printer wirelessly, you need to follow the instructions mentioned below via Wi-Fi Protected Set-Up (WPS).
STEP 1 = To get started, you need to hit the Wireless or Wi-Fi button provided on your printer, followed by the WPS button provided on your Router. But these buttons may vary from printer to printer & router to router. So, we suggest checking the respective guides for both to get a clearer idea of how to set up WPS.
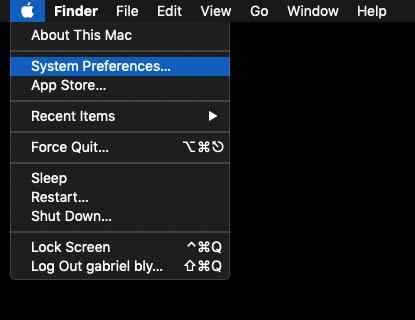
STEP 2 = After this, you can click on the Apple icon on your Mac and select System Preferences from the drop-down menu.
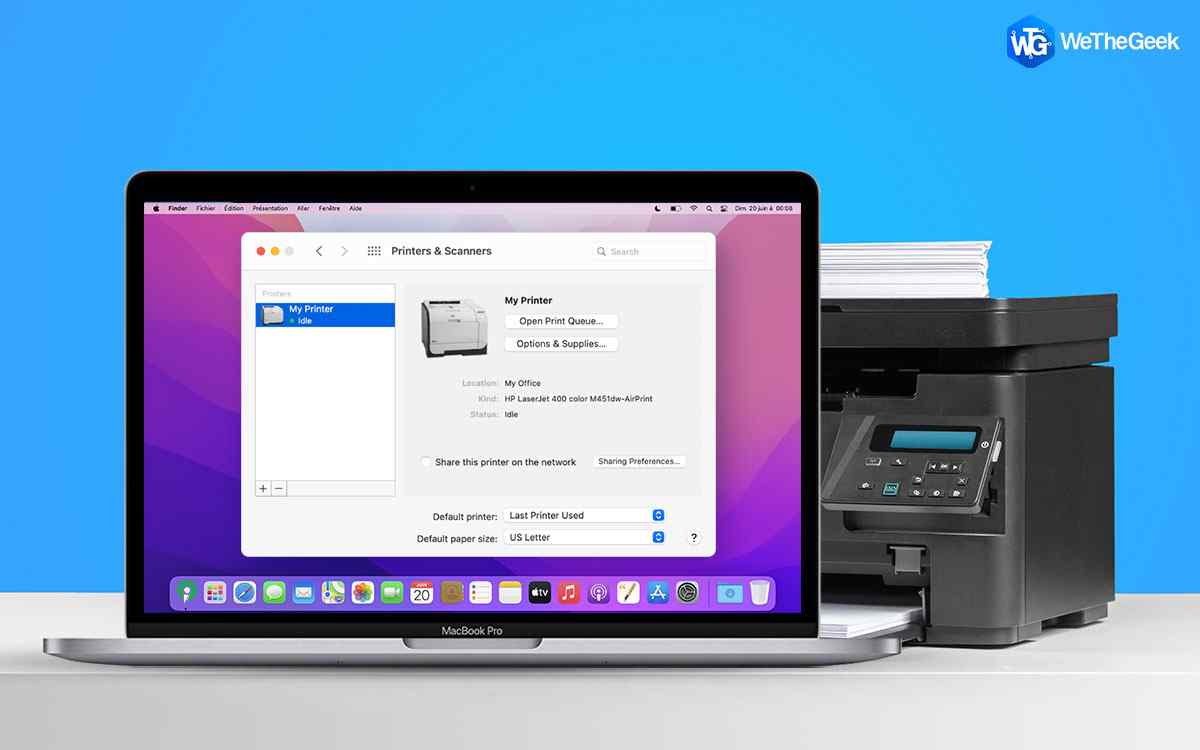
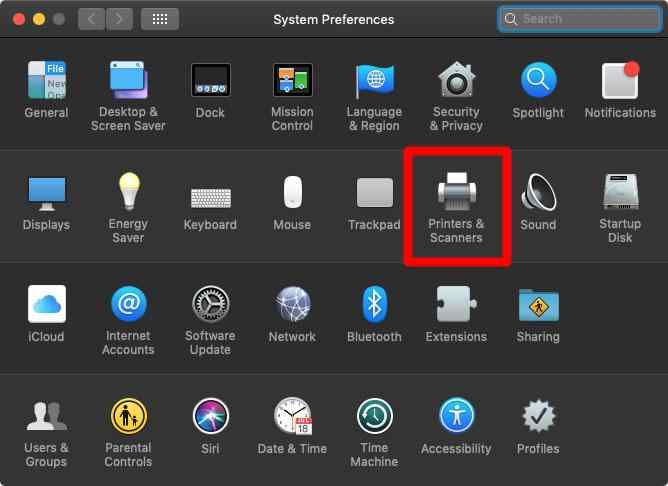
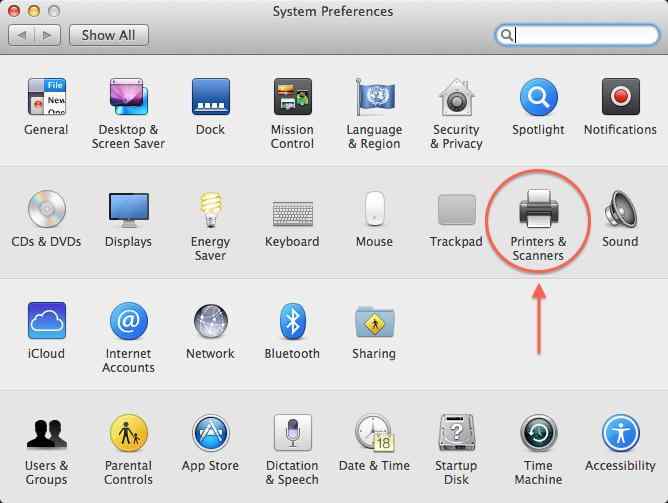
STEP 3 = From the next window, you need to find and click on Printers and Scanners. On some machines, the module can be found as Print & Scan.
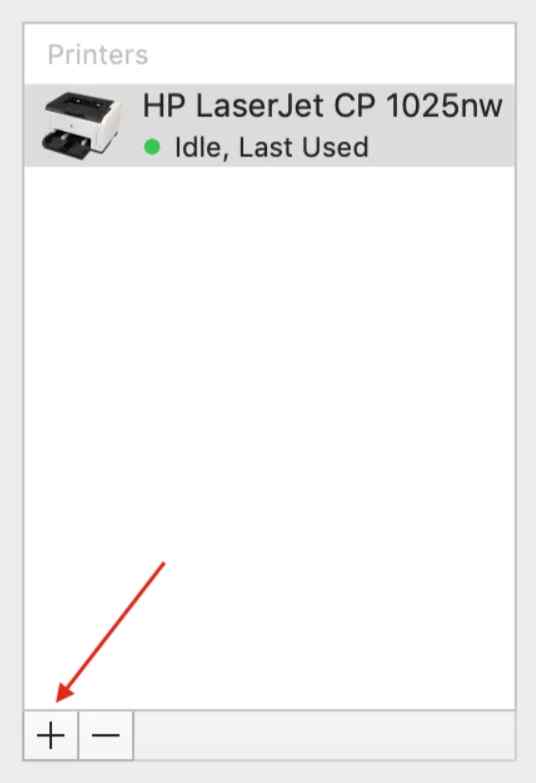
STEP 4 = Now at this point, you need to hit the + icon to add the printer to your Mac. You can refer to the screenshot shared below to get a clearer idea.
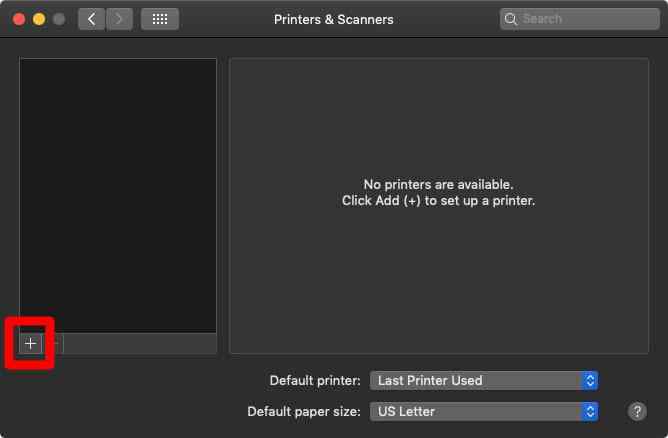
STEP 5 = At this point, you can find a list of discoverable printers on the network. Check the Default tab to select the printer.
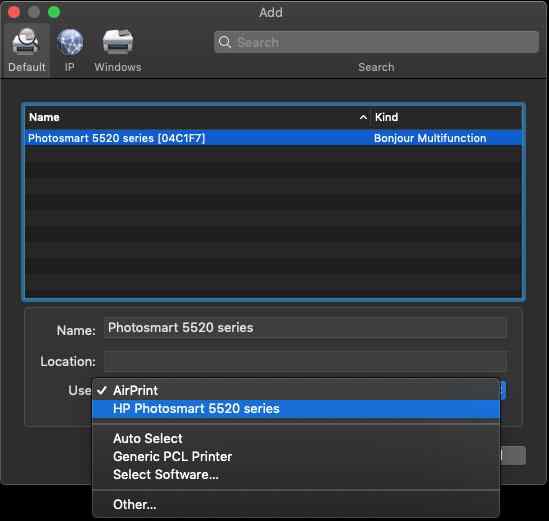
STEP 6 = Now, you need to select the printer’s software or Driver under the Use field. Simply, check for the following:
- AirPrint
- Printer’s Print Driver
- Auto Select (Choose this option in case you want your Mac to automatically download the correct version.)
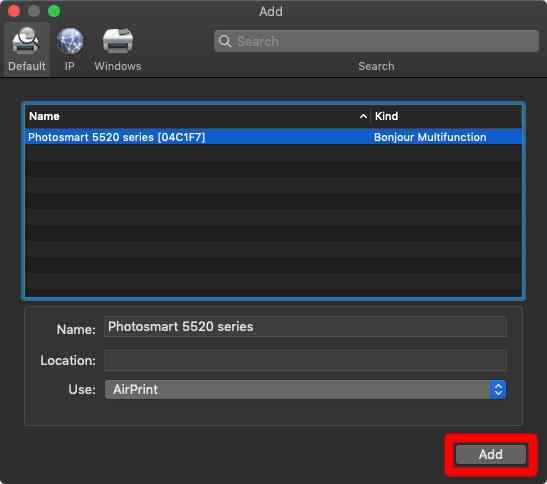
STEP 7 = As soon as you hit the Add button, a new wireless printer would be automatically added. You can see them under the Print & Scan header.
That’s all! Now you can easily conduct printing sessions wirelessly, using Setup Assistant functionality on your Mac.
Step-By-Step: Add A USB Printer To A Mac
To install and set up a wired printer on Mac, simply follow the step-by-step instructions provided below.
STEP 1 = To get started, simply attach the printer’s USB to your MacBook.
STEP 2 = As soon as you plug the printer in, your Mac will automatically recognize the printer and will soon install the required software/driver to work properly. In case your MacBook is unable to detect the printer, you can follow the instructions.
STEP 3 = Hit the Apple icon on your Mac and select System Preferences from the drop-down menu.
STEP 4 = Head towards the Printers and Scanners module. From the Default tab, click on the + icon to add the printer to a Mac.
STEP 5 = Once the product name of the Printer appears, click on the Add button to complete the process.

You can Adjust Color Density to improve the print quality. This is one of the easiest ways to add a printer to a Mac.
You might want to read: 10 Best Free Scanning Software For Mac To Use In 2021
Step-By-Step: Add A Network Printer To A Mac
Well, in small or large enterprises, a Network Printer allows multiple machines to utilize the same printer effectively and efficiently. To set up a Network Printer to a Mac, all you need to do is:
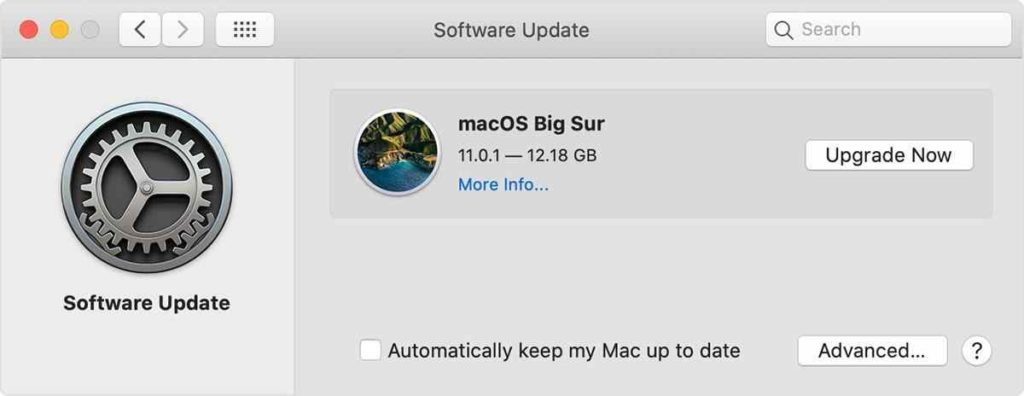
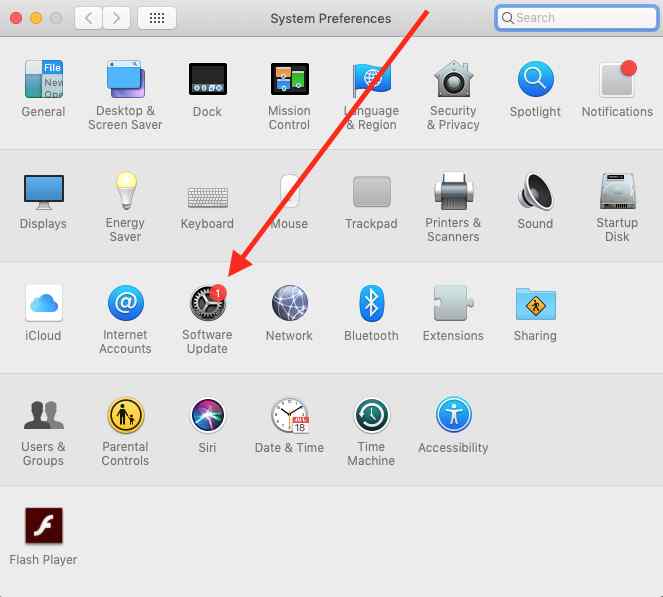
STEP 1 = First of all, navigate to the Apple menu and hit the Software Update button to get the latest OS X updates on your machine.
STEP 2 = Now, go to the Printers & Scanners module by following the same path mentioned in the above methods.
STEP 3 = From the list of printers, click on the Plus icon.
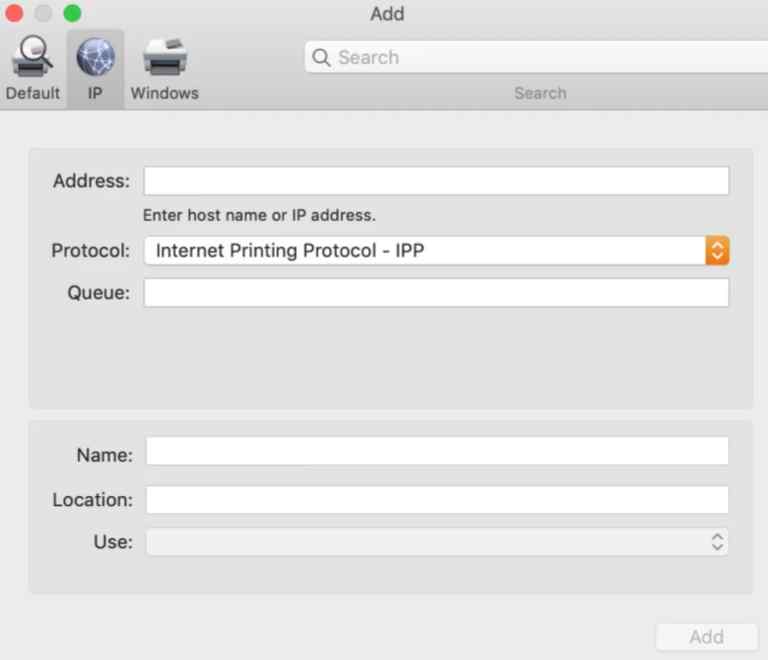
STEP 4 = Now at this point, head towards the IP tab, where you need to enter the IP Address, name of the printer, and the host.
That’s it! This is how you can easily add a printer to a Mac and execute multiple printing sessions without any hassles.
Step-By-Step: Add A Bluetooth Printer To A Mac
To print wirelessly to a Bluetooth enabled Printer, simply follow the instructions shared below:
STEP 1 = Hit the Apple icon on your Mac and select System Preferences from the drop-down menu.
![]()
STEP 2 = Now you need to head towards the Software Update and make sure no updates are pending. This will completely make your Printer ready for flawless Bluetooth pairing.
STEP 3 = Now go back and switch to the Printers & Scanners module. Hit the + icon, located at the bottom of the list.
![]()
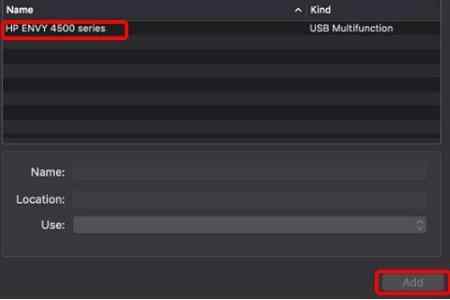
STEP 4 = Choose the printer, as soon as it appears in the list. Complete the action by hitting the Add button.
In case the printer doesn’t appear in the list, there’s a high probability that drivers for the specific printer were not automatically installed via Bluetooth. If that’s the case with you, we advise you to manually get them and then follow the instructions shared above to use the Bluetooth printer on Mac.
So, that was all for today! Hope you found our today’s guide on “How To Add A Printer To A Mac” useful. If you want us to cover more such setting up guides do Upvote this article and share your suggestions in the comments section below!