Is your external hard drive showing the wrong free space when connected to your Windows 10 PC? Well, as per our research, this is a common issue for most of the hard drives like Lacie, Sandisk, Western Digital, Seagate, etc. When you connect your 2 TB hard drive, it shows only 500 GB, 200 GB, or 32 GB available space on your computer. So, why is this happening? Is there a way to restore the external hard drive to full capacity? Keep reading to find all the answers!
Here’s a screenshot of a Windows 10 user struggling with the same issue where his 1 TB Hard Drive is Showing Less Space Than Actual.
Why Hard Drive Showing Wrong Free Space On Windows 10?
There are a plethora of reasons that may result in the hard disk showing less space than on a Windows 10 PC.
- The hard drive driver has become obsolete.
- You’ve formatted the hard drive using inefficient software.
- In case your hard disk has been initialized to a wrong partition table, you may face issues like “hard drive showing wrong free space”.
- Bad sectors are the culprits behind ‘hard drive showing wrong free space on Windows 10’.
We are sharing a quick list of troubleshooting methods you can implement right away to fix “hard disk space showing less than actual”.
You might want to read: Fix External Hard Drive Keeps Disconnecting Issue In Windows 10
{FIXED}: External Hard Drive Not Showing Full Capacity On Windows (2023)
To regain the full capacity of your hard drive, follow the instructions stated below:
METHOD 1 = Update External Hard Drive Driver
In case your hard drive driver is out-of-date, it will start to malfunction. One of these malfunctions results in showing the wrong capacity when connected to a PC. Hence, it is advised to keep your drivers up-to-date. Follow the instructions mentioned below to replace your faulty drivers:
MANUAL WAY = Using Device Manager
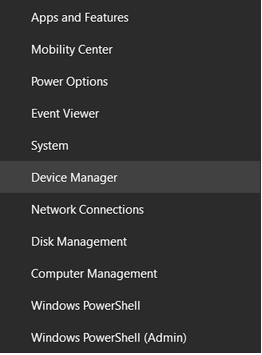
STEP 1 = Go to the Start Menu and right-click on the same. From the context menu, find and click the option Device Manager.
STEP 2 = From the Device Manager window, simply find the Disk Drivers category and expand it to see the hard disk which is showing less capacity than actual. Once found, hit the Update driver button from the context menu.
STEP 3 = Hit the option “Select automatically for updated driver software”.
STEP 4 = Follow the on-screen instructions to get the latest driver updates for your external hard drive.
AUTOMATIC WAY – Using a Reliable Driver Updater Program For Windows PC
STEP 1 = Install Smart Driver Care on your Windows 10 PC. It is one of the most popular, trustworthy, and reliable utilities chosen by several Windows users to install the latest bulk driver updates in one go.
STEP 2 = Using the registered version, you can click on the Start Scan Now button and allow the driver updater software to look for outdated, incompatible, missing, damaged drivers on your PC.
STEP 3 = As soon as the list of obsolete drivers appears, simply hit the Update All button to get the latest versions of each faulty device driver in one go.
STEP 4 = As per your preference, Smart Driver Care will start installing the best driver updates for your device(s). The Windows software fetches the latest and most compatible versions from trustworthy sources.
| Compatibility: | Windows 10, 8.1,8,7 (Both 32-bit & 64-bit) |
| Price: | USD 39.95 (Current Offer) |
| Review: | Smart Driver Care: No.1 Tool to Update Drivers |
| Help & Support | support@systweak.com |
METHOD 2 = Format Hard Drive Via Command Prompt
The following method shows the step-by-step instructions to format the hard drive via CMD utility. Doing so will completely wipe all the potential issues lurking around your external hard drive and thus resolve “hard drive showing wrong free space on Windows 10”.
| IMPORTANT: If you are considering this method then please note that all your stored files/folders will be deleted. So, make sure you’ve backed up critical files beforehand! |
STEP 1 = Launch CMD utility on your PC and make sure you run it as administrator.
STEP 2 = Type diskpart and hit the Enter button.
STEP 3 = As soon as the Diskpart pop-up appears on the screen, you need to execute another command line. Simply type – – list disk and hit the Enter button.
Executing this command line will ensure that all the disk drives will be listed in a proper manner, including the external drives connected to your PC.
STEP 4 = Now locate the hard drive showing the wrong free space on Windows 10 and type the command line: select disk 1 (where 1 is the external drive which you would like to format.)
STEP 5 = Now simply type clean and hit the Enter button to initiate the process of cleaning up all the data on the selected hard disk.
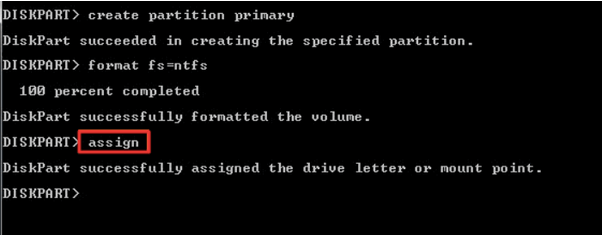
STEP 6 = Additionally, type create partition primary and hit the Enter button again!
STEP 7 = Execute another command line by typing format fs=ntfs (or type exfat if that’s the format of the file system). Hit the Enter button!
Do not forget to assign a new drive letter to the newly created partition. Type assign and click Enter button!
You might want to read: How to Reformat External Hard Drive on Windows and Mac
METHOD 3 = Update Firmware of External Hard Drive
Make sure you check the firmware version of your hard drive & if it’s outdated, simply update it with the latest and most compatible version to get rid of hard disk space showing less than actual. All you need to do is:
STEP 1 = Connect your external hard drive to your computer and go to the Start menu. Simply, right-click to select and open Device Manager.
STEP 2 = Locate Disk Drivers category and double-click to expand it under the Device Manager window. Simply, right-click on the hard disk showing less capacity than actual and select Properties. From the pop-up menu, navigate to the Details tab > select Hardware IDs from the Property section.
Now that you are aware of the Firmware version details. Navigate to the official website of your external hard drive’s manufacturer and look for the latest update. Alternatively, you can ask out for help through their Support section!
You might want to read: How to Recover Deleted Photos from External Hard Drive
How Do I Recover Data After Fixing an External Hard Drive Not Showing Full Capacity On Windows?
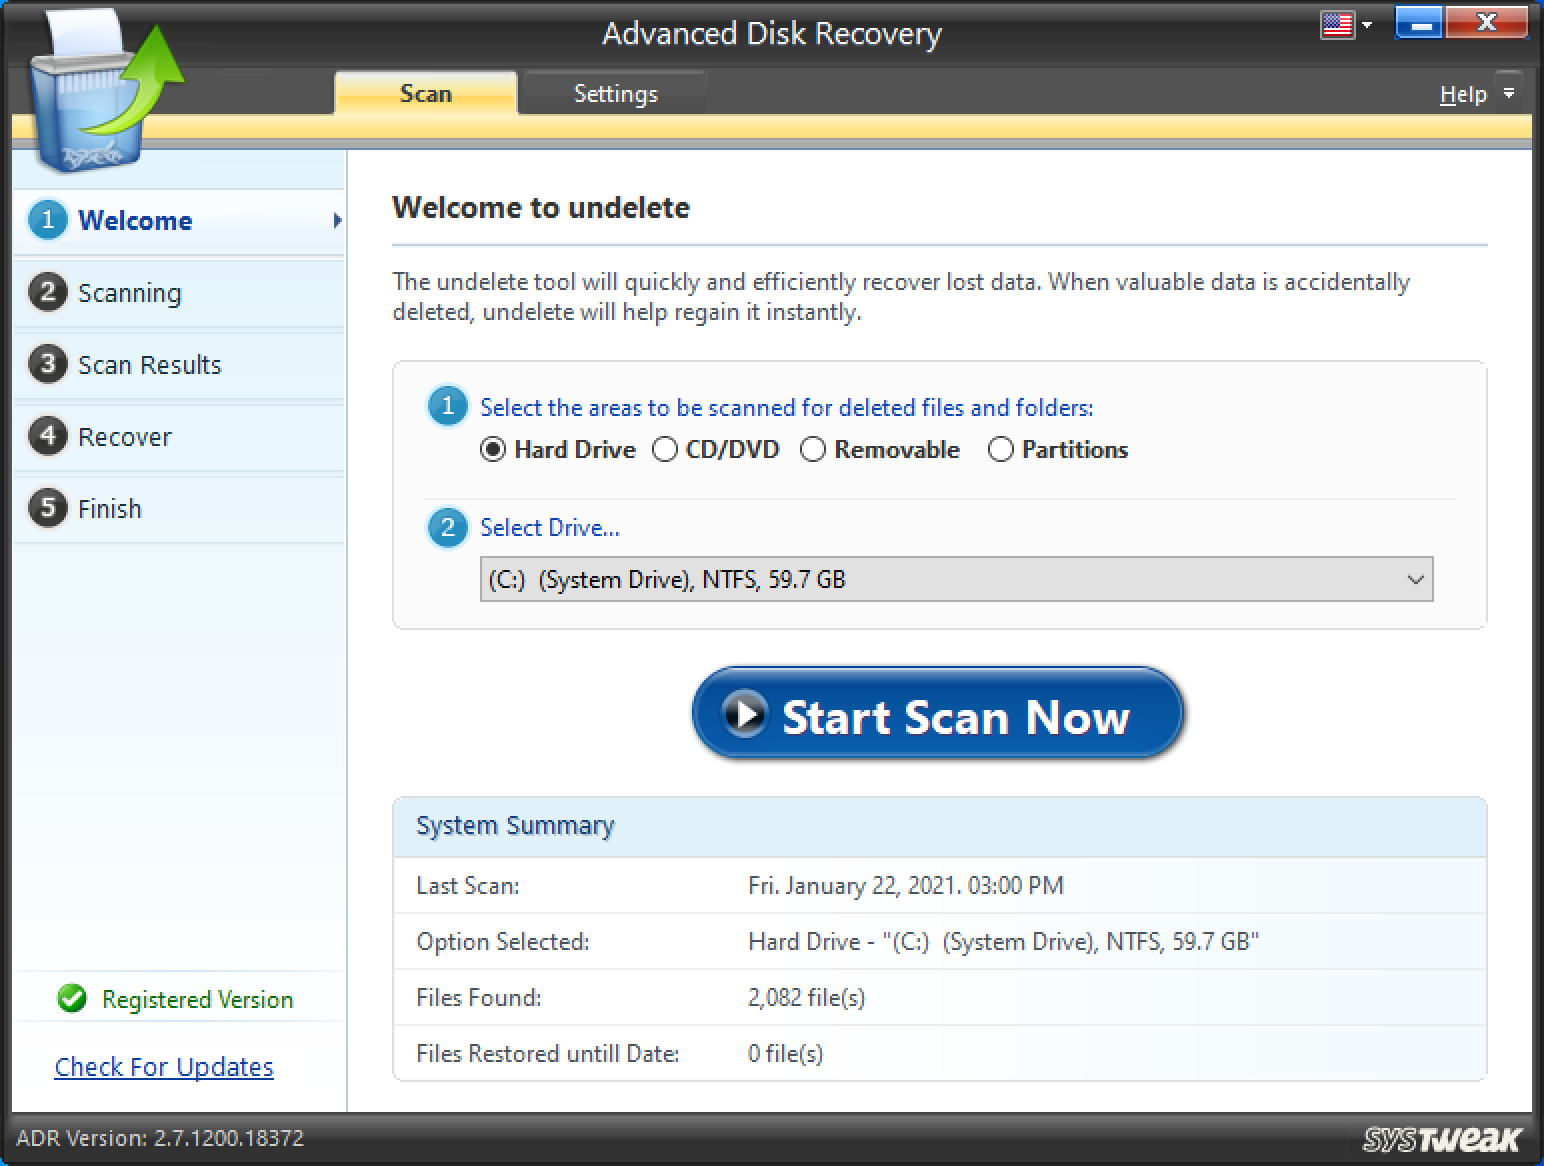
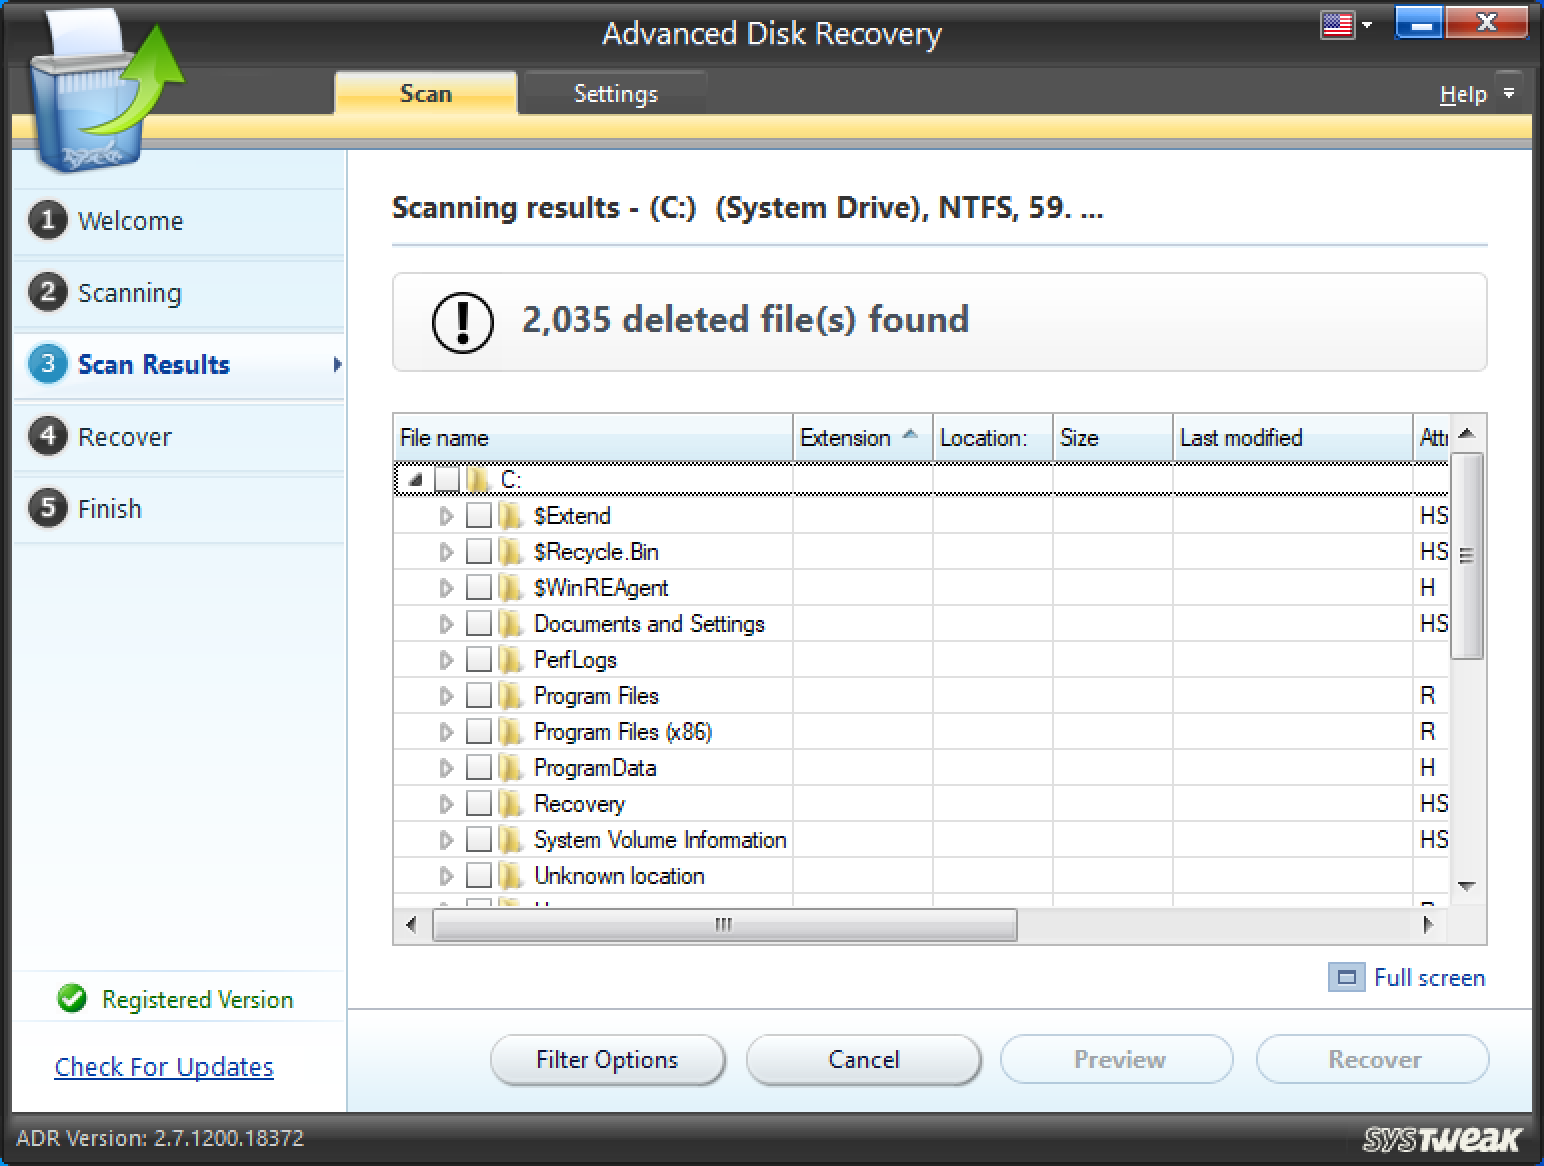
Most of the users have complained about losing precious data after getting rid of the annoying error. In case you don’t have a backup at hand, download Advanced Disk Recovery, a reliable file recovery software for Windows users to retrieve lost, missing, formatted, or accidentally deleted files/folders stored on the hard drive.

| Price: Free/$39.95 per Month (After Discount) |
| File Size: 4.4 MB |
| Compatibility: Windows 10, 8.1, 8, 7, Vista, and XP (Both 32-bit and 64-bit) |
Simply Install the software > hit the Start Scan Now button > let Advanced Disk Recovery look for all the missing data. Select the desired scanning mode from Quick Scan & Deep Scan. Once it displays a list of files/folders > mark the ones you wish to restore and click on the Recover button.

| IMPORTANT: While recovering files, make sure you select a different location from the place where you’ve lost your files in the first place. |
Read complete review: Advanced Disk Recovery: Utility To Retrieve Lost Data
So, this was all for today! Hope you were able to Restore External Hard Drive To Full Capacity. If you are facing any issues, do let us know in the comments section below!
NEXT READ:


 Subscribe Now & Never Miss The Latest Tech Updates!