
External hard drives becoming slow and unresponsive issue has become one of the most common concerns among Windows OS-powered computer users. In Windows, an external hard drive is connected via the USB 3.0 port and store explicitly large files, such as large media files, movies, and videos, etc. So, when it starts becoming a bit dysfunctional, it is a sign of worry as your entire data is at risk.
Usually, a slow or unresponsive external hard drive doesn’t mean that it will crash permanently but may result in some errors. This leads to the drive’s slow boot time, slower data transfer speed, unexpected drive crashes, lag in opening up of files/folders on the drive, etc. However, users are often advised to change their external hard drives in such a scenario and create a backup, but only when the drive has gotten old or signs of physical damage.
Before that, try these fixes and see if you can get back your drive in the best functional state. Or, at best, you can try Advanced System Optimizer. This all-round system optimization tool is embedded with multiple modules that perform different functions, making your Windows computer more efficient.
Let’s see the fixes to solve this issue and how Advanced System Optimizer can quickly and effectively solve them.
Note: Ensure that the external hard drive is connected to the system while executing these steps. In case the drive doesn’t show up or boot up on the PC at all, you might want to replace the connecting cable.
How to Fix My External Hard Drive Is Slow
Fix 1: Defragment External Hard Drive
When files are written over a disk, the data is stored or scattered across the drive, which reduces the contagious space for the news files to save. In defragmentation, the disk reduces this scattering and consolidates the files to make more designated space for new files or configurations.
You can carry out the defragmentation process for the external hard drive right through the Windows default defragmenter. This will help you rearrange the fragmented data into a consolidated storage space and get your hard drive to work with higher efficiency on your Windows computer.
Here’s how you can use the Windows Disk Defragmentation tool:
Step 1: Ensure the hard drive is connected via USB to your Windows computer.
Step 2: Head to This PC.
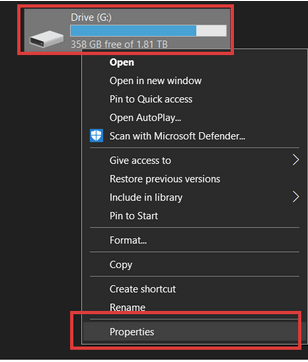
Step 3: Right-click on the drive representing the external hard disk.
Step 4: Click on Properties from the drop-down menu.
Step 5: Head to the Tools tab and then select the Optimize button.
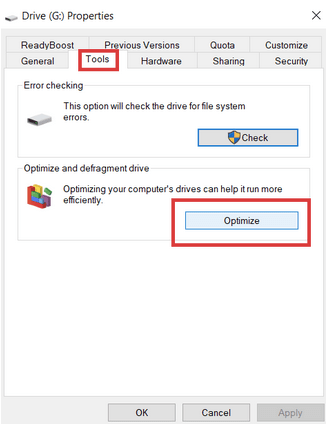
This will start a disk defragmentation process and will optimize your drive for faster performance.
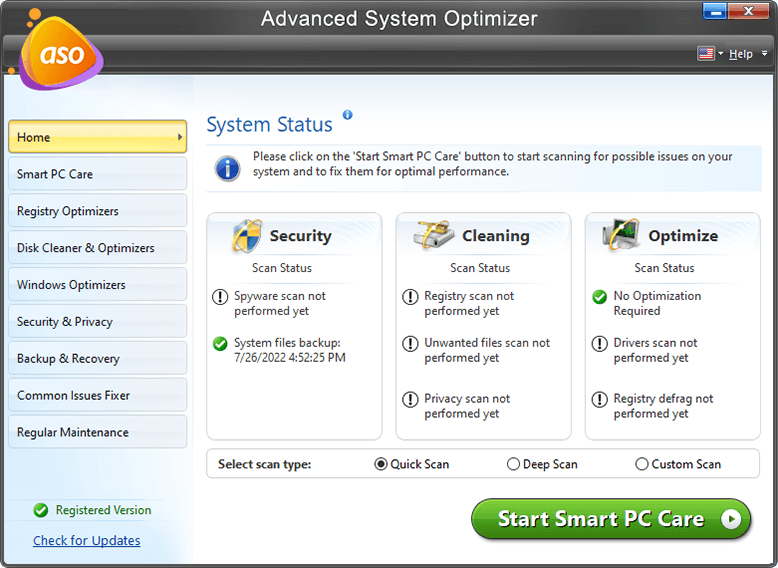
However, Advanced System Optimizer’s Disk Optimizer module performs this action giving better results.
Step 1: Download and Open Advanced System Optimizer.

Step 2: From the sidebar, select Disk Cleaners & Optimizers.
Step 3: Select Disk Optimizer. You’ll see that this option “removes fragments from drive” in the description.
Step 4: A new window will appear. Select your external hard drive in the Select Hard Drive menu.
Step 5: Click on the Start Scan Now button.
Step 6: Once the scan is complete, you’ll find the scan results in front of you. There, click on Defrag.
Step 7: This will begin an automatic defragmentation process.
Fix 2: Clean Up Large Files
External hard drives are used to fill the exceptionally large media files. For a hard drive to have faster response time and work without crashes and slow boot time, you must clean out all this junk and start managing the storage space on the external hard drive more efficiently.
To do that, there is no better option than to use Advanced System Optimizer’s Disk Explorer module. It displays all the disk usage and storage statistics of all the local disk drives. Moreover, the module analyzes individual disk drives for the space taken up by each file in there. Here’s how you can use Advanced System Optimizer to achieve that:
Step 1: Open Advanced System Optimizer.
Step 2: From the sidebar, select Disk Cleaners & Optimizers.
Step 3: Select Disk Explorer. You’ll see that this option “Displays Disk Usage by files and folders” in the description.
Step 4: A new window will pop-up. Scan the system for all drives and their storage overview.
Step 5: Now select the external drive and Analyze it.
Step 6: This will list all the folders in the external drive by their size in the Overview section.
Step 7: You can further bifurcate these files by their types in the File Type section.
Step 8: You can also find the largest files in the Top 100 Files section.
Just find the largest ones using the Disk Explorer tools and delete them to fasten the processing speed in your slow and unresponsive hard drive.
Fix 3: Clear up Junk and Cache Clutter.
Even the external hard drives are often cluttered with cache files. These files take quite some space over the external hard drive. Advanced System Optimizer’s System Cleaner removes this mess off your system and collaborates towards system optimization.
Step 1: Open Advanced System Optimizer.
Step 2: From the sidebar, select Disk Cleaners & Optimizers.
Step 3: Click on System Cleaner.
Step 4: Start scanning for junk, just ensure that the hard drive is connected to the system.
The junk will be automatically detected and cleaned off the PC. It is first transferred to the Recycle Bin, and therefore, to truly remove them off the system, you must empty the Recycle Bin.
Fix 4: Check Hard Drive and the PC for Malware
PCs are prone to malware infections, which are mostly sourced to users’ potentially threatening browser activities. Users can unknowingly invite malware into their systems through unprotected site servers, phishing emails, etc.. These malware traces are then further transferred to the external hard drive when you connect it to the system.
Advanced Driver Optimizer has a System Protector that detects and removes malware traces from the system, including trojans and malware. This not only ensures a faster response time for the external hard drive but also improves overall system security and efficiency.
Here’s how you can access System Protector in Advanced System Optimizer:
Step 1: Open Advanced System Optimizer.
Step 2: Head to Security & Privacy from the sidebar.
Step 3: Select System Protector.
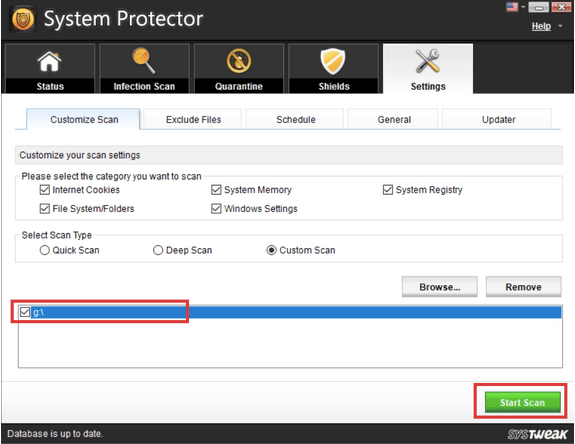
Step 4: Click on the Settings tab.
Step 5: Select the Custom Scan. Then Browse for the drive you want to scan for malware.
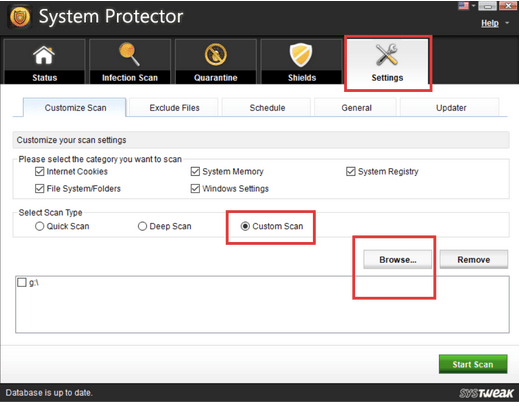
Step 6: Select the Drive.
Step 7: Click on Start Scan.
Step 8: Head to the Quarantine tab and delete the scanned and detected malware traces from the system and the external hard drive.
The scanning and quarantine process is executed by the tool on its own without manual hustle, thus offering a quick solution to the malware issue and, therefore, fixing the slow and unresponsive hard drive.
Fix 5: Update the Driver for External Hard Drive
Sometimes, slower response time or decline in the transfer speed is also because the associated driver has not been updated in a while. Driver software updates are essential for better performance of the system and the peripheral devices such as external hard drive. To update the driver associated with the external driver:
Step 1: Right-click on the Start button.
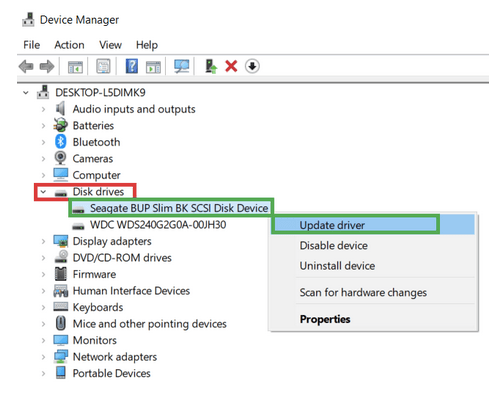
Step 2: Head to Device Manager.
Step 3: Expand the Disk Drives section.
Step 4: Right-click on the driver with your external drive’s name.
Step 5: Select Update Driver.
Step 6: Select Search Automatically for Drivers.
This shall download the new version of the concerned driver if it’s available on the computer. Just ensure that the hard drive is inserted into the USB 3.0 port of your computer.
Since Microsoft has already killed the automatic driver search option and no longer searches the web for available driver software updates, you can use Advanced System Optimizer’s Driver Updater module. Here’s how you can update the driver using the tool without manual efforts:
Step 1: Open Advanced System Optimizer.
Step 2: Head to Regular Maintenance in the sidebar.
Step 3: Click on Start Scan Now button.
Step 4: The scan results will list all the driver software updates available.
Step 5: Click on Update All and let the tool download and install all the new driver software updates automatically.
This will keep all the system drivers updated all the time and not just the one associated with the external hard drive, thus improving both the response of the external hard drive and the overall system performance.
Whenever you face an issue regarding the external hard drive’s performance and responsiveness, it isn’t necessarily due to physical damage. Physical damages to a hard drive generally render it corrupt or crashed. Therefore, just slower response and boot-up mean it can be a software-related issue or an issue associated with the system itself. Advanced System Optimizer is a one-stop solution for complete system performance improvement, which keeps it in its best functioning state. Using its modules for the external drive, as shown in the steps above, can ultimately help you improve the external drive’s performance.
So, stop stressing over your declining system performance and get Advanced System Optimizer and juice up that machine!
Mridula
Seems like these methods will solve my problem with the slow external drive.James
All the methods you explained at just great and they did work. I just have one question what is Direct Defrag? Is is something different? Can I give it a try?