
Managing data on your computer can be very tough and given the amount of data we possess, the size of the hard drive of our computer is generally not enough. That’s why most of us buy an external hard drive to store our data. What if one fine day, you need to access data stored on your external hard drive but the hard drive is not recognized by your Windows computer? The issue can be frustrating but not if you are aware of workarounds.
In this post, we have listed some of the ways to resolve the issue and make your hard drive recognizable.
Note: Before going forward with the steps, check if your USB ports are working. For it may be the hardware issue.
Once you are sure that your USB ports are in working condition, read on to know what to do next!
Take Help Of Default Troubleshooting Option In Windows:
This is the first and foremost method that should be used to check what the issue is. To do so, follow these steps:
How To Fix External Hard Drive Not Showing In Windows 10:
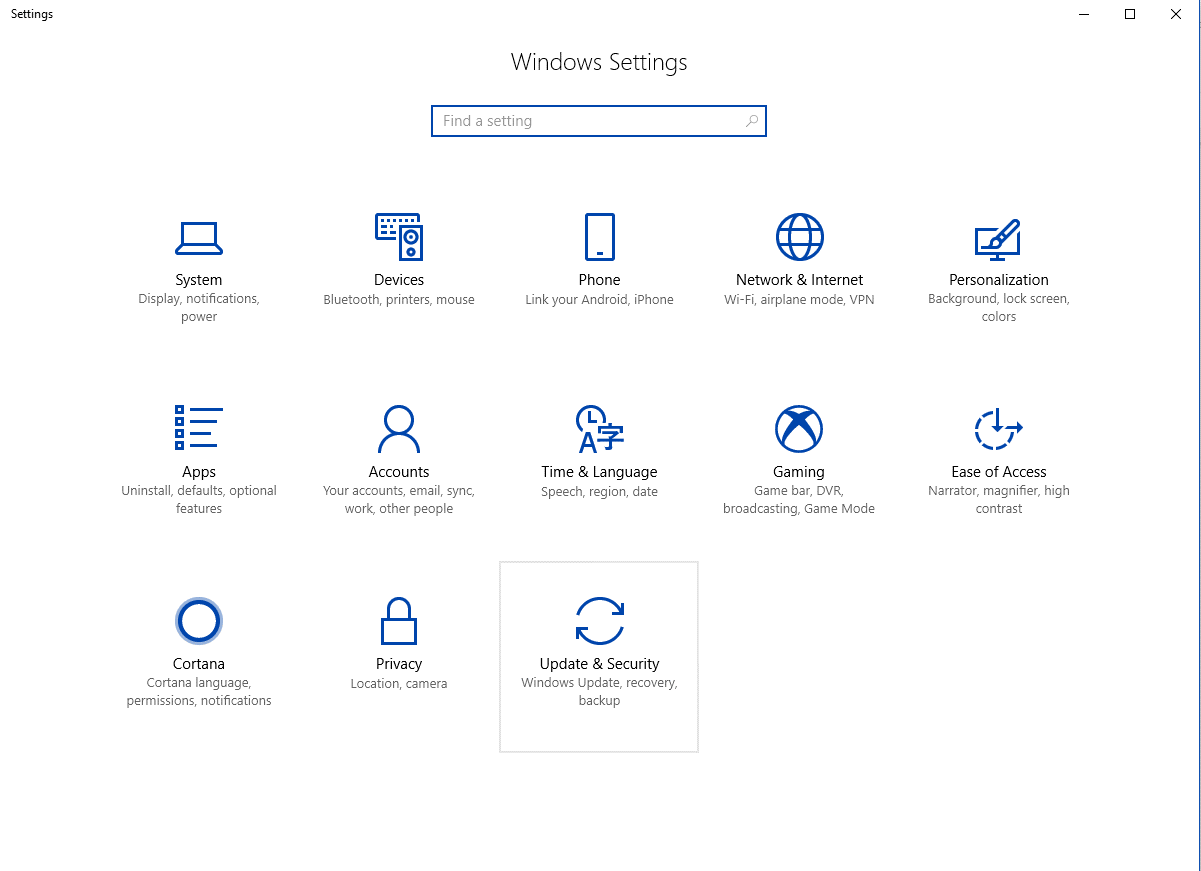
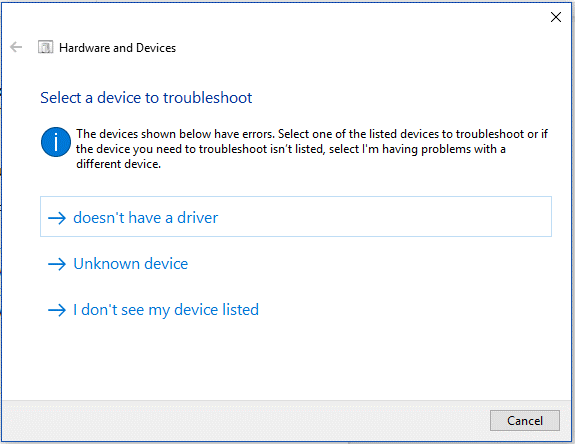
- Go to Start Button-> Settings->Update and Security-> From the left side panel, select Troubleshoot.

- Under Troubleshooting Options, in Find and Fix other problems, click Hardware and Devices.
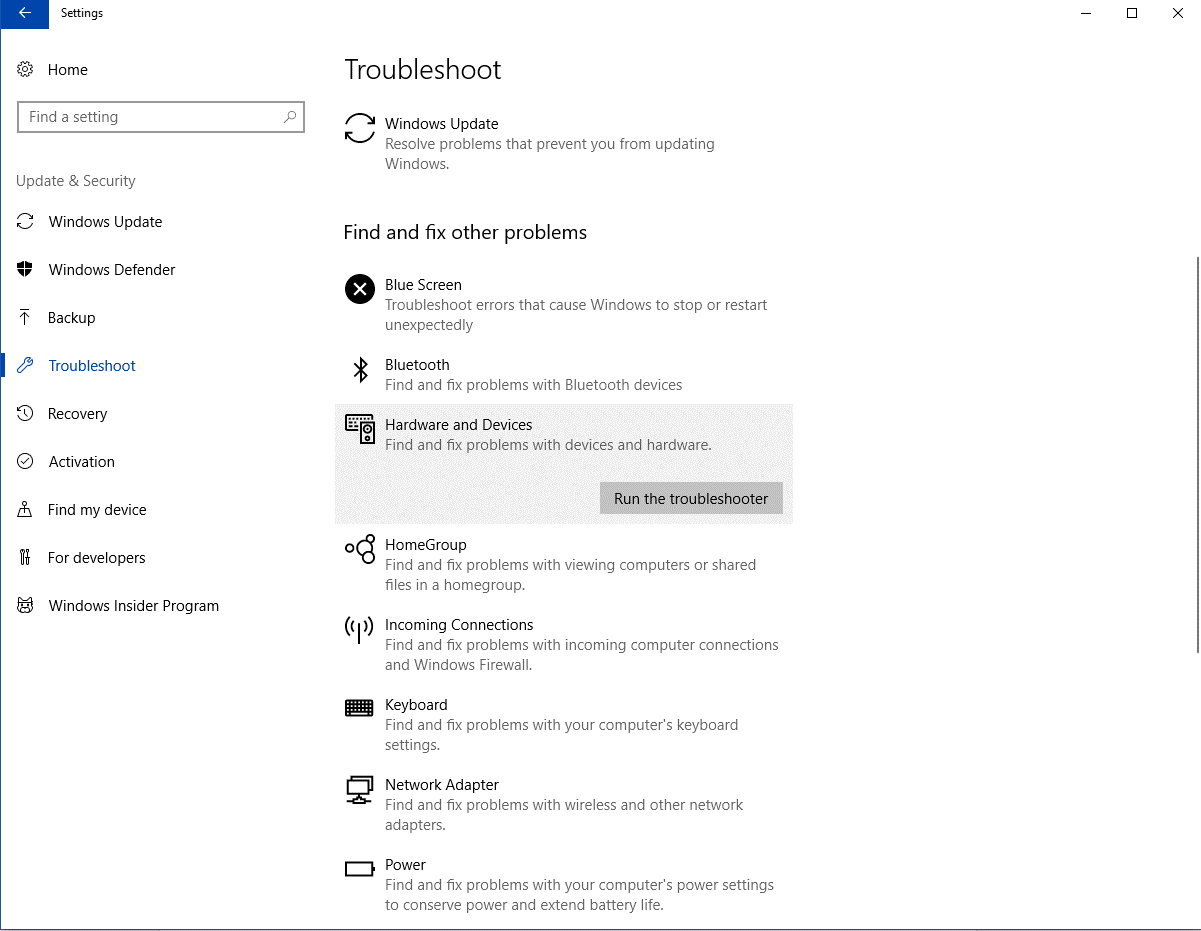
- Click on it and you will get an option “Run the troubleshooter”
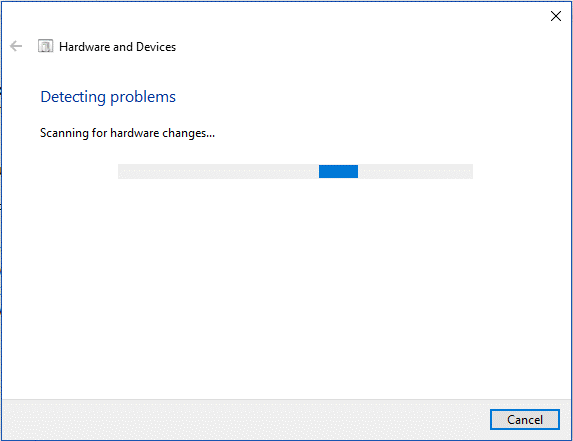
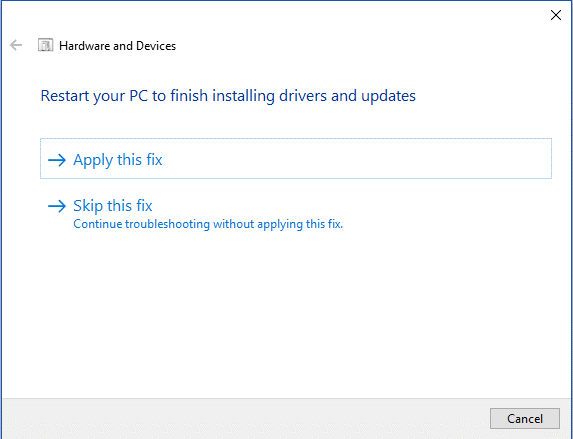
- It will detect the issues on your computer, will show the results once done.
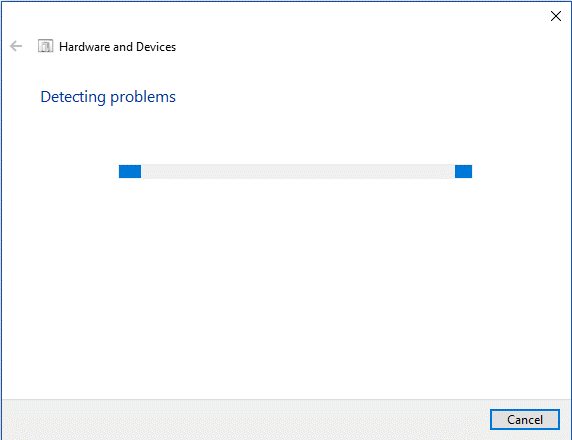
- If there would be any issues on your system detected by the troubleshooting wizard, it will be displayed and most probably the issue would be resolved, provided the issue comes from troubleshooting actions.
How To Fix External Hard Drive Not Showing In Windows 7:
- You need to locate Start button-> Control Panel->System and Security->Action Center. On this screen, you will get Troubleshooting.
- Once you get Troubleshooting interface on your Windows OS, look for Hardware and Sound-> Configure A Device.
- Follow the onscreen instructions to get the task done. If there would be any issues on your system detected by the troubleshooting wizard, it will be displayed and the most suitable fix will be provided.
Update or Reinstall the Device Driver
Sometimes the software of the device driver is outdated and this could be the issue why your external hard drive is not showing. Follow these steps to update your outdated drivers:
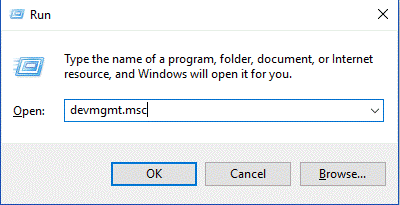
- Go to the search box and type Device Manager.
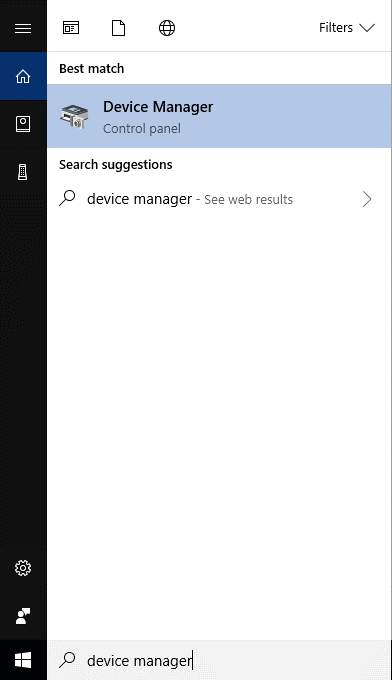
Note: Press Windows and R together to open Run window and type devmgmt.msc.
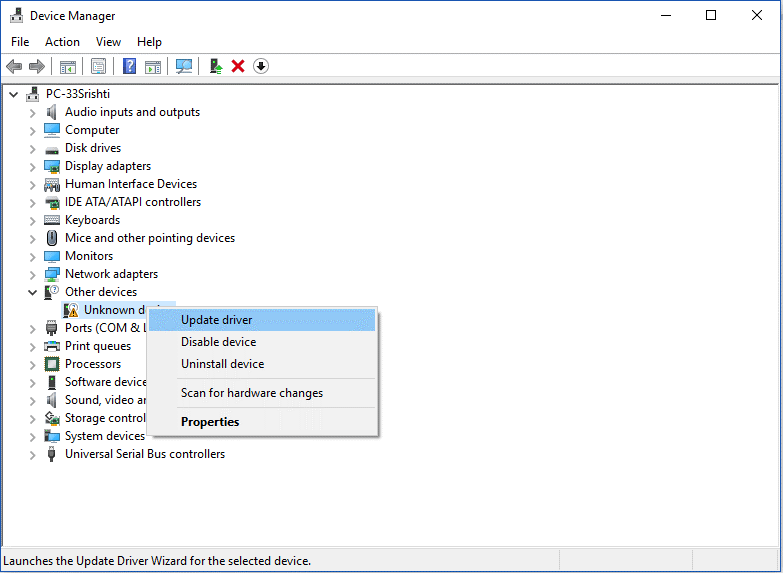
- Check whether there is a yellow/red sign against any of the drivers. Right, click on the driver and you will get a context menu, select “Update Driver”. Also, if you find any Unknown device, update it as well.
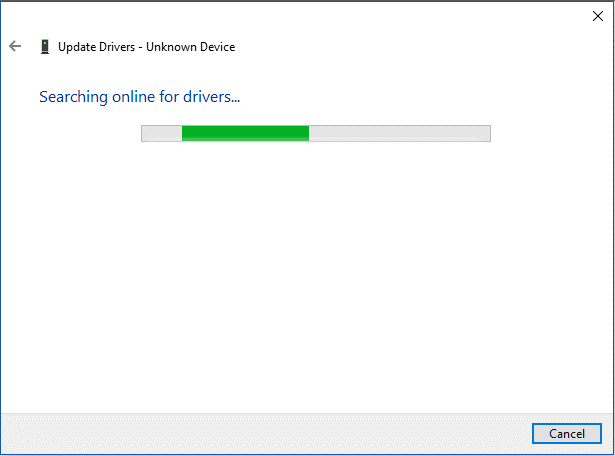
- Once you click “Update Driver”, you will get a new screen. Select “Search automatically for updated driver software” and then follow the onscreen instructions to get it done.
Create a New Partition on Your Removable Drive:
If you are connecting your external hard drive to your PC for the first time, then your PC might not recognize your hard drive as there is no partition created for it. Although, the device might be detected by Windows Disk Management tool. It is better to check whether the device is recognized by Disk Management tool. To do so, follow these steps:
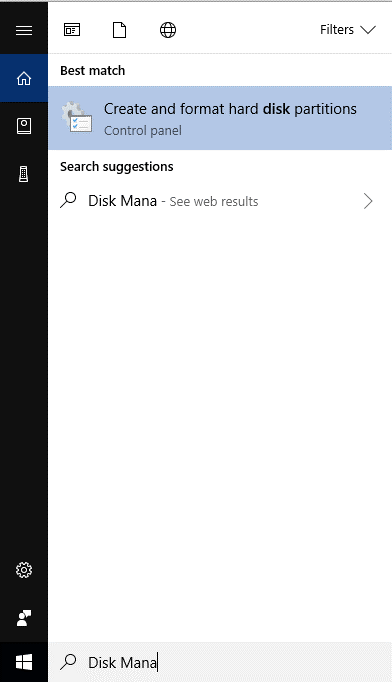
- Go to the Search bar, type Disk Management to open Disk Management tool and press Enter key.
- Check if you can see your external drive listed in Disk Management window if you can locate it, format it. This will make the external device recognizable to your PC, next time you connect it.
However, if you see that the drive is unallocated or unpartitioned, then you need to format the drive and create a partition. To do that, follow these steps:
- Go to the Search bar, type disk management to open Disk Management tool and press Enter key.

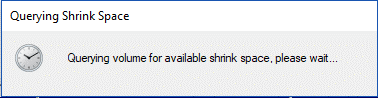
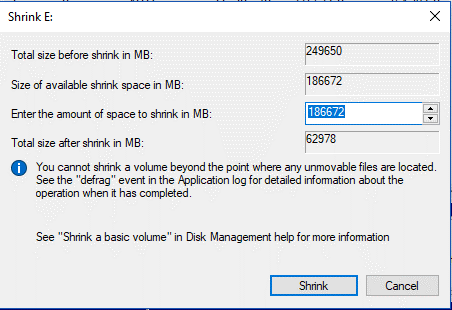
- Right-click on the hard disk and from the context menu, select “Shrink Volume”.

- On the next window, enter the amount of space in MBs and click Shrink button.
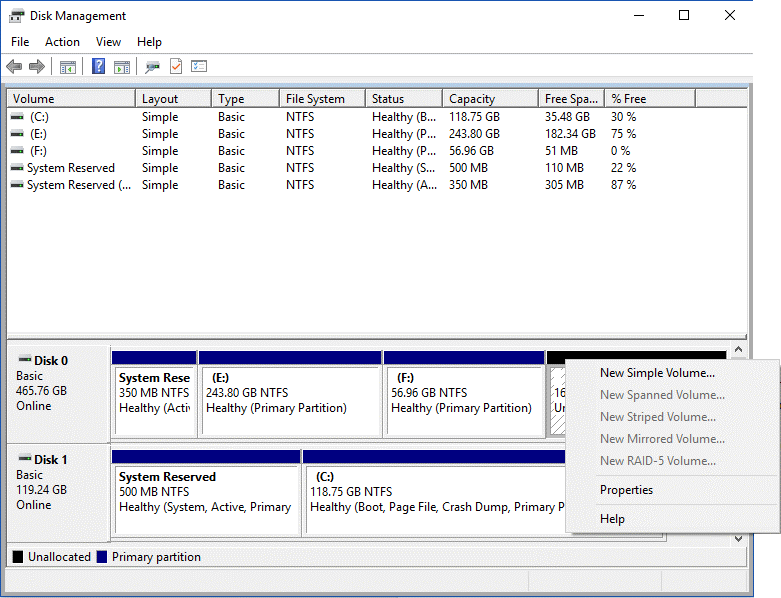
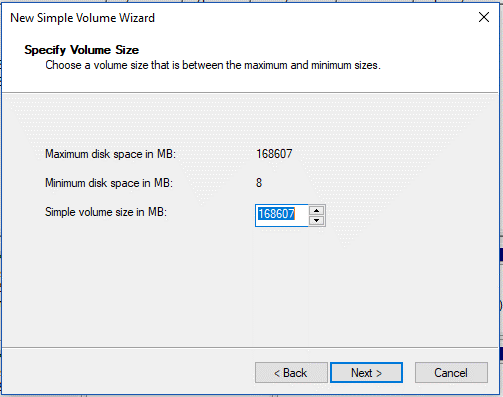
- Now right click on the unallocated space and from the context menu, select “New Simple Volume”.
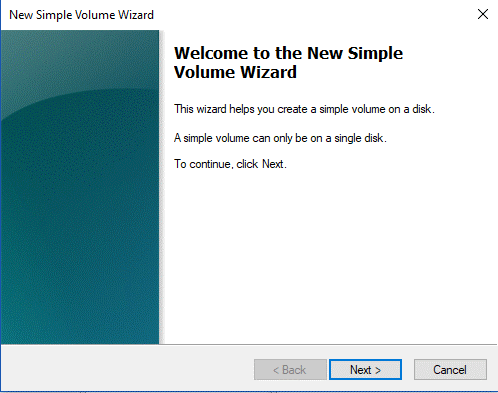
- You will get New Simple Volume Window, click Next and specify volume size.
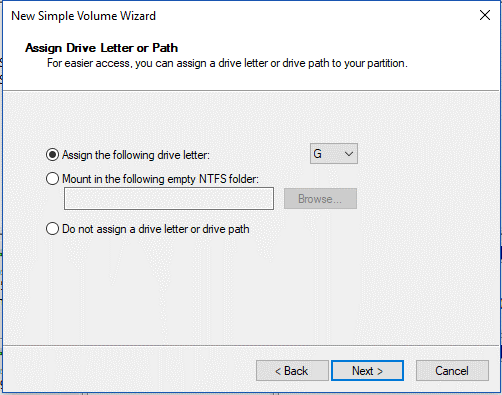
- Now assign drive letter or path, and format the partition into default system NTFS. Click Finish and it is done.

Disable USB selective suspend setting
If all the aforementioned issues don’t resolve your issue, then try to disable USB selective suspend setting. To do that, follow these steps:
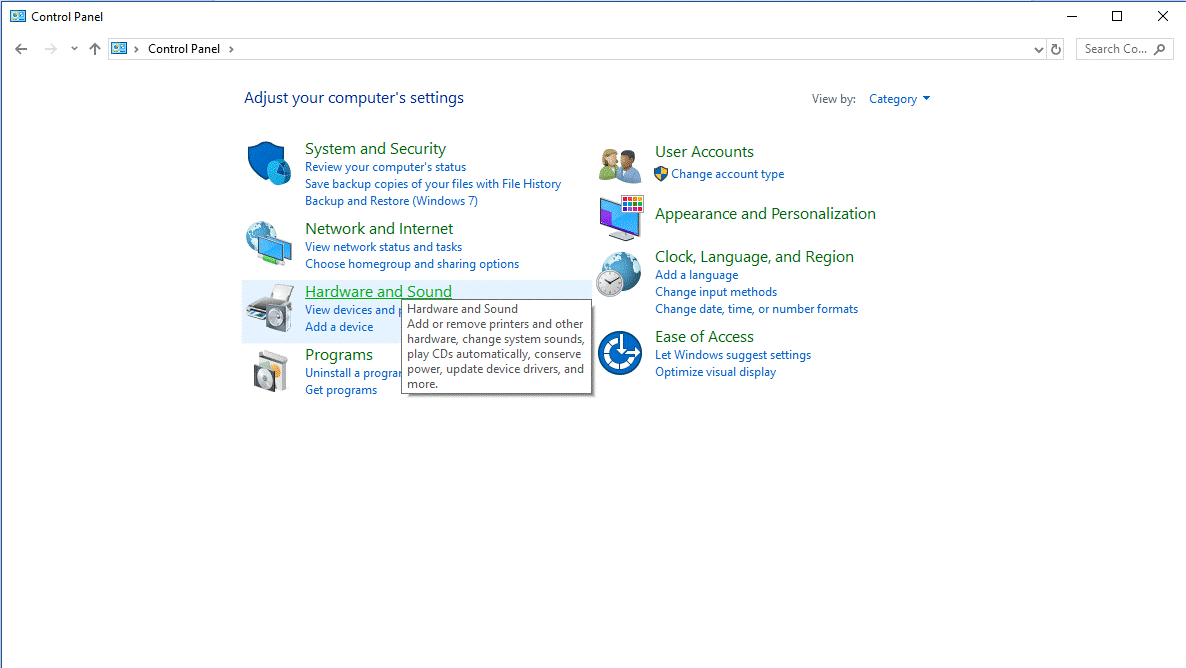
- Go to search bar and type Control Panel.
- Once Control Panel wizard is open, click on Hardware and Sound.
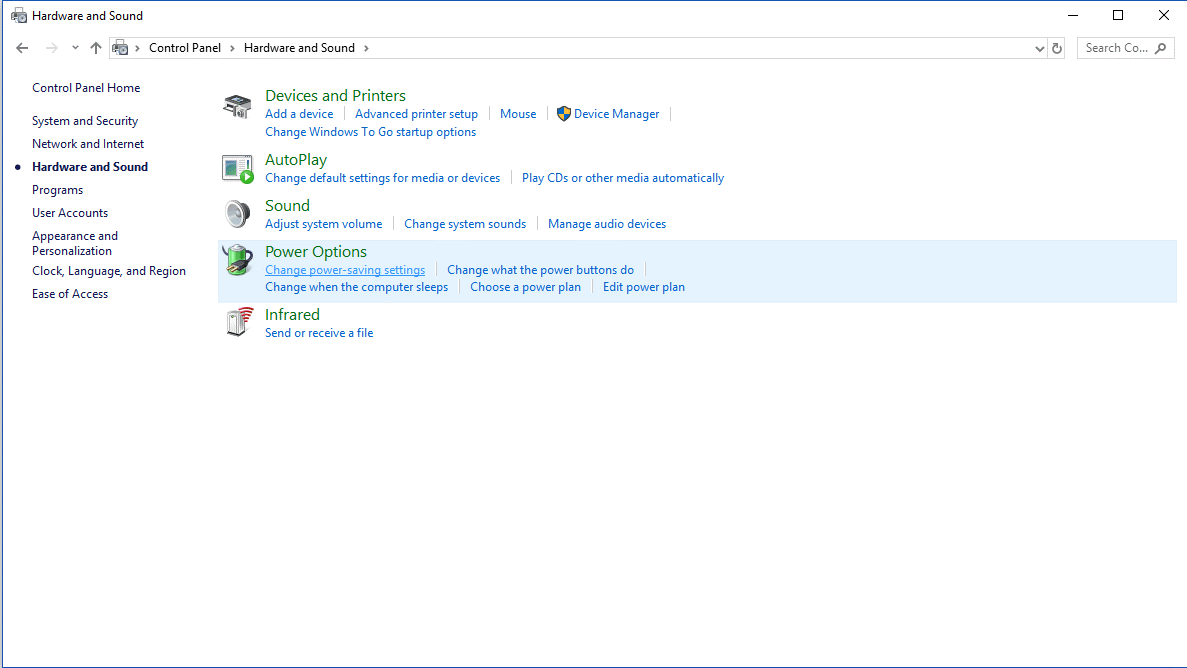
- From the Hardware and Sound window, choose Power Options.
- On the Power Options page, click Change plan settings.
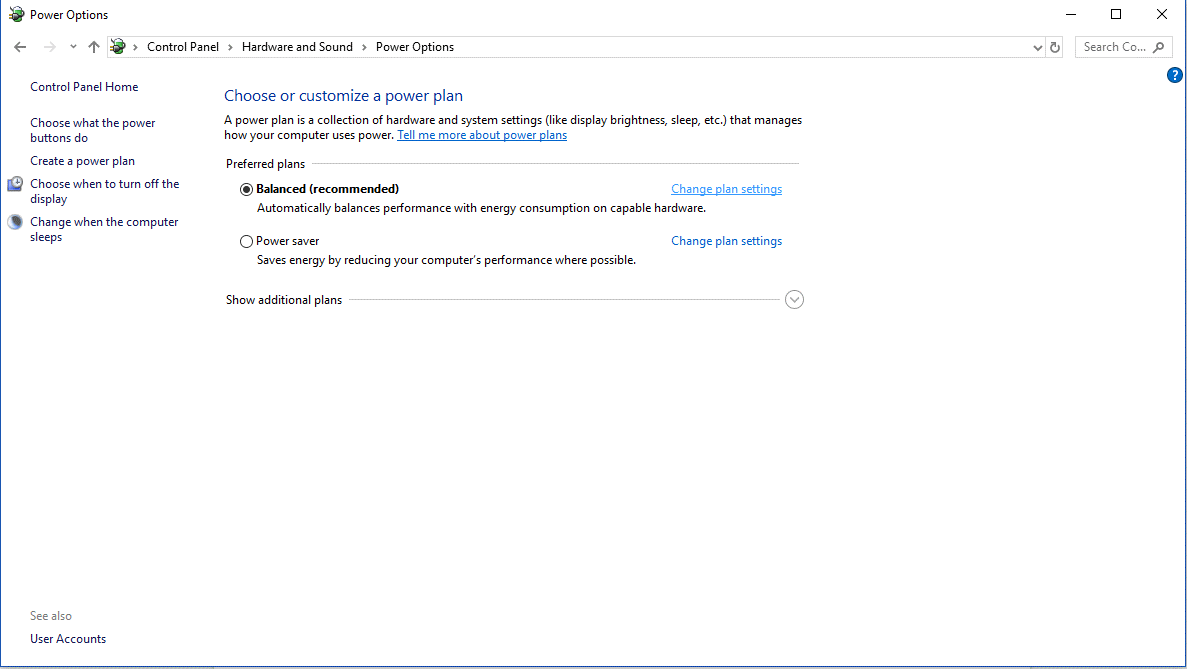
- On this page, locate Change advanced power settings.

- You will get into Advanced Settings of Power Options.
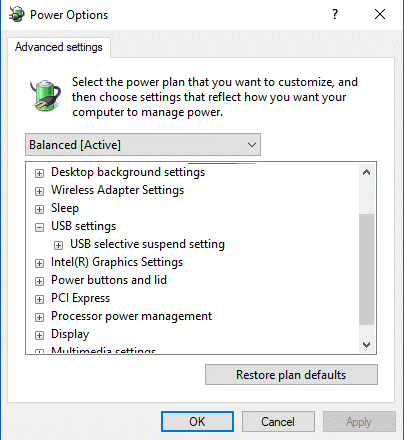
- You will get a list of options such as Desktop background settings, Sleep, USB settings and more. Click on the drop-down button beside USB settings to get more options. Click on USB selective suspend setting. You will get options Settings: Enabled. Now click on Enabled to get a drop-down menu and select Disabled.
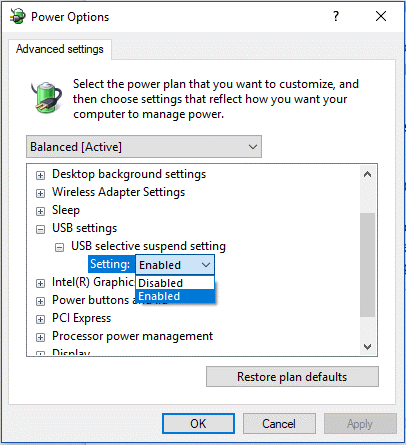
- Click Apply and exit the window.
So, these are the methods that can be used to fix external hard drive not showing error on Windows. Try them and let us know what worked for you in the comments section below.