
Encrypting your data means putting your data in a strong vault and keeping it locked only to be accessed by those who have the key. This does sound like an excellent idea and rest assured that your data is safe and secure from everyone, including you if you forget the key. The concept of data encryption is only successful when the owner has a key to unlock his/her data anywhere, anytime. Else your data can be locked away forever turning into digital junk that is of no use.
Microsoft has always been concerned with the security and safety of its user’s data and also introduced BitLocker in 2007 in Windows Vista for this same reason. This application can be used to encrypt your data and has been included in all the Windows OS versions hereafter. Using BitLocker has always been a matter of choice for Windows users until now. With Windows 11, Microsoft has enabled automatic device encryption without taking a confirmation from the user.
The biggest disadvantage of automatic device encryption in Windows 11 is the fact that if your system crashes and you need to format your computer, you will not be able to access your data. You might be able to connect your Primary HDD as secondary storage in another computer and copy the contents but will not be able to view or open them. This is because your data was automatically encrypted and can only be opened by the decryption digital key which you probably would not have as you never knew or thought of.
How To Disable Automatic Device Encryption on Windows 11?
Decrypting your encrypted data without a key might not be possible but you can at least stop Microsoft’s Auto-Encryption process in Windows 11 to ensure that your data is recoverable in times of system crashes or partition errors. Here are the steps on how to turn off automatic device encryption in Windows 11:
Step 1: Press Windows + I on your keyboard to open the Settings Menu.
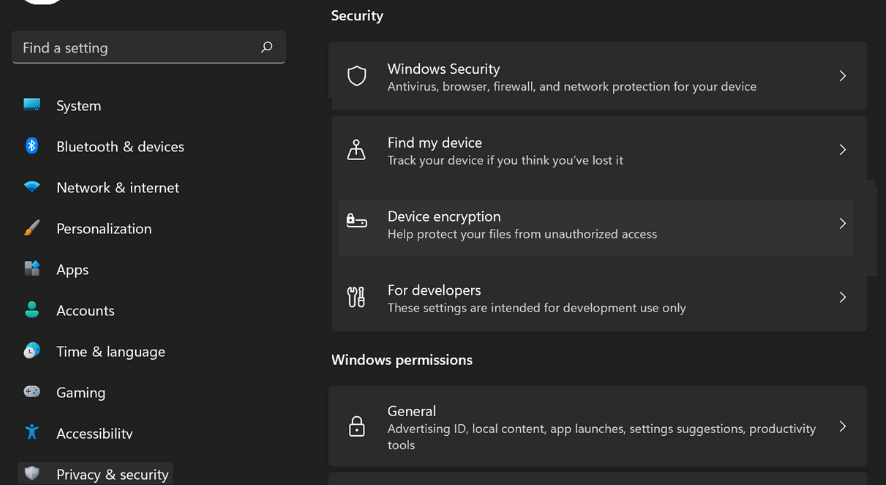
Step 2: Click on Privacy & Security option in the Settings menu.
Step 3: Now look for Device Encryption in the right panel of the Settings window under Security.
Step 4: Click on this option and toggle the slider button toward the right to turn off automatic device encryption in Windows 11.
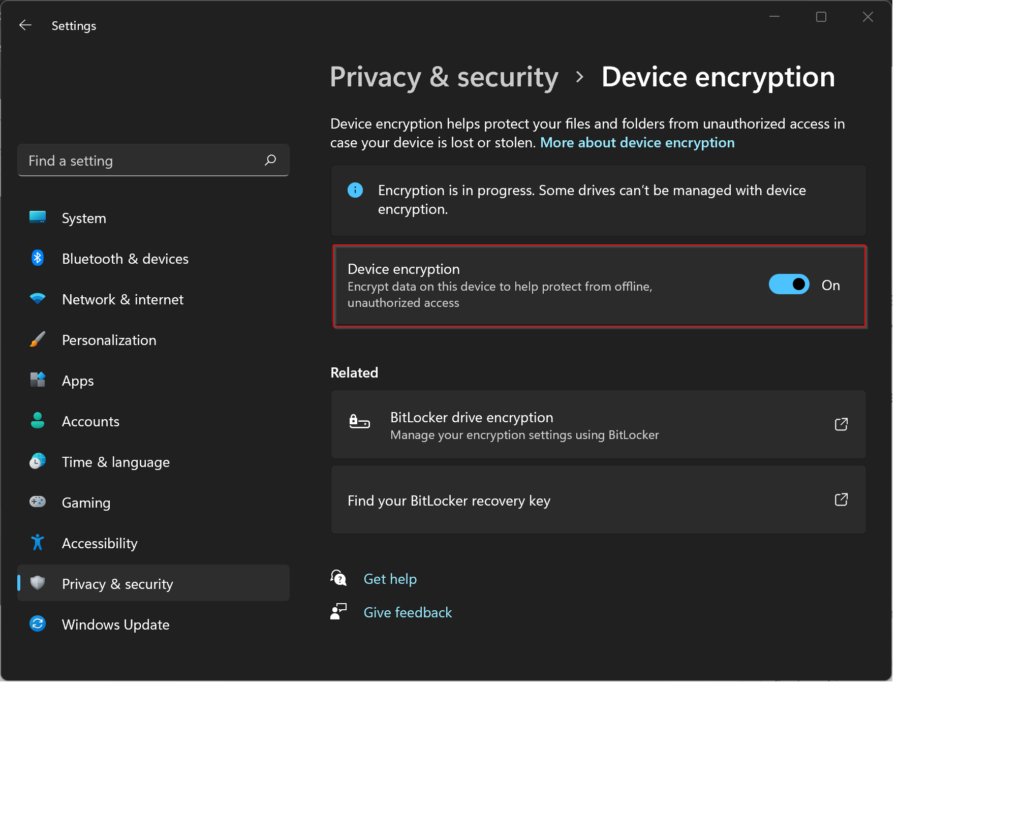
Step 5: You will now get a message stating Decryption is in Progress. Do not turn off your computer while this is happening.
Note: If you do not see this option, then your PC does not encrypt data as it lacks some feature that enables this mode in Windows 11.
Important: Why do some PCs running Windows 11 cannot encrypt data?
Here are two features that are unrelated: Device Encryption and Sleep Mode. However, there seems to be a connection between the two. The Sleep Mode built-in feature allows an idle computer to run on very little electricity. The computer appears to be turned off, but when it is turned back on, it displays the same open applications as before quickly but not instantly. As a result, PC makers included a new feature called Modern Standby, which allows a device to re-awaken nearly instantaneously. And, as it turns out, in Windows 11 Home, Modern Standby is tied to device encryption.
Device encryption will not operate if your PC does not have Modern Standby. Keep in mind that anyone downloading Windows 11 Home or Pro should keep an eye out for any unwanted automatic encryption. If your device doesn’t have device encryption, you might be able to use basic BitLocker encryption instead.
The Final Word On How To Disable Automatic Device Encryption on Windows 11?
Microsoft failed to provide its Windows 11 users with basic security information. The data on your disc is scrambled by an encryption, and you can only reassemble it if you have the encryption key, which is a piece of code that works like a password. That does sound good but Microsoft failed to inform users about the location of the Key that will decrypt their data.
It does sound strange but Windows 11 users will have to disable encryption, a new Microsoft security feature, to ensure that they don’t lose their data by accident?
Follow us on social media – Facebook, Instagram, and YouTube. For any queries or suggestions, please let us know in the comments section below. We would love to get back to you with a solution. We regularly post tips and tricks, along with answers to common issues related to technology.