RAM or Random Access Memory is one of the fundamental elements of your computer. It is your computer’s short-term memory where your computer stores all that data that it needs to access quickly. It is ideal for apps, processes, and other programs. But, what if your computer is not using all RAM as opposed to overutilized RAM? More importantly, what would happen if your PC doesn’t use all the RAM that is there, and what can be done? That’s what this post is for.
What Will Happen If Your PC Will Not Use All RAM
Let’s assume you have 8 GB worth of RAM but only 5 GBs is utilized. Normally, some RAM is reserved for certain things such as if you have an integrated graphics card or BIOS which is somewhere around 2% but, if say, you have 16 GB RAM and you are seeing just 8 GB or less in Task Manager, then that’s a problem. Some users have even reported that they were not able to see the RAM option itself in the Task Manager.
In any case, if your PC is not using all the RAM, you would see a drop in the PC performance because your computer will be using fewer resources and you’ll have issues multitasking.
Reasons Why Your Computer Is Not Using All RAM
- You are using 32-bit Windows OS.
- There are RAM-related issues
- Your RAM is not properly configured on your PC.
- Outdated BIOS
- You use an integrated graphics card which is consuming some part of your RAM
How To Fix “Computer Not Using All The RAM”
1. Use To 64-bit Version
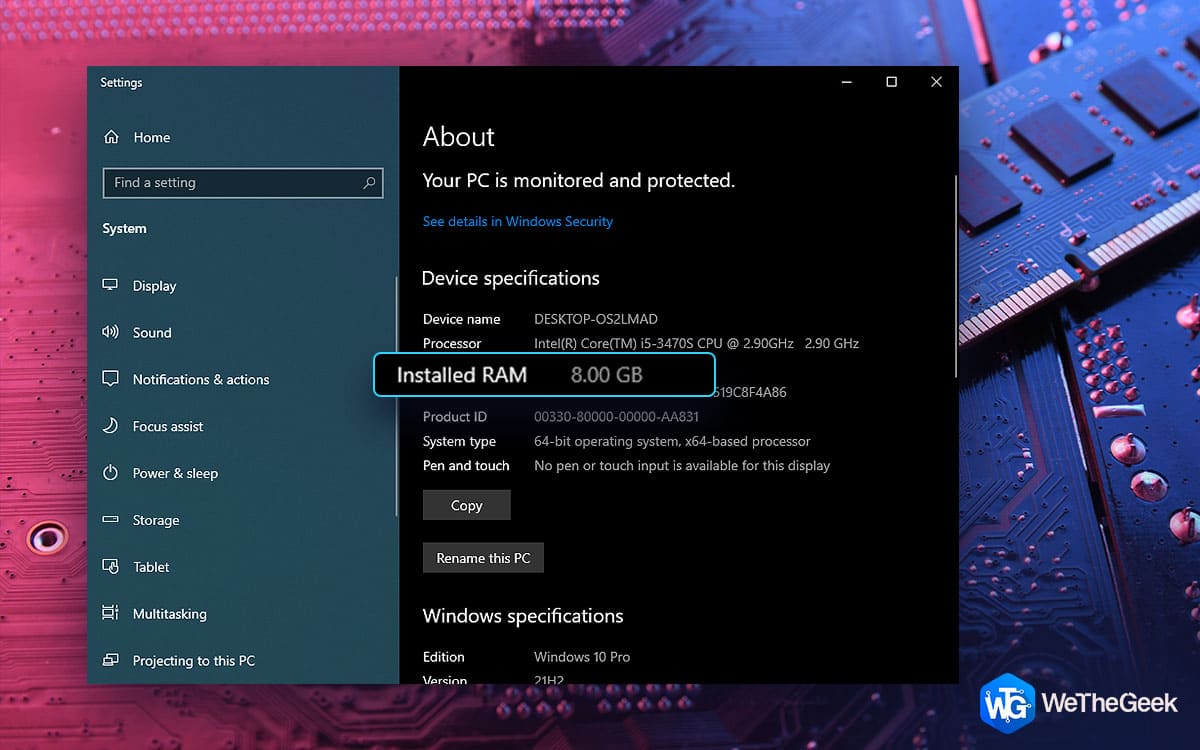
If you are using Windows 11, you can rule out this method as Windows 11 required a minimum of 4 GB RAM. In the case of Windows 10, if you are still using a 32-bit OS, you will only be able to utilize 3.5 GB. In that case, you may want to switch to a 64-bit OS. To do that a fresh or clean install is what you need. But, just in case you are unaware, how would you know if you are using a 64-bit OS or 32-bit? Here are the steps –
- Open Settings by pressing Windows + I
- Head to System.
- From the left, click on About.
- On the right, focus on the System type and see if you have a 32-bit or a 64-bit processor


Want to know more differences between 32-bit and 64-bit Windows, this post will interest you.
2. Check If Your RAM Has Issues
In case you have faulty RAM in your computer, quite obviously your system won’t be able to use it to its maximum potential. Consider reading this post to detect and resolve any impending issues. A delay could soon lead to your RAM failing.
3. Disable Auto RAM Virtualization
Still, your computer is not using all RAM? Try disabling Auto RAM Virtualization. Many users have been able to resolve the issue by using the steps mentioned below –
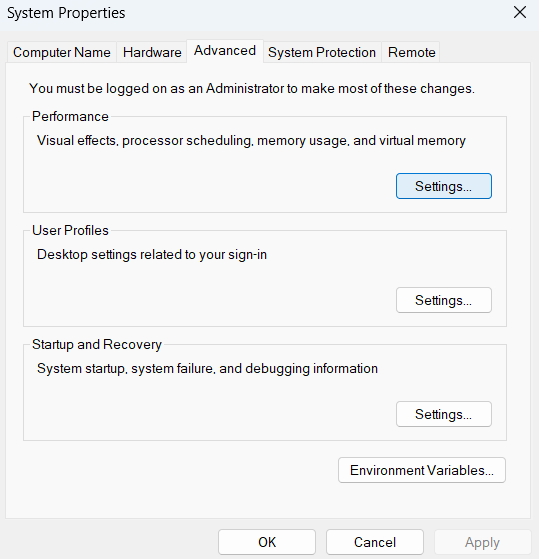
- In the Windows search bar, type View advanced system settings.
- When the System Properties window opens, click on Settings under Performance.
- Click on the Advanced tab.
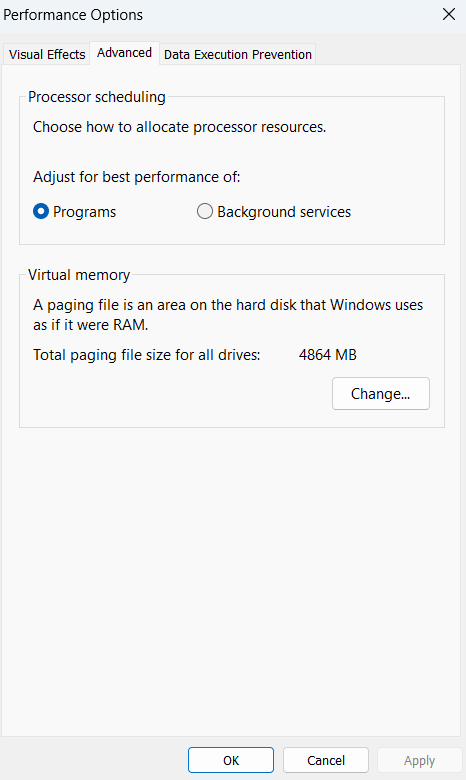
- Click on the Change button under Virtual memory
- In the Virtual Memory window, uncheck the Automatically manage paging file size for all drives.
- Select each of the drives and select the No paging file.
- Click on OK
4. Run a Diagnostic Test To Check Issues With Your RAM
An easy way to identify and get rid of RAM-related issues is to run memory diagnostics. Here are the steps to do that –
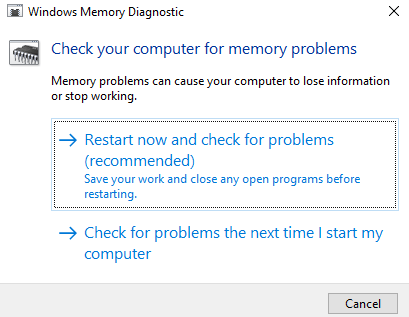
- Open the Run dialog box by pressing Windows + R.
- Type mdsched and hit the Enter key.
- Click on Restart now and check for problems (recommended)
- When the system reboots, you can press F1 and choose the test you want to perform – Basic, Standard, or Extended
- Depending on the option you have chosen, the test may take time.
- After the test ends, you can see the results. If you have missed the results, you can press Windows + R key, type evntvwr and press Enter.
- Select Windows Logs > System
- Click on Find from the left and type MemoryDiagnostic and press Find Next
- Select the log and check its description to know the RAM issues.
5. Update BIOS
If your PC is not using all RAM, it could be that your BIOS has become outdated, and hence your PC can’t access the full RAM. In such a scenario, you can update your BIOS. It is important that you perform these steps to update BIOS under expert guidance to avoid any mishaps –
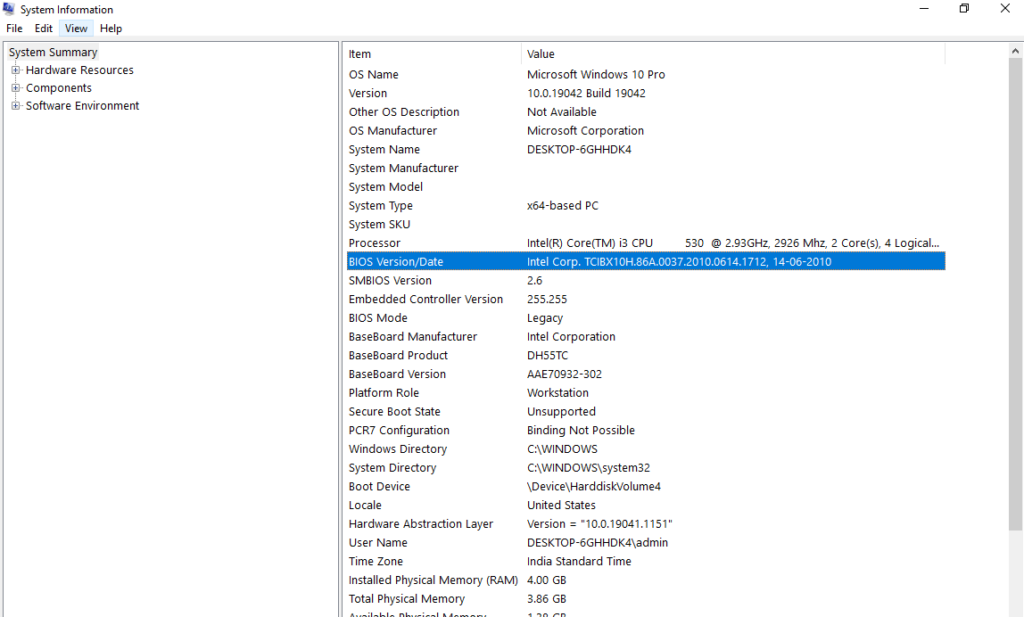
- Identify the BIOS version by typing msinfo32 in the Run dialog box and pressing Enter.
- Locate BIOS Version/ Date
- Head over to the manufacturer’s website and enter your PC’s serial number.
- From the list of drivers click on BIOS and download the update.
It is important that while the update is getting installed, you don’t shut down your computer
you can use a BIOS updater software
6. Enable Memory Remap
You can enable the Memory Remap feature which would further help remap the overlapped PCI memory over total physical memory. To do that –
- Restart your computer and at the same time press, F2, F12, or any other button to access the BIOS setup. You may want to refer to the steps belonging to your manufacturer.
- Head over to Advanced Chipset Features.
- Under Memory Remap Feature, click on Enabled.
- Save and Exit.
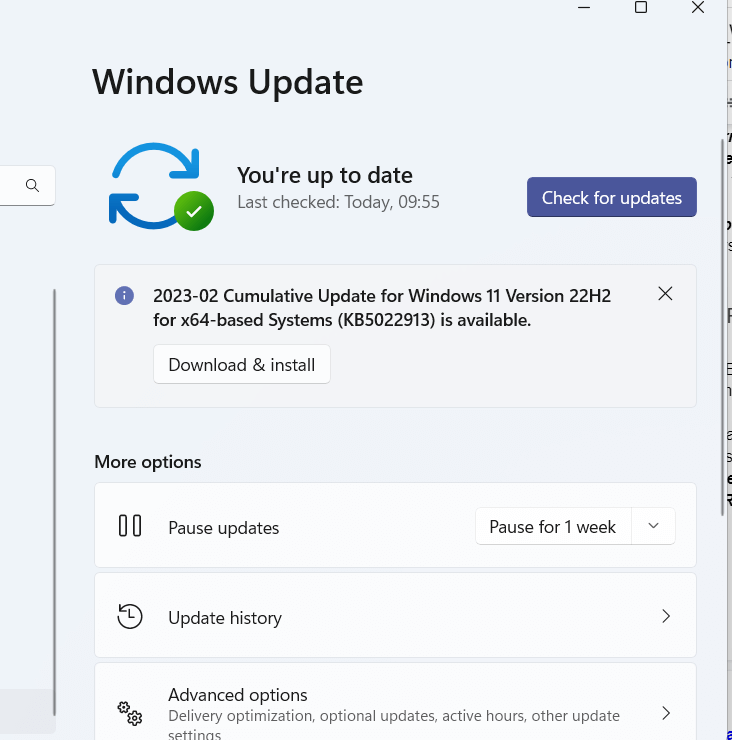
7. Update Windows
Last but not least, it could be that you are running an outdated version of Windows because of which there is RAm leaking or overuse. Here are the steps to update Windows 11.
- Open Settings.
- From the left click on Windows Update
- From the right, click on Check for updates and fetch any impending updates.
Not a Windows 11 user, a Windows 10 user instead? Here are the steps to update Windows 10.
 Additional Tip
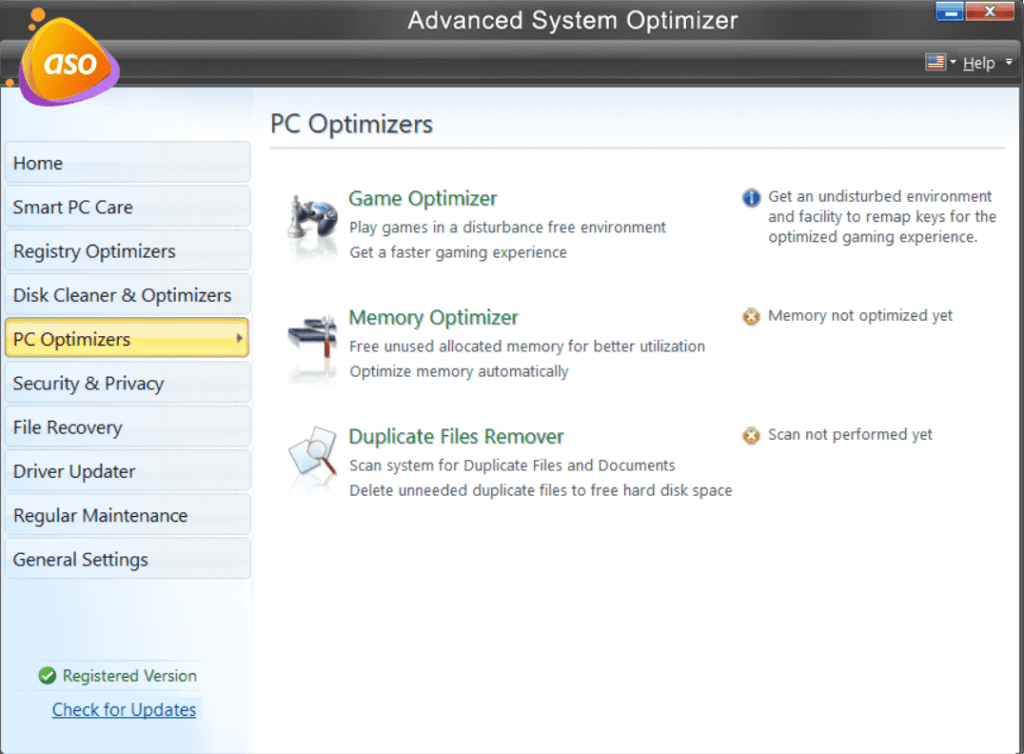
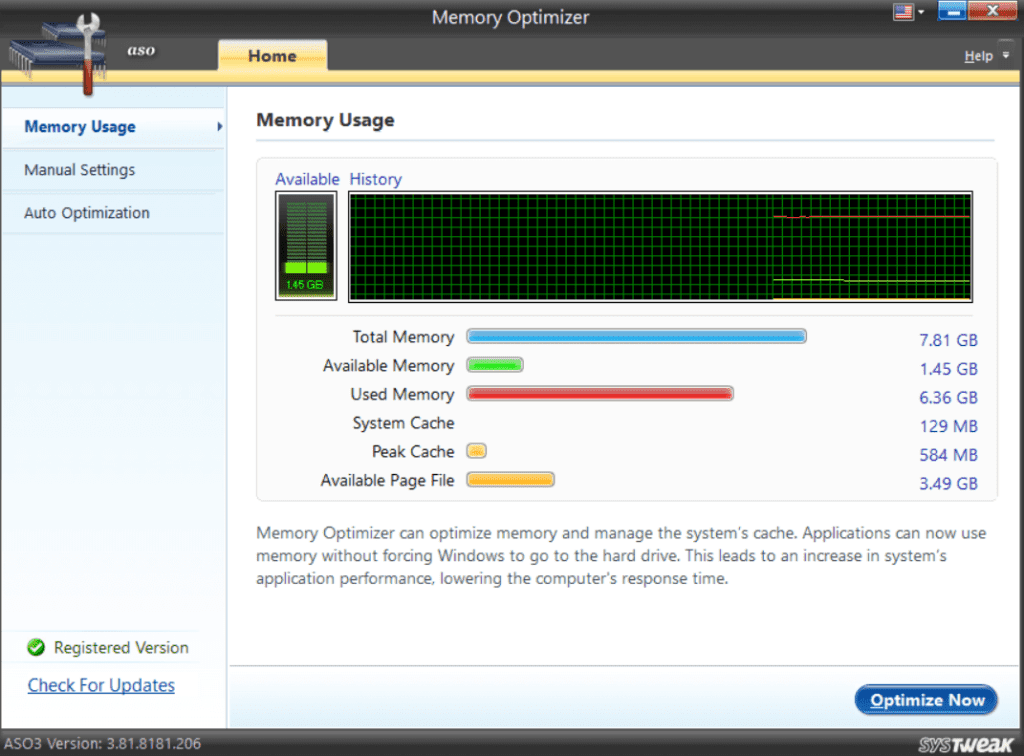
If your PC is not utilizing RAM as it should, there could be issues that you can’t manually catch hold of. Enter a tool like Advanced System Optimizer. It is regarded as one of the best Junk and RAM cleaners. To know why it has a reputation for being an efficient PC cleaner, you can check out this post.
How To Optimize RAM Using Advanced System Optimizer?
- Download, run, and install Advanced System Optimizer.

- From the left pane, click on PC Optimizers.
- From the right, click on Memory Optimizer.
- Click on the Optimize Now button
Wrapping Up
We hope that now your PC’s RAM is working to its full potential and that your computer is utilizing all the RAM. If yes, do let us know which of the above fixes worked out for you. For more such content, keep reading WeTheGeek. You can also find us on Facebook, Pinterest, YouTube, Twitter, and Instagram.