
Restarting a computer is often one of the first steps for troubleshooting almost any Windows issue. Experts recommend that you restart your computer once in a while so that you can free up memory, flush out RAM, repair system files and do a lot of other things. But, what if your computer won’t restart? To be more specific, what if you try to use the Restart option and the computer doesn’t?
It could be that your computer is stuck on the restart screen. If that’s an issue, we have got your back. But, if the restart option doesn’t work on your PC, this blog post will fix the issue for you.
Why Won’t My Computer Restart?
If you are unable to restart your Windows PC, the following could be the reasons –
- Broken system files
- Damaged hardware
- Recently installed application or process is interfering with the functionality of your computer
- Presence of Malware
What To Do If My PC Doesn’t Restart?
1. Run An Antimalware Scan
We urge you to run a malware scan. And, here’s why? Many malware-infected apps can interfere with your computer’s functionality, restarting being one of them. Here, you can opt for an antimalware tool like T9 Antivirus whose database is constantly updated to tackle even the most powerful and “new on the block” viruses.
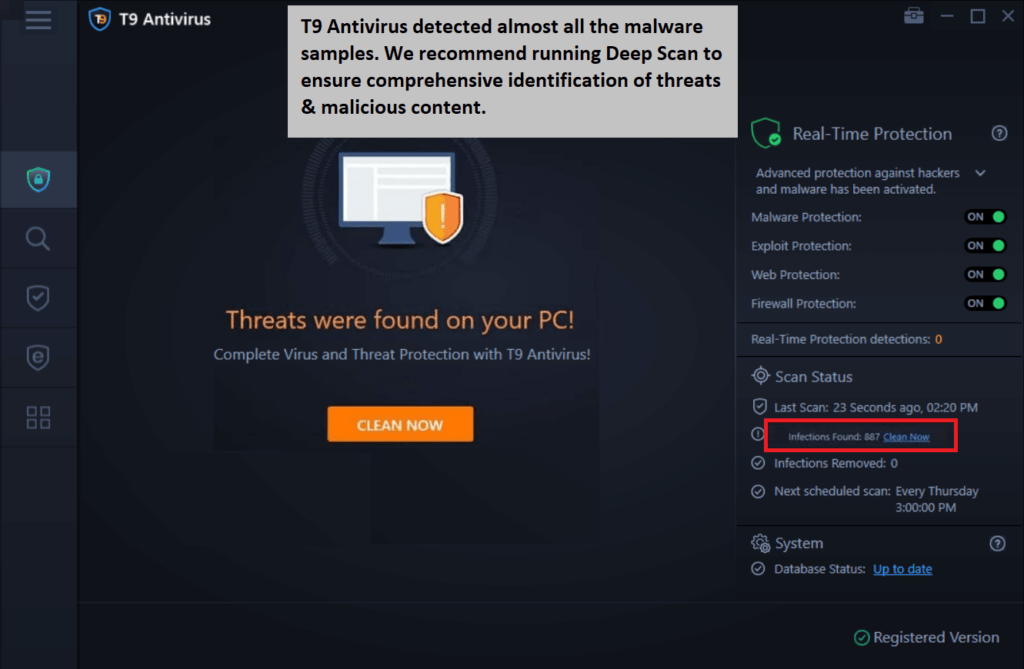

It further exhibits the following features –
- Real-time and on-demand scanning.
- Quick, Deep and Custom scan modes can help you look for malicious threats in every corner of your computer.
- Schedule scans.
- Web Protection stops you from accidentally stumbling on a website containing malicious threats
- Exploit Protection to help you steer clear from zero-day threats
Want to see T9 Antivirus in action and dive deeper into its other commendable features? Check this post out.
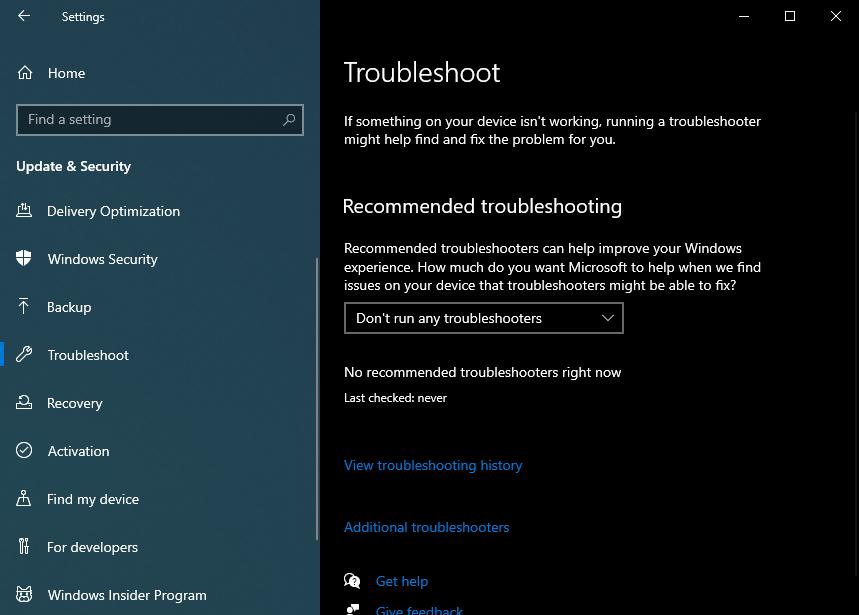
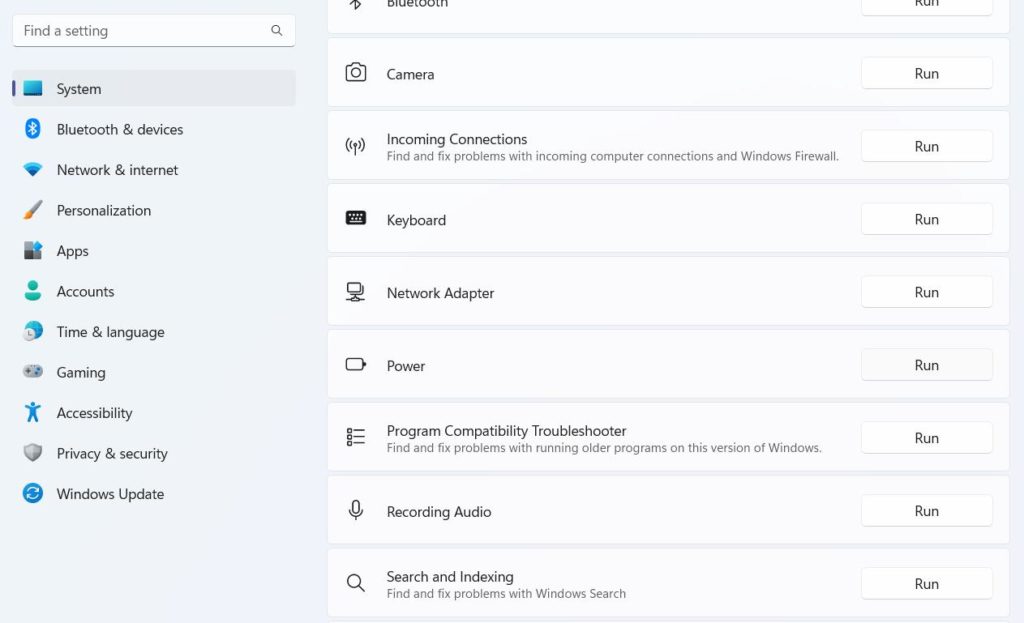
2. Run The Power Troubleshooter
First and foremost, try running the Power Troubleshooter which is your Windows inbuilt tool that can come to your rescue if your computer won’t restart.
In Windows 10 –
- Open Settings by pressing the Windows + I button
- Click on Update & Security
- From the left-hand pane, click on Troubleshoot.
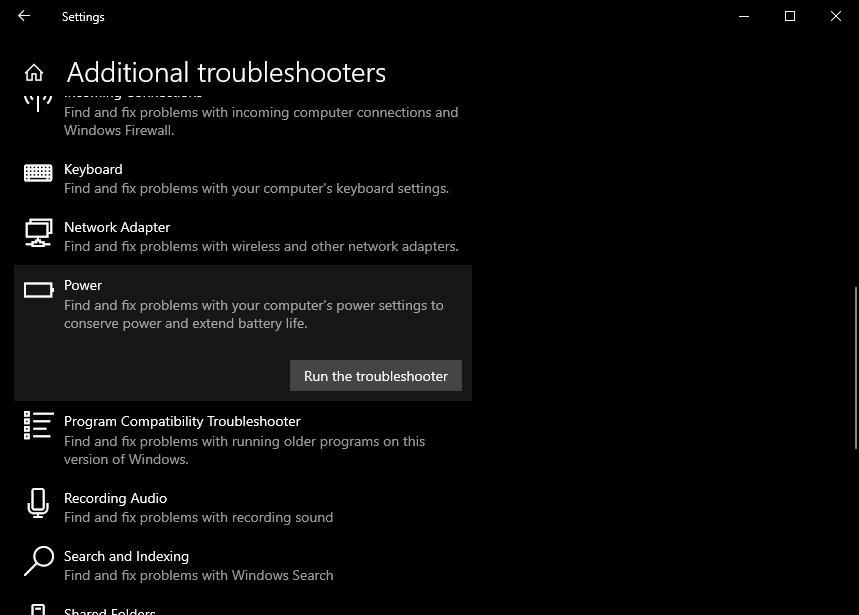
- From the right-hand side, click on Additional troubleshooters.

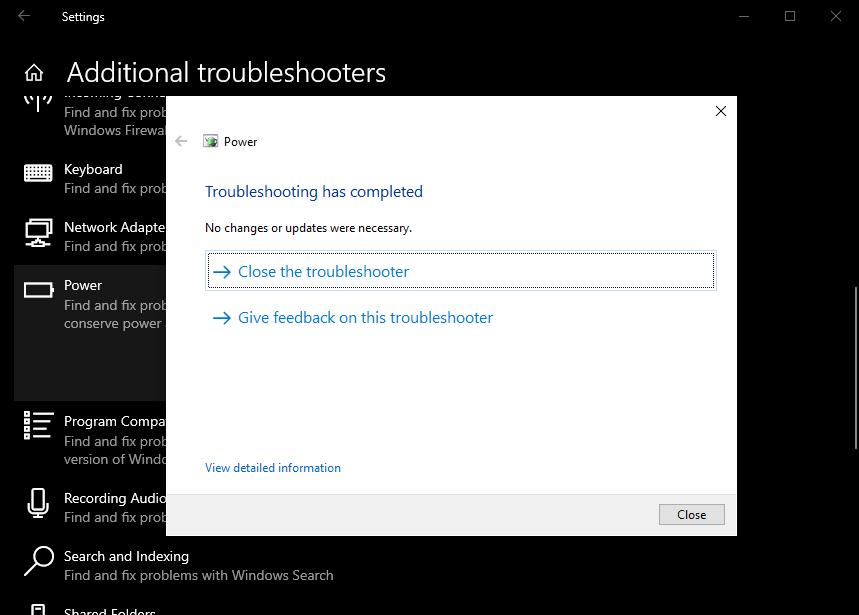
- In the next Windows, select Power and further click on Run the troubleshooter.
- Follow the on-screen instructions.
In Windows 11 –
- Open Settings by pressing the Windows + I button.
- From the right-hand side, click on Troubleshoot.
- Click on Other troubleshooters.
- Under Other, click on Run next to Power and follow the instructions that appear on your screen.
3. Disable Intel Management Engine
Intel Management Engine sometimes breaks the restart option. This could be the reason why you are unable to restart your Windows computer. Disabling this option may help in fixing the issue. Here are the steps to do that –
- Open Device Manager by pressing Windows + X keys.
- Click open System devices.
- Right-click on Intel(R) Management Engine Interface.
- Select Disable device.
- Shut down and once the PC starts, try to restart it.

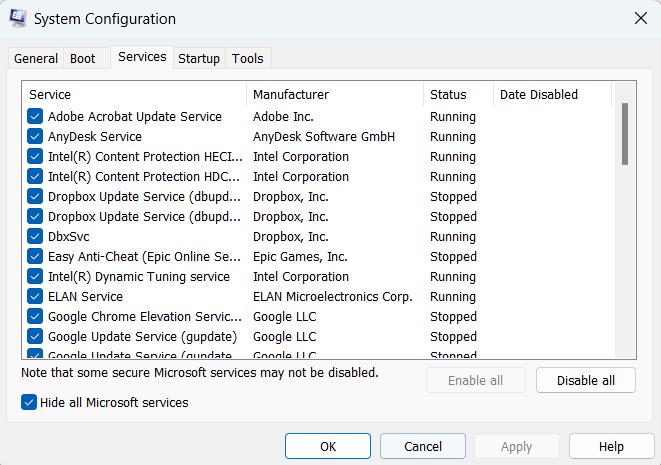
4. Perform a Clean Boot
Performing a Clean Boot can also help you fix the issue. Once you have performed the step below, you can further run an SFC scan as well.
- Open the Run dialog box by pressing Windows + R
- When the dialog box opens, type msconfig and press Enter.
- Click on the Services tab.
- From the bottom, click on the Hide all Microsoft services checkbox.
- Click on the Disable all option.
- Click on Apply and click on OK.
- Try restarting your computer now.
To run an SFC scan, open Administrative Command Prompt by searching for cmd in the Windows search bar and then selecting Run as administrator. When the Command Prompt window opens, type sfc /scannow and let the process complete.
Now, restart your computer and see if it works or not.
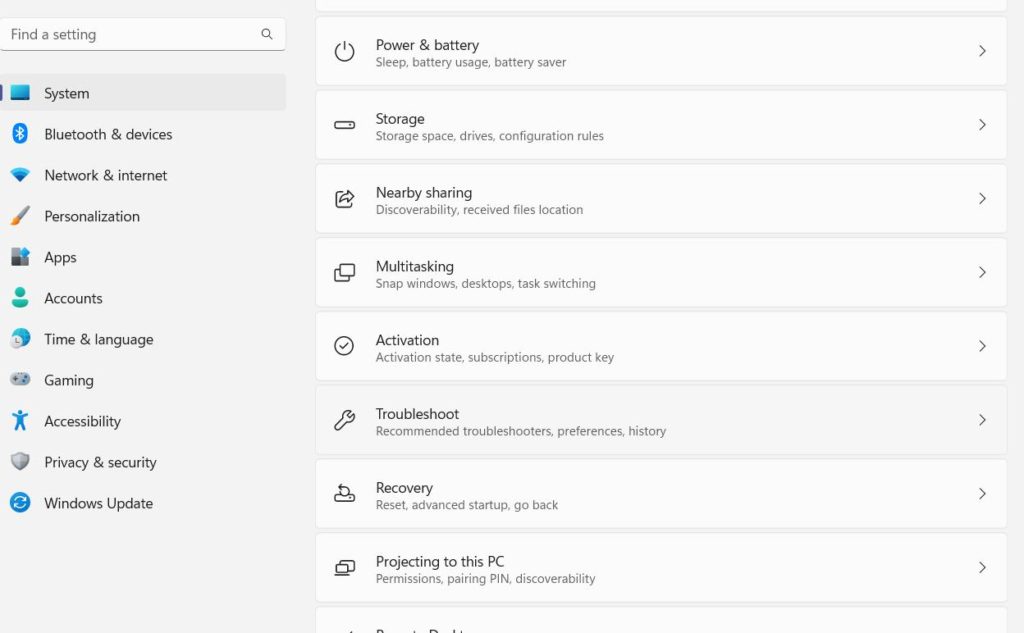
5. Reset Your PC
Tweaking settings for productivity can be great but it is no fun when tweaking the wrong ones makes you stumble upon grave issues like the one at hand. If you are a Windows 10 user, this guide on how to factory reset Windows 10 will be of ultimate help. For Windows 11 users, the steps to factory reset the computer are mentioned below –
On a Windows 11 PC
- Open Settings.
- Click on System from the left, if you haven’t yet selected it already.
- From the right, click on Recovery.
- Under the Recovery options, click on the Reset PC button.

Before you Factory Reset your computer, please go through the on-screen instructions thoroughly and we’d also recommend that you take a backup of important files as well.
6. Boot Into Safe Mode
Safe Mode helps you operate your computer with the most basic features and it is effective in a way that it can help you zero down on problems more easily. Now, knowing that you are unable to restart your computer under normal circumstances, you might as well give Windows Safe Mode a shot.
Tip: Let’s say you have started to face the issue after installing an application. You can check for the same in the same mode and if you identify that the application or process has been the culprit in the normal mode, you can remove it.
7. Reinstall Windows
If nothing else seem to work, you can perform a clean reinstall that’ll help you fix the issue. Unsure of how to do that, you can refer to this guide.
Wrapping Up
Were you able to restart your computer? If yes, which of the above workarounds helped you fix the issue? Do let us know in the comments section below. For more such content, keep reading WeTheGeek. You can also find us on YouTube, Instagram, Flipboard, Twitter, Pinterest and Facebook.