Activity History is one of the most intriguing functionalities for users to deal with. You probably know that Windows 10 captures and preserves all of your activities locally and on the cloud. This history contains a variety of data, ranging from browsing history to location information and so on.
Fortunately, Microsoft makes it simple to view all the data they store and allows you to erase it. Let’s look at how Microsoft tracks and saves your recent activity and associated data differently and how you can view Activity History In Windows 10.
What exactly is Activity History?
Activity history keeps track of everything you do on your computer and which applications and services you use. Your activity history is saved locally if you are signed in with a work or school account and granted Windows authorization. The tech giant will send your activity data to its Microsoft Servers. The company uses your activity history data to personalize your experience.
What are the different types of information does Windows 10 collect?
Windows gathers the following set of information:
- History of Edge browsing
- Google search history
- Location information (if enabled)
- Voice commands for Cortana
- The Timeline feature in Windows 10 is used.
Any activity collected through Microsoft’s HealthVault or the Microsoft Band device is saved on the servers if you utilize them. Microsoft claims that it gathers this information to enhance your overall user experience and present you with more relevant results and material helpful.
You might want to read: Windows 11 Won’t Shut Down? Here’s the Fix!
How to view the Activity History on Windows 10?
Follow the simple steps to check Activity History in minutes.
View from the Windows 10 Settings window
This is probably the most common and quickest way to view Activity History in Windows 10.
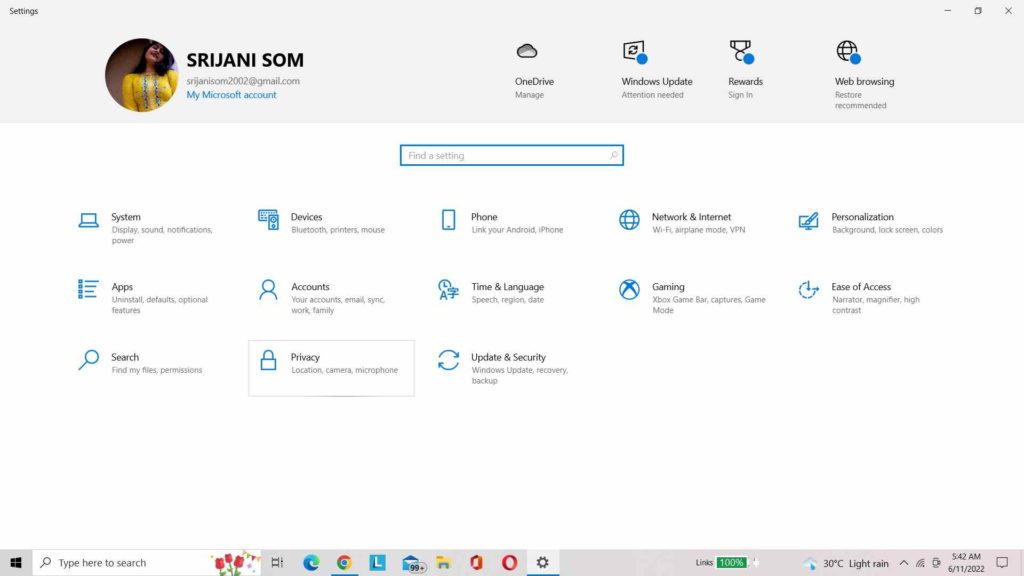
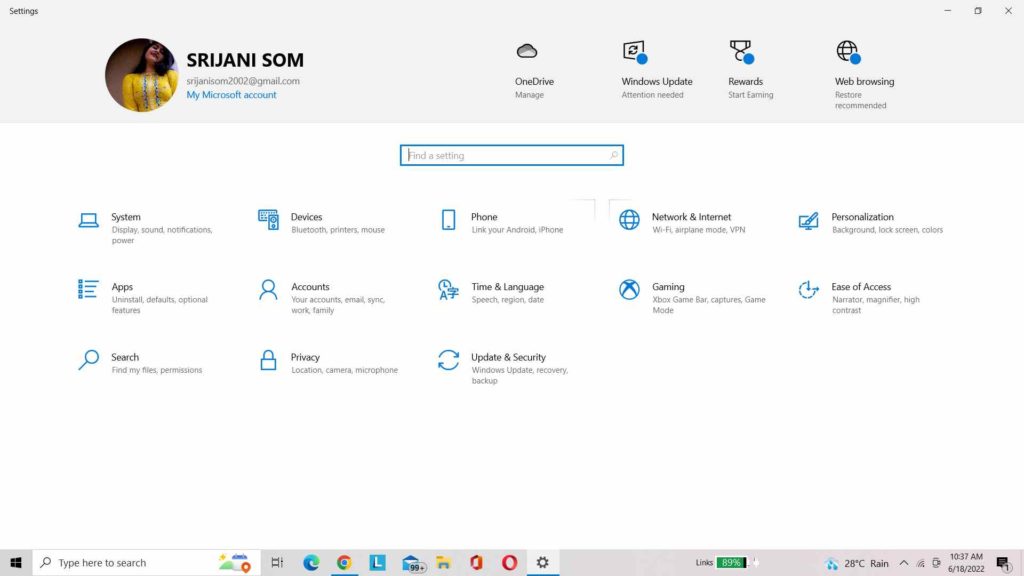
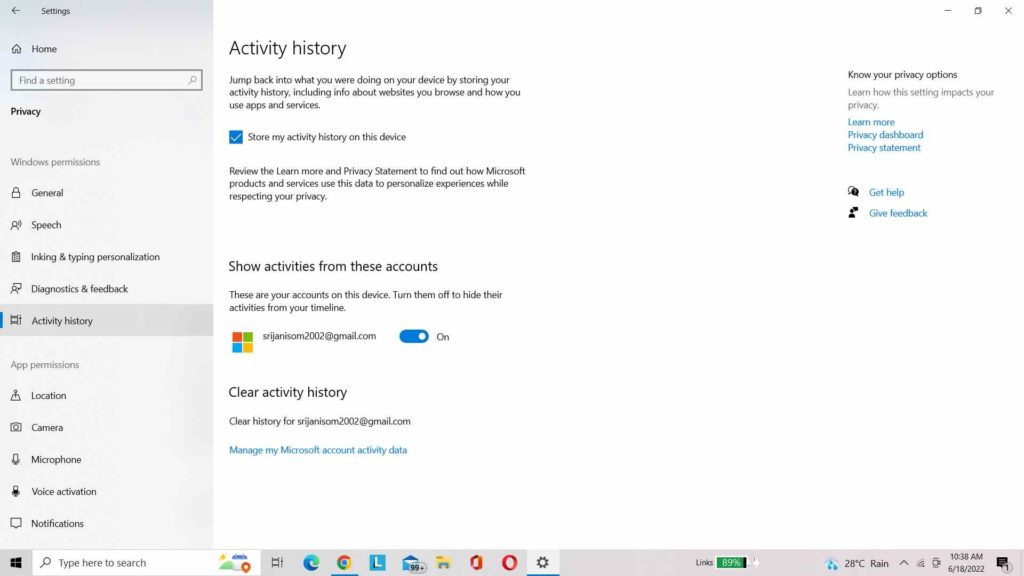
Step 1: To begin, you must press Win Key + I to access the Windows settings.
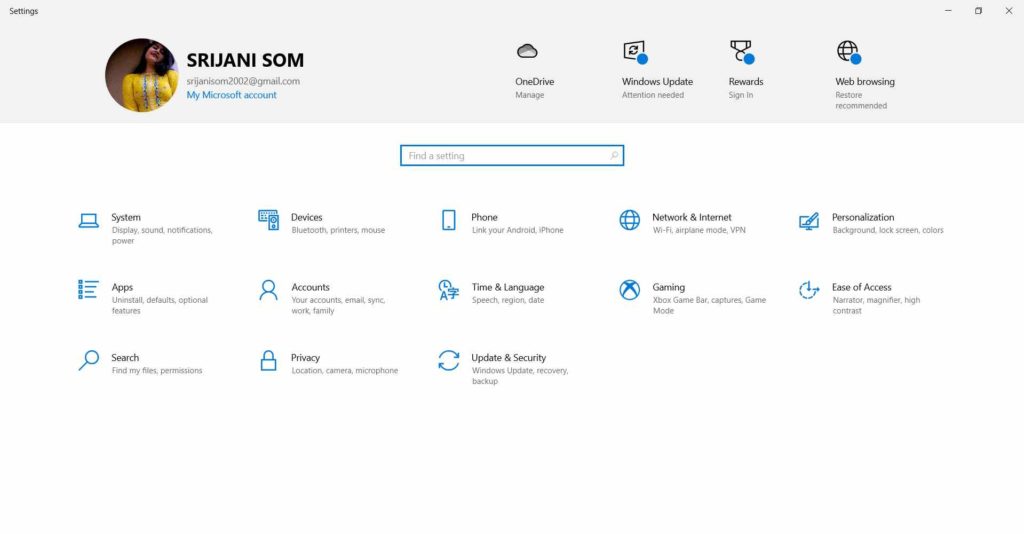
Step 2: After that, scroll down and hit on the Privacy module.
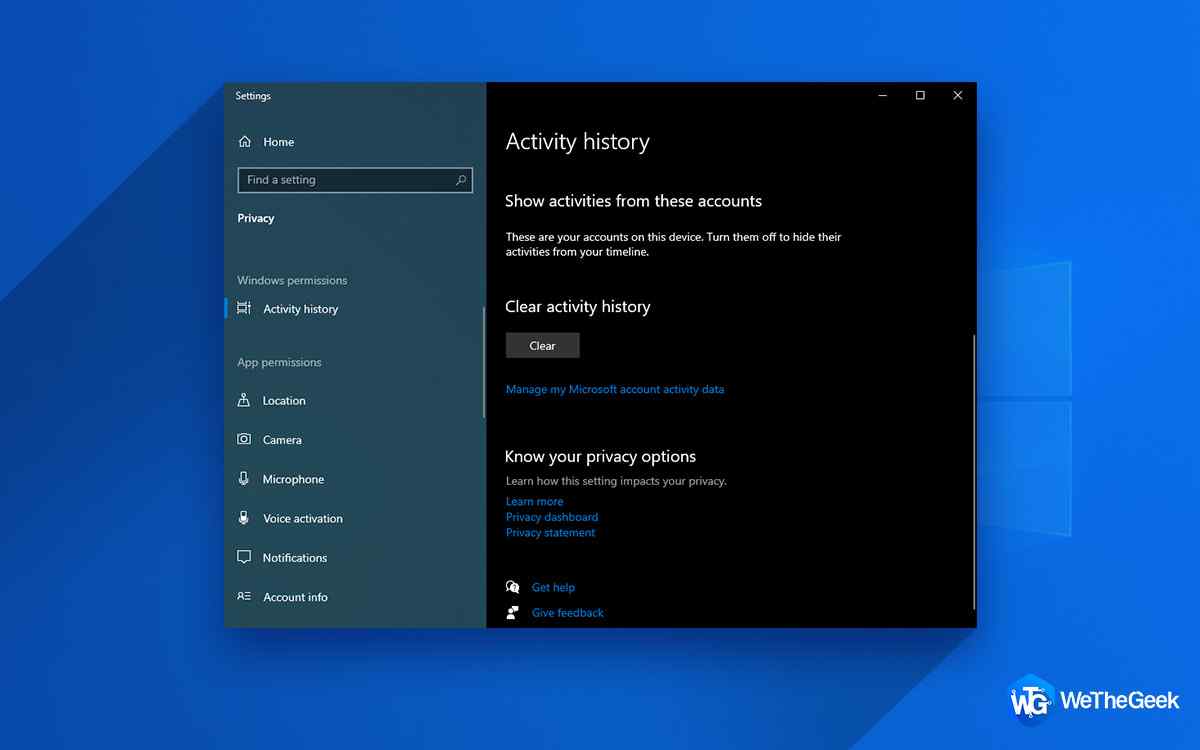
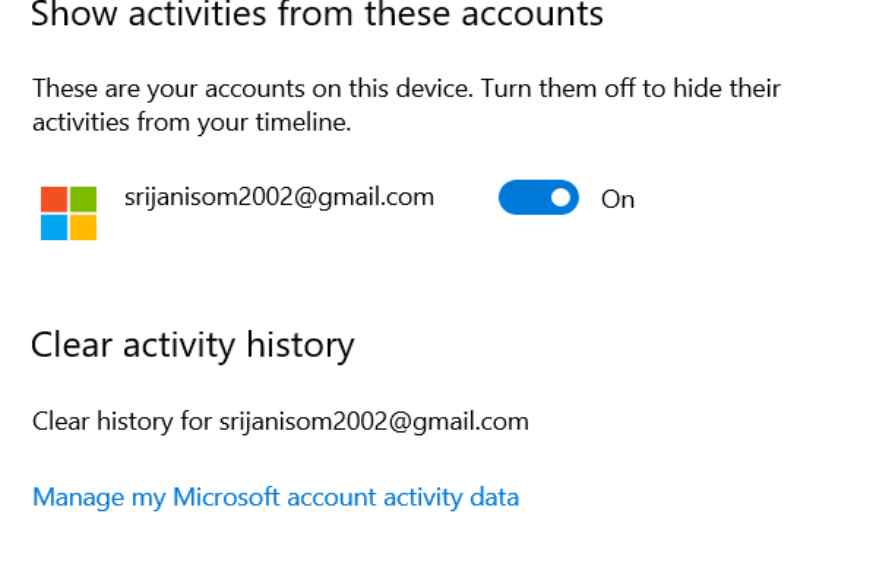
Step 3: Now, you have to choose Activity history from the left pane.
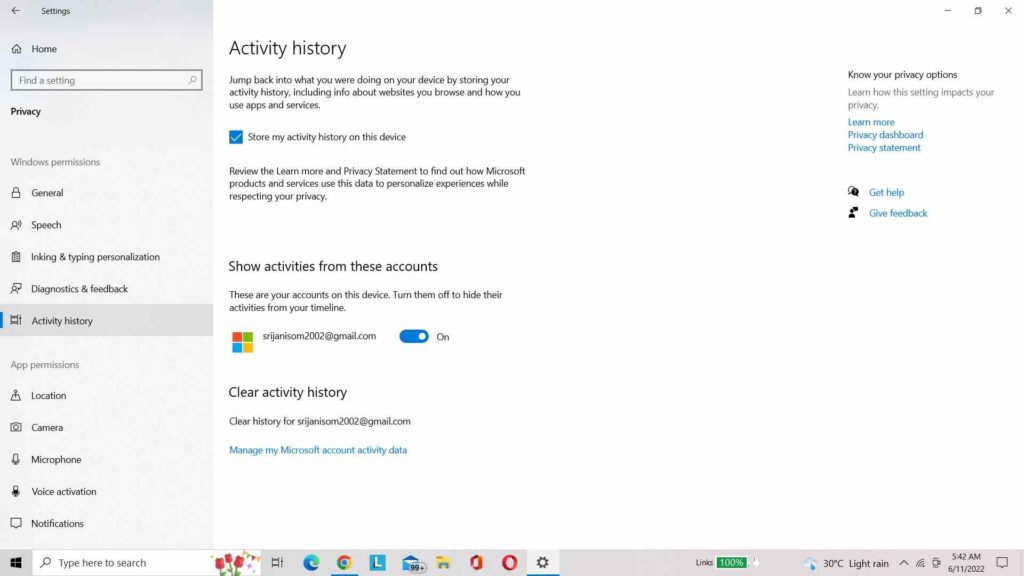
Step 4: Next, you need to click the option “Manage my Microsoft account activity data” under the Clear activity history header.
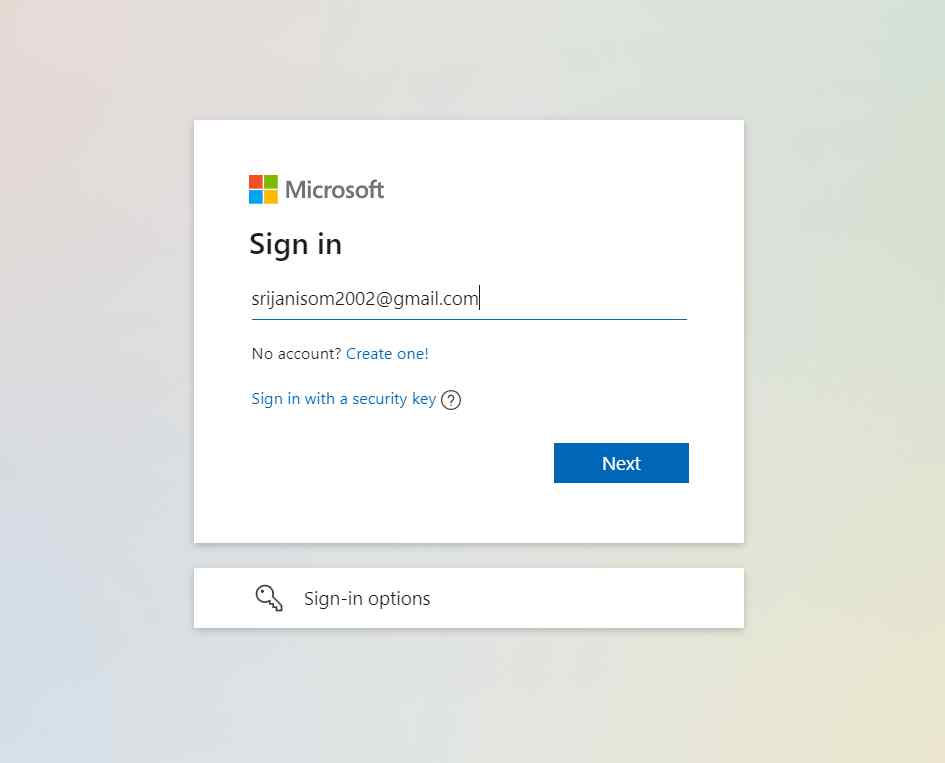
Step 5: The Microsoft Account login page will appear in your default browser.
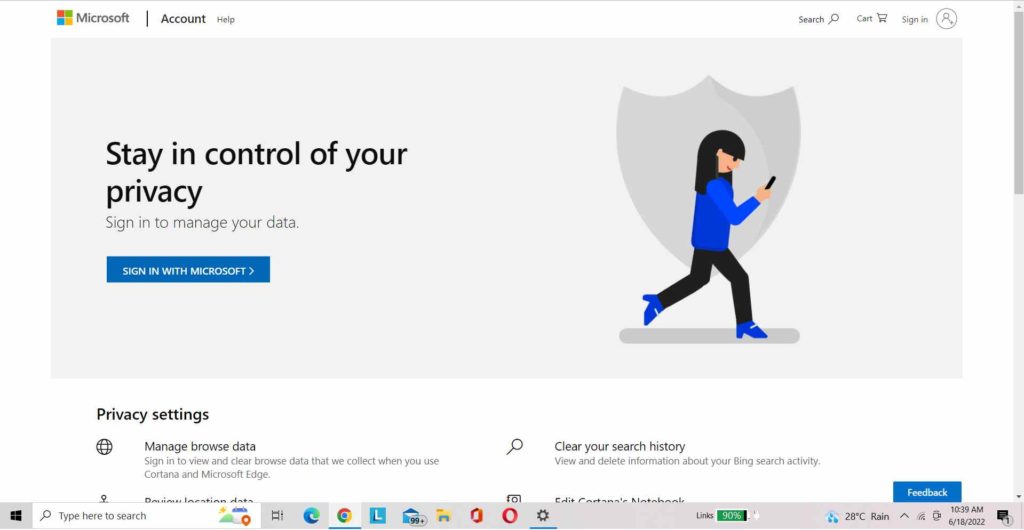
Step 6: You must sign in with your email address to proceed and check the Activity history on your Windows PC.

Step 7: After you’ve logged in, locate and navigate to the Activity history tab after you’ve logged in.

Step 8: Finally, you will be able to see the page of activity history.
View the Activity History from Microsoft privacy settings
Step 1: To access the Windows settings, you must press Win Key + I from your keyboard.
Step 2: Then, scroll down and click on the Privacy module.
Step 3: Now, in the left pane, choose Activity history.
Step 4: On the Activity History screen, simply scroll down and click on the link that says – “Privacy dashboard.”
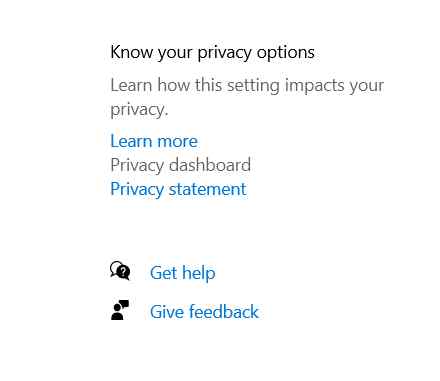
Step 5: You will be sent to the Microsoft Privacy page, where you may be asked to sign in. Enter the associated email ID and sign in.
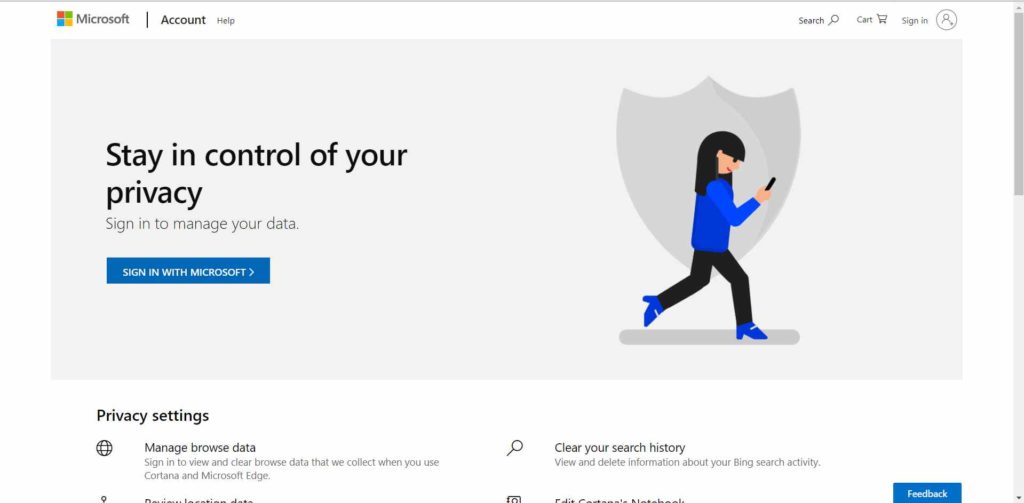
Step 6: After logging into your Microsoft Account, go to the Privacy tab and choose Activity History.
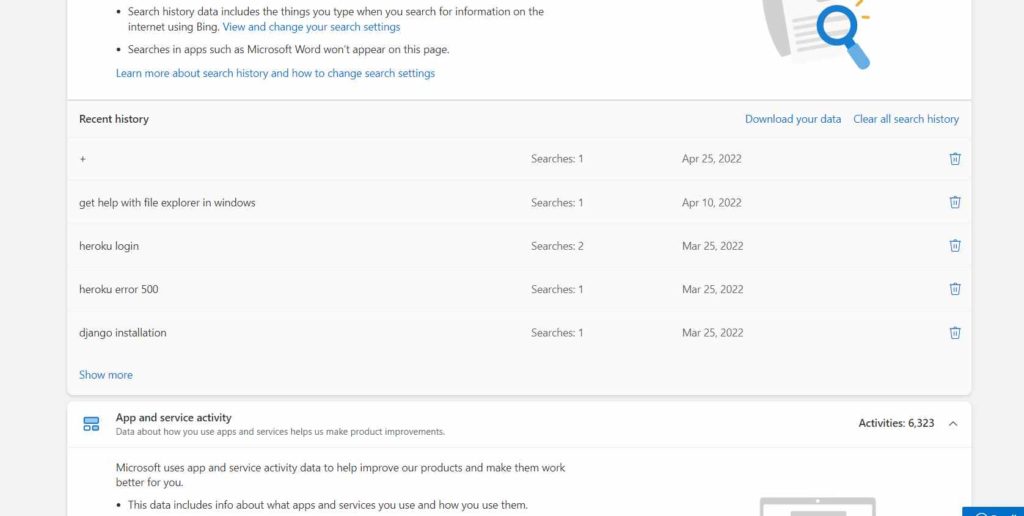
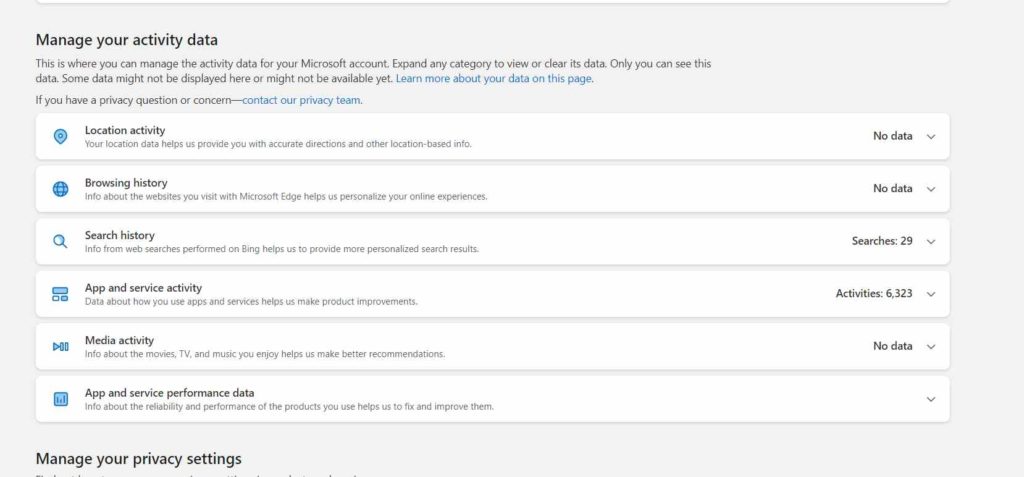
Step 7: Finally, on the Activity History page, you will be able to check your Activity History organized by Data Types (Search, Apps, Voice, Media, Browse, and Location).
You might want to read: How to Hide the Taskbar in Windows 11
How to delete the Activity History on Windows 10?
If you don’t want the tech giant to store your activity history on their servers, here’s what you need to do to remove the same:
Step 1: Go to Settings > Privacy > Activity History and navigate to the Clear activity history option.
Step 2: Scroll down and click the Privacy Dashboard Link on the right part of the Activity History page. This will take you to the Microsoft Privacy page, where you may be asked to sign in.
After logging into your Microsoft Account, go to the Privacy section > Activity History.
You will see the Activity History organized by Data Types on the Activity History Page (Apps, Search, Voice, Media, Browse, and Location).

As the screenshot shows, there is no reliable option to erase All Activity History at once. For each Data type, you must open the same and clear its Activity History.

You might want to read: How To Fix No Battery Detected Error on Windows 11 (6 Solutions)
How can you remove your account from the Activity History?
You might not want Microsoft servers to constantly record all the activities that you are doing on your system. Keeping this in mind, you might want to remove your account from the Activity History and prevent further data collection and tracking history.
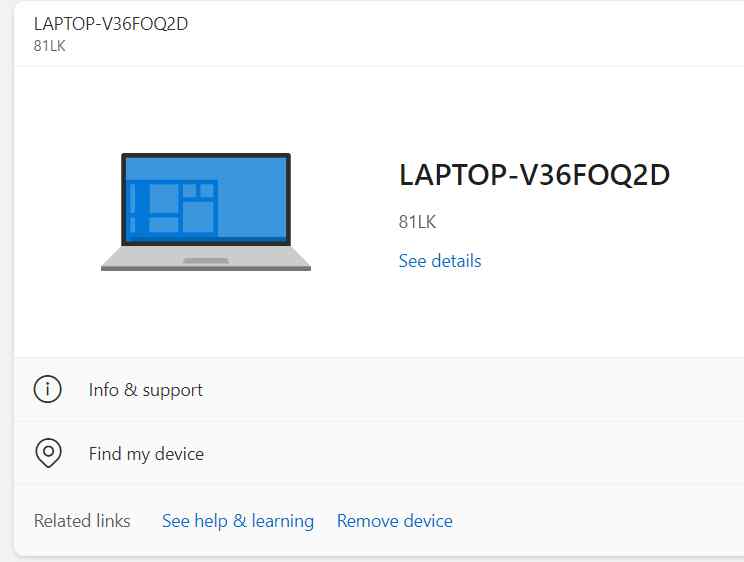
On the Activity History page, click on the Devices option, and then you will see the pop-up to get info & support, find my device, “Remove device,” and so on. Click on the appropriate option and delete your account successfully. From now on, Windows 10 will not monitor or build a timeline for that account’s activity, ensuring it is turned off.
Must Read: Windows 11 Webcam not Working? Here’s the Fix!
How can you prevent Windows 10 From Sending Activity Logs to Microsoft?
Microsoft allows its users to view Activity History In Windows 10 and prevent Windows 10 from sharing the activity history with Microsoft. For that, all you need to do is:
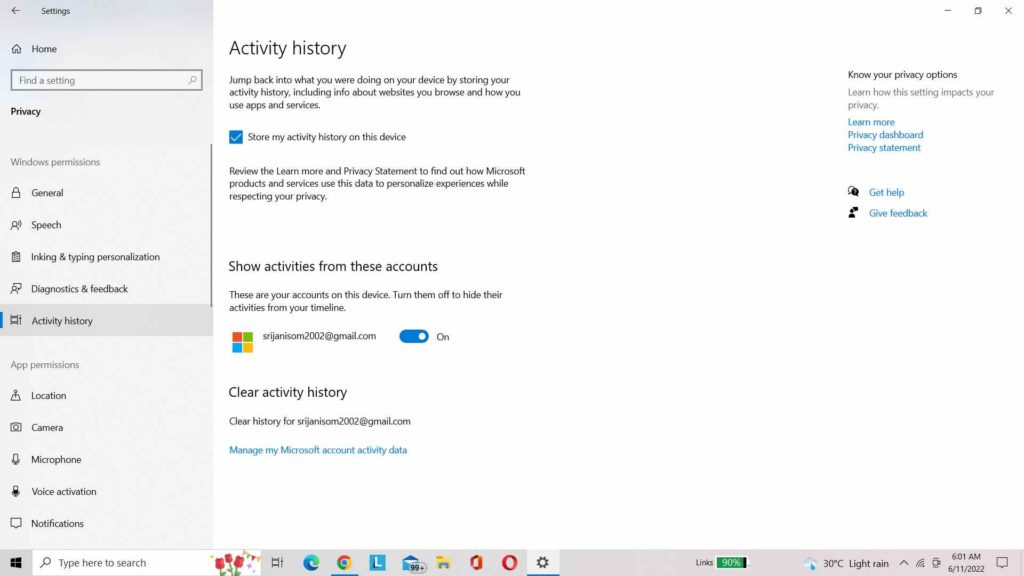
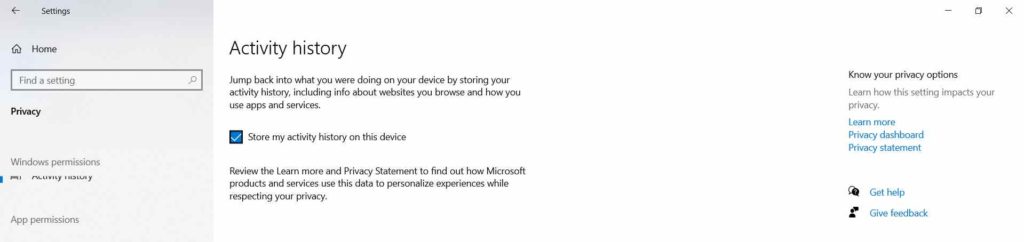
Step 1: First, you need to go to Settings and click on the Privacy module. From there, select the option Activity history and just uncheck the box next to ‘Store my activity history’.
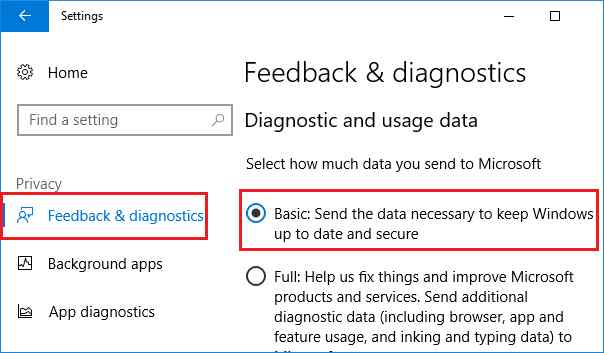
Step 2: Go back to Settings and land on the Privacy & security page. From the left tab, select, Diagnostics and feedback > Change the ‘Diagnostic data’ setting to Basic.
Now, Microsoft servers will no longer receive the data of your activity history. Hence, maintain your digital privacy the way you want!
Must Read: How To Enable Or Disable Quick Settings On Windows 11 Computer?
Frequently Asked Questions | More About Activity History On Windows (2022)
Q.1. How do I look at the history on my computer?
In Windows 10, go to Start, then Settings, Privacy, and Activity History.
Select Start, then Settings > Privacy & security > Activity history in Windows 11.
Q.2. How can I see my recent activity?
- Navigate to your Google Account.
- Click Data & privacy on the left menu column.
- Click My Activity under “History settings.”
Q.3. Can I see my history?
Yes, you can! Just go to settings, followed by navigating to the Privacy tab. From there, you can see the activity history.
Q.4. Who can see my activity log?
Only you can see your activity log apart from Microsoft.
That concludes this blog post. Using the aforementioned methods, you can easily view Activity History On Windows 10 PC. You can also delete your account as per your preference using the above steps. We hope you found this article useful.
Feel free to leave a comment if you have any problems. Thank you very much for stopping by! Follow us on social media – Facebook, Instagram and YouTube.
NEXT READ: