
Screen sharing has gained a lot of importance and popularity over the last few years, especially during the pandemic when working from home became a thing. It offers a handy way to collaborate in real-time, work on projects, presentations, conduct conferences, and business meetings, and so on. Whether you want to connect with your friends, family, or co-workers, screen sharing and video conferencing make it all easier. Don’t you agree?

Image source: Desk Roll Remote Desktop
So, in this post, we will be talking about Quick Assist. Developed by Microsoft, Quick Assist is a handy utility app that allows users to share their screens over a remote connection without using a third-party tool.
Also read: Windows 10 Quick Assist: An Easy Way to Remotely Troubleshoot
What is Quick Assist? How Does it Work?
Quick Assist is a pre-installed app on the Windows OS that enables users to share their device with another person over a remote connection. The Quick Assist comes in pretty handy when it comes to solving PC problems or providing assistance remotely. Quick Assist was initially rolled out along with Windows 10 and happens to be a part of the successor version Windows 11 as well. So, whether you want to help out a friend, a family member, or a colleague with their PC troubles, you can use the Quick Assist app to gain remote access to their device, or vice versa if you require assistance.
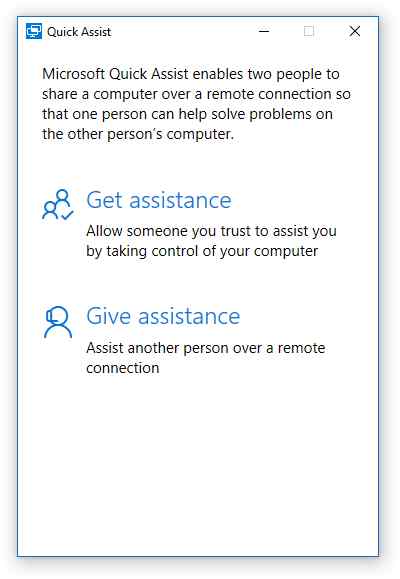
The Quick Assist comes with an easy-to-use interface and is simple to set up. All you have to do is launch the app, and enter the code provided by the sharer. And that’s it! Just within a few seconds, another user can gain full control over your device and settings remotely.
Also read: 8 Best Screen Sharing Software For Windows
How To Fix Quick Assist Not Working on Windows 11
Quick Assist not working? We’ve got you covered. Here are a few simple solutions that you can try to get the Quick Assist app up and running again on Windows.
Method 1: Check the System Requirements to Run Quick Assist
Tap the search icon placed on the Taskbar, type “Microsoft Store” and hit Enter. Once the Microsoft Store app launches, use the search bar to find the “Quick Assist” app.
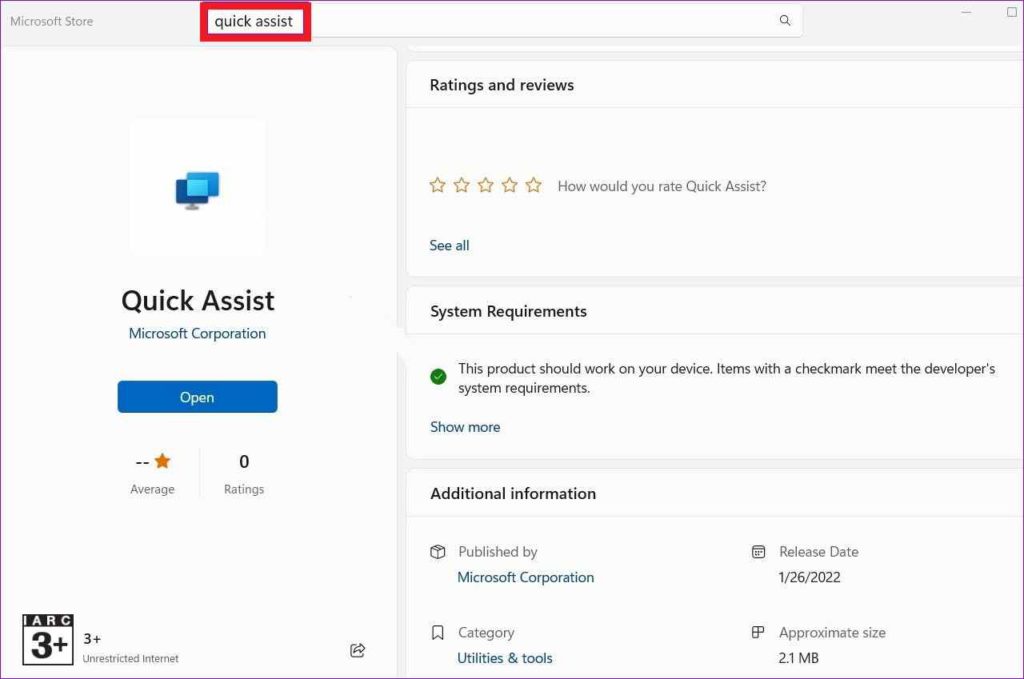
In the next window that appears on the screen, check for a green mark under the “System Requirement” section to confirm whether your Windows PC meets the minimum requirement to run the Quick Assist app.
Method 2: Run the App as an Administrator
Tap on the search icon placed on the Taskbar, type “Quick Assist” and then select the “Run as Administrator” option.
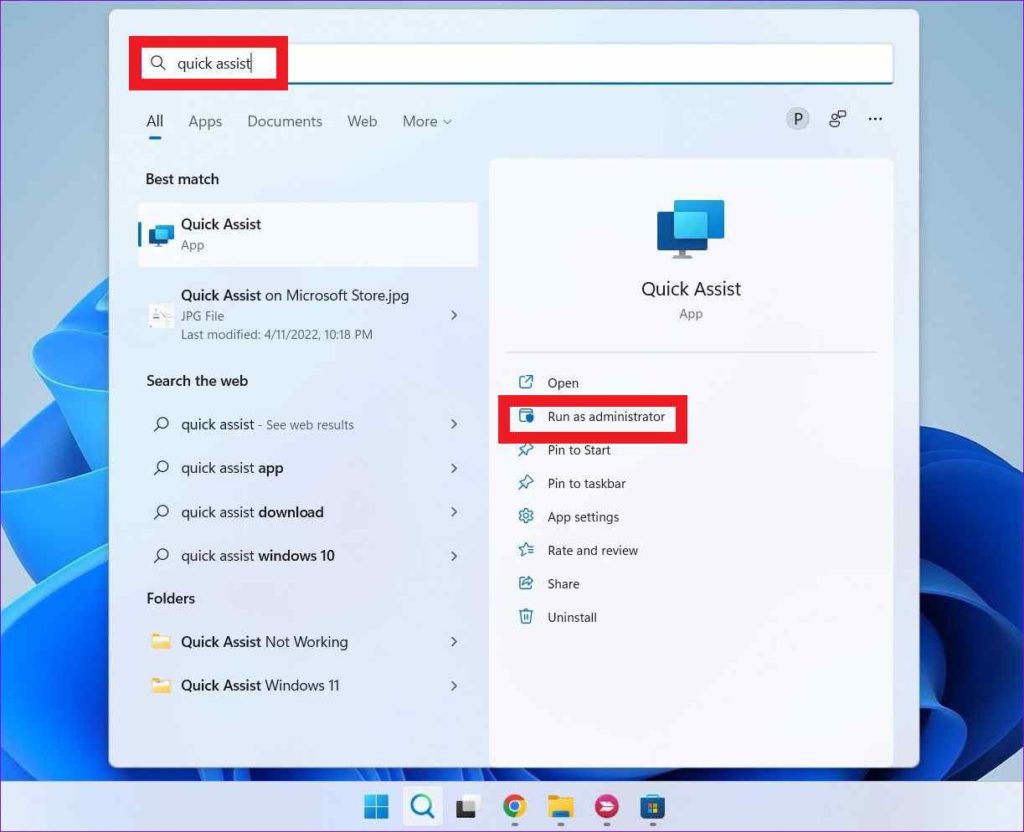
If the Quick Assist app does not have the required admin rights, the app may fail to load on your device. Hence, by launching the app in admin mode, you can easily resolve the “Quick Assist not working” issue on Windows.
Also read: How To Screen Record On Chromebook With Audio
Method 3: Repair the App
Launch the Settings app and then switch to the “Apps” section from the left menu pane.
Select “Installed Apps”. Now, scroll through the list of applications and look for the “Quick Assist” app on the list. Once you find it, tap on the three-dot icon placed right next to it and select “Advanced Options”.

Hit on the “Repair” button so that Windows can automatically scan and diagnose the underlying issues.
Method 4: Reset the Internet Settings
Misconfigured Internet or network settings can also trigger the Quick Assist not working issue on Windows. Hence, we will try restoring the Internet settings to the default state and see whether this hack works.
Tap on the search icon placed on the Taskbar, type “Internet Options” and hit Enter. In the Internet Properties window, switch to the “Advanced” tab.
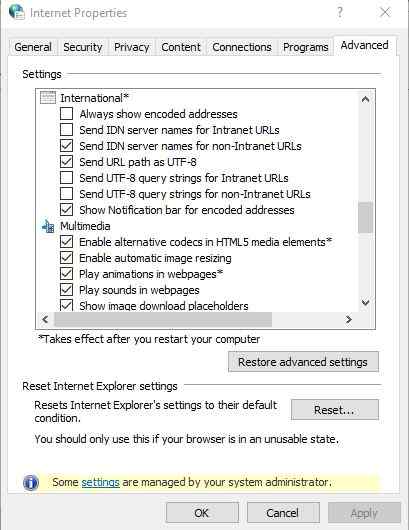
Hit on the “Restore advanced settings” button. Tap on OK. Reboot your device after making the above-listed changes.
Also read: How to Record Screen on Windows 11
Method 5: Re-register the App using Windows PowerShell
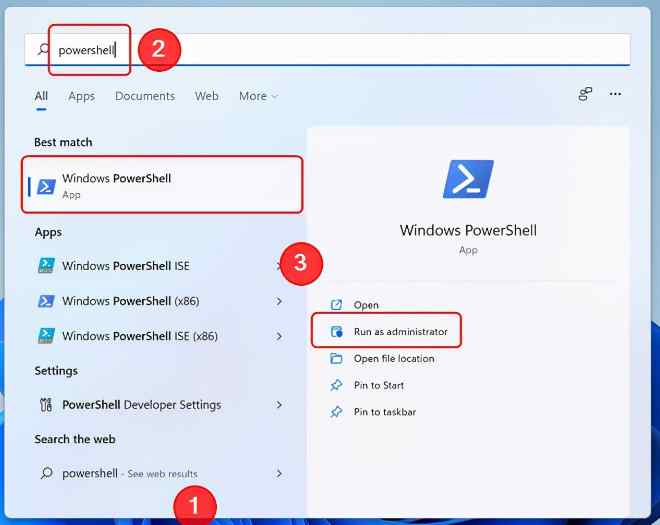
Tap on the search icon placed on the Taskbar, type “Windows PowerShell” and hit on the “Run as Administrator” option.
In the PowerShell window, type the following command and hit Enter to execute it:
Get-AppXPackage|Foreach{Add-AppxPackage-DisableDevelopmentMode-Register”$($_.InstallLocation)\AppXManifest.xml”}
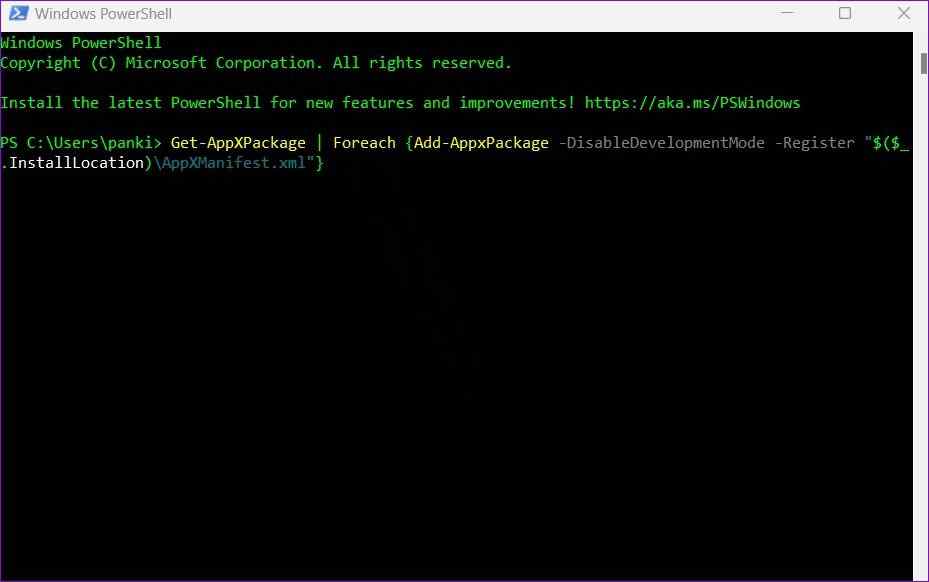
After the execution of the command, exit all windows, and reboot your device.
Method 6: Run the SFC Command
Yes, you can also use the SFC command to resolve the Quick Assist not working issue on Windows. The SFC command helps to scan and fix corrupt system files and settings. To run the SFC command on Windows 11, follow these steps:
Launch Command Prompt in Admin mode. Type the following command in the Terminal window and hit Enter.
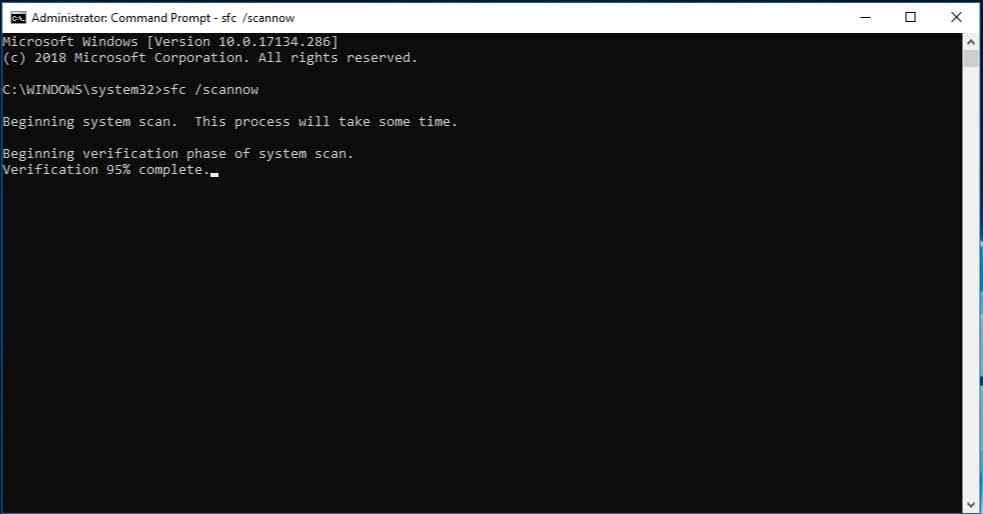
sfc/scannow
After the execution of the command, reboot your device and then relaunch the Quick Assist app to check if the issue persists.
Conclusion
Here were a few simple workarounds to fix the Quick Assist app on Windows 11 and 10. You can use any of the above-listed methods to get the Quick Assist app up and running again within no time. Also, if you are unable to resolve the issue then you can try switching to alternative screen sharing apps like Team Viewer and AnyDesk.
Do let us know if our post was helpful. Feel free to share your thoughts in the comments section!
Follow us on social media – Facebook, Instagram and YouTube.