
Windows 11 is indeed a breath of fresh air – A renewed UI and some great features. But, it is still far from being impeccable. Cut to the chase – You have upgraded to Windows 11 expecting mind-blowing performance and you wouldn’t like it if, for instance, it takes forever for an app to open or if there are lags in your game. So, to speed up Windows 11 and moreover, enhance its performance you can prep your PC up a little.
Few Quick Steps To Speed Up Windows 11
Worry not! If you are unaware of the steps, we are going to talk in detail about these a little later in the post. However, if you know the steps, go ahead and enhance your Windows 11 performance with these steps –
- Clear temporary files
- Tweak visual effects
- Adjust power plan
- Use a dedicated cleanup tool
- Disable Startup Programs
How To Speed Up And Improve Windows 11 Performance
There are ways more than in which you can improve Windows 11 performance. While this is not an exhaustive list, we have tried to include some of the best ways you can speed up Windows 11 and make it reach its full potential.
1. Restart Your Computer At Regular Intervals
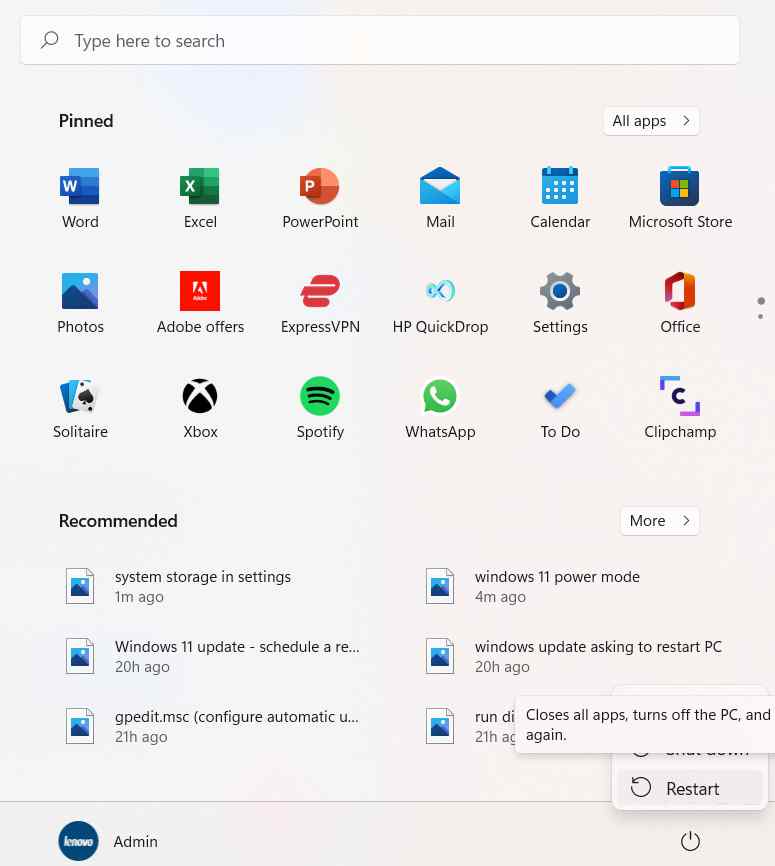
Depending on your workflow and how you juggle your day-to-day tasks, it is important that you restart your computer at regular intervals. Ideally, experts recommend that you restart your computer at least once a week to improve and speed up Windows 11 performance. If you can restart your computer at least once a day, there can’t be anything better. Few merits of restarting computers include clearing off temporary files and flushing RAM.
2. Update Your Windows 11 PC
Updates are crucial for your Windows PC and even if you have the latest Windows 11, you should not ignore updates that Microsoft frequently rolls out. However, if automatic updates tend to bug you, you can disable them temporarily. Apart from that, make sure that you fetch these updates because these updates patch security vulnerabilities in your PC and also regularly roll out features that can enhance your experience and productivity. To update or look for updates in Windows 11, here are the steps –
1. Press Windows + I and open Settings.

2. From the left-hand pane click on the Windows Update option.

3. On the right-hand side click on Check for Updates or if Windows prompts you to install updates, fetch them.
3. Use A Dedicated Tool to Improve and Speed Up Windows 11
When you install an application, its fragments get scattered across your system. This in turn slows down your PC. And, it goes without saying that when overtime , your PC becomes slow, it doesn’t deliver performance as it used to in its heydays.
One way to speed up Windows 11 PC and enhance its performance is to clean it.
As easy as it may sound, it is not. It is not easy for someone busy with day-to-day tasks to lock horns with unwanted files and risky registry items. You can leave this cleaning task on a specialist tool like Advanced PC Cleanup.
You can get to know this tool even better and further know why it is worth your time and money. Let’s give a brief glimpse of what this tool is capable of and how it can help you fix the otherwise risky registry items, delete temporary files and other junk.
1. Download, run and install Advanced PC Cleanup

2. As you can see and infer from the tool’s neatly segregated modules you can –
- Clean junk, temporary, and recycle bin files.
- Manage startup programs, uninstall apps completely and even keep tabs of old downloads.
- Advanced PC Cleanup also protects your computer from malicious threats and helps remove identity traces from your computer as well.
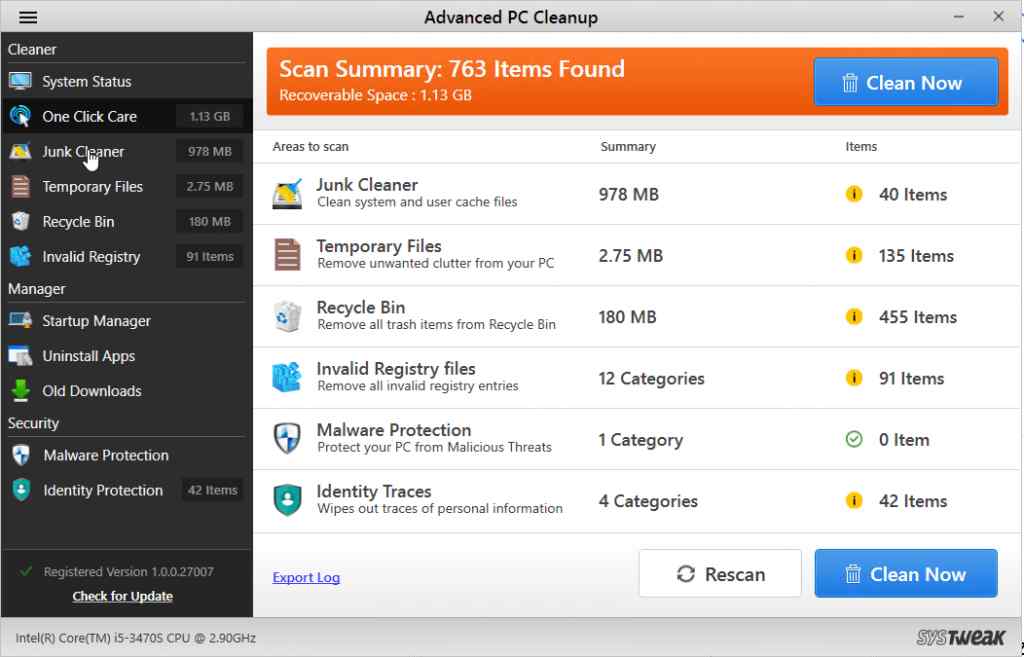
3. To quickly scan your system for junk and temporary files, clean recycle bin items, look for invalid registries, manage programs or even secure your PC, click on One Click Care.
4. Once the scan is over, click on the Clean Now button from the bottom-right corner of screen.
4. Tweak Visual Effects
Who doesn’t like an appealing visual experience when working on a desktop or laptop but there are some settings that you might not need right now. More so, because they can hog on your system’s resources and thereby make your Windows 11 slower.
Imagine being able to reduce 20% load off your GPU by just making a few minute tweaks to visual effects.
Here are the tweaks you can make to visual effects and improve Windows 11 performance and speed –
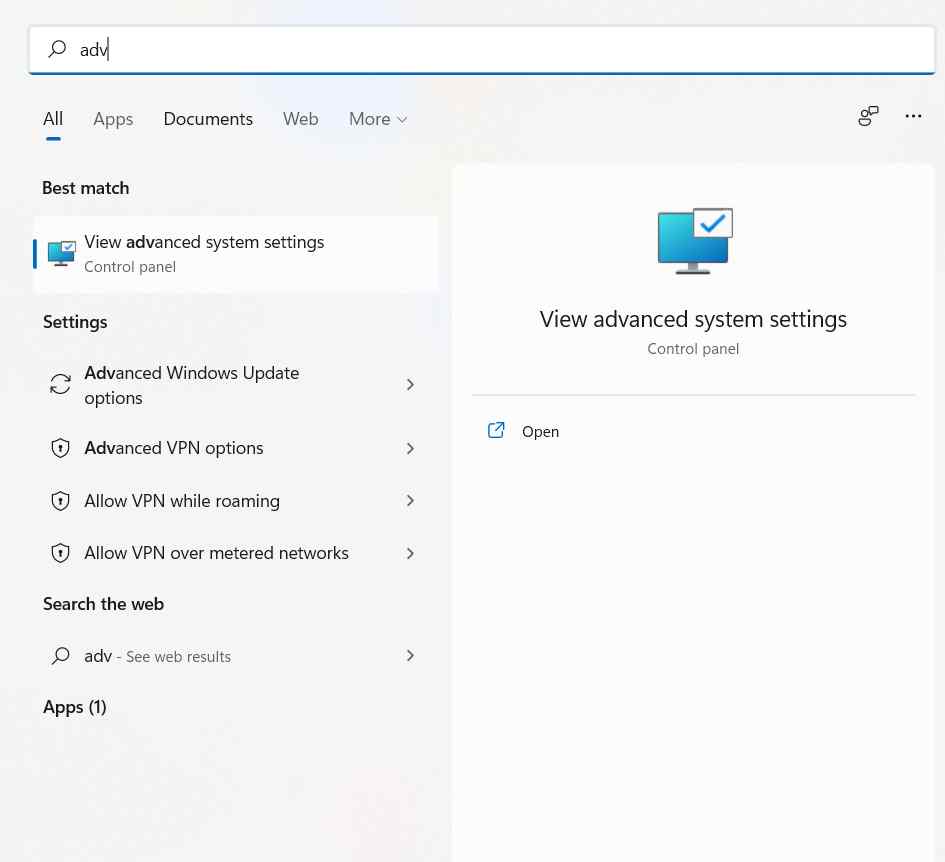
1. In the Windows search bar start by typing advanced system and click on Open from the right-hand side.
2. Under the Advanced tab, click on Settings.

3. Select the Adjust for best performance radio button.
4. Now, from the list that you see below checkmark, the following checkboxes – (i) Show thumbnails instead of icons and (ii) Smooth edges of screen fonts.
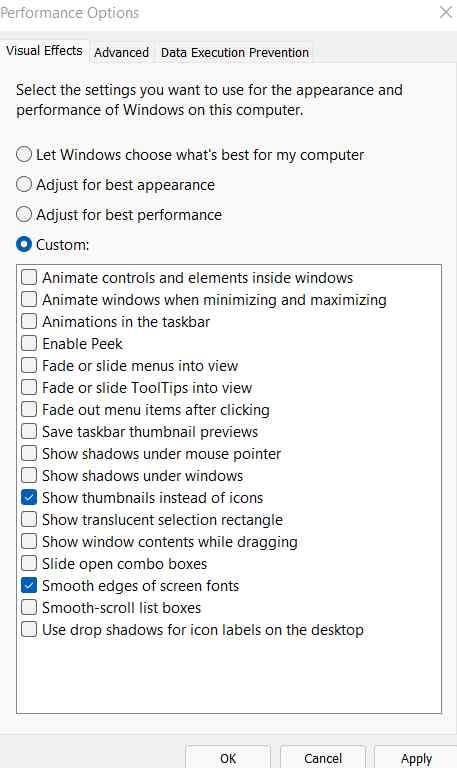
5. Click on Apply and then OK.
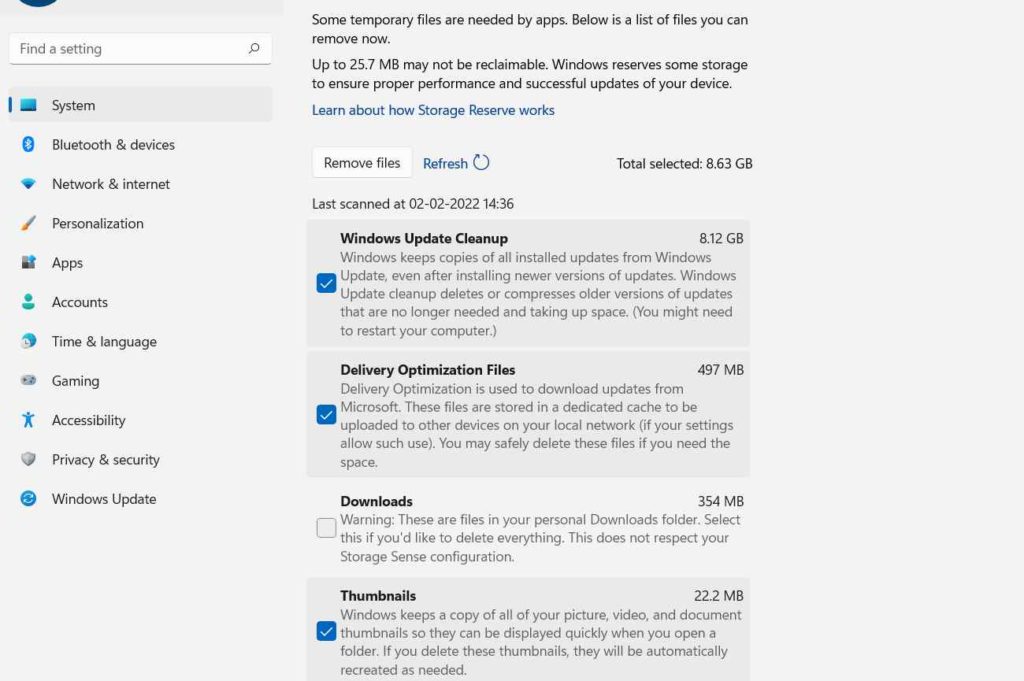
5. Clear Temporary Files To Enhance Your PC’s Storage, Speed, and Performance
Clearing temporary files is a quick process, and trust us – removing them does improve Windows 11 speed and performance.
You can do this as soon as you sit down to work on your computer because the process is very simple. But, first, a quick look at what these are – Temporary files are those that take up storage space on your PC when an app on your computer performs a certain task. Initially, they might not take a lot of space but if they go unchecked, you’ll soon be losing on significant storage space. So, here’s how you can get rid of temporary files.
1. Press Windows + R to open the Run dialog box.
2. In the dialog box type %temp% and press Enter.
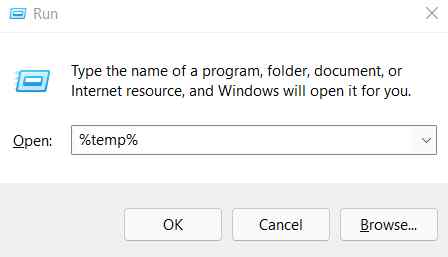
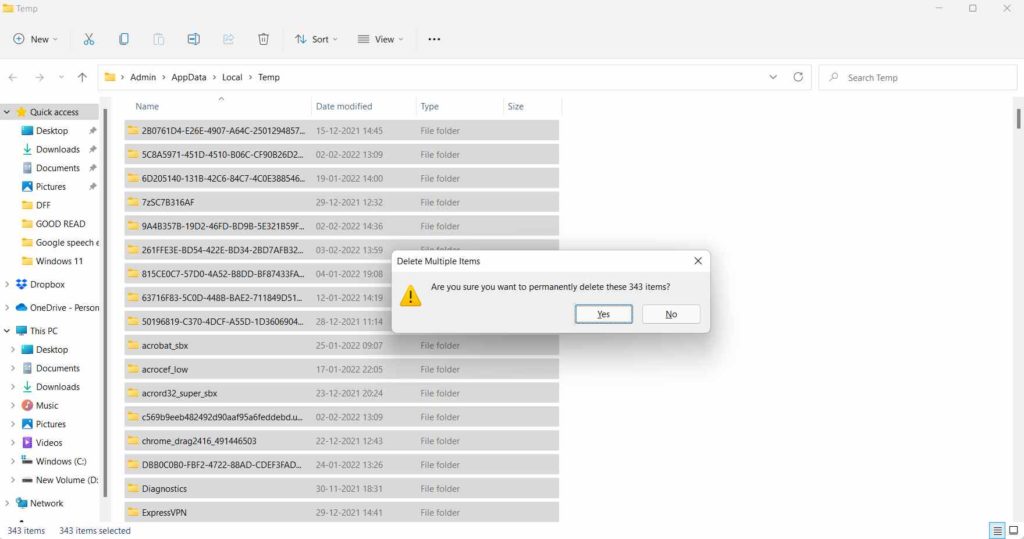
3. Select all the files by pressing Ctrl + A and then press shift+delete.
With temporary files gone you have done a good deed to your computer and in return, you have inched your PC towards better speed and performance.
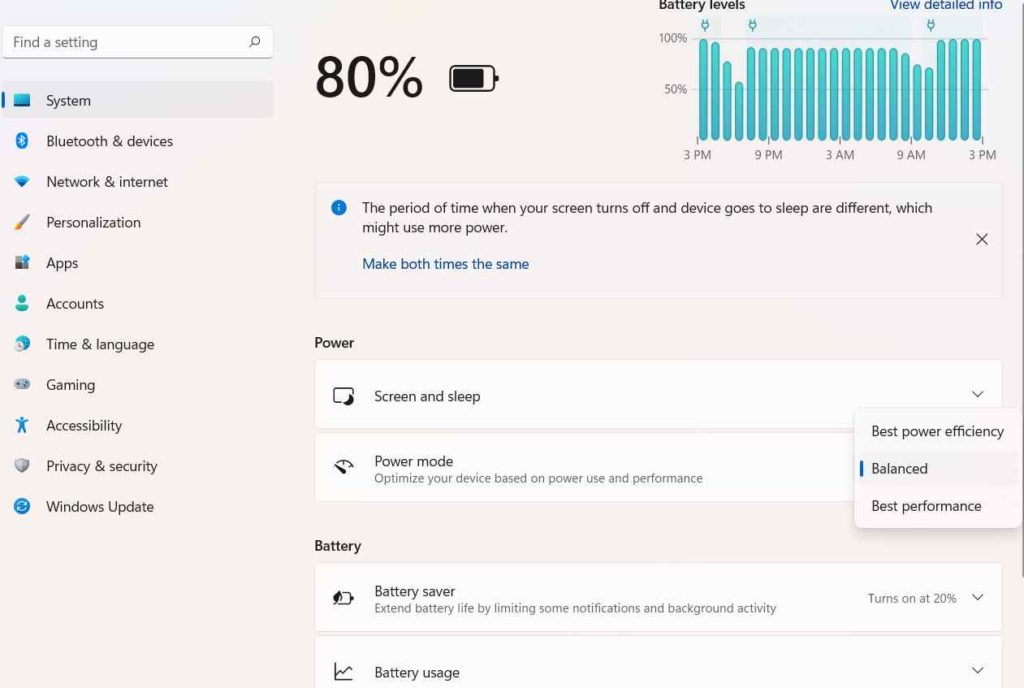
6. Hack Into Power Mode
If performance is all that you want and are ready to slightly compromise battery life, you can change the Power Mode. It would be that you want to be on your A-game while you are gaming. To change the Power Mode for ultimate Windows 11 performance and speed, here are the settings you need to tweak –
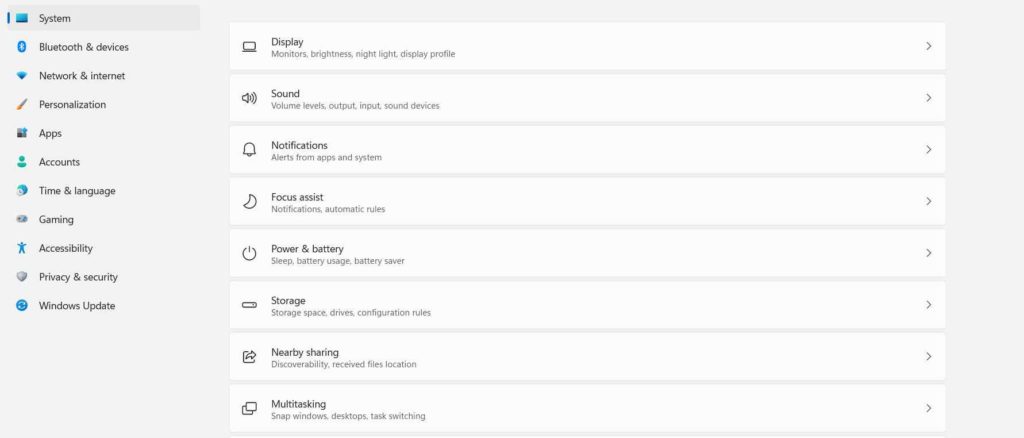
1. Open Settings.

2. Go to System.
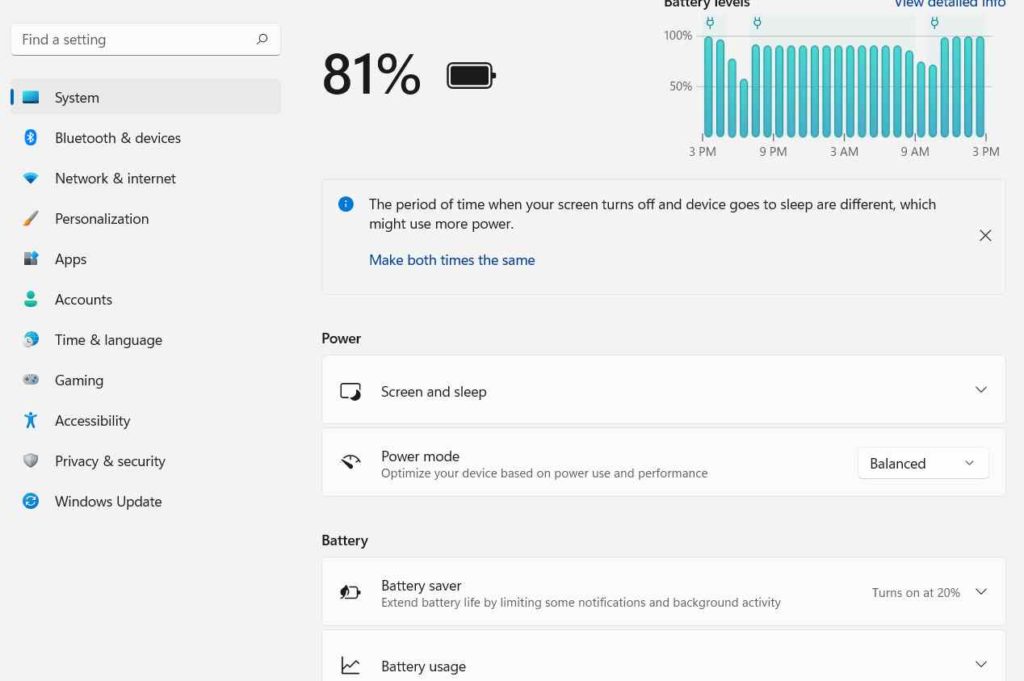
3. From the right-hand side, click on Power & battery.
4. Under Power click on the Power Mode dropdown and select Best Performance.
7. Disable Startup Programs
Many applications and programs often run in the background or automatically start without your consent. Not just that, these even take a toll on both your system’s memory and storage and even make your PC slow. For improving Windows 11 performance and speed, you can always disable unnecessary and unneeded startup programs. Here are the steps –
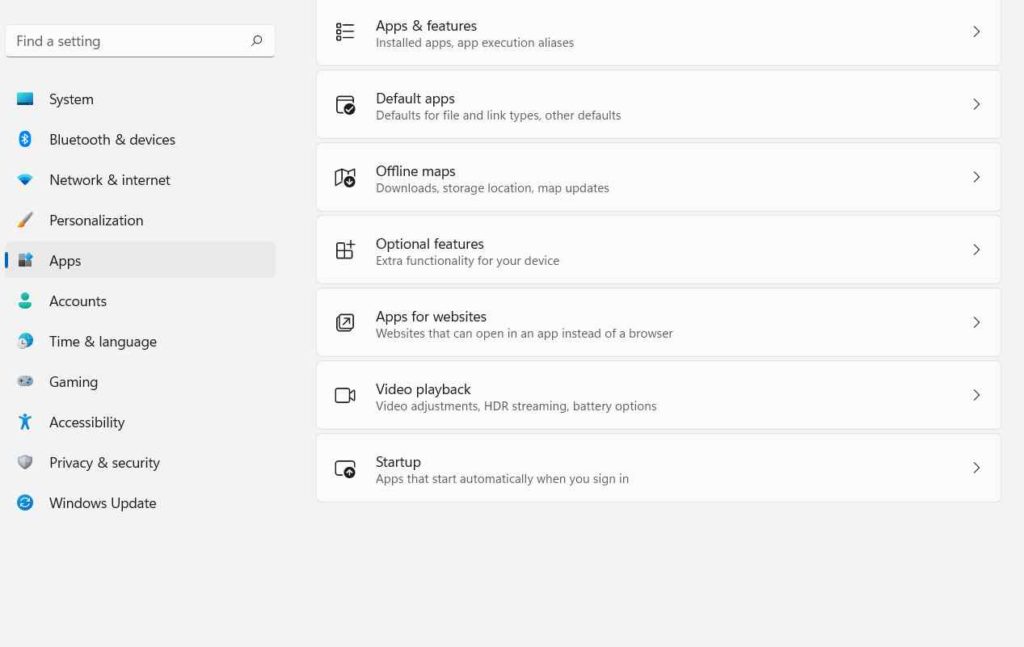
1. Press Windows + I to open Settings and then click on Apps from the left-hand side.
2. From the right-hand side click on Startup which is the last option.
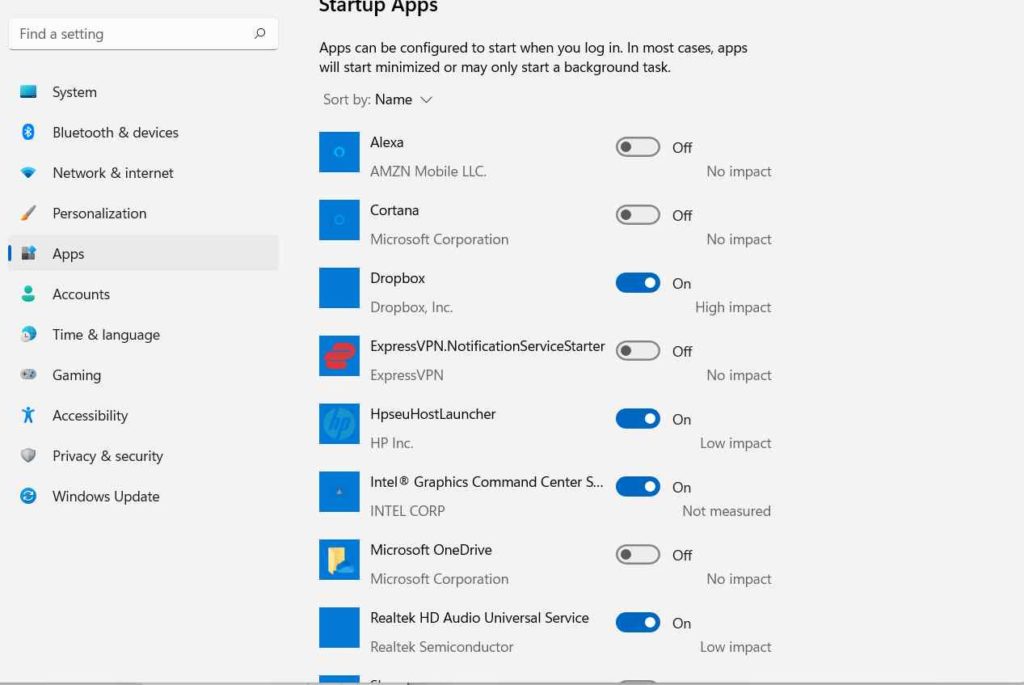
3. From the list of apps, toggle off the Apps that you don’t want to run in the background or don’t want to start automatically.
Alternatively you can,
1. Open the Task Manager by pressing the Shift + Ctrl + Esc key combination.
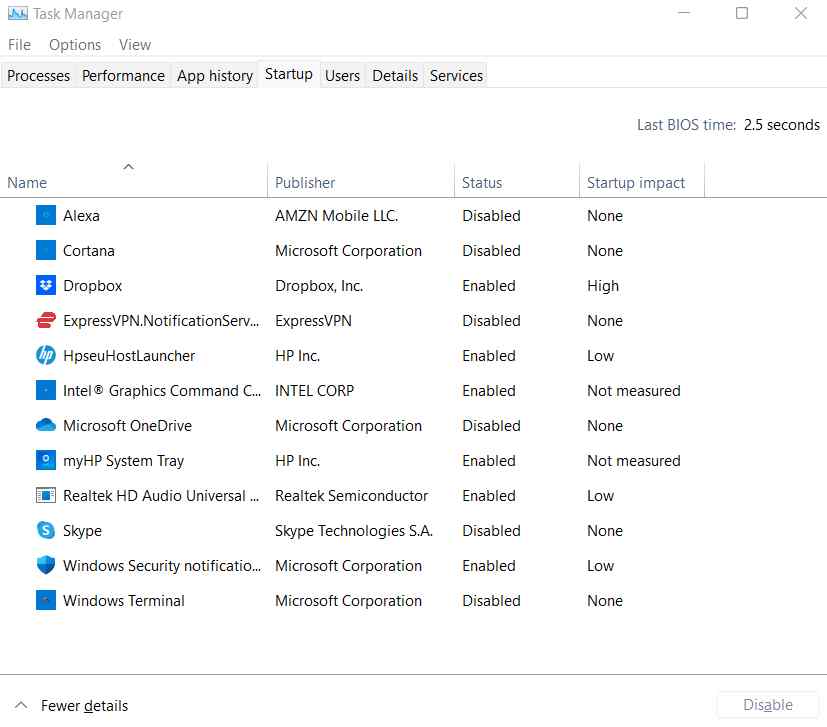
2. Head to the Startup tab.
3. Right-click on the app or program you want to disable and then click on the Disable option.
8. Reclaim Precious Disk Space
If you have recently upgraded your computer from Windows 10 to Windows 11, chances are there are some files that have tagged along and that can slow your PC.
Windows 11 is smart enough to tell you about all such temporary files and hence, you can remove them and free up precious disk space on Windows 11. For instance, you can get rid of older update files that are no longer needed or previous installation files in the windows.old folder.
Here are the steps to get rid of such redundant files to reclaim disk space and enhance the speed and performance of your Windows 11 system –
1. Hit the Windows + I key combination and open Settings.
2. Select System from the left-hand side.
3. Now, from the right-hand side, select Storage.
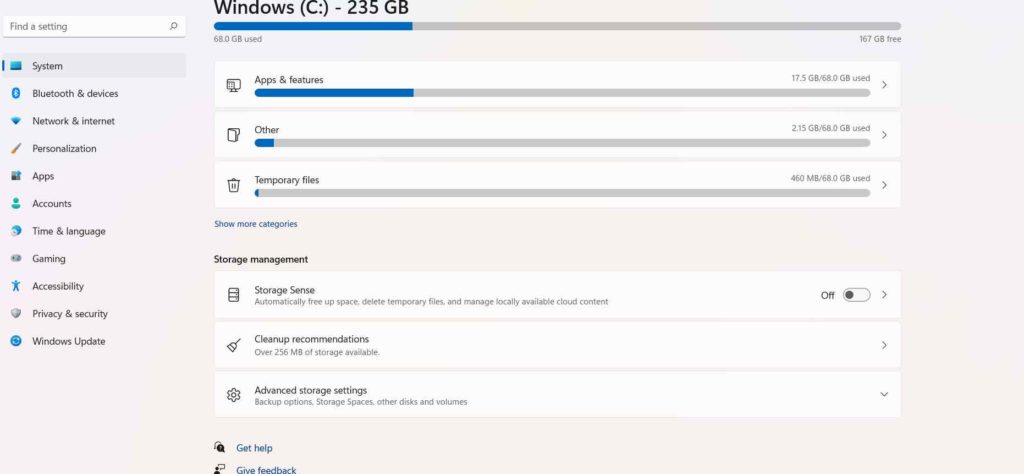
4. Locate Temporary Files.
5. Clear all the items that are pre-selected.
6. Next, select the Remove files option.
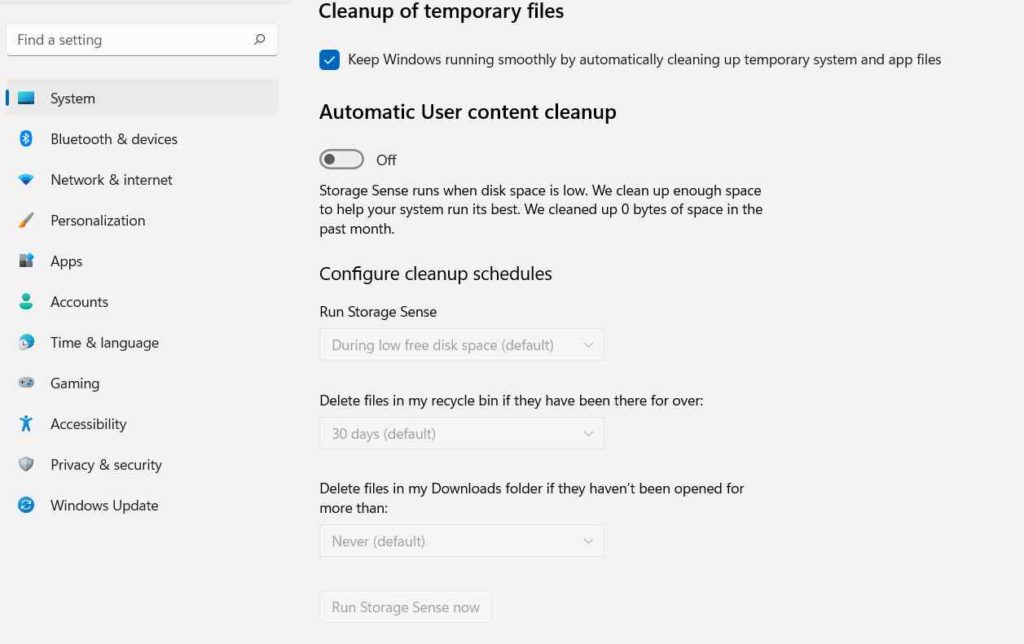
9. Enable Storage Sense
Speaking of storage, how can we forget activating Storage Sense. This is one feature that senses temporary files and other redundant files and automatically frees up space for you by removing them. So, while in Settings navigate to the path mentioned below –
Settings (Windows + I) > System (left-hand pane) > Storage (right-hand side) > enable Storage Sense by toggling the On/ Off switch to the right.
10. Change Power Plan
Here we shall be creating a power plan in a way that both hardware and system settings use optimum performance. Depending on the manufacturer you may be able to see a slightly different interface. For instance, I have an HP laptop, so I have applied the following settings to create a power plan as shown below –
1. In the Windows search bar type Control and click on Open from the right-hand side
2. When the Control Panel opens, click on the View by dropdown and select Large icons
3. Now, you can navigate to –
-Control Panel\All Control Panel Items\Power Options
Here I found that by choosing the HP Recommended radio button, I was able to see a decent performance overall. However, you can even choose the Balanced (recommended) plan which would give more or less the same performance
-Control Panel\All Control Panel Items\Power Options\Create a Power Plan
Here you can create a custom power plan.
11. Uninstall Apps That You Don’t Need
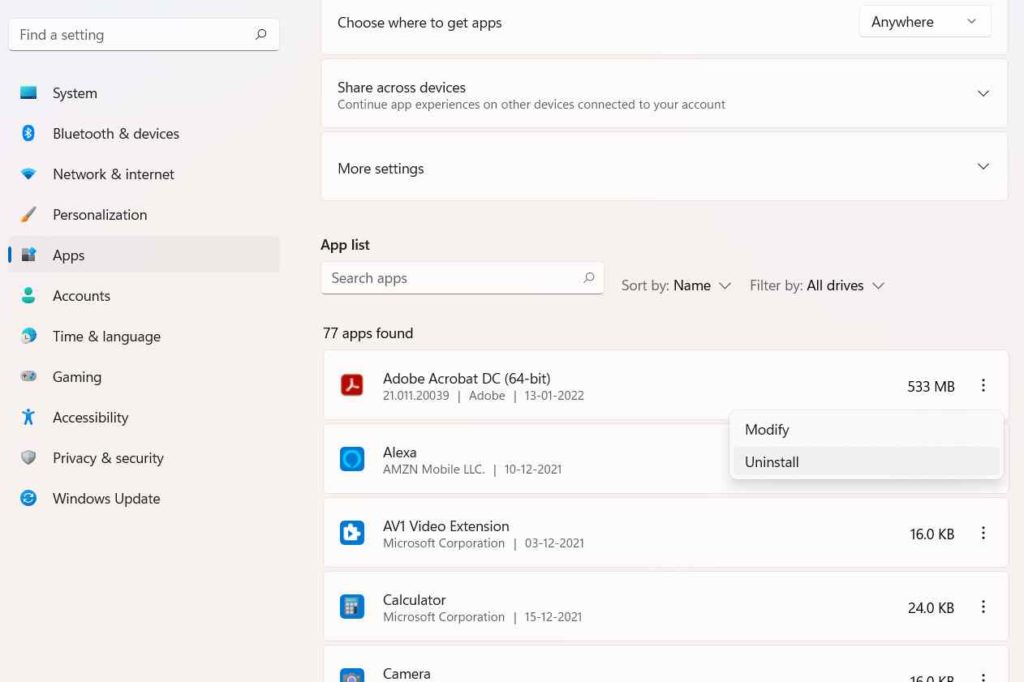
Simply put – Applications that you install, use your system’s resources. And, while you may not mind sharing computer resources with an application that’s your bread and butter but what about those that you don’t use.
Wouldn’t it be a wise move to look for apps that have been sitting there for no reason and remove them?
And, here it is not just about uninstalling an application but doing that the right way in a manner that even the application’s residual files are washed away. You can either use the manual ways to uninstall programs or you can take the help of some of the best uninstaller software for Windows.
12. Defragment Your Hard Drive
Unless you have purchased a brand new laptop or desktop, fragments can haunt your hard drive. And, throughout use, these do appear. Fragments are one reason why your system may perform poorly. We have covered a comprehensive post on how you can defrag Windows (with and without using software). This post will even come in handy in the long run as well.
13. Get Rid of Bloatware/ Debloat Your PC
Okay! So we talked about third-party apps that we can remove, but, what about those programs which at times our manufacturer or even Windows forcefully slaps on your system. If you are of the notion that you will have to make terms with such apps and let it make your system bloat and slow, you’ll be happy to know that you can remove such apps, and here’s how –
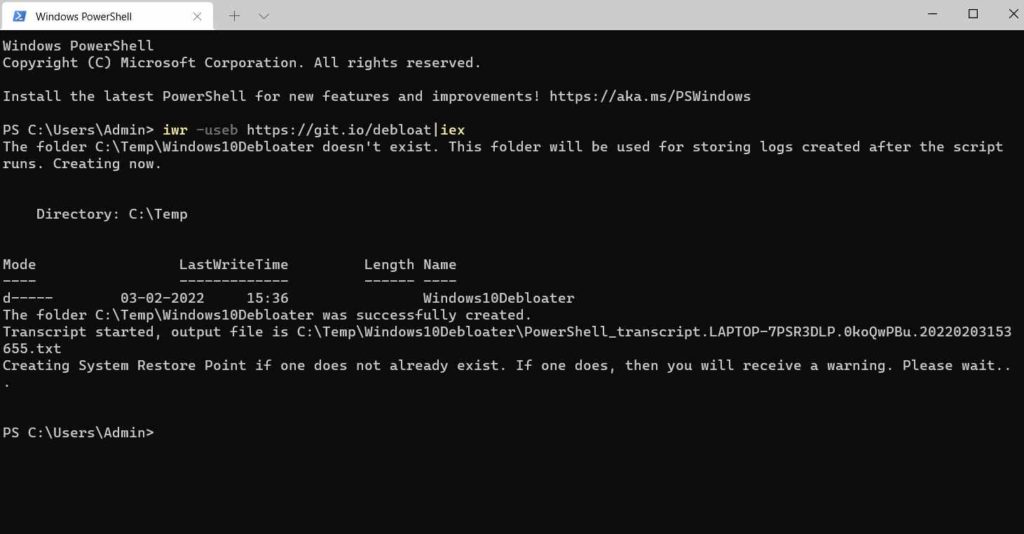
1. In the Windows search bar type Windows Terminal.
2. Select Windows PowerShell from the right-hand side.
3. In the Window that follows type –
iwr -useb https://git.io/debloat|iex
4. Choose items you want to disable.
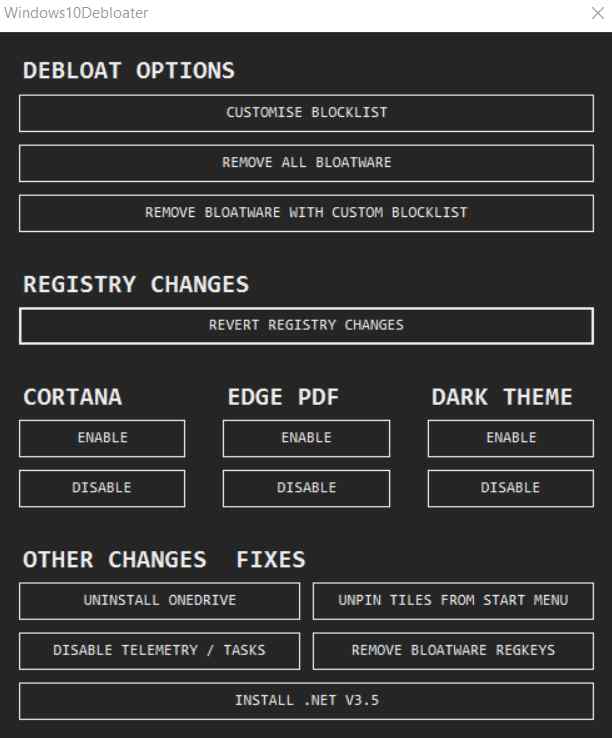
Note: While this tool can help you remove items that can further make your Windows 11 performance and speed even better if you aren’t aware of what something does here, it is better to not do it.
14. Invest In An SSD
Here we are not asking you to completely side HDDs. What you can do is keep a mix of both SSD and HDD (if possible). SSDs are known for faster speeds and better data handling, in fact, if put head to head with an HDD, an SSD performs almost a hundred times faster. Apart from that, SSDs are more energy and power-efficient. Needless to say, an SSD can significantly improve your Windows 11 PC’s speed and performance.
Frequently Asked Questions-
Q.1. Does Windows 11 Improve Performance?
The overall feedback based on several users is that Windows 11 does feel smoother and faster in comparison to Windows 10. Microsoft has improved memory management with WIndows 11. However, the judgment regarding Windows 11 speed and performance would still vary from user to user.
Q.2. What Can Make Windows 11 Slow?
Several things can make Windows 11 slow, quite like its predecessor Windows 10. Here are a few things that can deter Windows 11 speed and performance. Again, these are just a few things and it’s not an exhaustive list –
- Fragments on your PC – We’ve already discussed how you defragment your Windows PC.
- Presence of malware on your PC – whether before or after,keep your Windows 11 PC armed with an Antivirus.
- Old/ incompatible hardware.
- Inappropriate/ power-intensive settings.
- Unwanted applications/ bloatware.
- Poor updates pertaining to drivers on your PC.
Q.3. Does Windows 11 Use More CPU?
On a personal front, Windows 11’s more CPU friendly but over some time with too many background apps, Windows services, and many other factors you may notice high CPU usage.
Q.4. How do I speed up my computer Windows 11?
You can take several measures to speed up your Windows 11 computer. We have already discussed at length some of the settings you can tweak to do just that. For example, you can use dedicated cleanup software like Advanced PC Cleanup, change power mode, uninstall unwanted apps, create a power plan, debloat computer, and many others.
Wrapping Up
Found value in what you read and have been able to enhance Windows 11 speed and performance with the help of steps mentioned above? Do give this post a thumbs up and for more such content, keep reading WeTheGeek.
Follow us on social media – Facebook, Instagram and YouTube.