
Taking remote access to a computer which is physically located in a different location is not an uncommon task nowadays. This feature has made our work easier and productive and is being encouraged by many organisations. However, it is important to ensure that the remote access connection established is safe and secure. Here are different steps to set up a remote desktop in Windows 10.
How To Set Up Remote Desktop Access In Windows 10?
The Remote Desktop Access feature is an inbuilt utility inculcated in Windows operating system by Microsoft. However this functionality is limited to the Professional and Enterprise version of Windows. The process of setting up remote desktop on Windows 10 is completed in three major steps:
How To Turn On Remote Access On Host Computer
The Remote Connections feature is turned off by default in all Windows computers and needs to be enabled first. This can be done by make a few changes using the setting app by using the following steps:
Step 1: Type ‘Settings’ in the search box on the left bottom corner of your taskbar.
Step 2: From the various options in the Settings window choose System.
Step 3: The Left panel of the System Settings will contain many options where you have to scroll down and select Remote Desktop.
Step 4: Next, in the right panel of the window, turn the toggle switch towards right to switch on the remote Desktop settings.
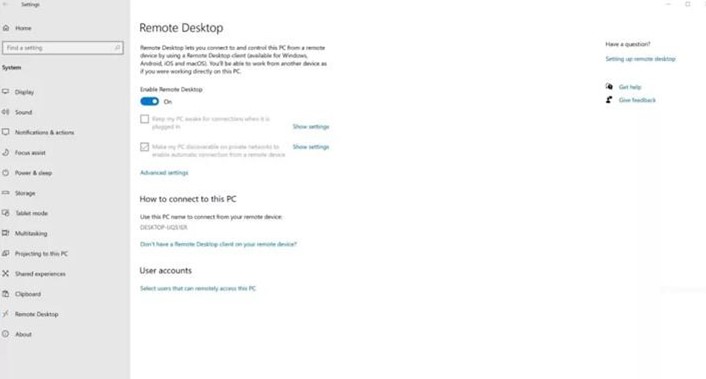
Note: Make a note of your PC’s name for setting up a remote desktop on Windows 10 PC.
How To Add Users To Your Whitelist
To sign in any computer using the Remote desktop access, you must know the credentials of that device. This can be a bit of time & effort consuming each time, you have login to another computer. Instead, you can add a user to the whitelist option under User Accounts settings. Here are the steps to do the same:
Step 1: Press Windows + I to open the Settings window and choose System among the various options.
Step 2: Scroll down on the left panel options and click on Remote Desktop.
Step 3: On the right panel, locate User Accounts and then click on “Select users that can remotely access this PC”.
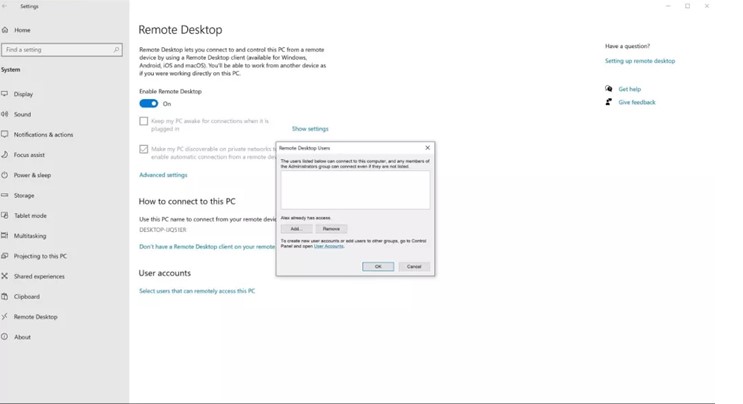
Step 4: Click on the Add button to add users. You can also click on Advanced followed by Find Now.
Step 5: Double Click on any user to add them to the whitelist.
How To Get Local Files Access While Using Remote Desktop
If you enable the remote users to access data, then it will make things easier for them to download files and use the printer from a different location. This option is also disabled by default and can be turned on by using these steps:
Step 1: Type Remote Desktop Connection in the search box on your taskbar and click on the best match result.
Step 2: Next click on Show Options and then choose the Local Resources tab.
Step 3: Now locate the Local Devices and Resources section and click on the More button.

Step 4: Check the boxes next to the drives you want to enable for Remote Desktop Sharing.
Note: Make sure that the Printers is check marked too to allow users to print from this device.
Now that you have completed all the settings, you can use the Remote Desktop app and enter the computer’s name or IP address followed by the credentials and access the computer from anywhere in the world. However, if you have added your computer to the whitelist, then you will not have to enter the credentials again.
Bonus Feature: How To Optimize Computers Remotely?
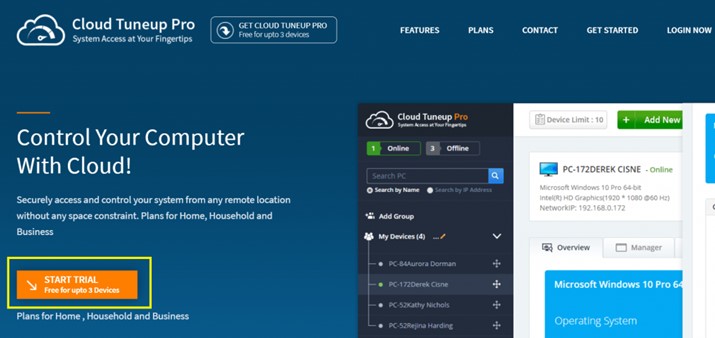
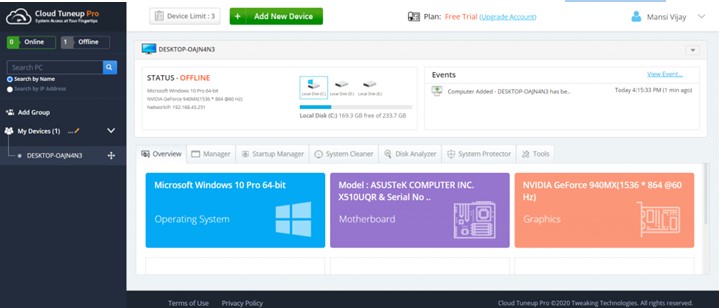
If you need to optimize computers using remote connection, then you can try using Cloud Tuneup Pro to get all the systems connected and managed by your system. A well-defined dashboard helps to scan, identify, analyse and delete junk, malware and temp files on other systems.. I am talking about Cloud Tune Pro which is a remarkable application with the following features:
- Optimize systems in different physical locations from your device.
- Boost System Performance and manage startup items.
- Fix bugs, repair Registry and uninstall unwanted programs.
- Scan, identify and remove malware, junk files and large files to secure the system and free up space.
As I mentioned earlier using Cloud Tune Up Pro is an easy task and installing it can be done with a few clicks. Follow these steps to use this application on your computer.
Step 1: Navigate to the official website or click the download button below:
Step 2: You can click on the trial version which will run for 30 days and then choose to register this product.
Step 3: Fill in the necessary details on the Account Signup page and click on the Signup button.
Step 4: Download and Install CTP on your Windows 10 PC and choose the account type.
Step 5: Choose I have a Cloud Tuneup Pro account and hit the Next button followed by entering your credentials.
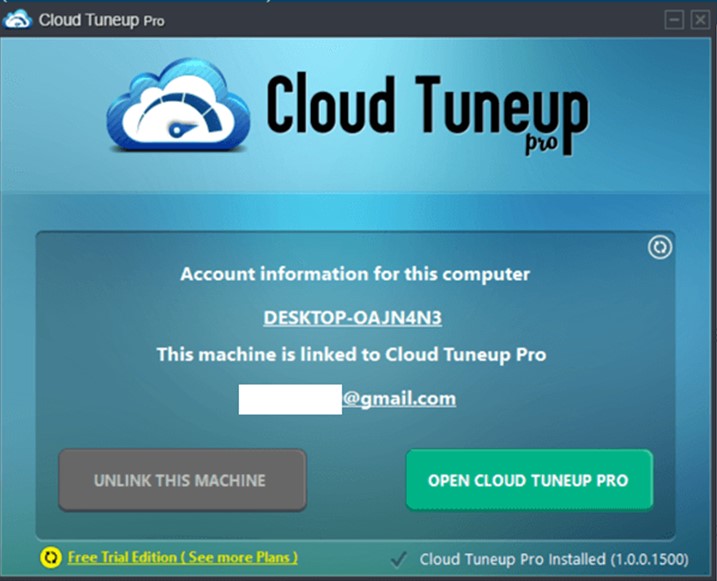
Step 6: Click on the Open Cloud Tuneup Pro button to open the dashboard and add devices.
This will help you to control and optimize all the systems connected to your desktop remotely with accessing them physically.
For More Information on Cloud Tune Pro, check this link.
The Final Word On How To Set Up Remote Desktop Access In Windows 10?
To set up a remote desktop on Windows 10, you can follow the steps mentioned above and get remote access without having to purchase any third party software. However, if you want to only optimize the systems remotely then Cloud Tuneup Pro is the best option you have. This helps manage computers that are placed in different locations without having to physically access them.
Follow us on social media – Facebook, Twitter, and YouTube. For any queries or suggestions, please let us know in the comments section below. We would love to get back to you with a solution. We regularly post tips and tricks, along with answers to common issues related to technology.