
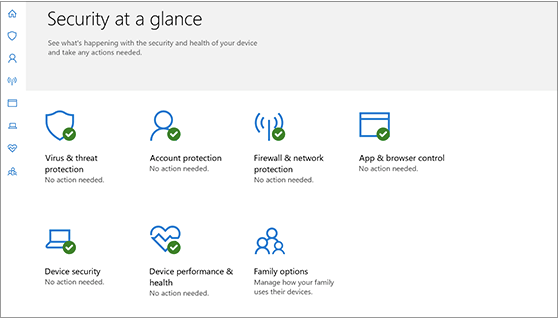
We’re all slightly aware of the Windows Defender security tool and how it functions, right? Windows Defender is one of the most comprehensible security solutions packed with Windows 10, to protect your device against the virus, malware, and other malicious threats. It keeps a close check on your online activities and makes sure that you don’t download any suspicious files from the web.
So, when the Windows Defender scans your device for threats, it consumes approximately 50% of maximum CPU capacity in the background. But if you want to limit this CPU usage percentage for Windows Defender scan, you can easily achieve that by making a few tweaks in the settings.
Here are the 3 most effective ways to set maximum CPU usage capacity for Windows Defender scan. But before we proceed, let’s get a quick understanding of how to check CPU usage on Windows 10.
Also read: How to fix 100% CPU usage in Windows.
How to Check Maximum CPU Usage on Windows 10
To limit or set a value for maximum CPU usage, you first need to be aware of the existing whereabouts listing how much CPU consumption Windows Defender scan is consuming in the background.
To check the maximum CPU usage for Windows Defender scan, follow these steps.
- Launch Windows PowerShell.
- Type the following command and hit Enter.
Get-MpPreference | select ScanAvgCPULoadFactor
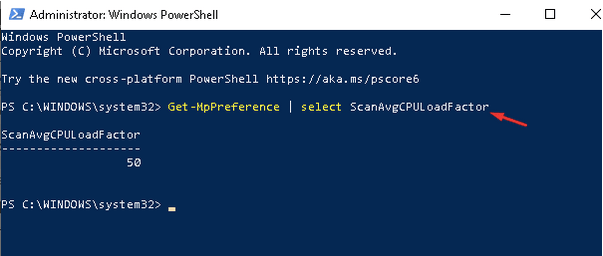
After a few seconds, you will see the exact CPU usage value displayed on the PowerShell window screen.
By default, the maximum CPU usage capacity used by the Windows Defender scan is approx. 50. If you want to limit or alter this value, here are a few ways to set a different value.
Let’s explore.
Also read: How to Resolve Antimalware Service Executable High CPU Usage issue?
How to Set or Limit Maximum CPU Usage on Windows 10
There are 3 simple ways to set or limit the maximum CPU usage value consumed by the Windows Defender scan. You can achieve the same via PowerShell, Group Policy Editor, and Windows Registry.
Windows PowerShell
Launch the Start menu search, type Windows PowerShell, and hit Enter.
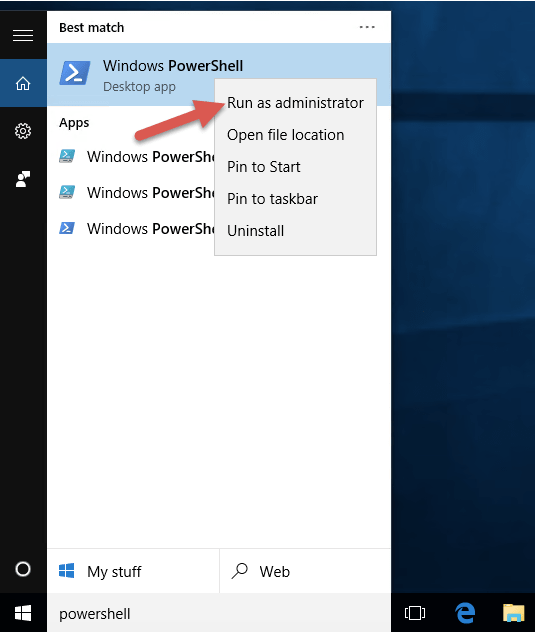
In the PowerShell window, type the following command and hit Enter.
Set-MpPreference -ScanAvgCPULoadFactor <percentage>
Make sure you specify a numeric value in the percentage section. You can use any numeric figure in the range of 5 to 100.
P.S. Don’t specify anything less than 5 or 0 as it might hamper the Windows Defender Firewall’s functioning on your device.
Group Policy Editor
Another workaround to set maximum CPU usage for Windows Defender scan is by using the Group Policy Editor.
Press the Windows + R icon to open the Run dialog box.
Type “gpedit.msc” in the text box, hit Enter.
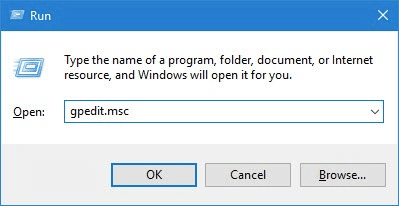
In the Group Policy Editor window, navigate to the following location:
Computer Configuration/Administrative Templates/Windows Components/Windows Defender Antivirus/Scan

On the right side of the window, double-click on the “Specify the maximum percentage of CPU utilization during a scan” file.
Check on the “Enabled” button and specify a value by using the drop-down menu.
Tap on OK and Apply to save your recent changes.
Windows Registry
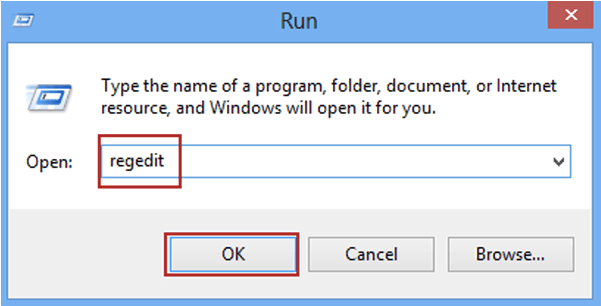
Press the Windows + R key combination to fire up the Run dialog box.
Type “Regedit” to open Windows Registry Editor.
In the Registry Editor window, navigate to the following path:
HKEY_LOCAL_MACHINE\SOFTWARE\Policies\Microsoft\Windows Defender
Right-click on Windows Defender, select New> Key, and label it as “Scan.” Now, right-click on the “Scan” key, choose New> D-WORD, and label the file as “AvgCPULoadFactor.”
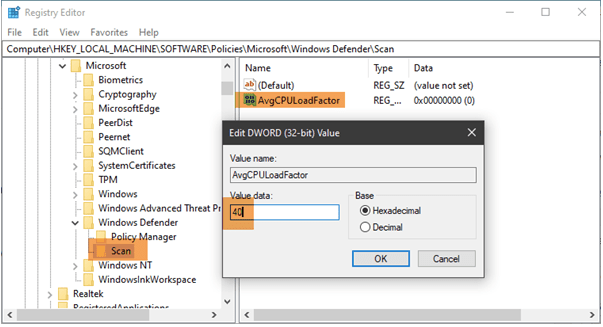
Specify any value between the 5-100 range to set maximum CPU usage for Windows Defender scan.
Download Systweak Antivirus for Windows


Looking for a comprehensive security solution to add an extra layer of protection to your device? Download Systweak Antivirus for Windows to safeguard your sensitive data and device from any malicious threats, including viruses, malware, trojans, spyware, ransomware, and more. Systweak Antivirus offers real-time protection against zero-day threats and viruses. Apart from this, you can also get advanced utility features along with Systweak Antivirus. It helps you clean malicious startup items to optimize your device’s performance and works round the clock to keep your sensitive data from being exposed.
For any other queries or assistance, feel free to hit the comments space