Ever wanted to record a video on Mac? Maybe for capturing a special moment from a movie, recording gameplay, online lectures, or a quick video note? Whatever be the reason, in this guide you can find multiple options to easily screen capture on macOS using Screenshot toolbar, QuickTime Player, iMovie, or through a dedicated Screen Video Capturing Software for Mac.
So, without further ado, let’s take a look at how to record the entire screen or just a specific part of the screen on Mac.
How To Record Video On Mac (2024)
We’ll discuss both manual and automatic ways to screen capture on Mac in this guide.
METHOD 1 = Use The Screenshot Toolbar
To get started, follow the steps mentioned below:
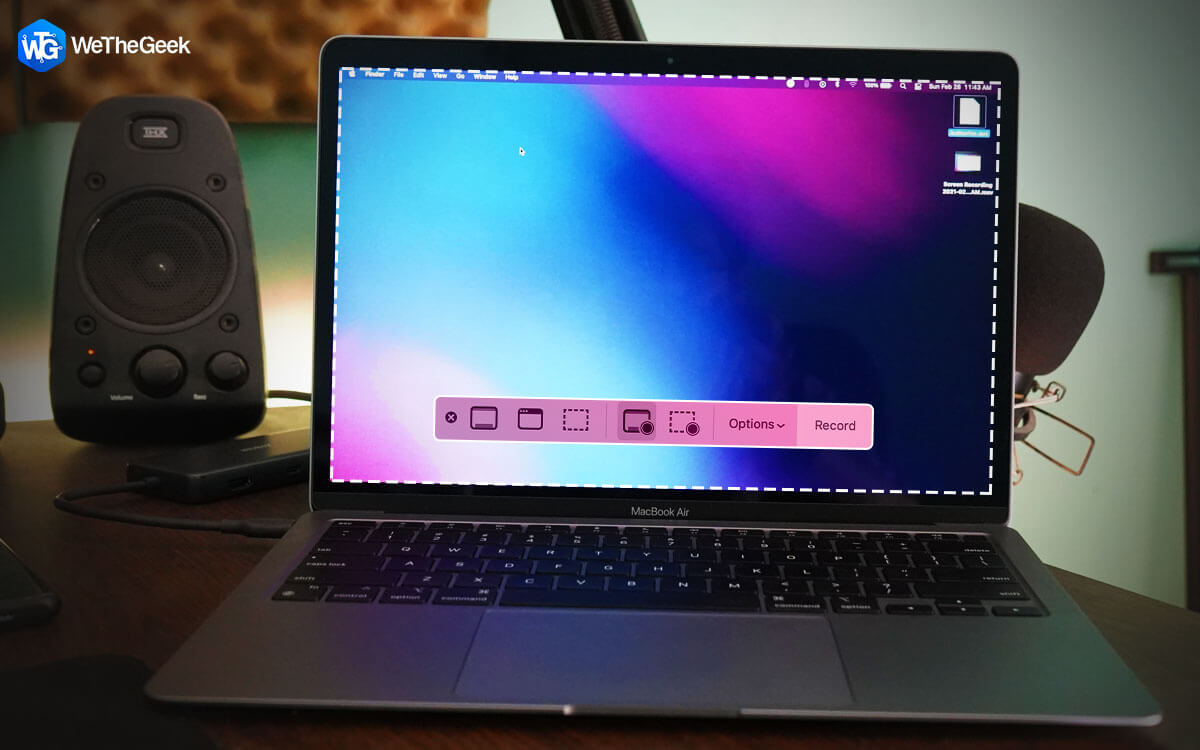
STEP 1 = Press the shortcuts key – – SHIFT + COMMAND + 5 altogether.

STEP 2 = As soon you press them, on-screen controls for capturing screenshots and recording video will appear. You will have the ability to record the full screen or a selected portion of the screen.
STEP 3 = To start full-screen recording, click on the fourth option as shown in the screenshot below. As soon as you click the same, the pointer would automatically change to the Camera icon.
![]()
STEP 4 = Now you can click anywhere on the screen to start the recording. Alternatively, you can hit the Record button from the on-screen controls window.
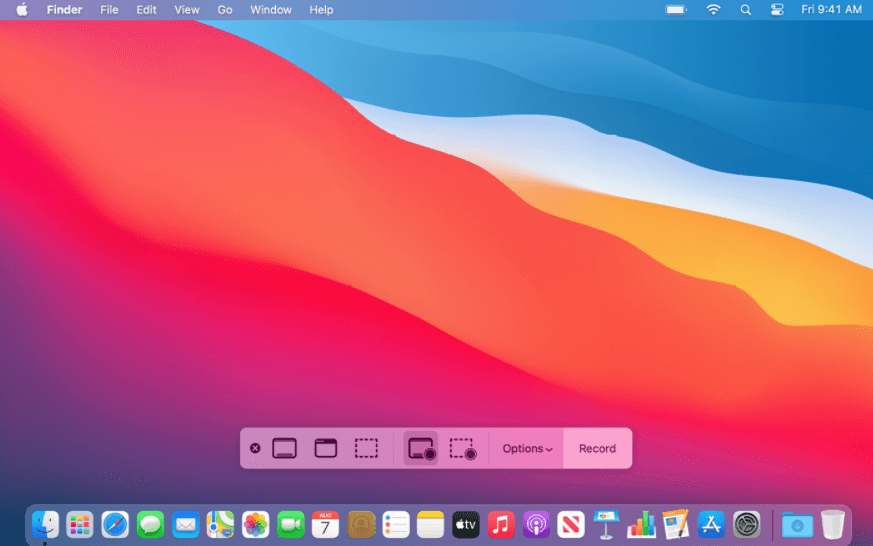
STEP 5 = To record a specific part of the screen, you need to click the fifth option to initiate the screen capturing. You can refer to the screenshot shared below to get a clearer idea.

STEP 6 = To capture a specific portion of the Mac screen, simply drag to select the area you wish to record and hit the Record button from the on-screen control window.
To end the video recording on Mac, simply press the shortcut keys – COMMAND + CONTROL + ESC. Additionally, you can find plenty of options to trim, share & save the video output file.
You might want to read: 8 Best Laptop Screen Recorder Tools To Capture Video & Audio
METHOD 2 = Record Video On Mac Using QuickTime Player
QuickTime Player is a pre-installed application that comes with your macOS. It is a free bare-bones version of the QuickTime Video Recording software. Follow the instructions shared below to get started:
STEP 1 = Navigate to the Mac Dock or Finder window and open the Applications folder.
STEP 2 = Find and click QuickTime Player from the list of installed tools on your Mac.
STEP 3 = As soon as you launch the QuickTime Player, head towards the File tab from the menu bar. A drop-down menu will appear on the screen with options like New Movie Recording, New Audio Recording, New Screen Recording, and more.
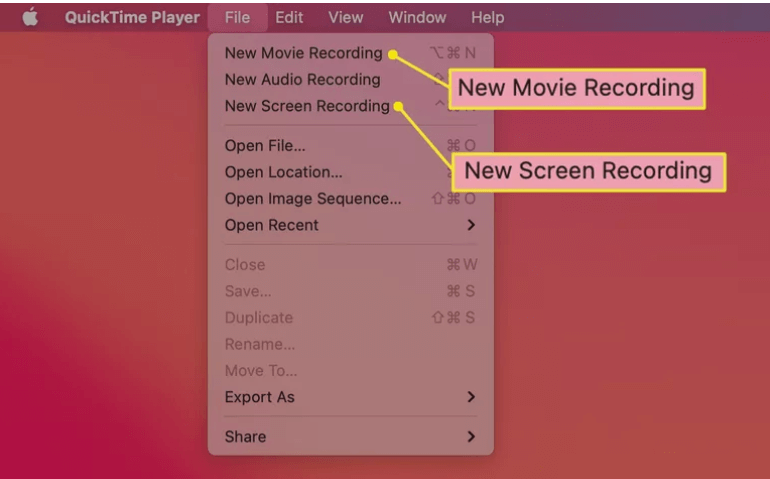
STEP 4 = You can select the New Movie Recording option to allow the system’s video camera to capture everything that it sees. Alternatively, you can choose the New Screen Recording option, to allow capturing the entire screen or a specific portion.
STEP 5 = Depending on your needs, you can choose any of the options and hit the red dot icon to start the recording. Hopefully, it helps to record a video on Mac just like you want it.
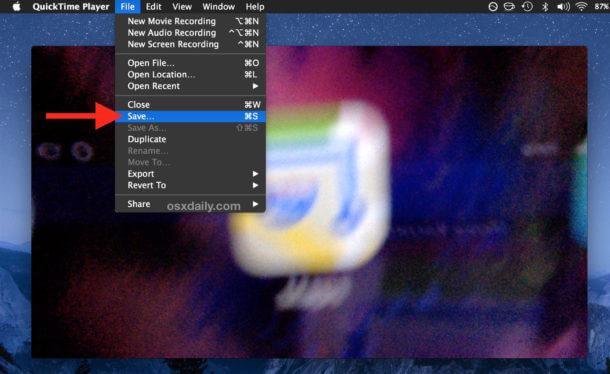
STEP 6 = Once you are done, you can click on the Stop button to end the screen recording. To save the file, simply click on the File tab and choose the Save option. Enter a name and select the destination where you would like to save the output file.
The default file format of the recorded video would be in .mov.
You might want to read: Capto Review: Best Screen & Video Recorder App For Mac
METHOD 3 = Record Yourself On Mac Using iMovie
Besides the aforementioned ways to record a video on Mac, there’s an excellent option available, if you want to capture yourself on the Mac machine. In this workaround, we’ll learn how to record a webcam using iMovie. Now, you must be thinking about how video editing software can help in screen capturing on Mac. Well, not many people know that it brings powerful functionality as a webcam recorder. Hence, you get a dedicated platform for recording your videos, editing them, and then sharing them further with your friends and family via social networking sites like Facebook, YouTube, Vimeo, etc. So, without further ado, let’s learn how to record a video on Mac using iMovie:
STEP 1 = Download the iMovie application on your Mac, if you don’t have it already.
STEP 2 = Launch the tool and navigate to the New Movie option from the File drop-down menu.
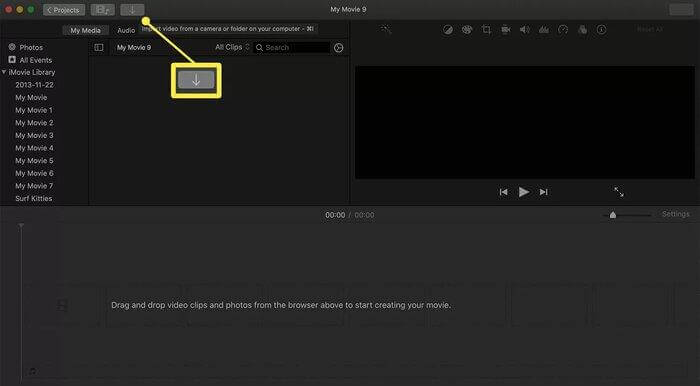
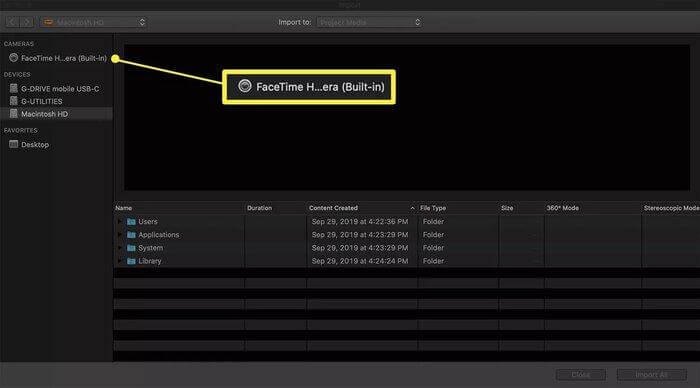
STEP 3 = From the next window, click on the FaceTime HD Camera option under the Camera header (in the left-side panel).
STEP 4 = At this point, you need to click on the Import option and select the iMovie project as per your preference.
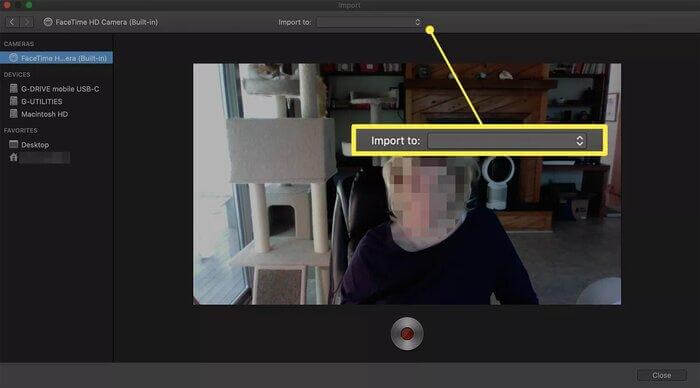
STEP 5 = Now hit the Record button, located at the bottom of the screen to initiate the screen capturing on Mac via webcam.

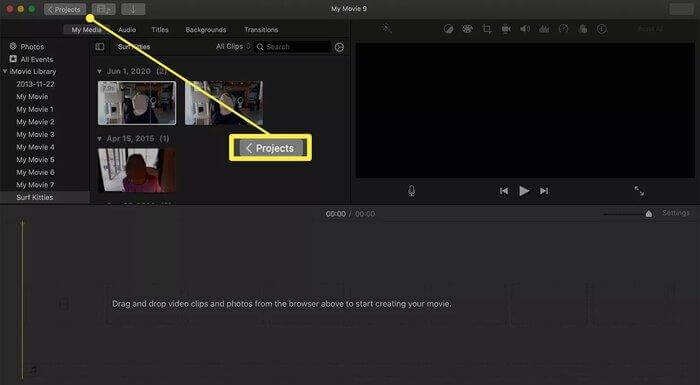
STEP 6 = You can hit the Stop button once you are done recording and export the final output file by clicking the Projects button as shown in the screenshot below.
Hopefully, this method helped you to film yourself easily on Mac with the iMovie app!
You might want to read:
METHOD 4 = Using A Professional Video Capture Software EaseUS RecExperts
To start recording videos on Mac with sound, you need a dedicated screen capturing tool. We recommend using EaseUS RecExperts for Mac, it supports a variety of powerful features for a seamless video recording experience with audio. Just remember that you need to switch the audio source to another option and record both internal microphones’ sound simultaneously.
To record a video on Mac, all you need to do is:
STEP 1 = Install the latest version of EaseUS RecExperts on your Mac. You can click the button provided below to get started as soon as possible.

STEP 2 = Open the streaming video you wish to record and launch the screen recording application on your Mac.
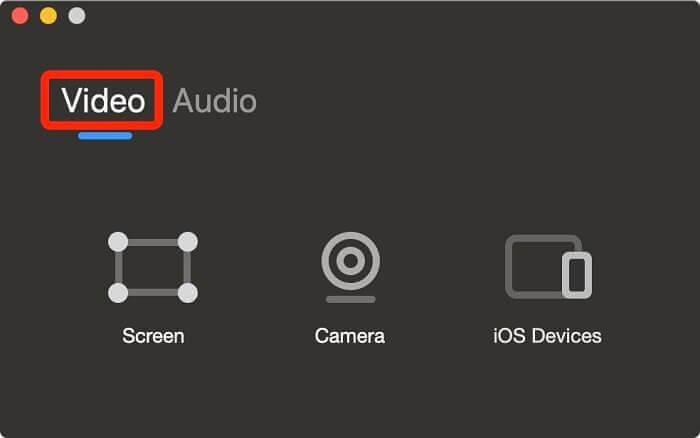
STEP 3 = Navigate to the Video tab from the main interface and click on the Screen module.
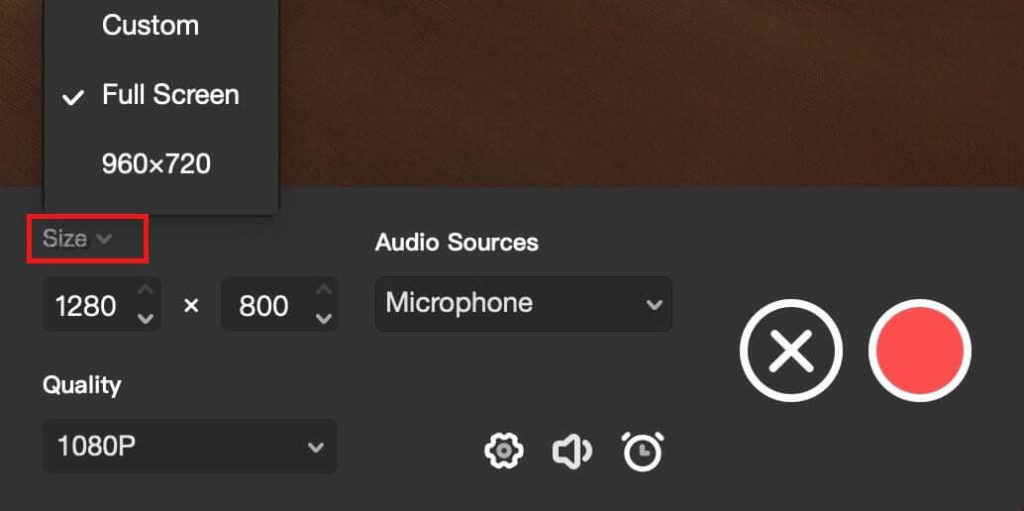
STEP 4 = Go to the Custom option to adjust your screen recording preferences. Make sure you select the System Sound option under the Audio Sources header. Once you are done making the changes, hit the red circle button to initiate the screen recording.
Once you are done recording, hit the Stop option to finish it. You can further save the video on your Mac for later watching.
That’s all for today! This was our comprehensive guide on how to record a video on Mac. In case you are facing any issues or have any feedback to share, feel free to mention them in the comments section below. You can also drop a line at our official mail at [email protected]
MUST-READ:
Top 10+ Best Video Editing Software For Mac (Paid & Free)
FIXED: Mac File Sharing Not Working (Catalina, Mojave, or Big Sur Users)