
Skype is a crucial part of our lives since it introduced the video calls feature for free. It was one of the first communication tools which were capable of making video calls at a distance possible. Now, since it has developed into so much more, it is more popular than ever. If you wish to keep a record of your conversations, you can use Skype for it. To record Skype video calls with audio is very easy, and we will discuss the different methods in this post.
Also Read: How to share screen on Skype for Android, iOS, Windows.
It is required to record Skype video calls on Windows 10 PC for several reasons:
- To record a Tutorial.
- To keep a record of attendance for the online classes.
- To record a video conferencing.
- To keep a memory of the video call with your friends and family.
Record Skype Video Calls On Windows 10 With Sound
1. Record Skype Video Calls On Windows 10 With Audio Inbuilt
The steps to record Skype video calls on Windows can be understood with the help of this method. There are several software available to record Skype calls. Skype understands that the recording comes in essential, and therefore it has an inbuilt feature. However, this is more of a professional way where others on the video call are informed about the recording.
Step 1: Start a video call and then locate the dot icon on the Right Bottom of the screen. Click on it, and you will get the Start Recording button, click on it.

Step 2: The recording will go on along the audio as the Video call goes on. As soon as the recording starts, the Recording sign appears on the top of the screen. It is visible to all the people present in the call. The timer as well starts showing the recording period.

Step 3: You can stop recording the video at any point in the middle of the call if you wanted by pressing Stop Recording beside the Recording sign.
Step 4: The video recording goes on to be saved on the local storage of Skype. The recorded file will be sent as a message to all the participants. It says it will be saved on Skype’s cloud storage for the next 30 days. You can also delete Skype Conversation, and it will be erased from your side.
However, if you don’t want anyone to know that you are recording a Skype call, then you must use another app. One such application is Windows Game Bar, an inbuilt app that records gameplay. Let’s know how to record video calls with audio with Game Bar.
Also Read: How To Run Multiple Skype Accounts On Android.
2. Record Skype Video Calls On Windows 10 With Audio With Game Bar
To make use of the inbuilt feature on Windows 10, we use the Game bar for this method. To record Skype video calls on Windows 10 with audio on both sides, the Game bar proves to be a robust process. The Game bar comes equipped with several features that are used to record the gaming experience on the screen. Follow the instructions to learn how to record Skype video calls on Windows with audio using Xbox Game Bar.
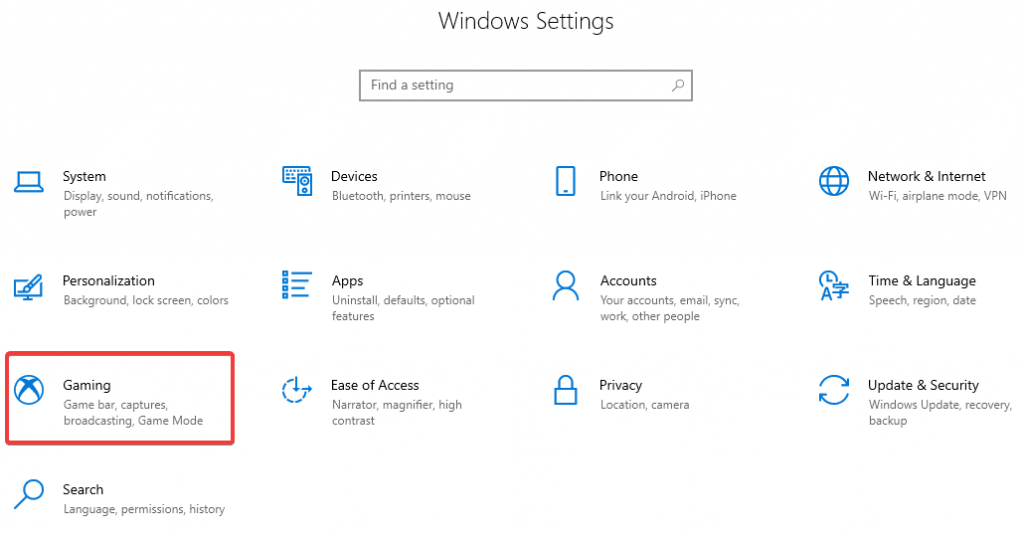
Step 1: Open Start Menu and click on the Settings icon. On the Settings menu, click on the Option Gaming.
Step 2: Now, here in this tab, click on the first option on the Left Panel named Game Bar.
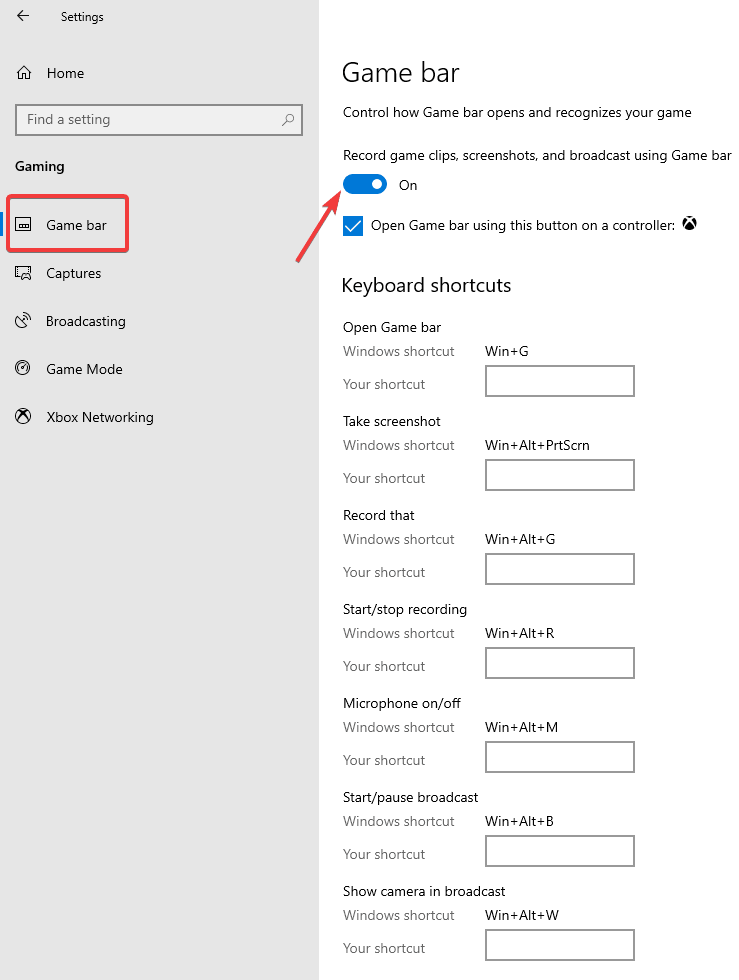
You will see a Toggle Switch on the right-side panel, turn it on to allow the recording by the Game bar. Also, check the box in front of the option Open Game Bar using this button on a controller.
Remember to note the Windows keys shortcuts shown in this tab as they come very handy in the video recording.
Read: Learn more about setting up the Game Bar Recording on Windows 10.
Step 3: Start a Skype video call and press Windows Key + G to launch Game bar.
Step 4: To record the Skype video calls on Windows 10 with audio press the keys: Press Windows Key + Alt + R or press the record button on the Game bar interface.

Step 5: When you are finished with the video call on Skype, you can press the same keys to Stop The recording. The Windows Key + Alt + R command works for both starting and stopping the recording.

Step 6: Check the video recording on your local storage on Windows 10.
Record Skype Video Calls On Windows 10 Without Sound
If you are interested in keeping a record of the Skype video call on Windows 10 without audio, you can make use of the software. Times when requiring the video to make a record of the attendees at the meeting for an office video conference call. This will be the most effective method to use while keeping out the audio from your side. This method will record only the screen and audio recording from the video all, canceling out your side of sound.
Tweakshot is a screen capturing tool that can efficiently record Skype video calls on Windows 10 PC. Tweakshot is capable of taking screenshots and video recording tools for Windows. It works well with the Windows version 10, 8, 7. It is excellent to select the screen for capturing the shots and editing them in the tool itself. Let’s learn more about it as we use it to record Skype video calls on Windows 10 PCs.
Step 1: Download the tool from the button given below:

Step 2: Once it is successfully installed on your computer, you can run the setup.
Step 3: Now open the Tweakshot tool from your saved location.
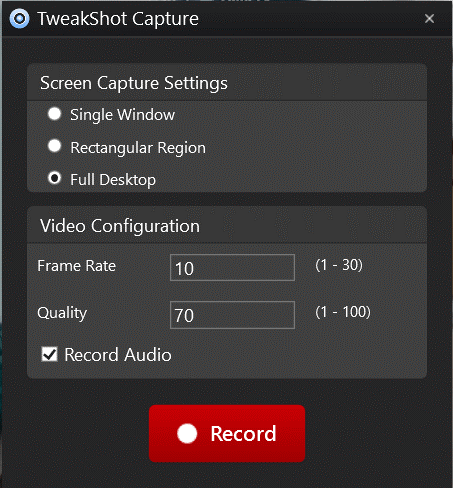
Step 4: As you start the Skype Video Call, you can now begin the video recording on the tool.

This video icon on the tool needs to be clicked to Record to start video recording of the screen on your PC.
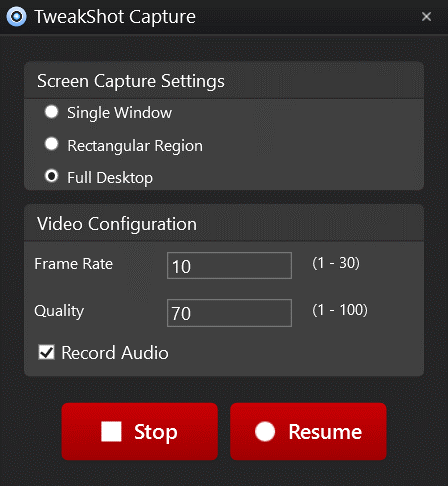
Step 5: The tool will fully capture the video call as it captures the screen recording smoothly.
Step 6: Click on stop as you are done with the video recording.
Step 7: Save the video file in the desired location of your computer.
Verdict:
There are several methods to record Skype video calls on Windows 10. Be it for the complete Skype call with audio with the help of the inbuilt feature or the Xbox Game Bar; it is easy to keep a record. The third-party tool TweakShot, is also recommended for the video capturing of the screen when the audio is not required. We hope you are now capable of recording the Skype video calls on your Windows 10 PC.
As we conclude the post, we would like to know your views. Your suggestions and comments are welcome in the comment section below. Share the information with your friends and others by sharing the article on social media.
We love to hear from you!
We are on Facebook, Twitter, LinkedIn, and YouTube. For any queries or suggestions, please let us know in the comments section below. We love to get back to you with a solution. We regularly post tips and tricks, along with answers to common issues related to technology. Subscribe to our newsletter to get regular updates on the tech world.
Related Topics:
Top 10 Skype Alternatives for Windows PC.