
To run a program, software or application on Windows 10, you need to install it first. The installation of a program is generally done in the root folder, which contains the operating system, and it is the drive C for most of us. But what if your C drive starts to fill up with all the programs and games you keep on installing? There is nothing you can or should delete from drive C as it contains all Windows operating system files or the program files and deleting any wrong folder would cause your computer to malfunction. To free up space on your drive C, the only option left is to move installed programs to another drive in Windows 10.
Fortunately, Microsoft had thought of this and designed an inbuilt utility that allows the user to move all the modern applications to a different drive. After these programs are moved, there are no issues with the functioning of these programs. However, this feature is a bit dicey and not always guaranteed for the traditional desktop programs. Here are the steps to move installed applications to another drive in Windows 10.
Also Read: How To Show Hidden Files and Folders On Windows 10
How To Move Installed Programs To Another Drive In Windows 10
As I mentioned earlier, this process is guaranteed to work on all modern apps or those apps which have been installed from Microsoft Store. As far as the Native apps are concerned, we can try to move them as well in the next section.
Steps On How To Move Installed Programs To Another Drive In Windows 10 – Apps From Windows Store
Step 1. Press the Windows + I keys on your keyboard to open the Settings menu and choose Apps.
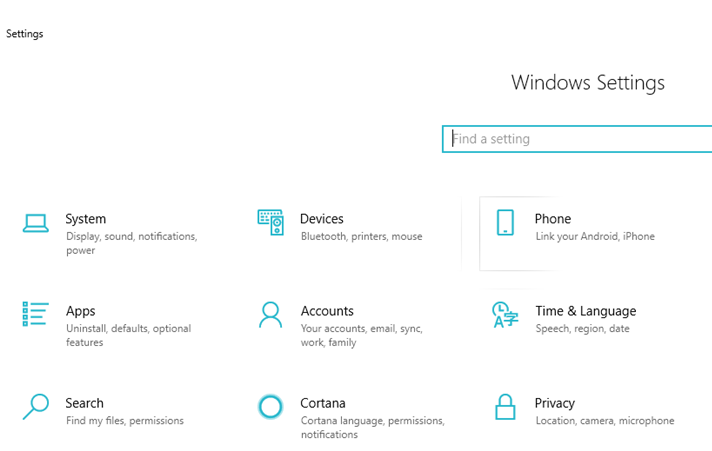
Step 2. A new window will open, which will have Apps and Features on the left side of the window.
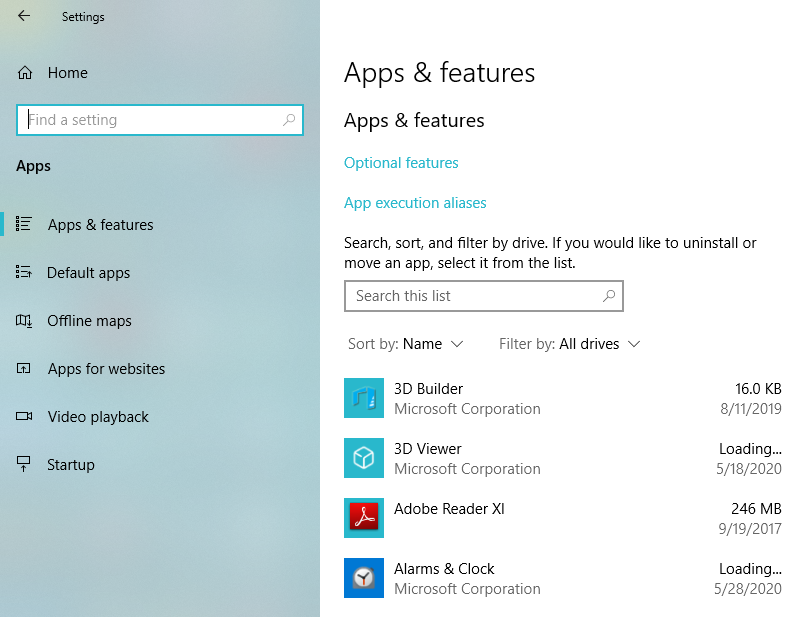
Step 3. Now look on the right pane, and you will see a list of all the apps in your system. This will include default apps and other apps installed by you.
Step 4. Next, select any app that you want to move to another drive and click the Move button under it. You will be asked to choose the new location where you wish to move this program and then click on Move again.
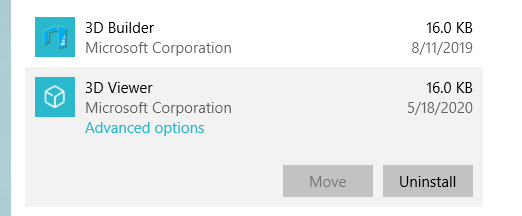
Step 5. Repeat this process for all the apps you want to move. There is no way to select multiple apps and move them in one go.
Step 6. You might observe that the Move button for some of the apps would be greyed out. This means that a particular app cannot be moved.

Note: These steps can be followed to move the program back to its original location as well.
Also Read: Automatically Move Files From One Folder To Another On Windows 10
Steps On How To Move Installed Programs To Another Drive In Windows 10 – Windows Default Apps
Microsoft has disabled the Move button in several default programs because those apps are system apps, and they require system files to run which are located in the Windows OS folder. Moving these apps might make them malfunction. However, there is a third party software that can move installed programs to another drive in Windows 10 computer.
The program recommended is called Steam Mover, which was developed by Steam Games to move the installed game files between different drives. However, this program works on all programs and can move installed programs to another drive. There is a limitation of using Steam Mover, the fact that is only moves install applications from an NTFS drive to another NTFS drive. It does not support any other disk format system like FAT or APFS.
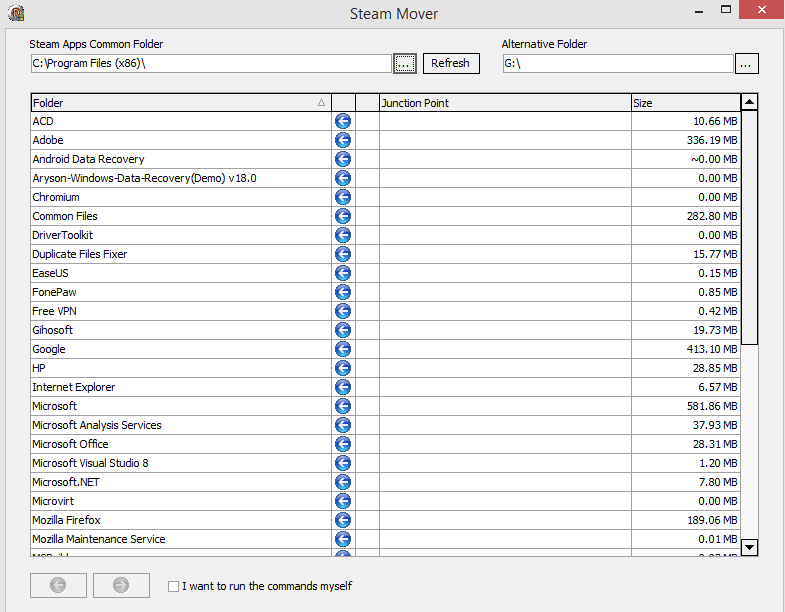
Step 1. Launch the Steam Mover app on your computer and locate the button next to the Common Folder.
Step 2. Clicking this button will allow you to select the path of the folder where the program you wish to move to another drive is installed. (In all Windows version, this folder would be labelled as Program Files)
Step 3. Now, locate and click on the Alternative folder where you want to move the installed program files and click on OK.
Step 4. You will now get a list of programs installed in the folder you selected in step 2. Choose all the programs you want to move and click on the blue arrow to begin the transfer.
Step 5. This process will take time, and once the programs have been moved, you will see that the folder path under the Junction Point Column will change to the newer folder.
Also Read: Ways To Eliminate The Windows.old Folder on Windows 10?
Steps On How To Move Installed Programs To Another Drive In Windows 10 – Change The Default Location
Once you are done with moving Installed programs to another drive in Windows 10, it is time to change the default location of installed programs. In other words, when you want to install an application, it will always install in the same location that has been chosen as default. With these steps mentioned below, you can now change the default location to another drive. Let us begin with the steps for apps installed from Windows Store:
Step 1. Open Settings on your Keyboard by pressing Windows + I button.
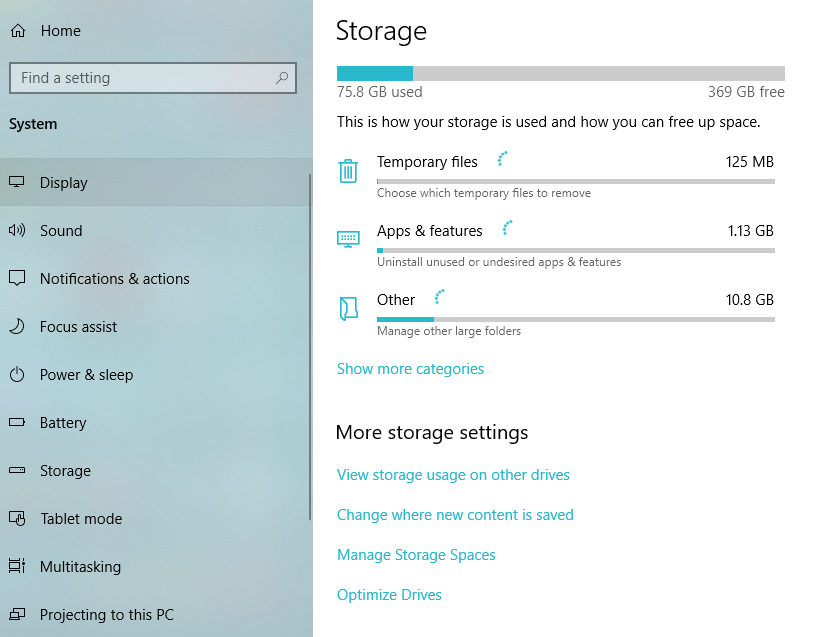
Step 2. Click on System and from the menu on the left panel, select Storage.
Step 3. Locate more storage settings and then click the link”Change Where New Content is Saved”.
Step 4. Now, select the new location from dropdown under New Apps Will save to.
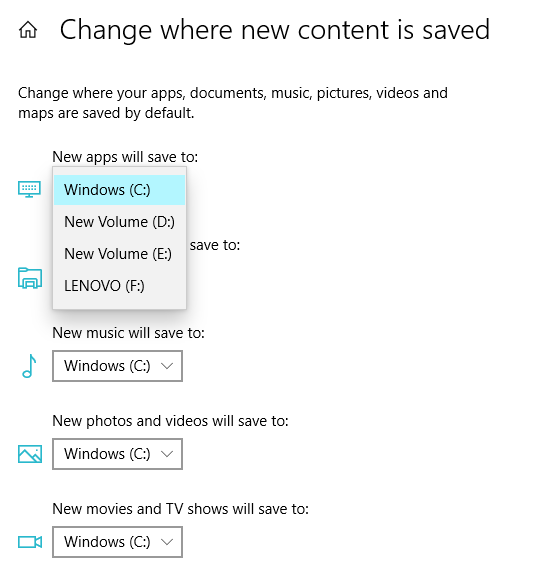
All the new apps installed after these changes were done will be saved to the new folder specified.
Also Read: Folders You Should Never Touch On Windows 10
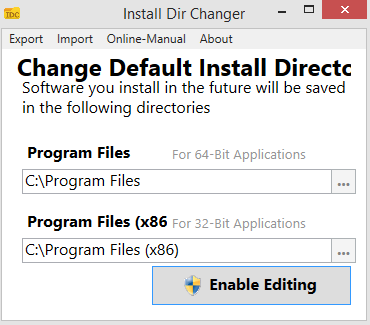
Microsoft does not want the Windows 10 users to fiddle with operating system as it is currently in the best possible state, and any change in default apps or system apps will cause instability in the system. However, if you are up to the risk involved, then there is a third-party app called Dir Changer which can be downloaded from SourceForge.
Download Dir Changer from SourceForge now
Step 1. Launch the program and click on Enable Editing.
Step 2. If you receive a User Account Prompt, then click on Yes.
Step 3. Now, you can select a default install path and choose the folder path by navigating to that location from within the program.
Step 4. Click on Apply Changes and any new program installed after this change will be installed to the new location you have selected.
Also Read: Steps To View Shared Files & Folders in Windows 10
Your Thoughts On How To Move Installed Programs To Another Drive In Windows 10
One of the most important reasons to move installed programs to another drive in Windows 10 is to free up space in the main drive where the Windows Operating System is installed.Did you know it is essential to leave at least 10 GB of free space on every drive for a smooth and uninterrupted running of the system? Windows use that space in case of hibernation as it creates a Hiber.sys file or Pagefile.sys which stores the contents of the RAM when it is overloaded. Thus it is crucial to keep the main drive free with space and move the third party programs and Windows Store apps to another drive. However, I would not recommend moving the Windows default applications anywhere else.
For any queries or suggestions, please let us know in the comments section below. We would love to get back to you with a solution. We post regularly on the tips and tricks along with solutions to common issues related to technology.
Suggested Reading:
Files & Folders Safe To Delete To Recover Space On Windows
10 Best File and Folder Lock Software For Windows 10, 8, 7 PC
How To Manage Files & Folders With Windows Tags
How To Force Delete Folder And Files In Windows?
How to Turn Off Recent Files and Frequent Folders in Windows 10