All Windows 10 computers have an incredibly large file that is hidden from the users and can be deleted if you are ready to sacrifice the Hibernate features on Windows 10. Apart from shut down, there are two other states which can be opted to save power and give your computer some rest.
Sleep Mode reduces the power consumption of your PC to a minimum, and your current work is saved into the RAM. When the machine loses power, the current state of the PC is lost, and it restarts as a new session.
On the other hand, hibernation is different from sleep mode, with the computer completely shuts itself down in the former and when turned on, it restores back to the previous state, taking the details from the Hiberfil.sys file stored on the hard disk.
The advantage of hibernation is a fast startup of your computer to exactly the same state that you left in. And the price for this benefit is the fact that you have to block a considerable amount of your hard disk space. If you can let go of the hibernate mode in Windows 10, then you can delete the Hiberfil.sys and free up valuable and always required space.
Also Read: Windows 10: Shut Down Or Enable Sleep Mode With Keyboard Shortcut
What is hiberfil.sys?
Hiberfil.sys is a Windows 10 system file, which captures a snapshot of the last active state of the operating system before the computer slips into a Windows hibernate mode. The snapshot includes recording and storing all the running processes and services along with third-party applications so that the computer restarts quickly, and returns to the state you last left it in. However, the Hiberfil.sys file is incredibly large in size and is stored on your hard drive, blocking space.
Read Also: Why Hibernate/Sleep Mode is Better than Shutdown
How Check the Hiberfil.sys in your System?
Hiberfil.sys is a system file, and it is not easily visible in your computer. To view system files, you need to enable certain options that will grant you permission to view all system files. This file is always located in the drive where the Windows operating system has been installed. For 90% of us, it is the C drive. Here are steps to view Hiberfil.sys, the file responsible for hibernation in Windows 10.
Step 1. Open C drive folder from This PC icon.
Step 2. Locate Options in the ribbon located on the top. It would generally be the last option in the ribbon.
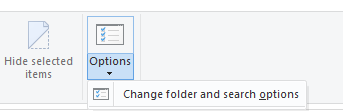
Step 3. Click on Options and then click on change folders and search options.
Step 4. A new window with the name of Folder Options will open. Click on the View tab.
Step 5. Locate Show hidden files, folders, and drives and check the radio button beside it.
Step 6. Scroll down and locate Hide Protected Operating System files and place a check next to it.
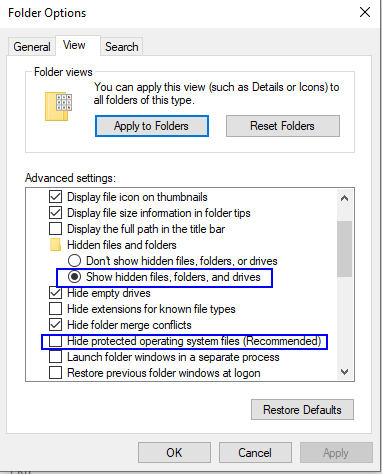
Step 7. Click on Apply and return to the folder displaying contents of the C drive.
Step 8. You will now be able to see the Hiberfil.sys. If you try to delete this file, you will get a warning prompt stating that this file is in use.
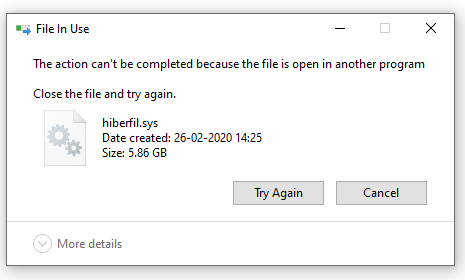
Notice the file size of the Hiberfil.sys which is almost 6GB or 75% of 8 GB RAM installed in my system.
Can Hiberfil.sys be deleted?
As Hiberfil.sys is a system file, it cannot be deleted, but we can disable the process of hibernation in Windows 10, which means that it will not store any data and not consume space on the hard drive. Alternatively, we can reduce the percentage of RAM that is stored in the Hiberfil.sys file. By default, Windows 10 stores up to 75% of the RAM content on to your Hard disk which can easily be reduced to 50%, thus freeing up space that can be used to store other data. To reduce RAM storage, follow these steps:
Step 1. Open Command Prompt in Administrative mode, by typing Command Prompt in the search box and from the search results, right-click on the relevant result, and choose “Run in Admin Mode”.
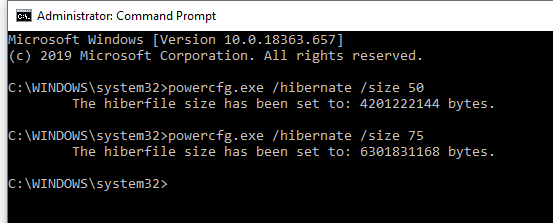
Step 2. Type the following command in the black and white window opened, and press enter.
powercfg.exe /hibernate /size 50
Step 3. You will get a message confirming the change in the allocated space of the Hiberfil.sys.
How to Disable Hibernation in Windows 10?
If you are not interested in your Windows to hibernate and want to free up the space reserved by the Windows operating system for Hiberfil.sys, then you can simply disable the hibernation mode in Windows 10. This may not permanently delete the Hiberfil.sys file but its size would be reduced to a negligible amount in Kilobytes which would not affect the free space on your hard drive. To disable the hibernation in Windows 10, follow these steps:
Step 1. Open Command Prompt in Administrative mode.
Step 2. Type in the following command and press enter.
powercfg.exe /hibernate off
Step 3. Restart your computer for the changes to take effect.
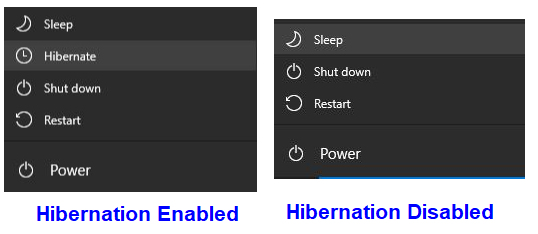
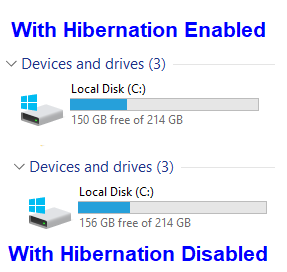
Step 4. Check the Power Options in the Start Menu of Windows 10, and you will notice that the Hibernate Option has disappeared. Alternatively, you can also observe that your hard drive free space has increased.
How to Enable Hibernation in Windows 10?
If you want to enable hibernation in Windows 10, then the process is the same with a different command.
Step 1. Open Command Prompt in Administrative mode.
Step 2. Type in the following command and press enter.
powercfg.exe /hibernate on
Step 3. Restart your computer for the changes to take effect.
Also Read: How To Prevent Wi-Fi Getting Disconnected During Sleep Mode
How to Disable Hibernation in Windows 10 through Power Settings?
If you do not want to go through the method of typing commands in the command prompt, then there is another method to disable hibernation in Windows 10 through the Power and Sleep settings in Windows 10. To prevent your computer from hibernating on Windows 10, follow these steps:
Step 1. Type Power & Sleep settings in the search box located on the bottom left of the taskbar.
Step 2. A new window will open. Locate and click on Additional Power Settings, located on the right side of the window.
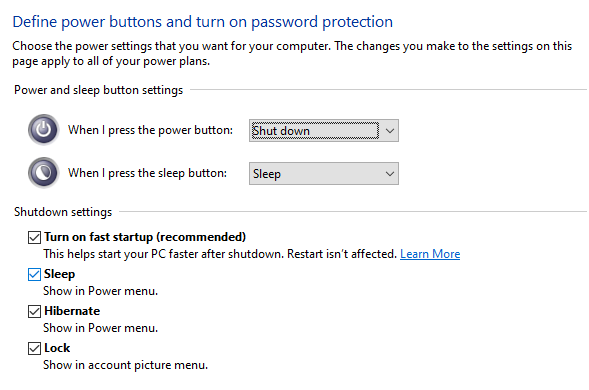
Step 3. A second window will open, which contains all the Power options of your computer. Among the options listed on the left side, click on Choose what the power buttons do.
Step 4. Next, click on Change settings that are currently unavailable.
Step 5. From the Shutdown Settings, you can remove the tick from the checkbox next to Hibernate.
If you wish to enable hibernation in Windows 10, then you can follow the same steps and check the box next to the Hibernate option.
Your thoughts on How to Delete hiberfil.sys file to Stop Hibernate in Windows 10?
Now that you know about a secret file consuming a large amount of your hard disk and what it is used for, it is your decision whether to disable hibernation in Windows 10 or keep it active. I personally would prefer the extra 6 GB to save my personal photos and videos and delete the Hiberfil.sys file or reduce it to a negligible size. Turning off the computer is a better practice than Sleep or Hibernate as giving rest to your computer is preferable than a fast restart.