If you’re a Mac user who frequently works in the Terminal, you’ve likely encountered the frustrating “Zsh Permission Denied Mac” error. This common issue can halt your workflow, leaving you puzzled about how to proceed.
But fear not! In this guide, we’ll walk you through troubleshooting and resolving the permission denied Mac Terminal error. Whether you’re a developer or a casual user, understanding and overcoming this issue will enhance your command-line experience.
We’ll cover everything from understanding the error’s root causes to implementing effective solutions. By the end, you’ll have a clear path to regain control of your Terminal and resume your tasks without the frustration of permissions errors.
Let’s dive in!
Also Read: How to Use the Terminal Command-Line in macOS
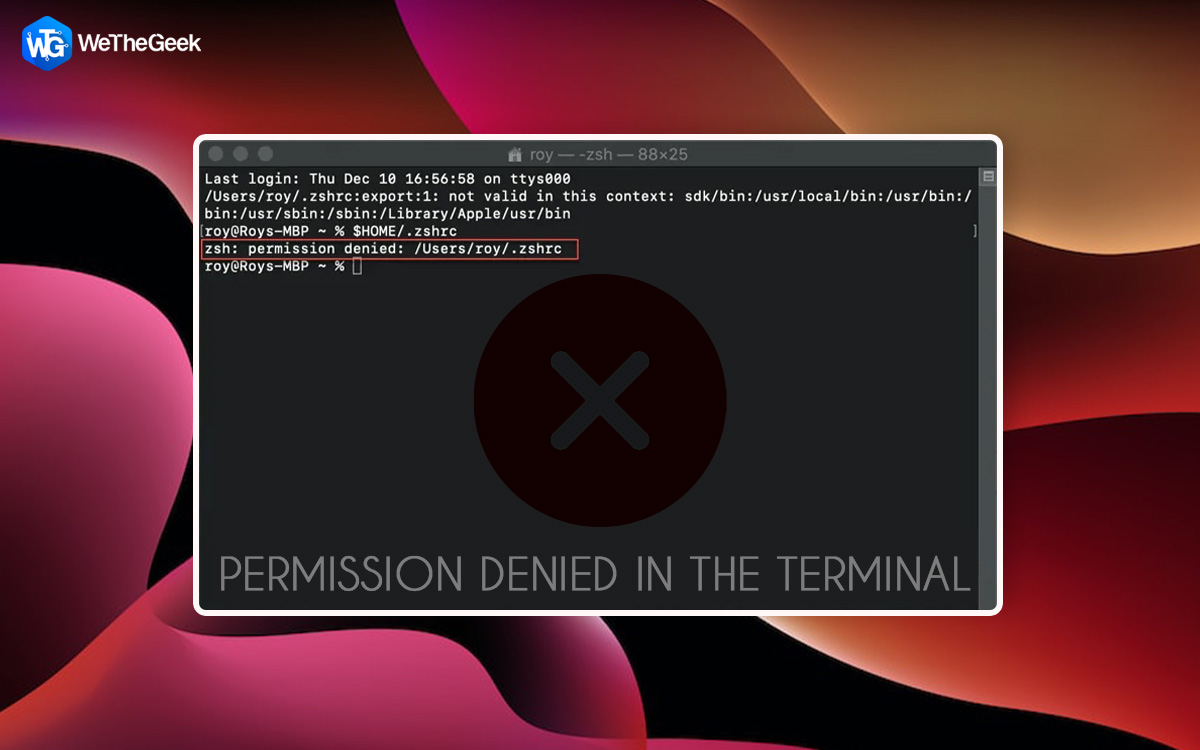
What is the Zsh Permission Denied Error?
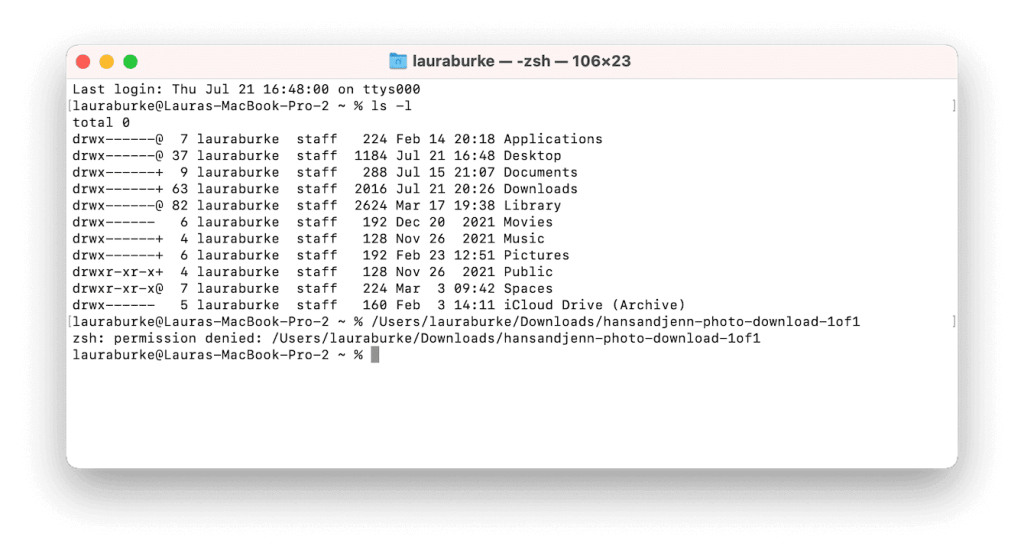
The Zsh Permission Denied Error occurs in the Zsh shell, a command-line interface, when a user attempts to perform an operation on a file or directory for which they do not have the necessary permissions. This error is indicative of the operating system’s security measures, which restrict certain actions to authorized users or processes.
The permissions in question are typically governed by three categories: owner, group, and others. Each category can have different levels of access, such as read, write, and execute. If a user lacks the requisite permissions for a specific action, the system will respond with a “Permission Denied” message, preventing the operation from proceeding.
Also Read: Mac Terminal Commands Cheat Sheet Everyone Should Have
How to Fix the Mac ZSH Permission Denied Error?
Solution 1: Check the Command Syntax
Double-check your command for typos, spaces, and special characters. Use tab auto-completion for accuracy. Consult command documentation if unsure. Confirm accurate file paths and permissions. This often resolves the “Zsh: Permission Denied” error. If the issue persists, proceed to Solution 2.
Also Read: How to Open the Terminal on a Mac (4 Ways)
Solution 2: Unlock the File/Folder
Before we dive into the steps, it’s important to note that unlocking a file or folder involves changing its permissions, which can affect how it’s accessed and modified.
Ensure you have the necessary privileges and exercise caution, especially when dealing with system-critical files. Now, let’s proceed with the process:
Step 1: Navigate to the file or folder you want to unlock using the Finder.
Step 2: Control-click (right-click) on the locked item. From the dropdown menu, select “Get Info.”
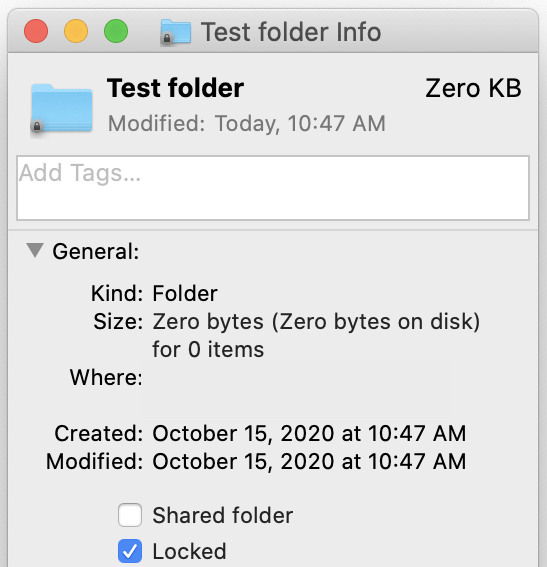
Step 3: In the Info window that appears, locate the “Locked” checkbox. Click on the checkbox to remove the checkmark, thereby unlocking the file or folder.
Step 4: Close the Info window and return to the Finder window.
Try accessing the file or folder. You should no longer encounter the zsh permission denied Mac error.
Also Read: How to View Hidden Files and Folders On Your Mac With Terminal
Solution 3: Add Execute Permissions to the Shell File
In some cases, the “Zsh: Permission Denied” error may be caused by insufficient permissions to execute a shell script. This solution involves granting the necessary permissions. Here’s how to fix the zsh permission denied macOS error:
Step 1: Launch the Terminal application on your Mac.
Step 2: To grant “execute” permissions, use one of the following commands:
– Type chmod +x , replacing with the actual path to your shell script. For instance, if your script is named “my_script.sh” and it’s in the Documents folder, you would type: chmod +x Documents/my_script.sh.
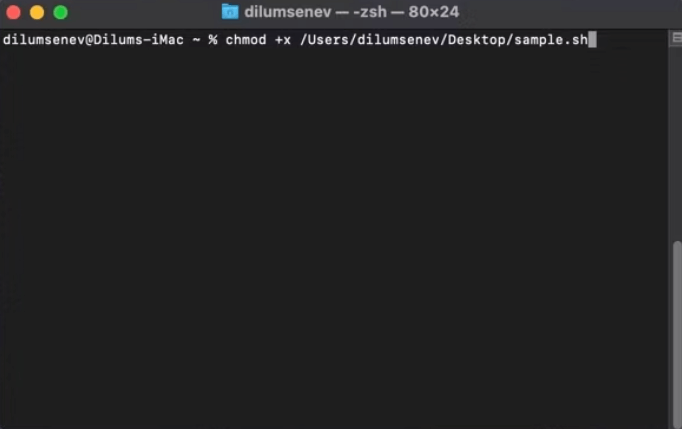
– Alternatively, you can use the command chmod +755 for the same effect. Using the same example as above, it would be: chmod +755 Documents/my_script.sh
Step 3: To confirm that the permissions have been modified, you can use the ls -l command and look for your shell script. The permissions should now include an “x” indicating that it is executable.
Solution 4: Use a Different Shell
You can switch to a different shell, such as Bash, which might not have the same permission issues you’re encountering with Zsh. Here’s how you can do it:
Step 1: Open Terminal.
Step 2: Type bash and press Enter to switch to the Bash shell.
Also Read: How To Password Protect A Zip File On Mac?
Solution 5: Use a GUI-based Text Editor
If you’re trying to edit a file and encountering permission issues, you can try using a GUI-based text editor (like TextEdit or VSCode) to open and modify the file. This may bypass some of the permission restrictions.
Solution 6: Use a Different User Account
Create a new user account with administrator privileges and see if the issue persists in that account. This can help determine if the problem is specific to your user account or system-wide.
Step 1: Go to System Preferences > Users & Groups.
Step 2: Click the “Add Account” button to add a new user.
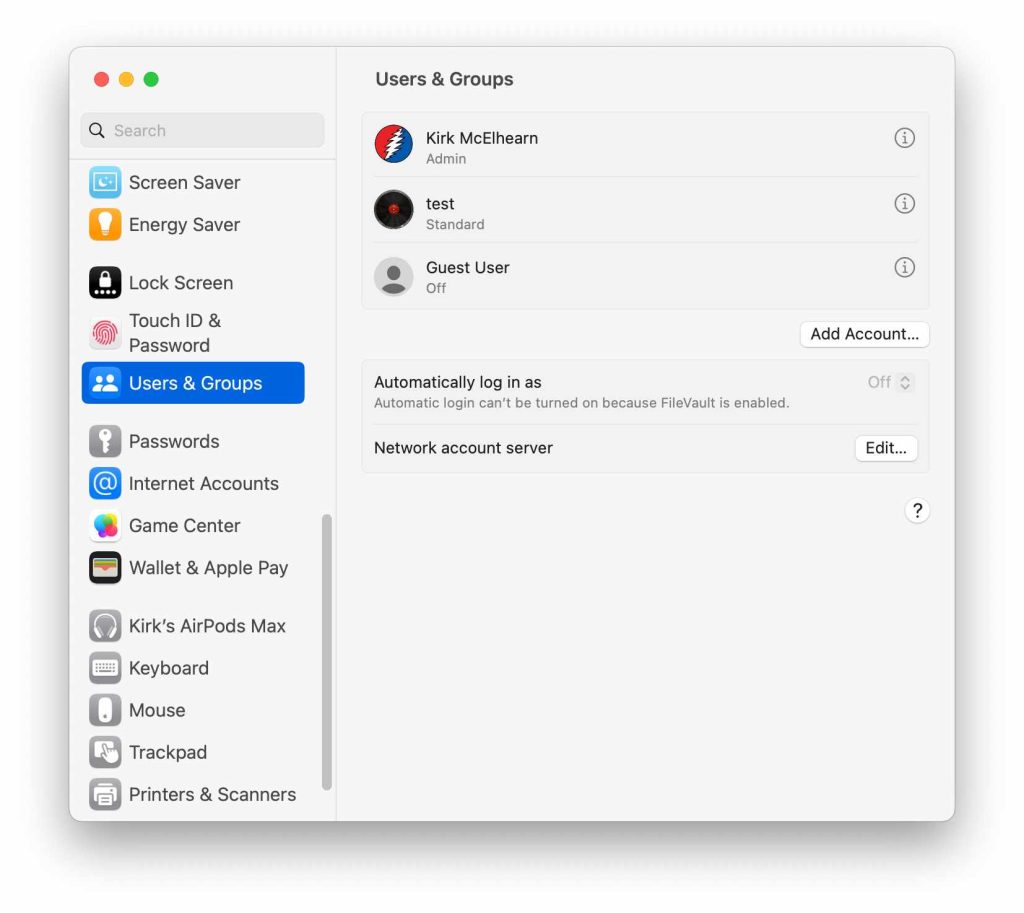
Step 3: Set up the new account with administrator privileges.
Step 4: Log in to the new account and see if you encounter the same permission issues.
By using a different user account, you may be able to resolve the zsh permission denied in Mac terminal error.
Conclusion
Resolving the Zsh Permission Denied Mac error is a crucial step toward a seamless command-line experience. By exploring a range of solutions, we’ve empowered you to navigate this common obstacle with confidence.
Whether through careful command syntax, unlocking files, or adjusting permissions, these steps ensure you can wield the Terminal effectively. Remember, each solution serves as a valuable tool in your troubleshooting arsenal. With these strategies in hand, you’re well-equipped to overcome permissions hurdles and continue your Mac-based projects without interruption. Follow us on social media – Facebook, Instagram and YouTube.