
The Windows operating system allows the user to use a Sleep option which retains all the last used programs and at the same time consumes less power. A computer in sleep mode is neither in shut down mode and nor in fully functional mode. It is somewhere in the middle and can be awoken with your mouse and keyboard. But what if you find that the Windows 10 Sleep option is missing from the power options on your computer? Here are a few quick and convenient fixes that will get your Windows 10 sleep option among the power options in Windows 10.
Step to Resolve Windows 10 Sleep Option Missing
The sleep option is a part of the Windows operating system and if it is no longer visible, then this must be system glitch and can be fixed via the Control Panel or Local Group Policy Editor. There is also another way, in case these two don’t work, and that is to update your display drivers. Let us examine each method and the required steps in detail.
Method 1: Check The Settings In Control Panel.
The first method to resolve the Windows 10 sleep option missing error is to enable the Sleep option in Control Panel. Here are the steps for the same:
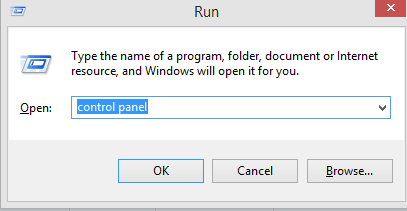
Step 1: Press the Windows + R on your keyboard to open the RUN dialog box.
Step 2: Type Control Panel in the text space and hit the Enter Key.
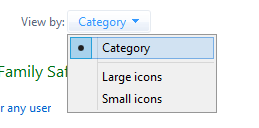
Step 3: Once the Control Panel window opens click on the View By option on the top right corner and select Category.
Step 4: Now, from the Control Panel options in the centre, click on System and Security.
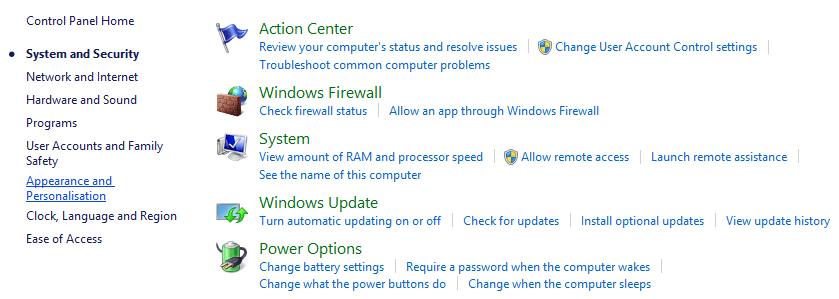
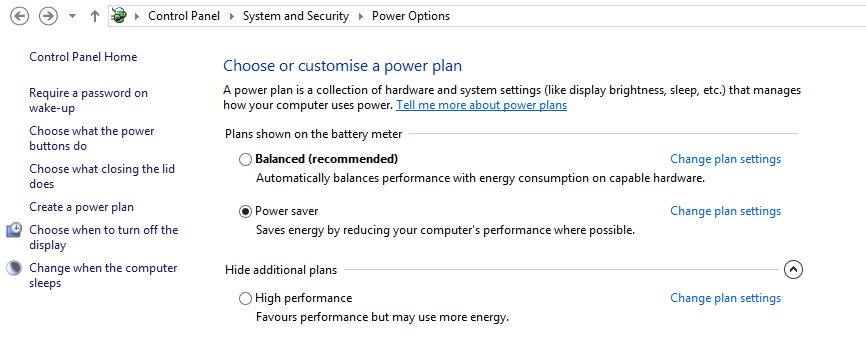
Step 5: Now locate and select Power Options and click on the option in the left pane that is labelled as “Choose what the power buttons do”.
Step 6: Moving further, click on “Change settings that are currently unavailable”.
Step 7: Next, check the box next to “Sleep” and click on the Save Changes button at the bottom.

Step 8: Restart your computer and check your Power options. You will find the Sleep option, now available.
Method 2: Check The Settings In Local Group Policy Editor.
The Local Group Policy Editor is another utility in the Windows 10 operating system that allows you to tweak many different settings and options. However, this setting is available only in Windows 10 Pro and Windows 10 Enterprise. If you are using Windows 10 Home, then you cannot access the GPE. Here are the steps to check the settings in GPE:
Step 1: Press Windows + R on the keyboard to open the Run box and type gpedit.msc in the text space.
Step 2: Click on OK to open the Local Group Policy Editor Window.
Step 3: Navigate to the path mentioned below by clicking and expanding the options in the left pane.
Computer Configuration -> Administrative Templates -> Windows Components -> File Explorer
Step 4: Once you click on the last option, File Explorer, notice the options in the right side of the panel.
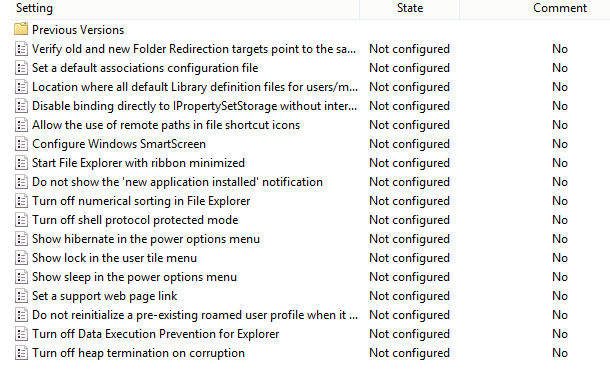
Step 5: Double click on the entry labelled as “Show sleep in the power options menu.”
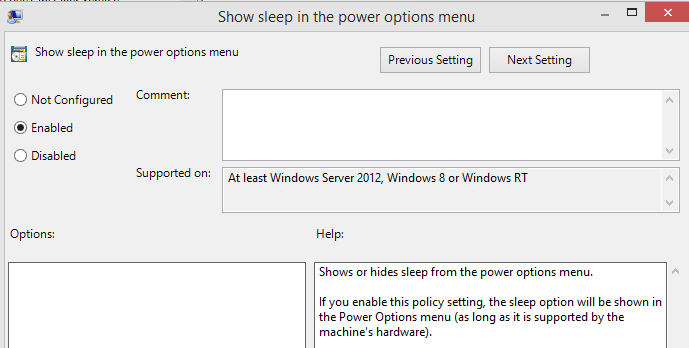
Step 6: A new window will open where you will have to click on Enabled option and then click on OK.
Step 7: Restart the computer and check your power options, and you will find that the sleep button will have appeared.
Method 3: Update The Display Driver
The above methods are bound to resolve your problem, but if you still cannot see the Sleep option, then there is one last step that can fix many issues including the Windows 10 sleep option missing. The resolution is simple and includes updating your display drivers. There are two ways to update all the drivers in your system: Manual (Hard) & Automatic (Easy). I will explain in brief about both these methods, and it is up to you to choose one out of them.
Before I begin, Let me tell you that both methods are 100% correct and will update your drivers. However, one of them is easy, and the other is a bit difficult.
Fix The Drivers Manually
The manual method to update all your drivers is using the Windows 10’s default driver tool known as Device Manager. This method requires time and effort as you will have to check each driver for an update manually. Also, Microsoft allows the device manager to look for driver updates within Microsoft’s servers, which means that you might not always find the update on time. Here are steps to use the device Manager to update drivers:
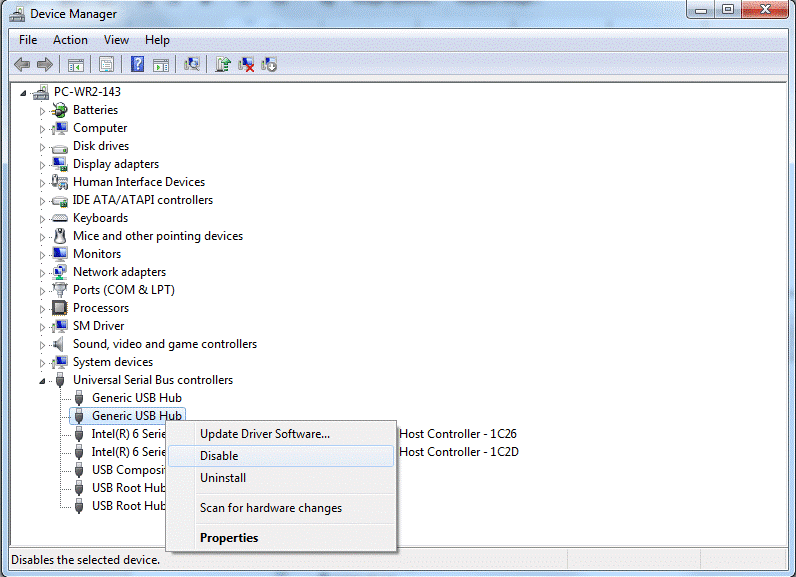
Step 1: Press Windows + R and open the Run dialog box. Type “devmgmt.msc” and this will open the device manager.
Step 2: Double click each category of drivers and choose your device driver. Make a right-click and choose Update Driver.
Step 3: Windows will automatically search for the updated drivers and follow the on-screen instructions to complete the process.
Step 4: Close the device Manager after all drivers have been updated and restart your computer.
Check if the power option has appeared on your computer.
Fix The Drivers By Automatic Method

Now that you have read about the difficulties in updating the drivers manually let us discuss the automatic method which can update the drivers with just two clicks. This can be accomplished by using a driver updater software like Smart Driver Care. I had discovered this software two years ago and ever since I am very satisfied using it to enhance computer speed and performance. Here are the steps to use the Smart Driver Care:
Step 1. Download and install the Smart Driver Care on computer.

Step 2. Double click on the file downloaded and install it.
Step 3. Once the installation is completed, you can launch the software and register it.
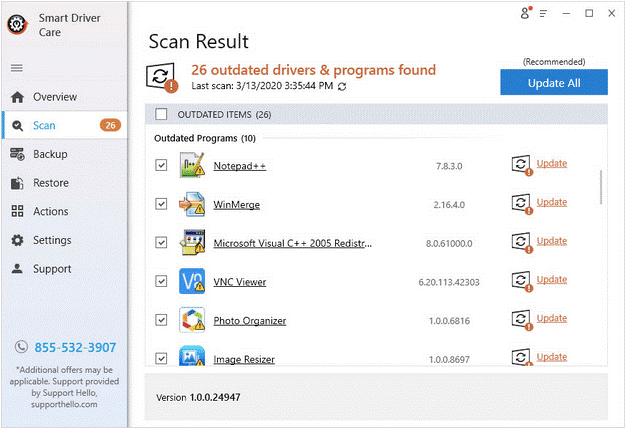
Step 4. Press the Scan Now button to begin the scanning process.
Step 5. Click on the Update All button to begin updating the drivers.
Step 6: Once the process is complete, you will find the sleep button appear among the power options in your computer.
The Final Word On How To Fix Windows 10 Sleep Option Missing
If you enable the sleep option on your computer, then it can help you to save power and give your computer rest when you are not using it. The above method described will fix the sleep option not visible issue, and you will be able to use it again.
Follow us on social media – Facebook, Twitter, LinkedIn, and YouTube. For any queries or suggestions, please let us know in the comments section below. We would love to get back to you with a solution. We post regularly on the tips and tricks along with solutions to common issues related to technology.