You can customize your Windows desktop with unique skins and widgets using Rainmeter. It aids in fine-tuning everything from clock skins to widgets that display system resource utilization. However, you’re not alone if you’re new to this tool and having trouble with problems like Rainmeter not opening or regularly crashing. Let’s examine numerous troubleshooting techniques to address any Windows Rainmeter difficulties.
Also Read: The Best Rainmeter Skins To Enhance Your Windows 11, 10 Experience (2023)
Some Common Rainmeter Issues Faced By Windows Users
A novice may run across some problems when setting up Rainmeter. These issues consist of the following:
- The Rainmeter app in Windows won’t open.
- Rainmeter crashes apparently at random times.
- Rainmeter freezes when skin is applied.
- Rainmeter does not launch when Windows first starts.
Let’s jump into the remedies if you’re experiencing any of the abovementioned issues.
Method 1: Update The Rainmeter App
Step 1: Open your default browser and navigate to the official Rainmeter website.
Step 2: Click on the Download button to get the latest version of Rainmeter.

Step 3: Locate the installation file in your downloads folder and double-click to launch it.
Step 4: Click OK and follow the onscreen instructions to continue the installation.
Once the latest version has been installed, you can check if the issue persists.
Also Read: Customize Windows 10 Start Menu For Improved Experience
Method 2: Turn Off The Skins For Some Time
The main benefit of Rainmeter is that it works with numerous external skins. But what if the skin you’re attempting to install is why Rainmeter crashes so frequently? Disable the skins that are now active on your desktop to check. To temporarily disable all Rainmeter skins, follow the instructions below:
Step 1: Right-click your applied skin and select Manage Skin.

Step 2: Find the Active Skins tab in the Manage window. You can see a list of all currently active skins under this category.
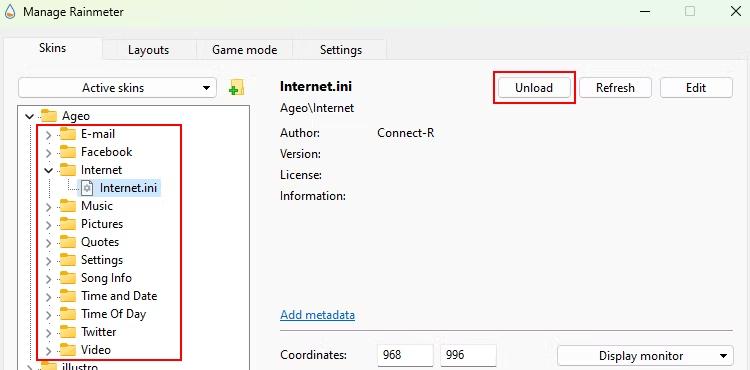
Step 3: For each component of an active skin, click Unload.
Step 4: Run Rainmeter after completing these procedures to see if the problems still exist.
Step 5: Start re-enabling the disabled skins if everything goes smoothly. This way, you will
find the bad ones, which may occasionally result in unanticipated bugs and crashes.
Method 3: Change The Rainmeter’s Startup Parameters
You can also change Rainmeter’s starting settings to get around some problems. Set the software to launch whenever your computer boots if Rainmeter isn’t opening as soon as you restart your PC. The following describes how to change Rainmeter’s startup options:
Step 1: Open the Windows Task Manager application.
Step 2: From the left sidebar, select the Startup Apps tab.
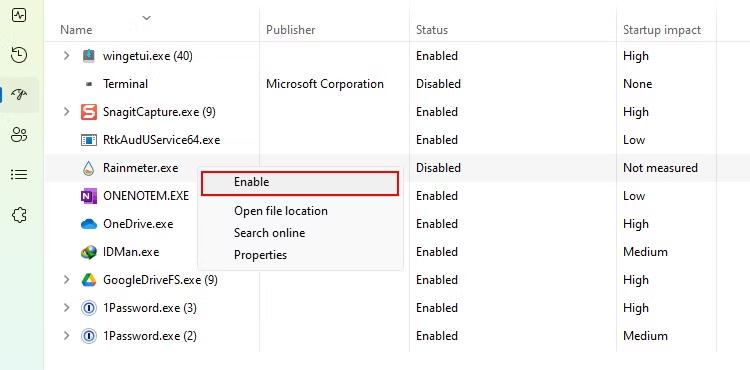
Step 3: Right-click Rainmeter beneath the Name entries and choose Enable.
Step 4: After changing the startup options, reboot your PC.
By following these instructions, Rainmeter should launch seamlessly with Windows without delaying loading your presently selected skin.
Method 4: Deactivate Hardware Acceleration
Rainmeter occasionally performs slowly or ineffectively. This can be due to the Hardware Acceleration feature. Probably due to the app crashes, you won’t be able to access it from its settings; use the instructions below:
Step 1: Type Graphics settings into the Windows search box, then click Open.
Step 2: Select the Rainmeter.exe file by clicking the Browse option.
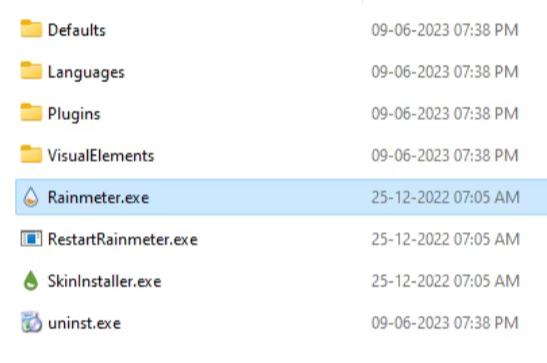
Step 3: The principal location of this file is in the Rainmeter directory at C:\Program Files\Rainmeter.
Step 4: Click on Options when Rainmeter shows in the list.
Step 5: Select Power Saving as the graphics setting.
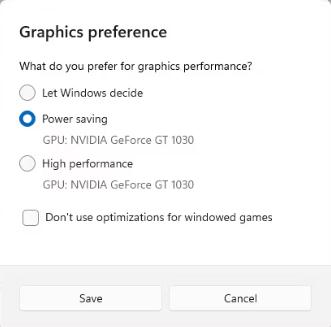
Step 6: To ensure that the modifications are effective, click Save.
Step 7: Start Rainmeter again to see if the problems have been fixed.
Step 8: If disabling hardware acceleration doesn’t resolve your problem, switch it back on.
Method 5: Make A Clean Reinstall Of the Rainmeter
A reinstallation of the software requires first completely removing it. Any damaged or incorrectly set files should be eliminated after a clean installation of Rainmeter. We advise making use of the Advanced System Optimizer to remove Rainmeter.
Step 1: Download and Install Advanced System Optimizer from the button down below.

Step 2: Launch the app and click Regular Maintenance in the left panel.
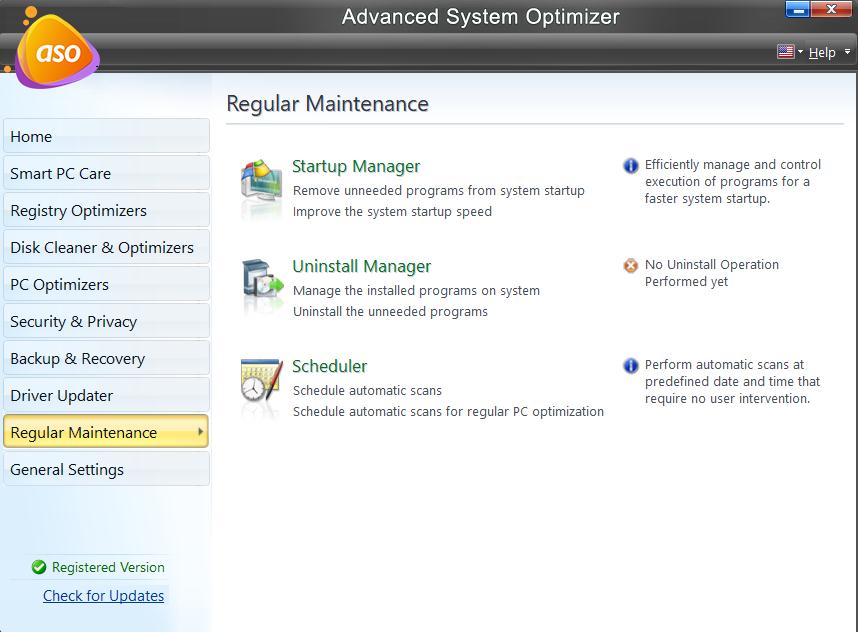
Step 3: Click on Uninstall Manager on the right side of the app interface.
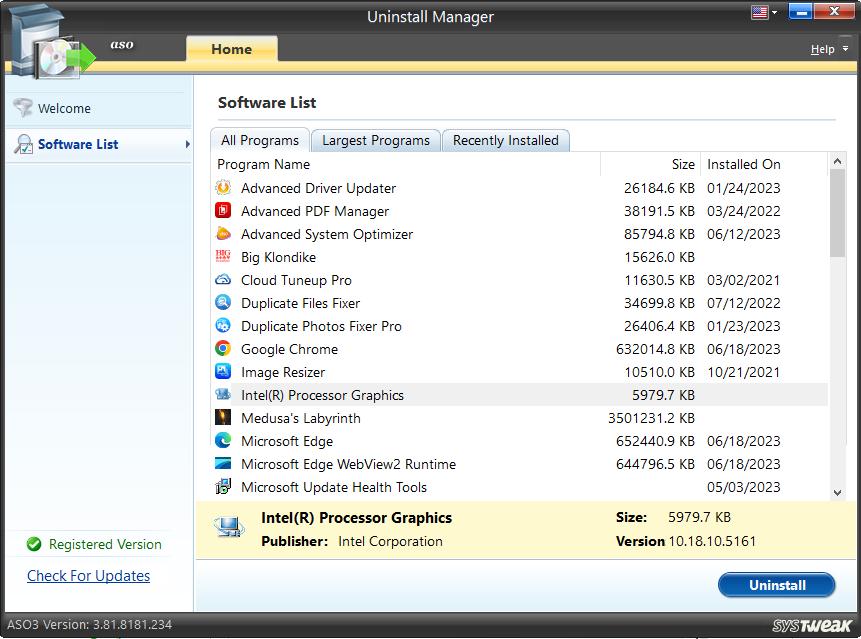
Step 4: A new app window will open where you must click the Software List button.

Step 5: Click on the app you want to uninstall, Rainmeter in this case, and then hit the Uninstall button in the bottom right corner.
After the uninstallation, download Rainmeter or launch the EXE file you already downloaded. Start Rainmeter after going through the complete setup procedure once more.
Also read: Advanced System Optimizer Review: Is It A Good PC Cleaning Software?
The Final Word On How To Fix Common Rainmeter Issues On Windows?
Rainmeter is the best tool for modifying or customizing the Windows operating system. There are countless options that you can investigate using Rainmeter. But what could be more annoying when you are unable to open Rainmeter? All the fixes listed above should enable you to resume using Rainmeter without experiencing any crashes.
Please let us know in the comments below if you have any questions or recommendations. We would be delighted to provide you with a resolution. We frequently publish advice, tricks, and solutions to common tech-related problems. You can also find us on Facebook, Instagram, Twitter, YouTube, and Pinterest.
Also Read:
10 Best Windows 10 UI Customization Tools in 2023
How To Master Windows PC: 50+ Tips, Tricks, And Tutorials For Every User